
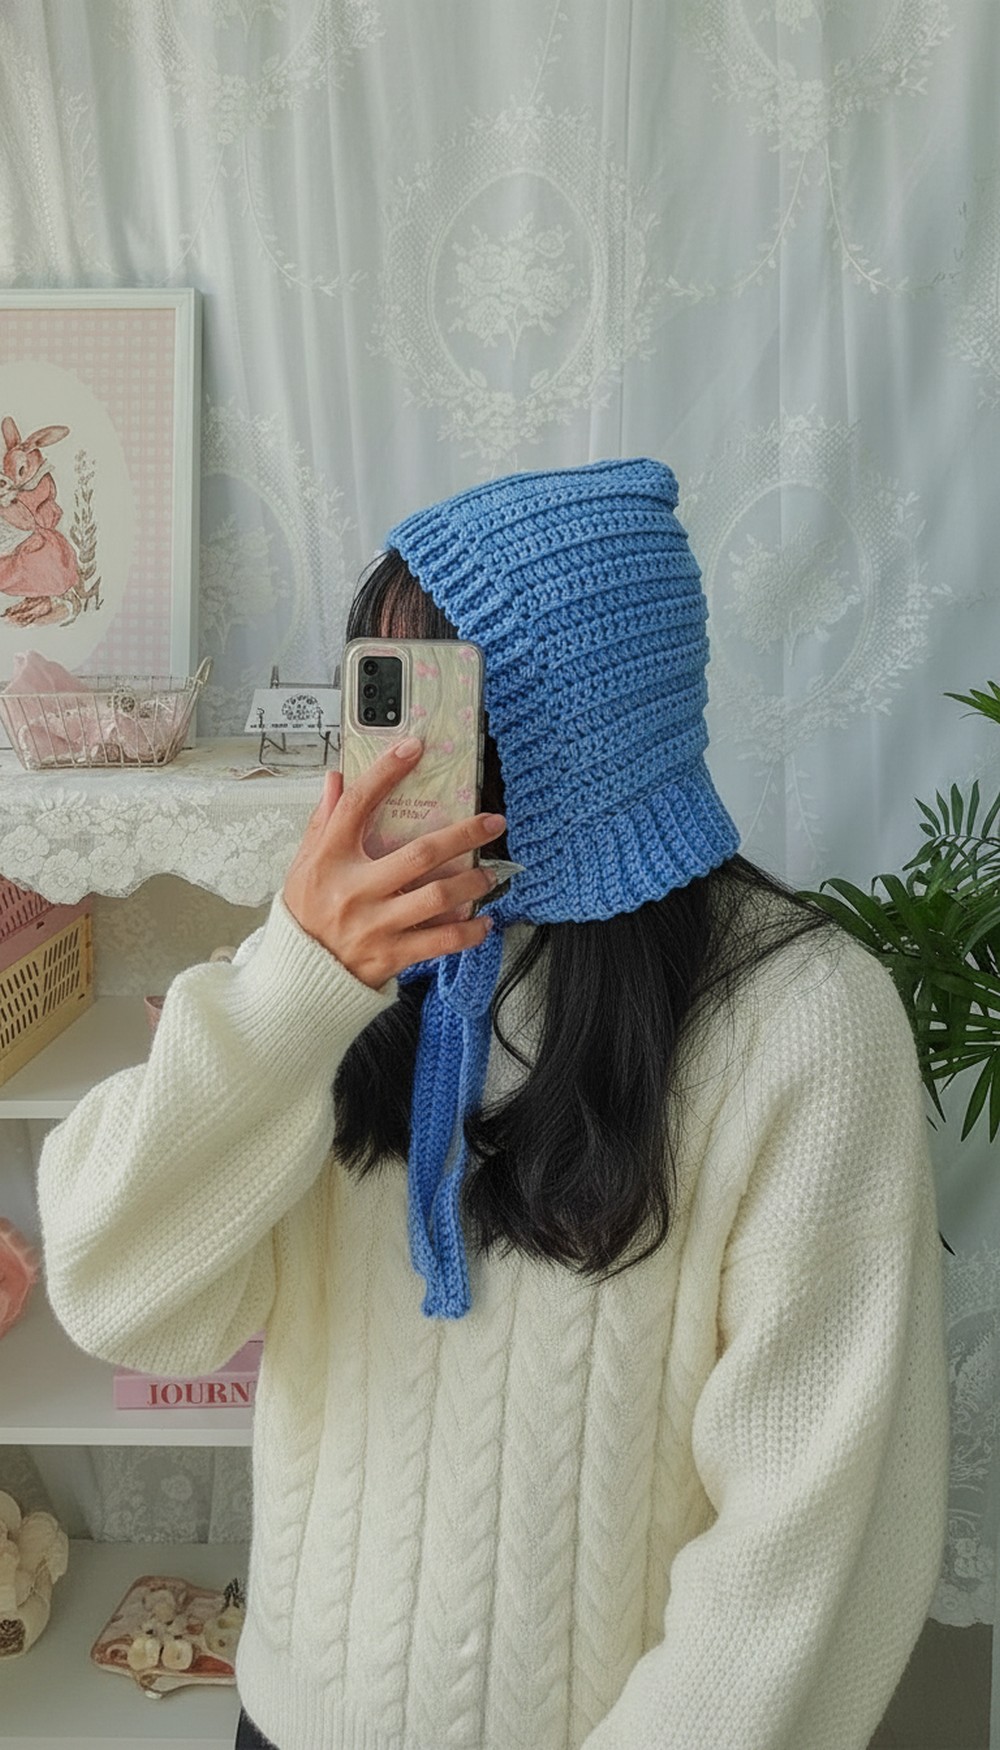
Brighten chilly days with a soft blue bonnet that hugs gently, adds charm, and keeps you cozy that’s simple, joyful stitching perfect for everyone.
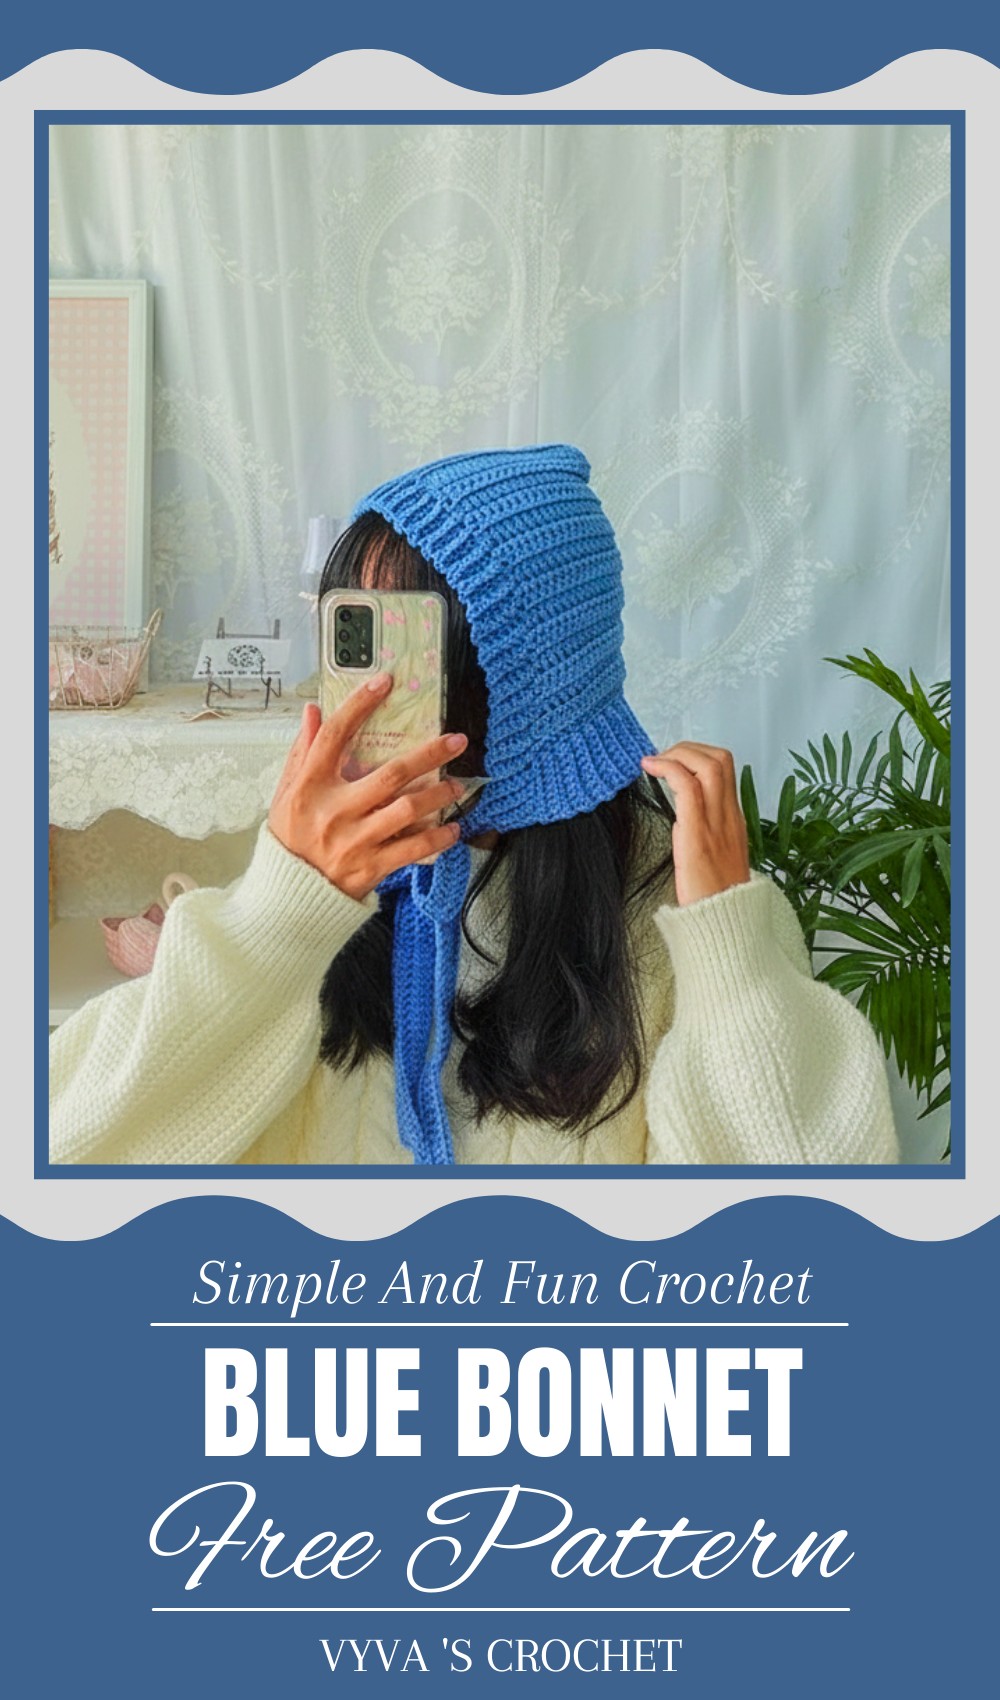
Quick & Fun Blue Bonnet Pattern to Warm Up Any Day
Soft, warm, and charming, this blue bonnet is like a cozy hug for the head. Its gentle shape fits comfortably, making it perfect for keeping little ones snug during cool days. The bonnet looks like a small, lovely crown with its smooth rounded top and neat edges, adding a touch of magic to any outfit. Its light and fluffy design keeps things fresh and breezy while still offering protection from the cold.
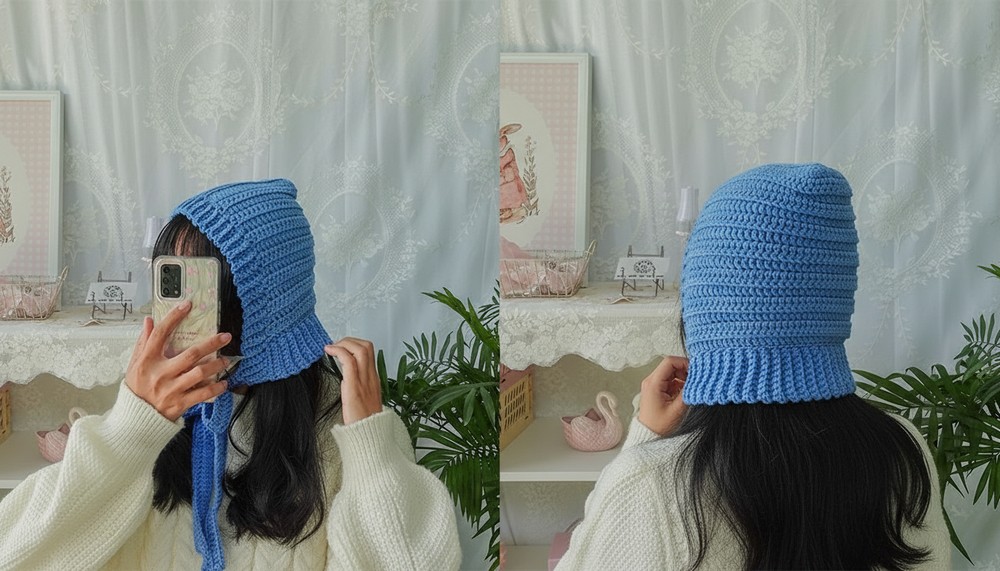
Whether worn outside for a walk in the park or at home for comfort, this bonnet brings both style and warmth together. The peaceful blue color soothes the eyes and feels calm, making it a favorite for babies and adults alike. Made with soft yarn, it is gentle on delicate skin and easy to wear all day. Beautiful and useful, this bonnet is a perfect gift or a special treat to bring happiness wherever it goes.
Crochet Blue Bonnet Pattern
Materials Needed:
- 3 rolls of yarn, approx. 50g each (blue color suggested)
- Crochet hook 4.5mm
Abbreviations:
- ch = chain
- sc = single crochet
- dc = double crochet
- sl st = slip stitch
Pattern Steps:
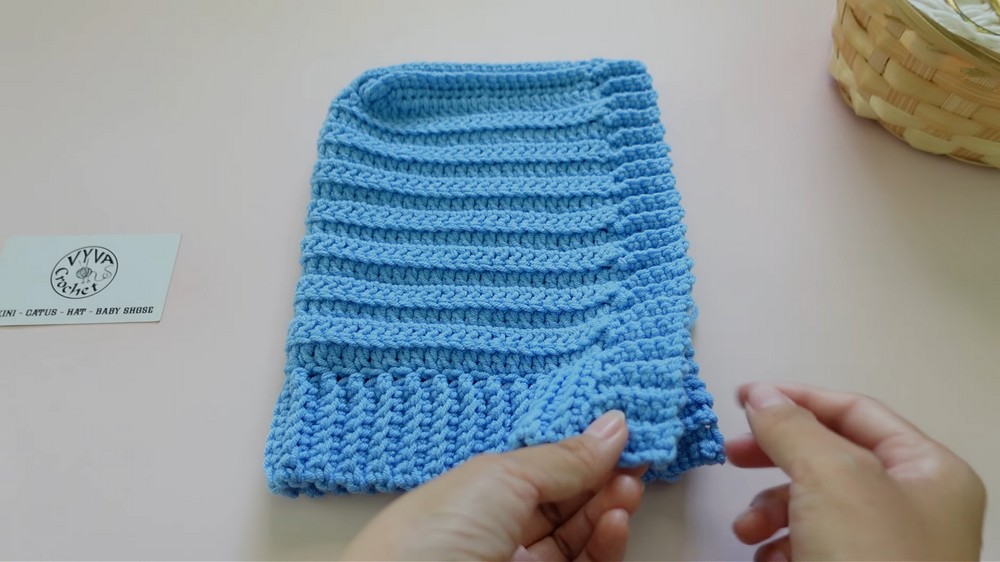
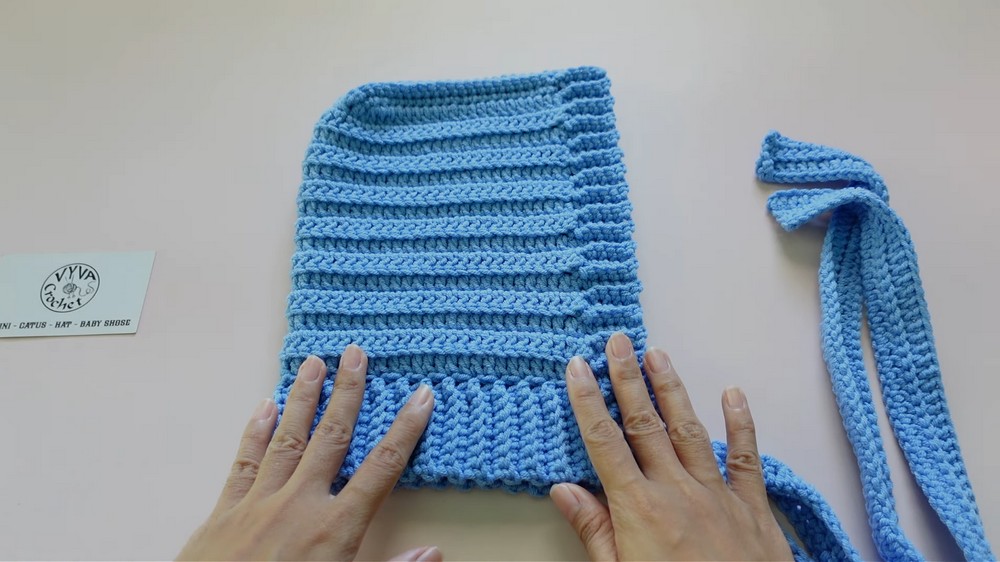
Crown (Top of the Hat)
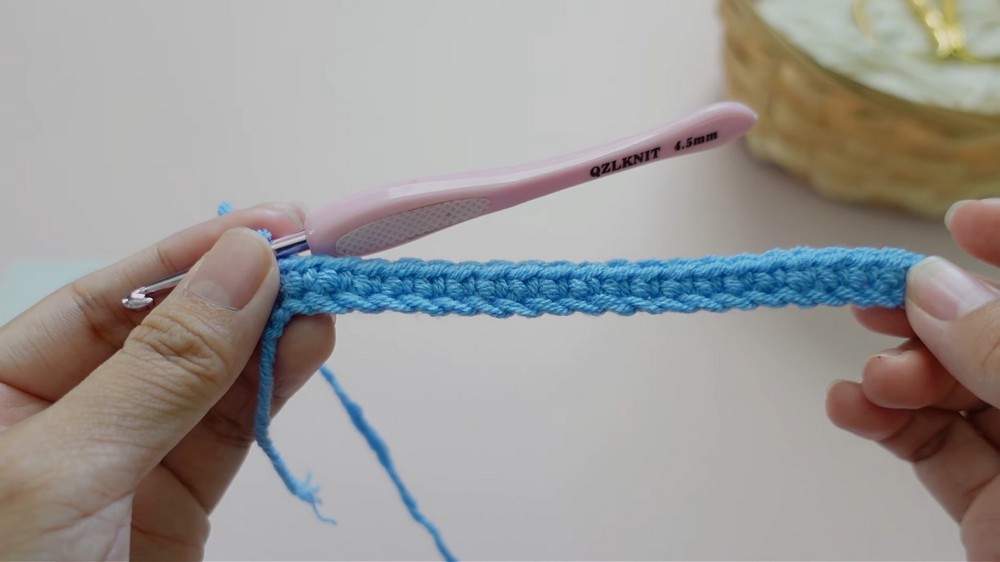
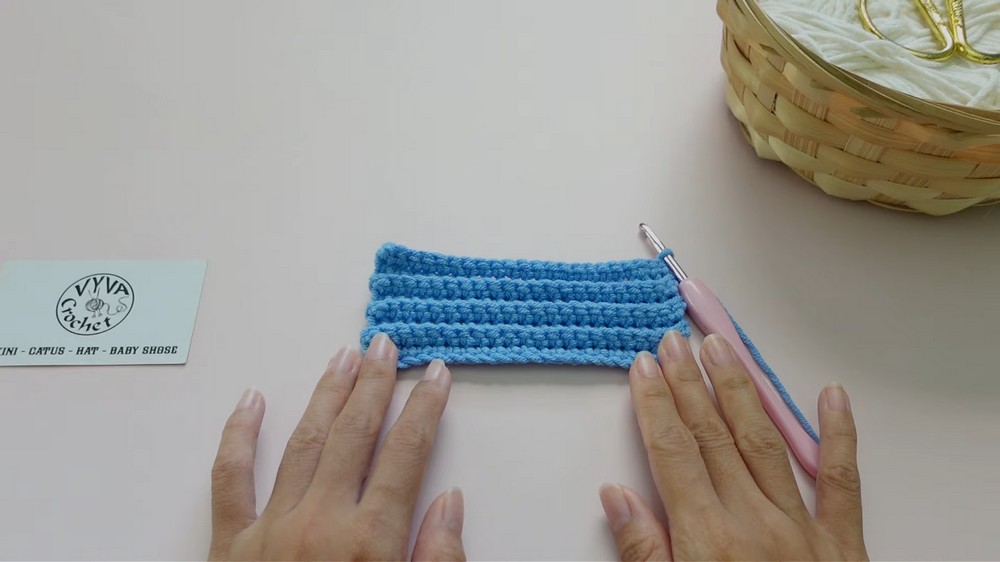
- Foundation Chain: Chain 22 stitches.
- Row 1: Chain 1, skip the first stitch, then sc in each stitch across (total 22 stitches).
- Rows 2 to 8: Chain 1, turn. Work sc in the back loop only for every stitch across. Keep the stitch count constant at 22. Repeat this for rows 2 through 8.
- When row 8 is completed, the crown—topmost part of the bonnet—is ready.
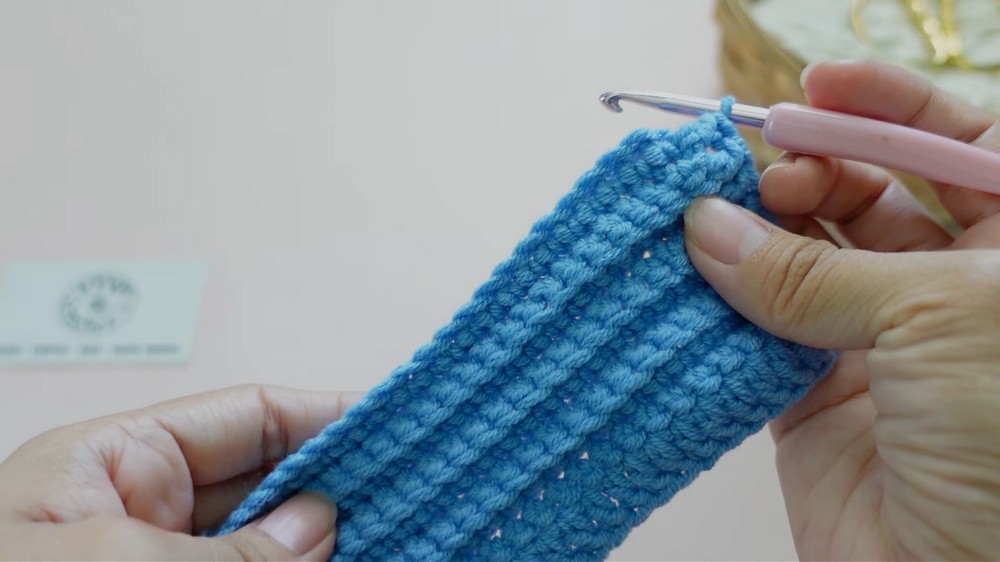
Body of the Hat
- Identify the four edges of the crown.
- First Edge: Chain 2, turn. Work dc in each stitch along the first edge. Complete the edge (total 52 stitches when all edges are joined).
- Second and Third Edges: Repeat dc in each stitch for the second and third edges similarly.
- Row 2: Chain 2, turn. Work dc in each back loop stitch across (52 stitches).
- Row 3: Chain 2, turn. Repeat working dc in back loops across.
- Alternate between row 2 and row 3 techniques until row 15 is completed. This forms the fuller body of the bonnet.
- After finishing row 15, chain 1 and cut yarn.
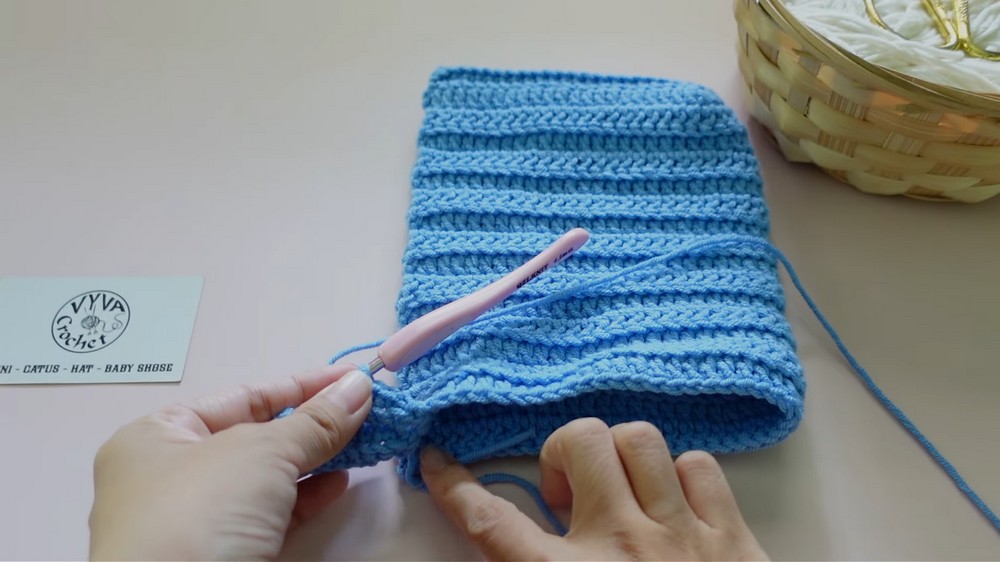
Bottom Border of the Hat
- Join yarn around the body’s bottom edge.
- Chain 8, then chain 1, skip the first stitch, and sc in each stitch across.
- Slip stitch into the second stitch of the hat’s body edge.
- Row 2: Chain 1, turn. Work sc in the back loops across.
- Row 3: Repeat row 2.
- Row 4: Skip third stitch, slip stitch in fourth stitch, then alternate rows 2 and 3 pattern.
- Continue until you reach the last stitch, chain 1, and cut yarn.
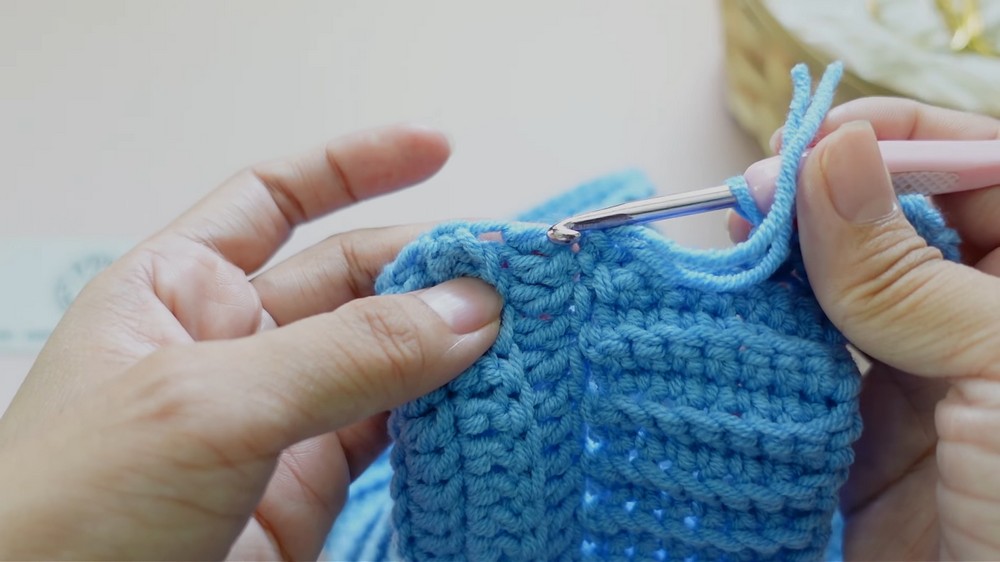
Front Border of the Hat
- Attach yarn at the left side of the bottom border.
- Chain 5, chain 1, skip first stitch, and sc in each stitch across.
- Slip stitch in the second stitch of the bottom border and turn.
- Repeat sc in back loops for rows 2 and 3, alternating certain slip stitch placements just like in the bottom border until complete.
- Chain 1 and cut yarn.
Creating Two Ties (Ropes)
- At the left side border, join yarn and chain 70 for the first rope.
- Row 1: Chain 2, skip two stitches, then dc in each third stitch across.
- Continue to slip stitch and double crochet alternately as explained until end of the row (total 70 stitches counted in dc).
- Row 2: Work dc in the back loops across the rope. Chain 1, cut yarn after finishing.
- Repeat steps for the second rope on the right side border.
- Weave in all yarn ends carefully.
Special Features:
- Uses a simple single crochet and double crochet technique ideal for beginners.
- The bonnet has a rounded crown and bubble body adding volume and protection.
- Borders and ties provide decorative flair and function for secure fastening.
Difficulty Level:
Beginner to Intermediate — suitable for those comfortable with basic crochet stitches and working in rows and loops.
Tutor’s Suggestions:
- Maintain consistent tension to keep even stitch size.
- Use a smooth, soft yarn for baby softness and comfort.
- Count stitches regularly to avoid unintentional increases or decreases.
Uses:
- Ideal for warming babies or toddlers during chilly weather.
- Can be gifted or used as a photography prop for newborn shoots.
- Stylish accessory combining comfort with cuteness.
Helpful Tip:
To achieve a perfect fit, adjust the initial chain count for the crown based on the head size you are making it for — more chains for a bigger bonnet, fewer for smaller sizes.
Conclusion:
This blue bonnet is a delightful project that blends simple stitches with charming design. Its cozy and bubbly texture makes it perfect for keeping little heads warm with a handmade touch. Follow these clear steps, and you’ll have a beautiful bonnet to treasure or gift in no time. Happy crocheting!
Leave a Reply