
Master the art of polymer clay sculpting with easy-to-follow tips for beginners and pros to achieve stunning results with simple techniques and styles
Turning simple polymer clay into beautiful creations is both fun and rewarding. It’s a fantastic way to express your creativity while making something truly your own. From unique decor items to personal keepsakes and even tiny figurines, polymer clay sculpting allows you to transform your ideas into tangible pieces of art. The purpose of this craft could be as simple as relaxing after a long day or as ambitious as creating handmade gifts or starting your own small business.
Beginner-Friendly Polymer Clay Ideas and Sculpting Tips to Try

With polymer clay, the possibilities are endless! You can sculpt anything from playful charms to detailed miniature models or even stylish home accessories. Experimenting with different techniques and textures, like blending colors or adding fine details with tools, helps you truly elevate your designs. Whether it’s marbled effects, intricate carvings, or layered patterns, there’s a style for everyone. It’s a medium that encourages you to try out new things and push the limits of your creativity.
Another highlight of polymer clay is how easy it is to work with. It’s perfect for beginners, forgiving of mistakes, and doesn’t dry out during your process. Once you bake your sculpture, it becomes durable and can last for years! It’s not just a craft—it’s a fun and relaxing way to create something meaningful and add a personal touch to your art, home, or accessories.

Polymer Clay Basics: A Beginner’s Guide
Polymer clay is a versatile and exciting medium used by artists, DIY enthusiasts, and beginners alike. It doesn’t dry out like traditional clays and hardens only when baked, making it ideal for sculpting, crafting, and endless creative pursuits. In this guide, you’ll learn all about polymer clay, from choosing the right materials to sculpting techniques and finishing touches.
What is Polymer Clay?
Polymer clay is a synthetic clay made from polyvinyl chloride (PVC) that remains workable until baked in the oven. It’s lightweight, durable, and easy to use, making it a favorite among crafters.
Step 1: Choosing the Right Polymer Clay
- Popular Brands
- Fimo, Sculpey, and CosClay are great brands.
- Fimo is firmer and better for intricate details, but it requires more conditioning, making it trickier for beginners.
- Beginner Recommendation
- Use Premo by Sculpey for strong bases.
- Choose Sculpey 3 or soft CosClay for designs, as they’re easier to mold and work with.

Step 2: Tools You’ll Need
- Rolling Tools: Pasta machine or acrylic rolling pin.
- Shaping Tools: Rounded metal tool (or end of a spoon), loop tool, silicone rubber tip tool.
- Texturing Tools: Dotting tools, sponges, brushes, or improvised items like popsicle sticks or guitar strings.
- Work Surface: Cutting mat or ceramic tile.
- Cornstarch: To reduce sticking while working.
- Foil and Wire: For building armatures.
- Acrylic Paints: For finishing (optional).
- Bake & Bond: Polymer clay glue for connecting baked and raw clay.
Step 3: Conditioning Polymer Clay
Conditioning ensures your clay is soft, workable, and free of air bubbles.
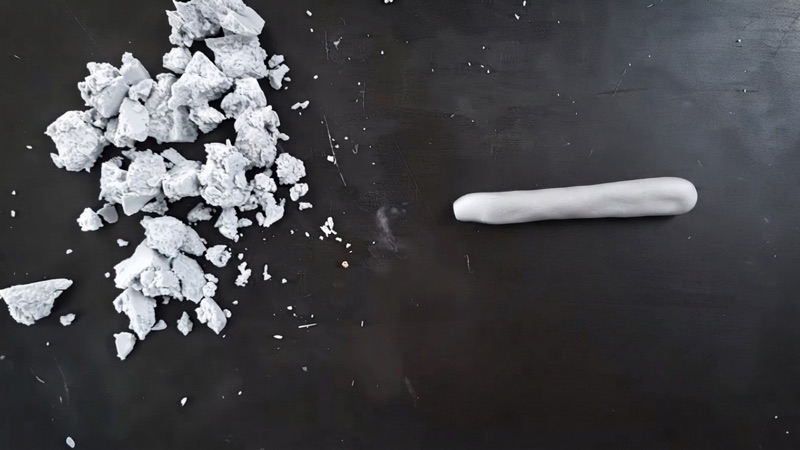
- Break into Pieces
- Start by breaking the clay into smaller portions that are easier to handle.
- Knead and Roll
- Knead pieces about the size of a walnut into small sausages.
- Roll and re-roll the sausages repeatedly until the clay is uniform and smooth.
- Sheet Rolling
- Use a pasta machine or rolling pin to flatten the clay into sheets.
- Watch for air bubbles—pop them with a tool and re-roll.
- Use Cornstarch if Sticky
- Sprinkle cornstarch on your hands, tools, or work surface to reduce sticking.
Step 4: Building an Armature
An armature is a support structure that helps your sculpture hold its shape.
- Create Base with Tin Foil
- Make a rough shape of your sculpture using aluminum foil.
- Add Aluminum Mesh
- For thin or delicate sections, wrap wire mesh around the foil for additional support.
- Why Armatures Are Important
- They minimize clay usage, save baking time, and prevent your sculpture from collapsing.

Step 5: Sculpting Techniques
- Adding Raw Clay
- Use a rounded metal tool to smooth and blend clay pieces as you attach them.
- Smoothing Clay
- Use a loop tool first for surface smoothing.
- Then gently rub isopropyl alcohol over the sculpture using a soft sponge or scotch-bright pad.
- Removing Stickiness
- Dust cornstarch on the clay if it feels sticky.
- Enhancing Details
- Use silicone tip tools for sharp lines and tight spots.
Step 6: Adding Textures
Textures bring life and detail to your sculpture.
- Create Organic Patterns
- Use ball bearings in a ziplock bag and tap them on the clay to make dotted textures.
- Use Everyday Tools
- Try dotting tools, paintbrush ends, or stamps.
- Plastic Sheet Trick
- Place a thin sheet of plastic over the clay before stamping or line work for soft, clean patterns.
- Layer Textures
- Build up textures gradually for a realistic finish.
Step 7: Baking Polymer Clay
- Follow Temperature Guidelines
- Bake at 120°C for 15 minutes per 6 millimeters (thickness).
- Use an oven thermometer to ensure precise heat levels.
- Cooling
- After baking, let your sculpture cool completely. It may feel soft initially but hardens as it cools.
Step 8: Painting Polymer Clay (Optional)
- Base Colors
- Block out base colors using acrylic paint. Polymer clay doesn’t need priming because it’s non-porous.
- Washes
- Apply watered-down acrylic paints to fill cavities and crevices. Quickly wipe off excess paint from high points for contrast.
- Dry Brushing
- Rub most paint off your brush, then lightly brush over raised surfaces to highlight details.
- Add Randomness
- Use flicking techniques with watered-down paint to create a natural appearance.
- Sealing Options
- Seal with glossy or matte varnish to protect pieces that will be handled frequently.
Step 9: Using CosClay for Flexibility
CosClay stays flexible after baking, making it ideal for intricate or moving parts.
- No Armature Needed
- For simple pieces, bake CosClay directly without foil or mesh support.
- Mixing with Sculpey
- If needed, mix CosClay with Sculpey for detailed sections where added stiffness is desired.
Step 10: Embedding Gems and Using Bake & Bond
- Embed Gems
- Place gems directly into raw clay before baking to create an embedded look.
- Use Bake & Bond
- Add Bake & Bond glue to attach baked and raw clay together, or to join separate pieces without blending them.
Explore Your Creativity
With polymer clay, the possibilities are endless. You can sculpt intricate designs or keep things simple. Feel free to mix brands, test textures, and try techniques that suit your preferences. The beauty of polymer clay lies in its versatility—make creations that reflect your unique artistic voice.
Leave a Reply