
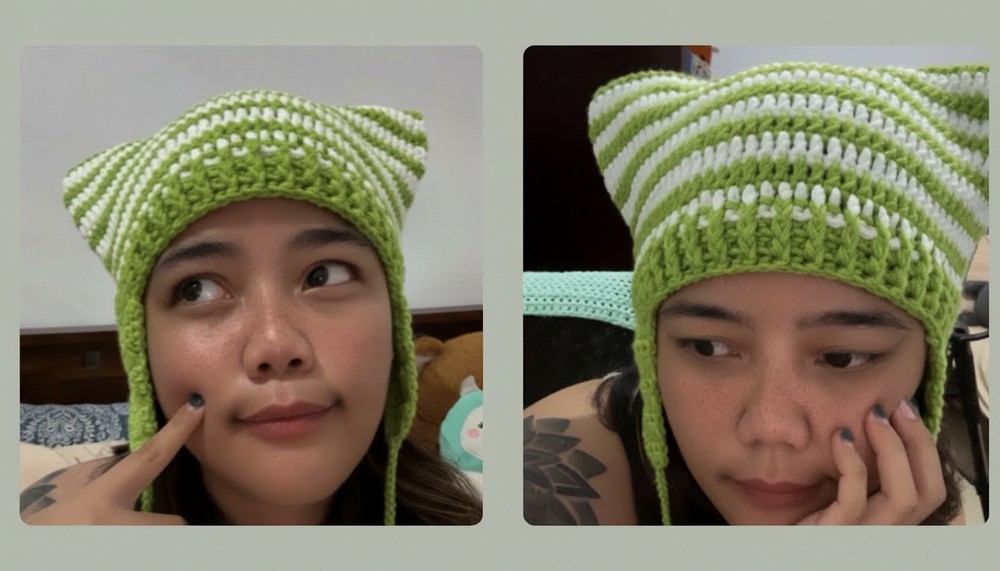
Purrfect your style with this cozy crochet cat hat pattern that’s easy to make and adds a playful touch to any chilly day wardrobe.
On a chilly day, staying warm doesn’t mean giving up on fun and style. This charming hat looks just like a playful kitten, with soft little ears that stand up and add a touch of whimsy to any outfit. Made from gentle, cozy yarn, it fits snugly to keep your head warm and comfortable. Its cute and simple design makes it perfect for people of all ages, whether for outdoor adventures, casual outings, or relaxing at home.
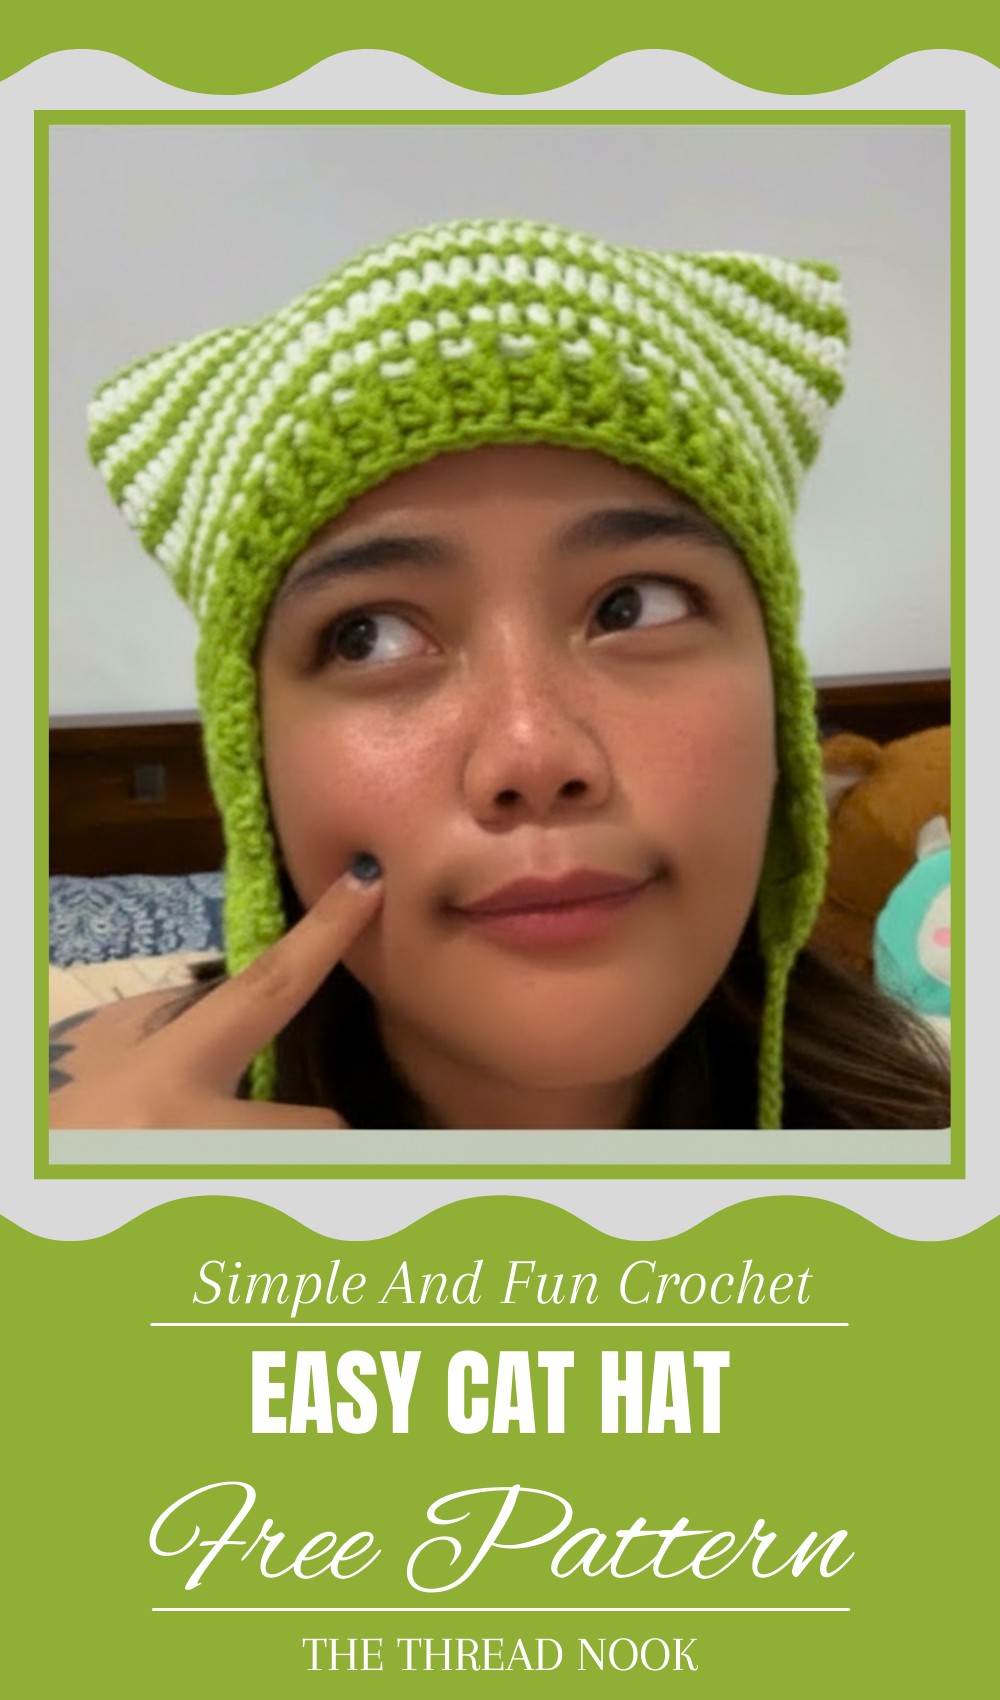
Whip Up a Sweet Crochet Cat Hat for Your Next Winter Look
The cat-ear detail brings a smile to everyone’s face and adds a bit of magic to cold days. Wearing this hat feels like having a tiny, cuddly friend with you, brightening your mood and spreading joy wherever you go. Easy to make and delightful to wear, it’s a perfect way to combine warmth, comfort, and playful style in one cozy accessory.

Cat Hat Crochet Pattern – Step-by-Step
Materials Needed:
- 5-ply milk cotton yarn (category 4, medium worsted weight)
- Contrasting color yarn for ears/star (optional)
- Crochet hook: 3.25 mm (body), 6.0 mm (optional for some parts)
- Stitch markers
- Yarn needle
- Scissors
- Tape measure
Special Features:
- Customizable to head size, made-to-measure
- Worked flat then in rounds for a comfortable fit
- Color changes integrated seamlessly
- Front post/back post double crochet ribbing for texture
- Cat ear flaps and star appliqué make it playful and cute
Uses:
- Cute hat for children or adults
- Perfect gift item
- Fun cosplay or themed outfit accessory
Step-by-Step Pattern
Step 1: Taking Measurement & Chain Foundation
- Measure head circumference; divide by 2 (e.g., 21.5″/2 = 11″).
- Chain approximately 44 chains (or length to half head circumference), keeping chains loose for easy work in back bumps.
- Add 2 extra chains (turning chains, not counted as stitches).
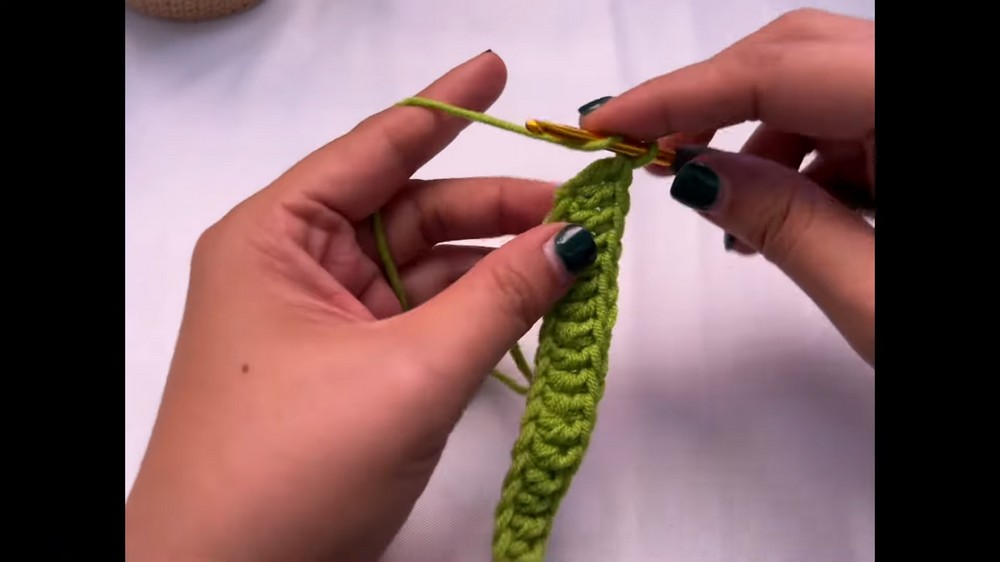
Step 2: First Row – Double Crochets in Back Bumps
- Skip first chain, yarn over, insert into third chain from hook.
- Work 1 double crochet (dc) into each chain back bump across.
- At last chain, work 3 double crochet into the same stitch to create a neat corner.
- Turn work.
Step 3: Second Row – Double Crochet Back across
- Chain 2 (does not count as stitch).
- Work 1 double crochet into each stitch across the row on the other side of foundation chain.
- At last stitch, work 2 double crochet in the same stitch for increase.
- Slip stitch to join and mark last stitch with a stitch marker.
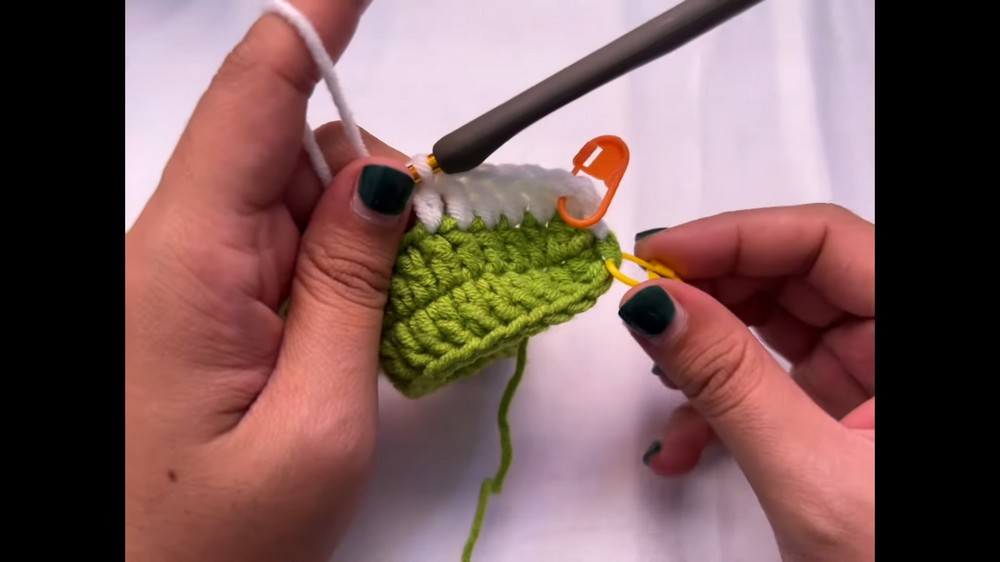
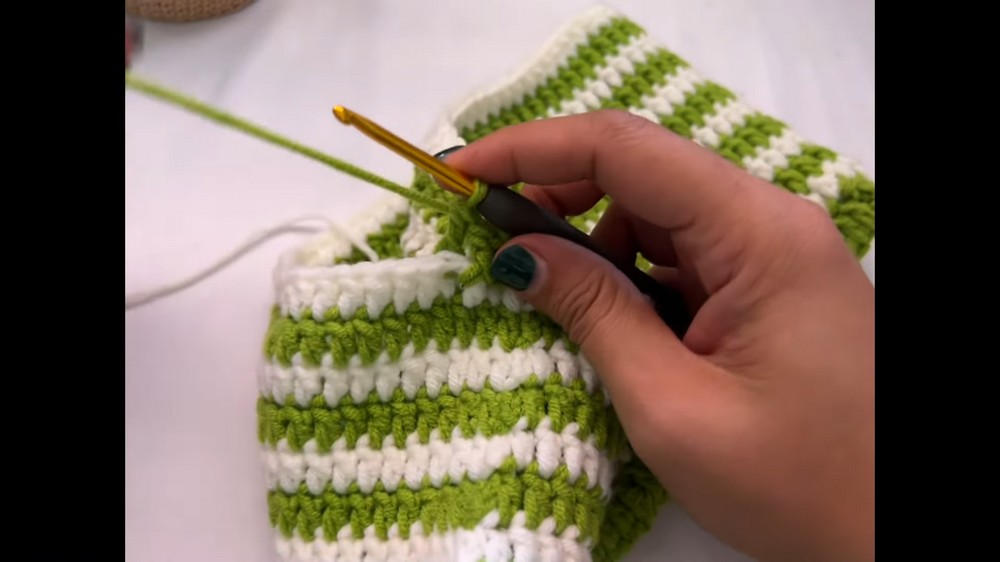
Step 4: Color Change (Optional)
- For color changes, finish the last double crochet of the current color by pulling up the loop with the new color.
- Continue working one double crochet per stitch in new color for desired number of rows (e.g., 7 rows of green).
- Mark last stitch with a stitch marker.
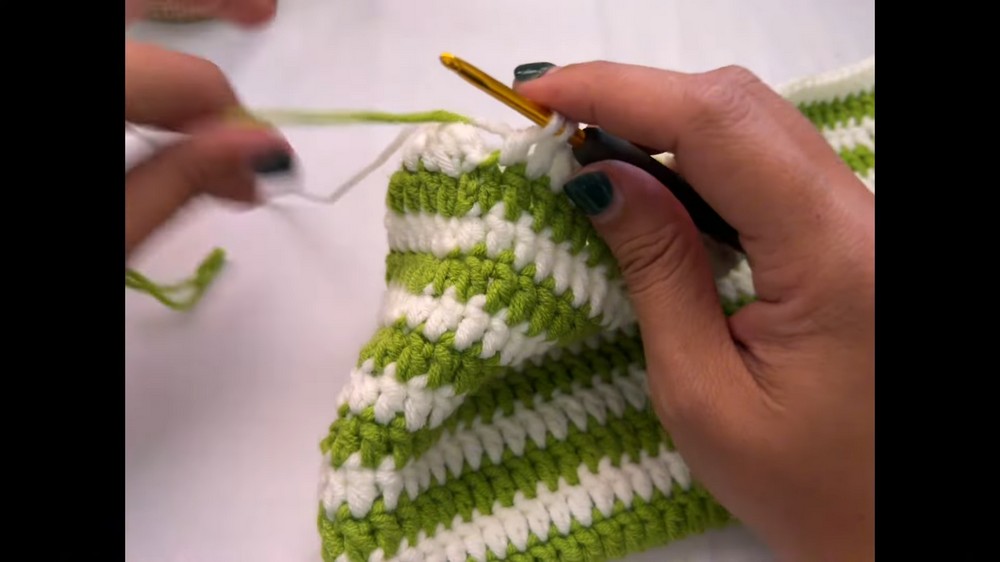
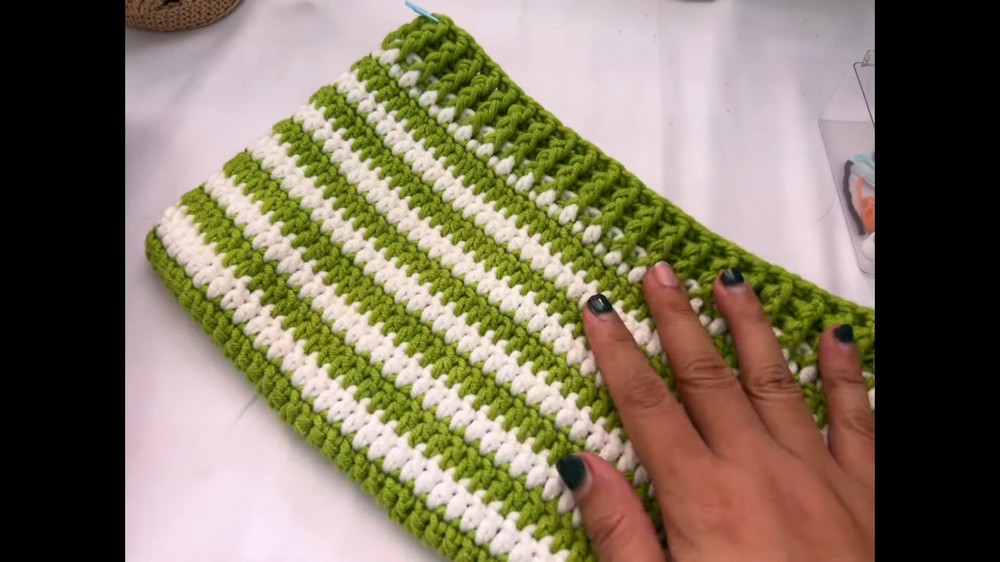
Step 5: Main Hat Body Working in Rounds
- Chain 2 at start of round (does not count as stitch).
- Work 1 double crochet (dc) in each stitch around.
- Join rounds with slip stitches, continue rounds until you reach approx. 12 rows or desired height.
Step 6: Ribbing Pattern – Front & Back Post Double Crochet
- Chain 2 (does not count as stitch).
- (Front post double crochet) fpdc around post of next dc.
- (Back post double crochet) bpdc around post of following dc.
- Repeat fpdc and bpdc alternately around the round.
- Join with slip stitch, chain 2 and repeat ribbing for 3-5 rows or until desired ribbing height.
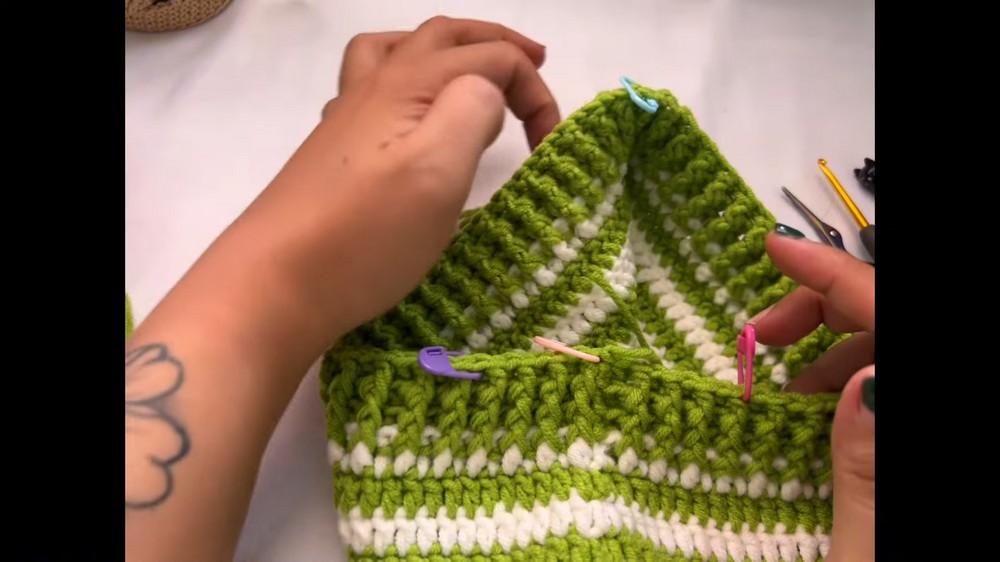
Step 7: Mark Cat Ear Flap Positions
- Count total stitches around (e.g., 90 stitches).
- Divide in half, place a stitch marker at each half (e.g., 45 and 46).
- From each marker, count and mark 8 stitches inward for where ear flap will begin and end.
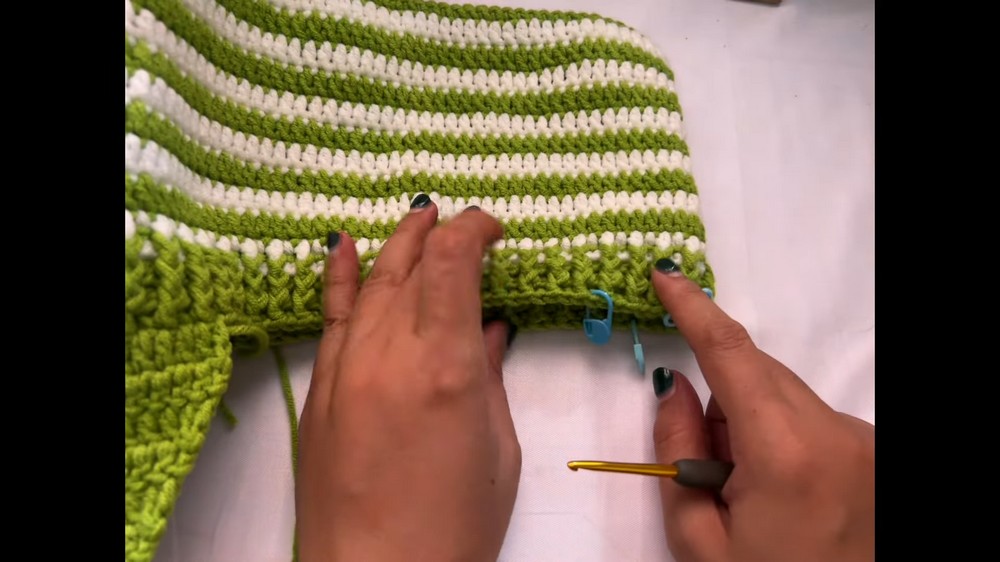
Step 8: Ear Flap Construction
- Attach yarn at first ear flap marker. Chain 2.
- Work double crochet (dc) evenly across 16 stitches (between markers). Place stitch marker on first dc.
- Next rows: decrease rows by skipping first stitch and last stitch of the row to shape ear flap triangle.
- When 2 stitches remain, decrease row to finish flap tip.
Step 9: Make Second Ear Flap
- Repeat step 8 on opposite side of hat.
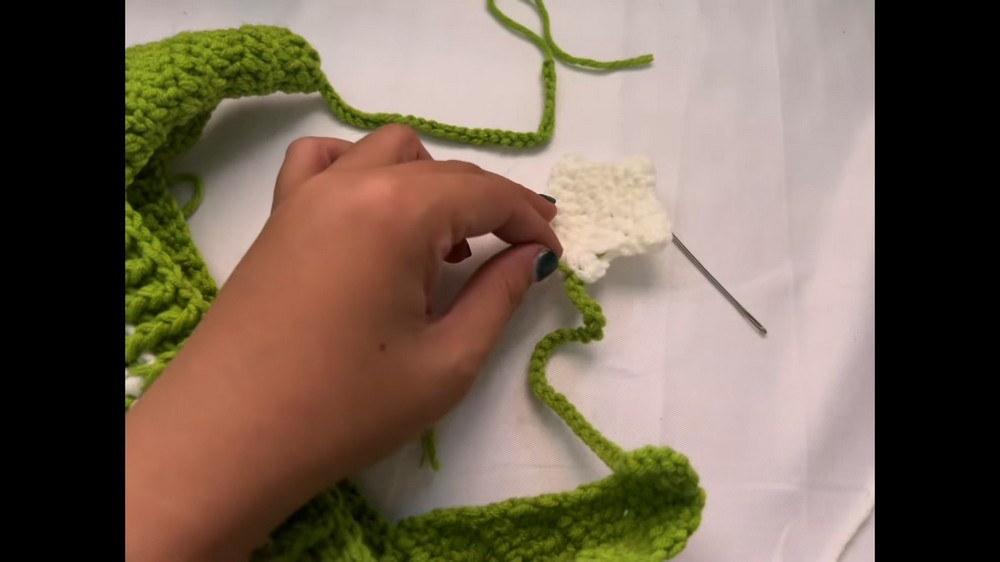
Step 10: Star Appliqué (Optional)
- Use a magic ring; chain 1 and work 5 single crochets (sc) inside ring. Pull tight.
- Row 2: Increase by working 2 sc in each stitch around (10 sc).
- Row 3: Increase every other stitch to shape star points (carefully count increases).
- Shape star points by working single crochet, half double crochet, double crochet, half double crochet, single crochet in one stitch creating 5 points.
- Fasten off leaving a long tail for sewing. Make 2 stars (one per ear flap).
Step 11: Assembly & Finishing
- Seam ear flaps to sides if necessary.
- Sew stars onto ear flaps with yarn needle using long tails carefully.
- Weave in all yarn ends carefully inside hat.
- Block or shape hat if needed for neat appearance.
Tutor’s Suggestions:
- Use stitch markers when working in rounds to track beginning/end of rounds and ear flap sections.
- When changing colors, twist yarns tightly and carry tails neatly to avoid holes or loose stitches.
- Carry and weave in tail ends as you go for a cleaner finish.
- Adjust chain foundation to fit your head measurements for perfect sizing.
- Practice front and back post double crochet on swatches before ribbing to ensure smooth tension.
Tip:
To keep the ribbing elastic and stretchy, work the front and back post double crochets loosely and avoid pulling the yarn too tight.
Conclusion
This cozy and charming cat hat pattern combines basic crochet stitches, colorwork, and shaping techniques into a delightful, wearable accessory. Whether for yourself or a loved one, its custom fit and playful design make it a perfect gift or fun project for crochet enthusiasts of intermediate level.
Leave a Reply