
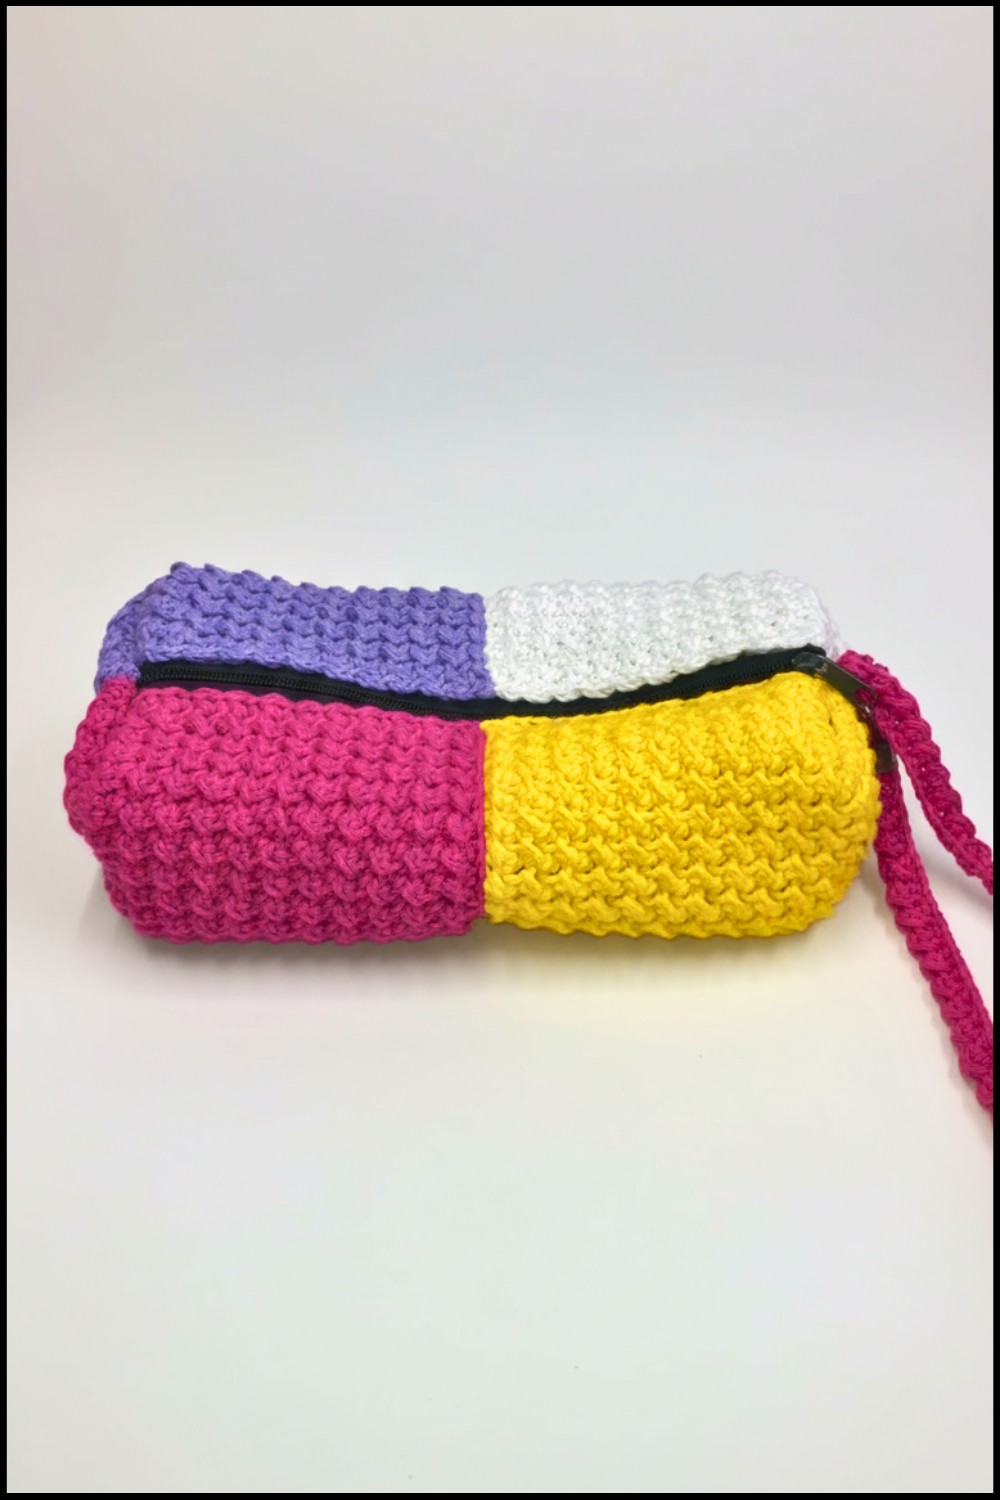
Organize your essentials with this Crochet Cosmetic Bag Pattern that offers a perfect mix of style functionality and a touch of personality.

It’s frustrating when your makeup and essentials are scattered everywhere, but having a cosmetic bag with a stunning design makes organization simple and stylish. Featuring a beautiful Crochet Cosmetic Bag Pattern, this option combines charm with functionality, making it perfect for carrying makeup, skincare products, or small accessories. Whether it’s for travel, a busy day out, or tidying up your vanity, this bag keeps everything neatly in place and easy to find.
Creative Crochet Cosmetic Bag Pattern You’ll Love Using
Its eye-catching design adds a touch of elegance, making it more than just a storage pouch—it’s a thoughtful, practical accessory for daily life. Say goodbye to messy bags and hello to a stylish, functional solution that suits all ages. Plus, it makes a unique and heartfelt gift for loved ones. Whether you’re on-the-go or organizing your vanity, this bag blends usability with beauty, ensuring your essentials are stored in style.

Materials List
- Yarn: 100% cotton yarn (choose summer colors you prefer)
- Hook: 2.5 mm crochet hook
- Tools:
- Stitch marker
- Scissors
- Tapestry needle (for sewing and weaving in ends)
Skill Level
Intermediate
Key Abbreviations (US Terminology)
- ch: chain
- sl st: slip stitch
- hdc: half double crochet
- sp: space
Special Notes
- Ensure an even tension throughout.
- Use stitch markers to identify rows or specific points as indicated in the pattern.
- The finished size of the bag will depend on your gauge and yarn choice.
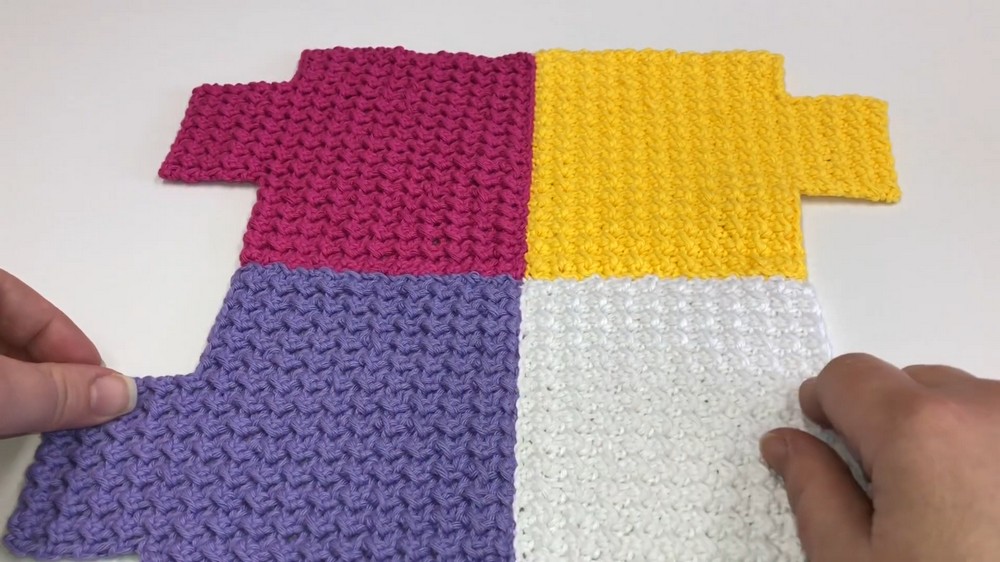
- The bag comprises 4 crocheted parts, which will be later joined by sewing.
Final Dimensions
- Finished make-up bag: Approximately 12.5 cm wide and 11 cm tall.
Pattern Instructions
Step 1: Starting the Base of the Bag
- Start with a Slip Knot and make 32 chains. (Bag width = approx. 12.5 cm)
- Add 2 chains for turning.
Row 1
- In the third chain from the hook, work 1 hdc.
- Mark this stitch with a stitch marker.
- In the next stitch, work 1 sl st.
- Alternate between hdc and sl st across the row, ending with a sl st in the last stitch.
- You should have 32 stitches in total.

Row 2
- Ch 2, turn your work.
- In the first stitch, work 1 hdc and mark this stitch with a stitch marker.
- In the next stitch, work 1 sl st.
- Continue alternating between hdc and sl st across the row, ending with sl st in the last stitch.
Rows 3 to 22
- Repeat Row 2 for the next 20 rows.
- Your work should now measure approximately 11 cm tall.

Step 2: Creating the Wide Part for Sewing
- Place a marker on the eighth stitch from one edge.
- Place another marker on the fourteenth stitch from the opposite edge.

Row 23: Start Wide Section
- Make a sl st in the next 7 stitches from the marked edge.
- Ch 1, then work 1 sl st in the first stitch. Mark this stitch with a stitch marker for reference.
- In the next stitch, work 1 hdc. Work alternating sl st and hdc until the marked stitch. End the row with 1 hdc.
Rows 24 to 31
- Ch 1, turn your work, and repeat Row 2.
- Continue alternating hdc and sl st across the row for a total of 31 rows.
Your piece should measure approximately 4.5-5.5 cm wide at this point.
Step 3: Making 4 Identical Pieces
Repeat the pattern above to create 4 identical pieces. Once all pieces are ready:
- Place the wide part of each piece facing inward.
- Sew the edges of all the pieces together using a tapestry needle for neat finishing.

Step 4: Adding the Decorative Edging
- Insert the hook into the project and join with a new yarn of a contrasting color (optional).
- Ch 1, work 1 hdc in the same space.
- In the next space, work (sl st, ch 1, hdc).
- Repeat (sl st, ch 1, hdc) across all edges.
- End with a sl st, ch 1, and cut your yarn.
Step 5: Adding the Handle
- Ch 60.
- Work Rows 1-2 as described for the bag body (alternating between hdc and sl st).
- Sew the handle ends securely to the bag’s sides.

Conclusion
Your summer-inspired crochet make-up bag is complete! You now have a functional and stylish accessory, with perfect dimensions and a beautiful textured look.
Pattern Corrections and Notes
- On Row 23, double-check your stitch placements to maintain the proper stitch count. Misplacement here can affect the alignment of your sections.
- Sewing tip: Keep stitches evenly spaced when sewing the pieces to ensure neat seams.
Tips
- When changing yarn colors, ensure you join the new yarn securely to avoid unraveling.
- Consider blocking your bag for an even, professional finish.
- To make the bag sturdier, you can sew in a fabric lining.
Final Thought
This bag is a fantastic project to showcase bright, summer colors and add a pop of vibrance to your accessories collection. Whether for yourself or as a gift, it’s sure to make a statement.
Leave a Reply