
Grab your hook and build a stylish everyday accessory with Crochet Lumi Bag Pattern that offers beauty and practical comfort in one piece.
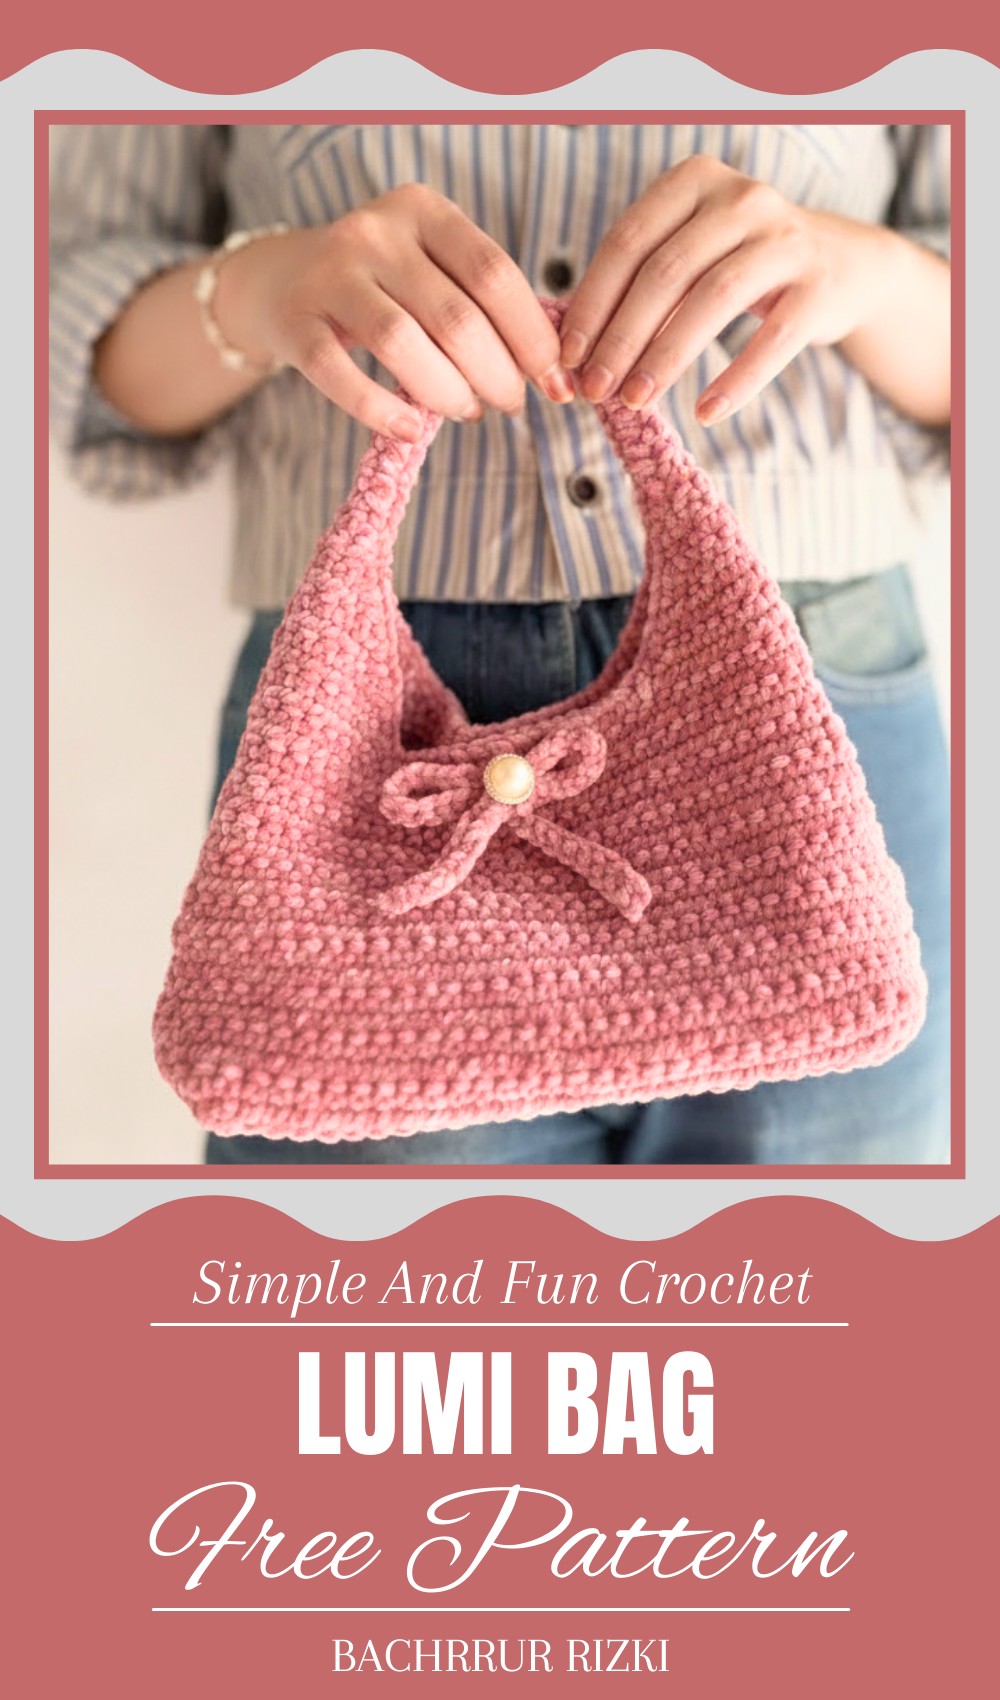
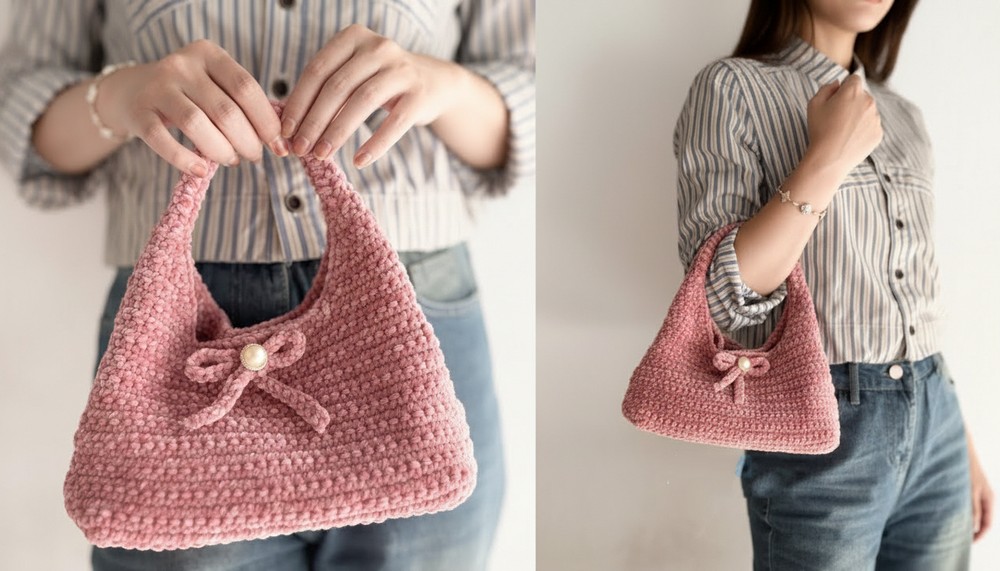
Step into everyday style with a handmade bag that feels soft strong and truly special. This lovely piece is not only useful but also beautiful making any simple outfit look more charming and complete. You can carry it to the market to the park to family visits or even small events where you want to show your creative side. Its neat shape and lovely texture make it stand out while still being easy to use and comfortable to hold.
Stylish Crochet Lumi Bag Pattern Eye-Catching Bag for Day or Night
Made with yarn and simple stitches it can be created in many colors to match your clothes and mood. The Crochet Lumi Bag pattern gives clear step by step guidance so anyone can make this stylish bag with confidence. It is perfect for beginners and relaxing for experienced crocheters. Once finished it becomes a proud handmade piece that shows your skill and adds beauty to daily life in a simple joyful way.
Materials
Required Items:
- Yarn:
- Mini Aster Yarn (Bluere), three-ply, fine weight thread (or a similar lightweight yarn).
- Additional thread for plastic canvas lining (optional): Mimosa thread or any leftover thread.
- Crochet Hook:
- 4.0 mm (US size G/7).
- Plastic Canvas (optional, for a sturdy base).
- Tapestry Needle: For joining and sewing edges.
- Scissors: For trimming ends.
- Measuring Tape: To ensure accurate dimensions.
- Glue Gun: For attaching decorative accessories (optional).
- Magnetic Closure: For securing the bag.
Key Abbreviations (US Terminology)
- Ch – Chain
- Sc – Single Crochet
- Dec – Decrease (single crochet two stitches together)
- Dc – Double Crochet
- Sl st – Slip Stitch
- Rep – Repeat
Special Notes
- Dimensions:
- Bag height: 13 cm.
- Handle drop: 19 cm.
- Base: 10 cm x 22 cm.
- Plastic Canvas Lining (Optional): This strengthens the base and ensures longevity.
- Yarn Handling: If using multiple strands, ensure even tension throughout to maintain uniformity.
Step-by-Step Pattern: Lumy Bag
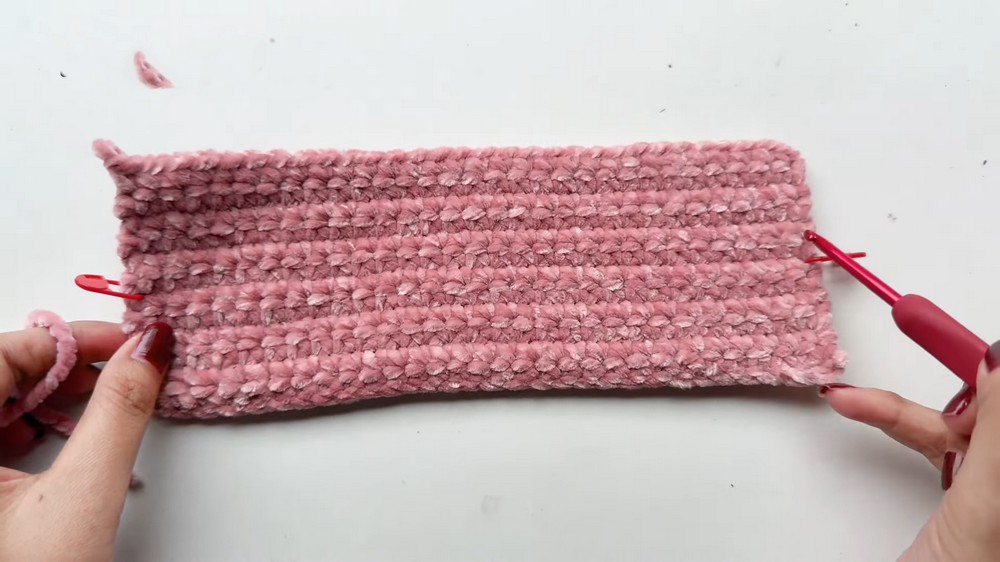
Step 1: Base of the Bag
- Foundation Chain:
- Begin with Ch 30 + 1 (total: 31 chains).
- Row 1 (Sc Row):
- Insert hook into the 2nd chain from the hook, work Sc across. Total: 30 Sc.
- Row 2-12 (Sc Rows):
- Ch 1, turn, and work 30 Sc across for each row.
- Continue for 12 rows in total to create a rectangular base.
- Finish:
- Fasten off and weave in the ends.
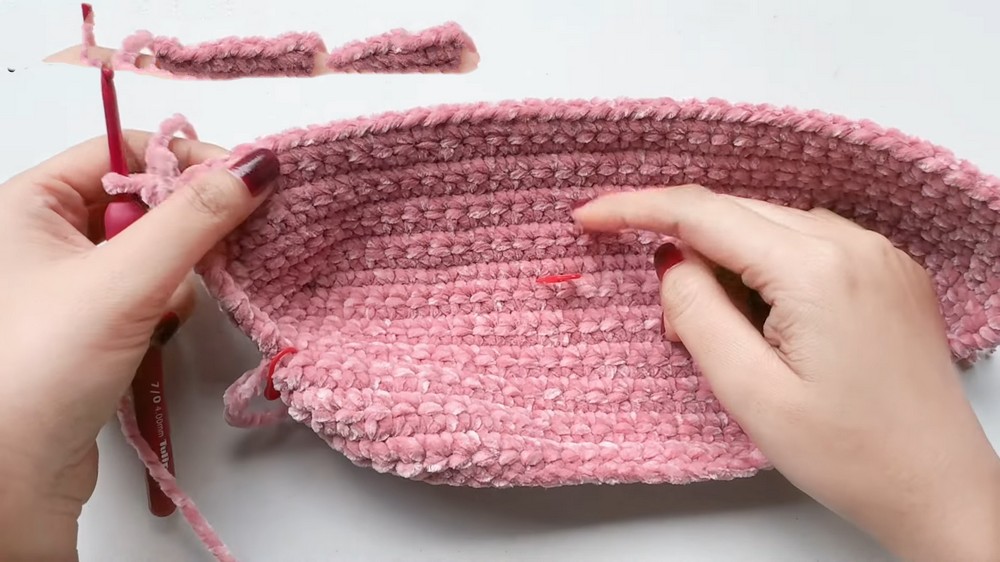
Step 2: Establishing the Bag Body
Using the base edges, begin crocheting the body’s foundation.
- Mark the Center and Sides:
- Place markers as follows:
- Center point on each shorter edge of the base.
- Six rows on each shorter side (to define the side edges).
- Place markers as follows:
- Foundation Round:
- Join yarn at any marker and Ch 1.
- Establish the round with 42 Sc per round:
- Work 6 Sc along one shorter side.
- 30 Sc along the longer edge.
- 6 Sc along the remaining shorter side.
- Close the round with a Sl st.
- Row 1-4:
- Ch 1, turn, and work 42 Sc back and forth for 4 rows.
Step 3: Shaping the Body of the Bag
Begin shaping by reducing stitches in specific rows.
Row 5 (Reducing to 40 stitches)
- Ch 1, turn, and Sc 2.
- Dec once. (Work a decrease by crocheting 2 stitches into 1).
- Work 34 Sc, leaving the last 4 stitches unworked:
- Dec in the next 2 stitches.
- Sc the final 2 stitches.
- Total: 40 Sc.
Row 6-9 (Maintain Stitch Count)
- Work 40 Sc in each row.

Step 4: Continuing Reductions
Row 10 (Reducing to 38 stitches)
- Ch 1, turn, and Sc 2.
- Dec once, then 32 Sc.
- At the end of the row: Dec once, Sc 2.
- Total: 38 Sc.
Rows 11-14:
- Work 38 Sc per row.
Row 15 (Reducing to 36 stitches)
- Ch 1, turn, and Sc 2.
- Dec once, then 30 Sc.
- At the end of the row: Dec once, Sc 2.
- Total: 36 Sc.
Rows 16-19:
- Work 36 Sc per row.
Step 5: Handles
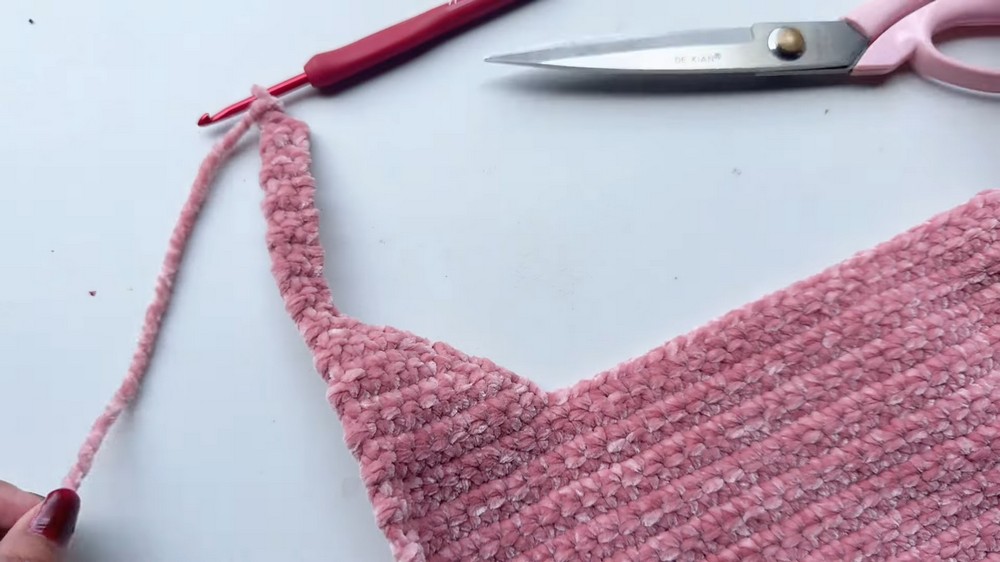
Left Handle (Row 20 Onwards)
- Row 20:
- Work 10 Sc, turn.
- Work 8 Sc, then Dec once.
- Rows 21-29 (Handle Shaping):
- Alternate reducing with decreases or sc rows as follows:
- Row 21: 7 Sc, Dec once.
- Row 22: 5 Sc, Dec once.
- Maintain the decrease pattern until the handle narrows.
- Alternate reducing with decreases or sc rows as follows:
- Rows 30-42 (Handle Completion):
- Work 2 Sc per row to create the final strap.
- Right Handle:
- Repeat the steps of the left handle on the opposite edge of the bag’s body.
Step 6: Adding Stiffness to Base (Optional)
- Cut a plastic canvas to match the base size.
- Using leftover Mimosa or similar thread, crochet a lining layer to conceal the canvas.
- Place the plastic canvas inside the bag base and secure with thread.
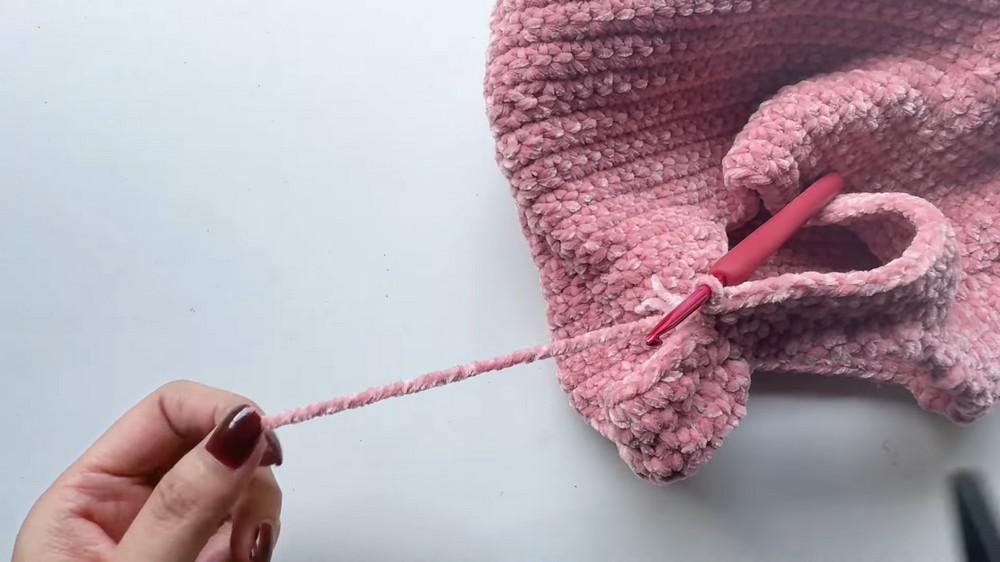
Step 7: Sewing the Edges and Connecting Handles
- Side Seams:
- Use Sc stitching to sew the edges of the bag together.
- Connecting Handles:
- Attach the handle securely to the base using Sc loops.
- Detailing the Handles:
- Work Sc around the edges of the straps to provide stability and a clean finish.
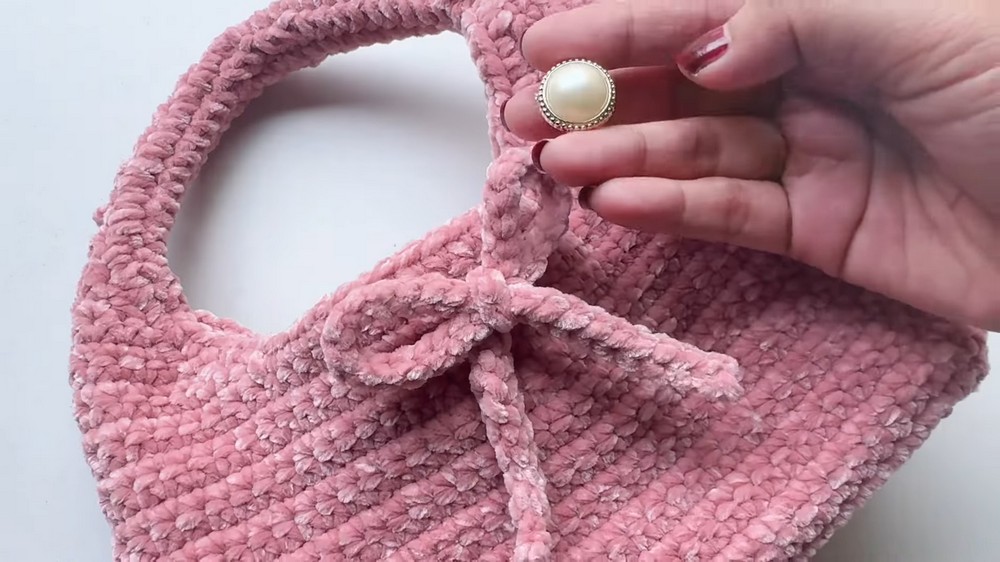
Step 8: Finishing Touches
- Ribbon Decoration (Optional):
- Cut 3 meters of thread and fold in half.
- Use a double chain stitch to form the ribbon.
- Attach decor (such as a bow or embellishments) with a glue gun.
- Magnetic Button:
- Align the button to the bag opening and attach it using fabric glue or sewing.
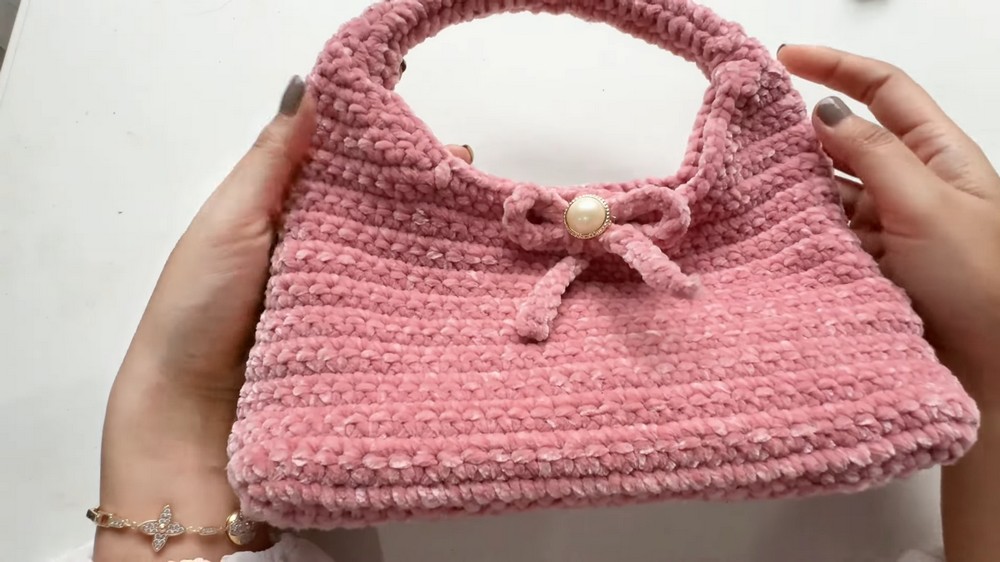
Conclusion
Congratulations! You’ve completed your Lumy Bag! The structural design, accessorized handle, and sturdy base make this bag versatile and durable for daily use.
Pattern Correction Notes
- Marker Adjustments: Double-check center placements with accurate measurements when marking base edges.
- Handle Length: Ensure both handles align symmetrically against the bag body.
Tips for Success
- Maintain Uniform Tension: Especially during shaping rows, keep an even tension to maintain symmetry.
- Customization: Adjust length and width based on personal preference or yarn thickness.
- Optional Accessories: Add tassels, beads, or charms for a personalized touch.

Leave a Reply