
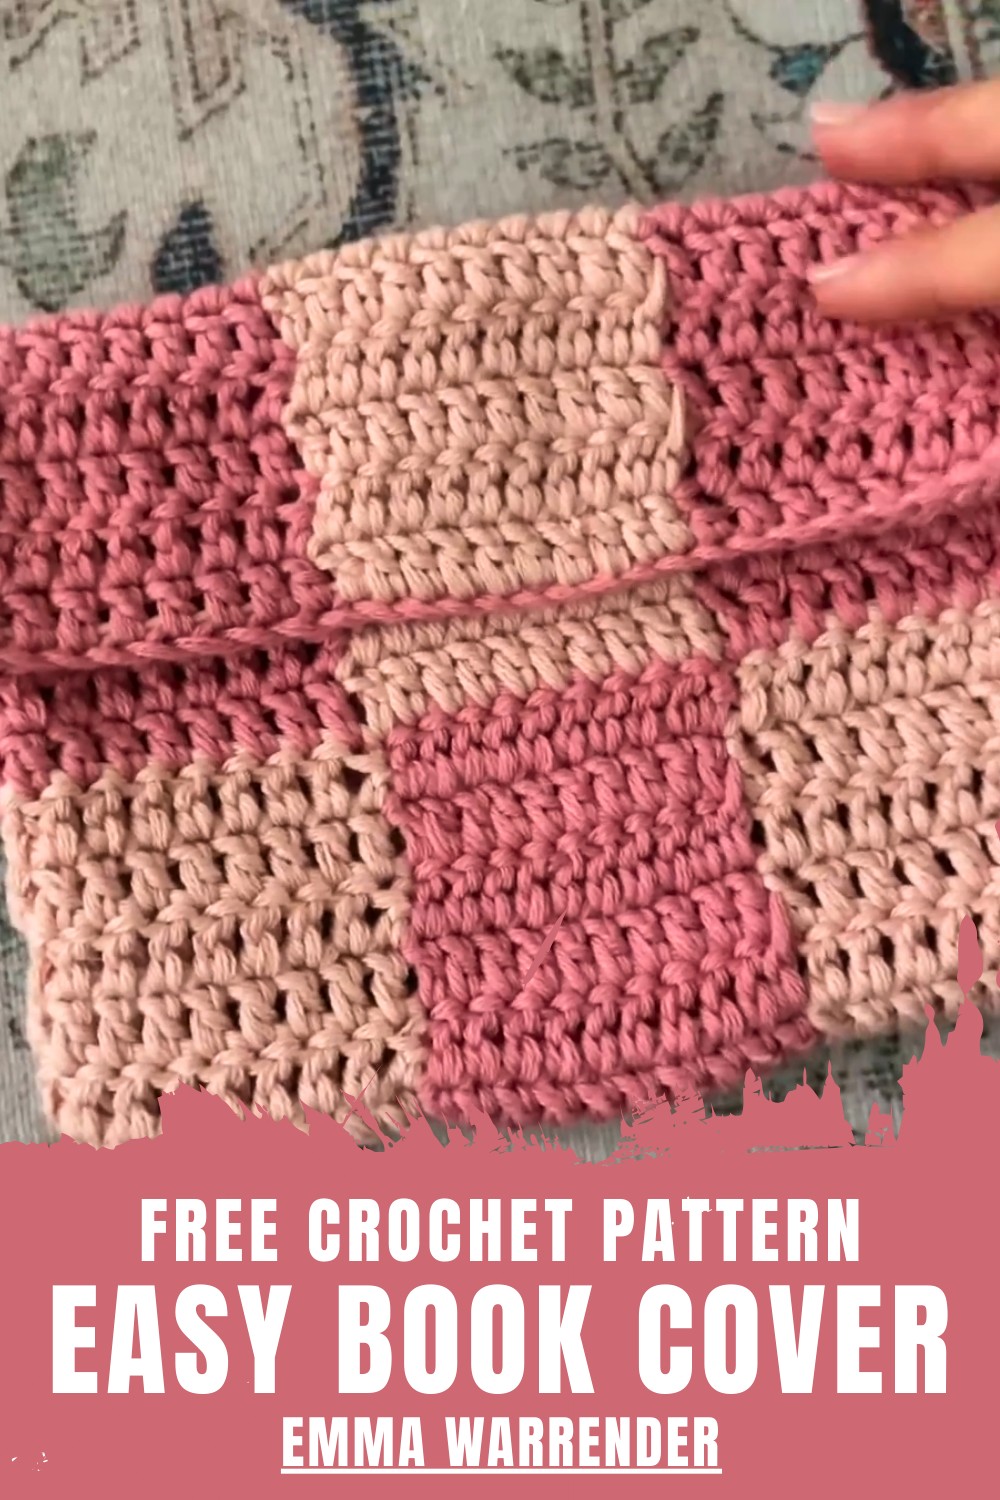
Protect your books with this free crochet book cover pattern that keeps pages safe adds a soft touch and gives personal look to reading time.
A beloved book feels more special when covered in something warm and pleasing to the eyes. The Crochet Book Cover pattern helps shape a neat cover that fits nicely and protects pages from dust and light damage. Its gentle texture and flexible form make it easy to hold and carry anywhere without worry. It is perfect for school books, journals, or storybooks, and can also be given to someone who loves reading.
Crochet Cute Book Sleeve – Free Crochet Pattern
The pattern is simple and clear so anyone can complete it without confusion or stress. The finished cover looks beautiful and adds a personal touch that stands out. It offers comfort, protection, and style in one useful piece, turning simple material into something meaningful that keeps books safe while making reading time feel calm, cozy, and more enjoyable every day.
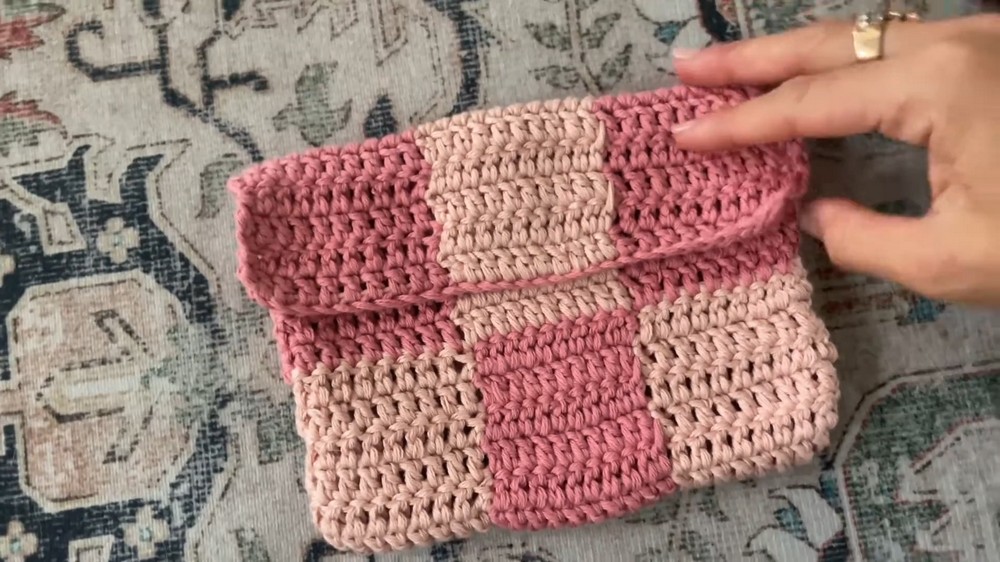
Crochet Checker Print Book/Device Cover Pattern
Materials
- Yarn: Worsted weight (#4) yarn in two contrasting colors (e.g., two shades of pink)
- Hook: 4 mm (US G-6) crochet hook (adjust as per your yarn)
- Notions:
- Scissors
- Yarn needle (for sewing ends)
- Stitch markers (optional, for alignment)
Key Abbreviations (US Terms)
| Abbreviation | Meaning |
|---|---|
| ch | chain |
| dc | double crochet |
| sl st | slip stitch |
| st(s) | stitch(es) |
| rep | repeat |
Special Notes
- The pattern is fully adjustable for any device (book, Kindle, laptop, etc.)—measure your device for custom fit.
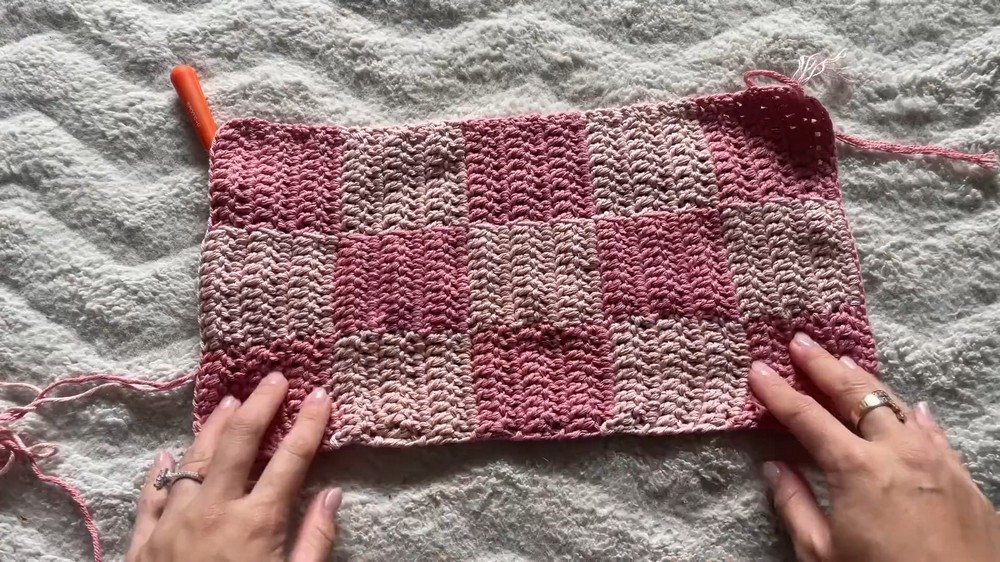
- Each checker square is composed of 10 dc x 6 rows; the initial chain and row counts should be multiples of 10 for the checker effect.
- Carry color changes by working over unused yarn or leaving it to the side as instructed.
- Device cover is constructed as one long panel, folded in half, then slip-stitched closed on both sides.
Pattern
1. Sizing & Foundation Chain
- Measure the width of your device.
- Determine how many checker squares will fit across (each square = 10 dc wide).
- For example: Chain 30 for 3 squares across; adjust to suit your device.
- Ch a multiple of 10 to the required width.
- E.g., ch 30 for 3 squares across.
2. Row 1: Foundation Row
- Ch 2 (turning chain), does not count as a stitch.
- Starting in the last ch of your foundation, dc in each chain across.
- For the checker pattern:
- Work first color (Color A) for first 10 dc.
- Change to second color (Color B) for next 10 dc.
- Change back to Color A for final 10 dc.
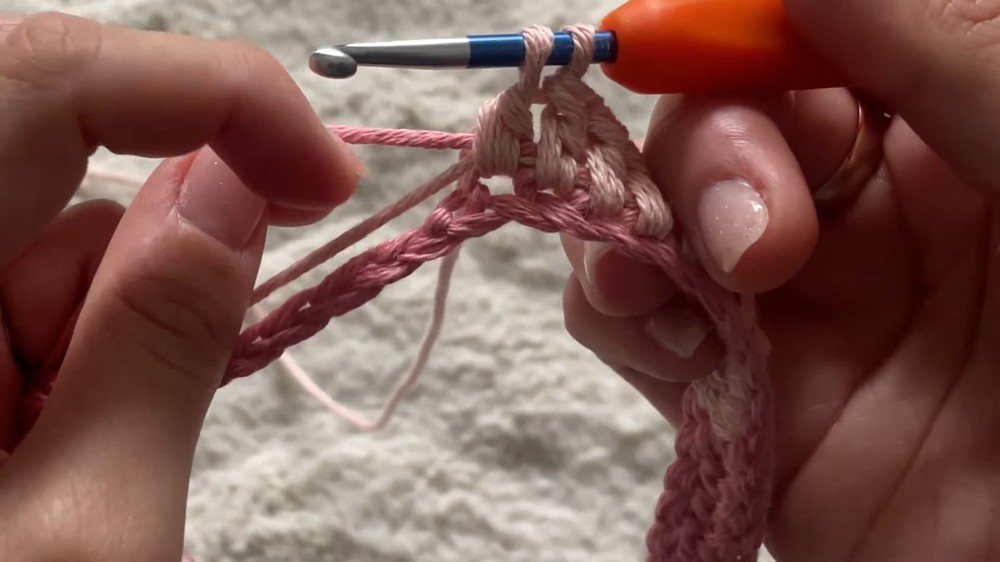
- Color Change: On the last dc before the next color, leave 2 loops on hook. Yarn over in new color and pull through to finish dc.
- For the checker pattern:
3. Rows 2–6: Continue Checker Pattern
- Ch 2, turn (counts as first dc).
- Work 9 more dc in current color, for a total of 10 dc (one square).
- On the 10th dc, execute color change as above before finishing the stitch.
- For each group of 10 dc, continue alternating colors and carrying unused yarn as required (either crochet over it or drop it).
- Repeat for all squares across the row.
- Continue for 6 rows total to make square checkers.

4. Creating the Checker Pattern
- After 6 rows (one full square height), change the arrangement:
- Start next row/group with the alternate color to offset the checkers.
- E.g., If Row 1 started with Color A, Row 7 begins with Color B, Row 13 with Color A, etc.
- For each color change, carry the unused yarn by working over it or leaving it at the side for pickups at next change.
- Continue alternating every 6 rows for a checkered pattern.
5. Repeat Panel Pattern
- Continue working in established pattern, alternating colors every 6 rows, until panel is twice the length of your device (to fold over), or longer if making a flap/closure.
- For example: If your device is 7″ tall and squares are 7 cm (approx. 2.75″), work 5 squares tall (~35 cm) for a fold-over cover.
6. Fastening Off
- On final row, bring carried threads to the end and securely fasten off.
- Cut yarn, leaving a small tail for sewing.
7. Assembly – Seam the Sides
- Fold panel in half along center checker line for a book/device cover shape.
- Match squares on both layers for visual consistency.
- Attach yarn at corner.
- Slip stitch through both layers along one side:
- For each double crochet row, work 1–2 sl sts as needed for flat seam.
- Adjust to maintain edge alignment.
- Fasten off.
- Repeat seam on opposite side.
- Fasten off and weave in all yarn ends.

8. Finishing
- Turn cover right-side-out.
- Insert device to check fit.
- Add optional button, flap, or closure if desired.
- Enjoy your protective checker print cover!
Conclusion
This easy checker print crochet cover is fully adaptable for any device. The pattern uses simple double crochet and colorwork to achieve a clean, modern look. Color changes are made by carrying yarn, and the panel is finished by slip stitching the sides. Customize for gifting or personal use!
Pattern Correction & Tips
Correction:
- Always confirm stitch count (multiple of 10) for correct checker alignment.
- Ensure color changes are completed before final yarn-over on the last dc of each section for crisp color edges.
Tips:
- Use stitch markers for side alignment while slip stitching closed.
- Try the panel against your device after the second row to confirm fit and adjust as needed.
- For a snug fit, allow for slight shrinkage since dc will contract a bit after completed rows.
- Weave in tails as you work over them to minimize finishing.
Leave a Reply