
Guard your surfaces with charm using the Free crochet Teddy Bear Coaster Pattern, that’s for decor, or adding a playful touch on table.
Soft and adorable, a teddy bear coaster adds a cozy charm to your table while protecting it from spills and stains. This playful crochet project combines half double crochet stitches and simple increases to form a round, cuddly bear face that’s both functional and delightful. Its compact size makes it perfect not only for cups and glasses but also as a sweet accessory to cherish or gift to loved ones.
Perfect Crochet Teddy Bear Coaster Pattern for Table Accents

Starting with a small chain loop, the pattern grows in neat rounds with carefully placed stitches to shape the ears and face, creating a friendly expression that’s easy to recognize. The half double crochet stitch gives the coaster a slight thickness, providing good protection against moisture and heat. Plus, working in continuous rounds makes it simple to follow along, perfect for beginners and kids eager to try crochet. The cozy yarn combined with the fun teddy bear design brings warmth and personality to everyday moments like tea time or coffee breaks.
Other Creative Ideas from This Pattern
This base pattern lends itself easily to crocheting other cute coaster designs or decorative pieces. By changing colors or adjusting the ear shapes, you could make different animals like cats, rabbits, or even playful monsters. The simple stitch work also serves as a great foundation for small appliqués, ornaments, or pins. With just a little imagination, this pattern opens the door to a world of charming handmade creations that brighten up everyday life and make thoughtful, personal gifts.

Crochet Pattern: Cute Kitten Face Coasters
In this pattern, you’ll learn how to create a set of adorable kitten coasters, which can double as jewelry holders for your earrings, rings, and bracelets, or as drink coasters. This project is incredibly quick and beginner-friendly, and the best part is you only need a small amount of yarn! Perfect as a gift or to add a cozy, handmade touch to your home decor, these coasters are versatile, fun, and super easy to make.
Uses of This Pattern
- Coasters for Drinks: Protect your table while enjoying a fun cat-themed accessory.
- Jewelry Holders: Use them as trays for your rings, earrings, or bracelets.
- Decorative Piece: Add a charming handmade accent to your living space or desk.
Skill Level & Terminology
- Skill Level: Beginner
- Terminology: US crochet terms are used throughout.
Materials & Tools
- Yarn: Double-stranded yarn in your desired colors (lightweight or medium-weight yarn works best).
- Crochet Hook: 5mm crochet hook.
- Scissors: To cut the yarn.
- Tapestry Needle: For weaving in ends.
Optional: Use stitch markers to keep track of your rounds and stitches if you are new to crocheting.
Gauge
Gauge is not critical for this pattern since the coasters are small and decorative, but your stitches should be uniform and tight to minimize any large gaps.
Abbreviations
- ch – Chain
- sc – Single Crochet
- hdc – Half Double Crochet
- dc – Double Crochet
- st – Stitch
- sl st – Slip Stitch
Special Instructions
Magic Ring Alternative:
If you’re not comfortable with a magic ring, you can alternatively chain 2 and work the first round directly into the second chain from the hook.
Finished Size
Each coaster measures approximately 4–5 inches in diameter, depending on your yarn thickness and crochet tension.
What You’ll Learn From This Pattern
- Basic Amigurumi Techniques: Practice starting with a magic ring and working in the round.
- Half Double and Double Crochet Stitches: Work with foundational stitches to create different shapes and textures.
- Decorative Embellishments: Discover how to add features like ears to simple patterns.
- Finishing Techniques: Learn how to neatly weave in ends and block your project.
The Pattern
Coaster Base
- Foundation Round:
- Create a magic ring and secure it with a slip knot.
- ch 3.
- Work 10 hdc into the magic ring. (10 hdc)
- Pull the tail to close the circle tightly.
- sl st to the top of the first hdc to join.
This forms the starting circle for your coaster. Pull the magic ring tight to create a neat and closed center.
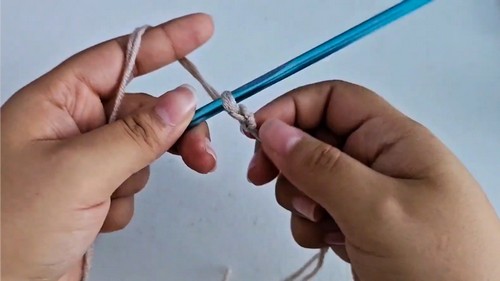
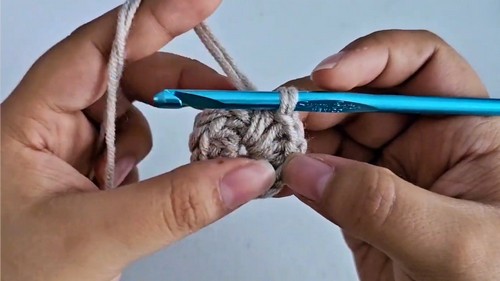
- Round 2 (Increases):
- ch 1, work 2 hdc in each st around. (20 hdc)
- sl st into the top of the first hdc.
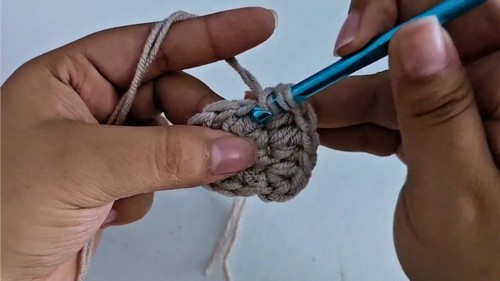
- Round 3:
- ch 1, work 1 hdc in the first st, then 2 hdc in the next st. (30 hdc)
- Repeat the pattern of 1 hdc, 2 hdc in same st until the end of the round.
- sl st into the first hdc to close the round.
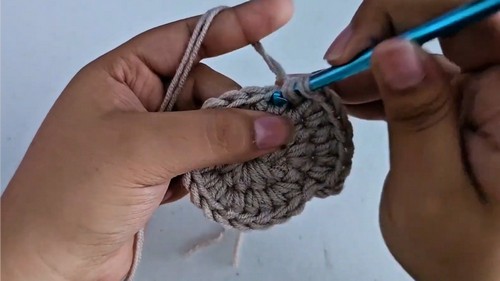
- Round 4:
- ch 1, work 1 hdc in the first 2 sts, then 2 hdc in the next st. (40 hdc)
- Repeat the pattern of 1 hdc in 2 sts, 2 hdc in next st until the end of the round.
- sl st into the first hdc to close the round.
The coaster base is now complete! The increases ensure that the circle remains flat. If your coaster starts curling, lightly block it by dampening and pinning it flat to dry.
Ears
The ears add a cute detail to the coasters and are worked seamlessly from the edge.
- Using the same yarn, ch 1 and turn your work.
- First Ear:
- In the next stitch, work 5 dc into the same stitch.
- sl st into the next st to anchor the ear.
This creates a petal-like shape resembling a cat’s ear. The ears are worked directly onto the edge of the coaster for a seamless finish.
- Single Crochet Between Ears:
- In the next 5 sts, work 1 sc evenly. (5 sc)
- Second Ear:
- In the next st, work 5 dc into the same stitch for the second ear.
- sl st into the next st to anchor it.
- Complete the Round:
- Work 1 sc in each remaining st around to complete the round.
- sl st to the first sc and fasten off.
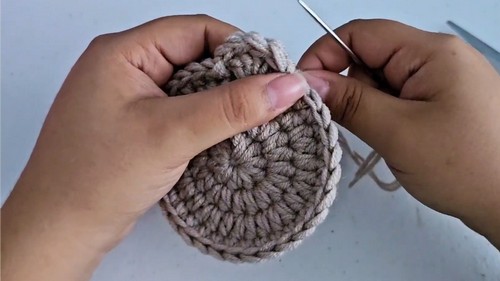
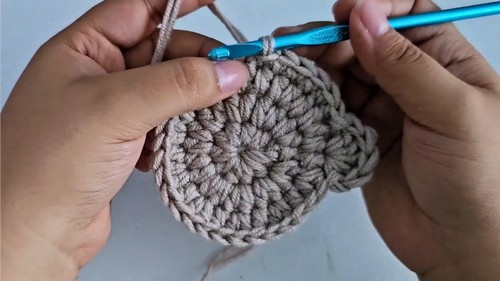
The ears instantly bring the coasters to life! If you’re not reading row-by-row, simply create two small domed shapes on opposite sides of the circle base.
Finishing the Coasters
- Weave in Loose Ends:
- Use a tapestry needle to weave in the starting tail from the magic ring and any other remaining loose ends.
- Weave the tails back and forth through a few stitches on the backside of the work to secure them, and trim excess yarn.
- Shaping (Optional):
- If the coaster is uneven, lightly steam-block or wet-block it and shape it gently to flatten and smooth it out.
Difficulties & Solutions
Difficulty: Uneven Edges
The edges of your coaster may become wavy due to inconsistent tension.
- Solution: Focus on maintaining consistent tension and avoid pulling the yarn too tightly while crocheting.
Difficulty: Magic Ring Gaps
It’s common for gaps to appear when creating a magic ring.
- Solution: Pull the tail firmly after completing the first round to close the center tightly. If this is still challenging, start with a foundation chain and work into the second ch from the hook as an alternative.
Difficulty: Determining Stitch Placement for Ears
Beginners may find it hard to estimate where to start the ears.
- Solution: Use stitch markers to evenly divide the circle into four parts. Use one part for each ear and the spaces between for flat stitching.
Why You’ll Love This Pattern
This adorable cat-inspired coaster pattern is perfect for beginners who want to practice working in the round and adding small details like increases and decorative ears. It’s a fast and satisfying project, ideal for quick gifts or brightening your home with handmade charm. You can experiment with colors to create unique coasters or choose tones that match your home décor.
Leave a Reply