
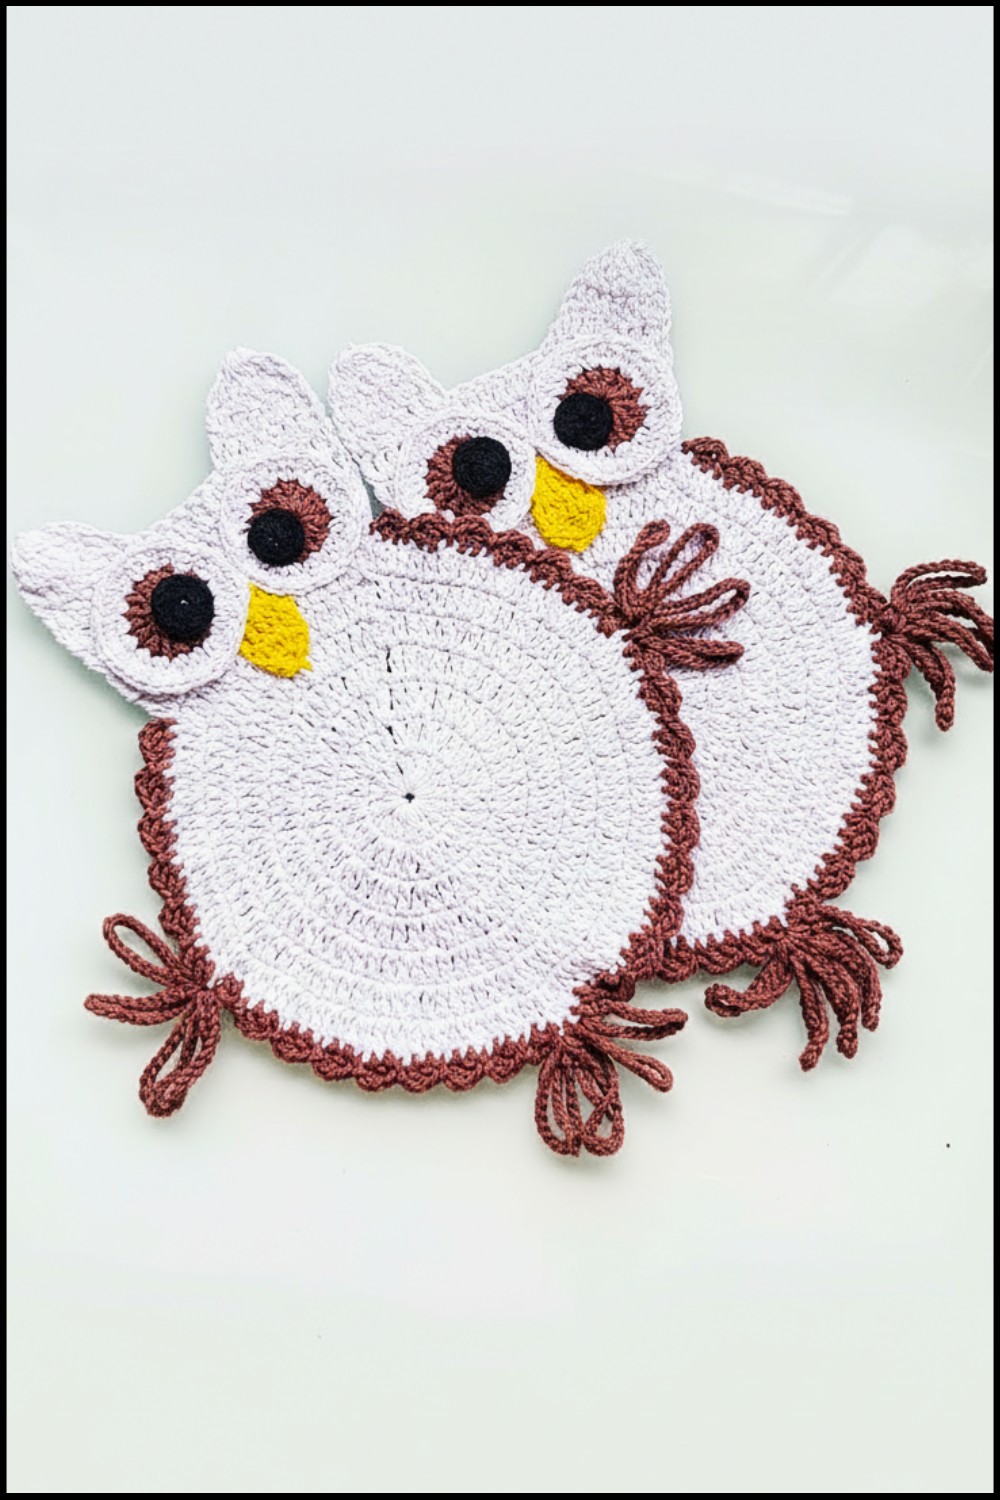
Decorate your table with this Crochet Owl Placemat Pattern perfect for giving meals a cozy look that makes every dining moment feel special.

Bright big eyes and a round belly make any dinner table feel like a happy forest home. This soft mat for your plates has a sweet face that watches you eat and keeps your table clean from spills. Making this Crochet Owl Placemat pattern is a joy because you can use earthy brown colors or bright pinks to match your kitchen. The beauty of this design is in the layers of stitches that look like soft feathers which feel thick and strong.
Easy Crochet Owl Placemat Pattern for Morning Coffee or Tea
You can use this lovely bird to hold a hot bowl of soup or a cold glass of milk. It is a wonderful gift for a friend who loves nature or for a child who wants a fun mealtime. Every loop you make builds a wise little friend that stays flat and steady under your dishes. This charming piece adds a touch of magic to every bite you take.

Materials List
- Yarn:
- Main Color (Charme cotton yarn or equivalent).
- Secondary colors for details: white (eye details), yellow (beak), and brown (feathers or decoration).
- For smaller and neater stitches, cotton yarn is preferred.
- Hook:
- 2mm crochet hook (adjust size if needed).
- Optional Items:
- Tapestry needle (for sewing and weaving ends).
- Scissors.
- Universal glue (optional, for attaching details).
Key Abbreviations
- ch: Chain
- sc: Single Crochet
- dc: Double Crochet
- sl st: Slip Stitch
- rep: Repeat
- st: Stitch
Special Notes
- Use stitch markers to identify key rows and placement for features like the beak, eyes, and ears.
- Ensure accurate stitch count for symmetry.
- Adjust yarn weight and hook size proportionately if making larger or smaller owls.
Pattern Instructions
Step 1: Begin the Base Body (Foundation Round)
- Foundation:
- Start with a slip knot.
- Chain 6. Join the chain into a ring using a sl st in the first chain stitch.
- Round 1:
- Ch 3 (counts as the first dc).
- Work 15 dc into the ring. You will now have a total of 16 dc (including the ch-3).
- Join with a sl st in the top of the ch-3.
- Round 2:
- Ch 3, dc in the same st (counts as 2 dc).
- Work 2 dc into each st around (increase in every stitch).
- You now have 30 dc.
- Join with a sl st in the top of the ch-3.

Step 2: Build the Body
- Round 3:
- Ch 3, dc in the same st (counts as 2 dc).
- Next st: Work 1 dc.
- Next st: Work 2 dc into the same st.
- Alternate between 1 dc and 2 dc around the round.
- You now have 45 dc.
- Join with a sl st in the top of the ch-3.
- Round 4:
- Ch 3, 2 dc in the same st, followed by 2 dc in the next 2 sts.
- Continue the sequence (increase, dc in next two sts).
- Total: 60 dc.
- Join with a sl st.
- Subsequent Rounds (5-7):
- Round 5: Work increases every 3 stitches (2 dc, dc in next three sts) → Total 75 dc
- Round 6: Work increases every 4 stitches → Total 90 dc
- Round 7: Work increases every 5 stitches → Total 105 dc


Step 3: Shape the Head
- Foundation Row for Head:
- Work 22 dc across the top area. Use stitch markers if needed to keep alignment.
- Rows 2-4:
- Turn the work and continue working dc in each st for a total of 4 rows.
Step 4: Form the Ears
- Left Ear:
- Row 1: Work 8 dc across the edge designated for an ear.
- Row 2: Turn the work and repeat dc across 8 stitches.
- Row 3 (Decrease row): Work partial dc stitches:
- Start as normal for a dc, but leave the last loop of the stitch on the hook. Repeat this for all 8 dc, leaving loops on the hook.
- Once all loops are on the hook, yarn over and pull through all loops. This forms a gathered ear point.
- Right Ear:
- Repeat the same process as the left ear on the opposite side to ensure symmetry.

Step 5: Add Feather Details
- Side Feathers (Four Cords):
- Work 4 cords (wings) along the side of the owl’s body. For each cord:
- Ch 20.
- Attach with a sc into the same base point.
- Repeat 4 times.
- Work 4 cords (wings) along the side of the owl’s body. For each cord:
- Bottom Feathers (Five Cords):
- Repeat the same process below the body, but work 5 cords instead of 4.

Step 6: Eyes
- Large Eye Base (Brown Yarn):
- Make a magic ring or ch 6, join with a sl st.
- Work 15 dc into the ring.
- Eye Details (White Yarn):
- Attach white yarn and work sc into each st, adding occasional increases if needed.
- Pupil (Black Yarn):
- Work 15 dc into a magic ring (similar to the large base).
- Assembly:
- Sew the three parts together using a tapestry needle or glue if preferred.

Step 7: Beak
- Yellow Yarn:
- Foundation Chains: Ch 6.
- Row 1: Dc into each chain (total 6 dc).
- Row 2: Work dc across, decreasing slightly by leaving loops on the hook and yarning through them.
- Sew the beak between the eyes using a tapestry needle.

Step 8: Final Assembly
- Attach Features:
- Use sewing or glue to attach eyes, beak, and other details securely.
- Finishing Touches:
- Weave in all loose ends.
- Adjust and shape the owl by gently stretching or flattening.

Conclusion
Your crochet owl is complete! A perfect decorative item, gift, or token of appreciation. Customize details, colors, or sizes to match your personal style.
Pattern Corrections
- Use stitch markers for alignment during body-building rows.
- Double-check stitch counts for symmetry, especially on the ears and body.
Tips
- Stretch and Shape: Cotton yarn is versatile; shape your owl after finishing for perfection!
- Sew Securely: If using glue, opt for durable adhesive to increase longevity during washes.
- Experiment: Use vibrant colors and alternate placements for a unique creation.
Leave a Reply