
Brightening everyday style with Free Crochet Daisy Bucket Hat Pattern brings cheerful detail and seasonal fashion appeal for sunny days.
A handmade bucket hat is a fun and practical crochet project that can be worn in every season. The Free crochet Daisy Bucket Hat Pattern is a beautiful wearable design that combines comfort with a fresh floral look. With a few simple changes, the same pattern can also be used to make a plain bucket hat, a sun hat, or a colorful hat with different flower designs. It is a great project for using your favorite yarn colors while creating something stylish and useful.
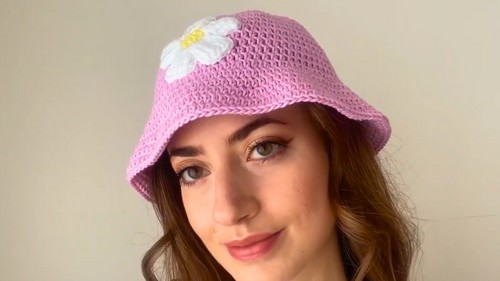
This daisy bucket hat stands out with its cheerful flower details that give it a bright and charming appearance. The soft crochet texture makes it comfortable to wear, while the rounded crown and gently sloping brim provide a classic bucket hat shape. The daisy motifs add a lovely handmade touch that makes the hat feel fresh and unique. Whether made in traditional white and yellow flowers or colorful shades, the design easily matches casual outfits, spring and summer clothing, or festival fashion. It is both fashionable and practical, offering light sun protection while adding personality to any look.

Easy Crochet Daisy Bucket Hat for All Sizes
The pattern is suitable for confident beginners as well as crocheters with some experience. The main stitch is usually the single crochet, combined with simple stitches like double crochet to create the daisy petals and shape the hat. Basic increases help form the crown and brim, making the instructions easy to follow while allowing crocheters to practice useful techniques and improve their skills.
A finished daisy bucket hat makes a thoughtful handmade gift for friends, family, or anyone who loves unique accessories. It is also perfect for vacations, picnics, beach trips, festivals, and everyday wear. If you are looking for a crochet project that is fun, practical, and full of handmade charm, this pattern is a wonderful choice for both beginners and experienced crocheters.
Sweet Crochet Baby Hat with Flower Pattern
Overview
This adorable crochet baby hat features a soft stitch pattern topped with a charming crochet flower. Inspired by a design found on Pinterest, this project is quick and satisfying, ideal for beginners and intermediate crocheters alike. The hat is worked in the round using mercerized yarn and includes a lovely textured flower to add a delicate finishing touch. Multiple sizes can be easily adapted to fit your baby’s head.
Notes and Tips
- The hat is crocheted in continuous rounds beginning with a magic ring.
- The pattern uses increases to shape the crown and then continues with simple stitches for the body.
- Flower is created separately with a magic ring and half double crochets, finished with decorative petals using extended stitches for texture.
- Stitch markers are recommended for counting rounds easily.
- Use soft mercerized yarn for comfort and neat stitch definition.
- Measurements given are approximate; adjust hook size or yarn weight as needed for different ages.
Skill Level
Beginner to Intermediate: suitable for those comfortable with basic crochet stitches, magic ring, and working in rounds.
Materials
- Mercerized yarn in desired colors (original uses 2 skeins)
- Crochet hook sizes 3.0 mm and 3.5 mm
- Stitch marker
- Yarn needle for finishing
- Scissors
Measurements / Sizing
- Crown chain foundation: begins with magic ring containing 11 single crochets
- Final stitch counts at key rounds (24, 36, 48 singles) indicating hat size progression
- Flower size designed to fit proportionally on baby hat
Gauge & Stitch Pattern
- Gauge not strict but consistency ensures smooth shaping.
- Stitch pattern mostly single crochet and half double crochet for flower center and petals.
- Flower petals have textured stitches made by wrapping yarn multiple times around hook for elongated effect.
Stitch Abbreviations
- ch = chain
- sc = single crochet
- hdc = half double crochet
- sl st = slip stitch
- st = stitch
- inc = increase (two crochet stitches in same stitch)
- magic ring = adjustable loop crochet start
Special Techniques
Magic ring: Start your rounds with an adjustable loop to crochet tightly closed centers.
Elongated stitches: Wrap yarn multiple times around the hook before pulling through to create textured, extended stitches, used in flower petals.
The Crochet Pattern!
Hat Base
Round 1:
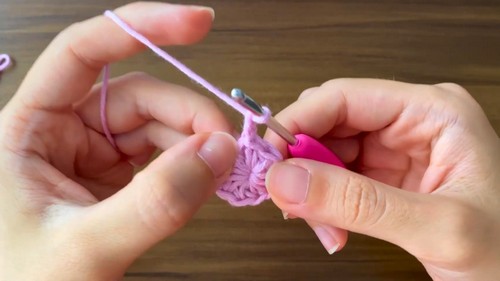
- Begin with a magic ring and work 11 single crochet (sc) stitches inside. Pull ring tight to close. Use stitch marker to mark end of round.

Round 2:
- Chain 2. Increase rounds by making two sc stitches in each st around, doubling stitches to reach 24 sc.
Round 3:
- Chain 2. Work a pattern of alternating single crochet and double stitches: single crochet in one stitch, crochet twice in the next to increase. Total 36 sc stitches by round end.
Round 4:
- Chain 2. Continue increasing using a pattern of two odd stitches followed by two even stitches, alternating single crochets to total 48 stitches.

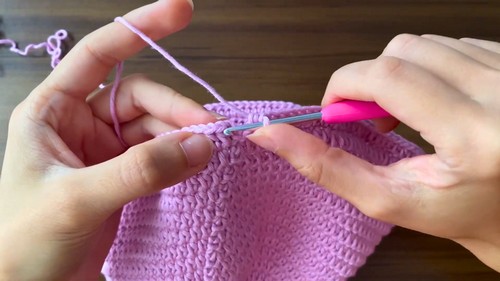
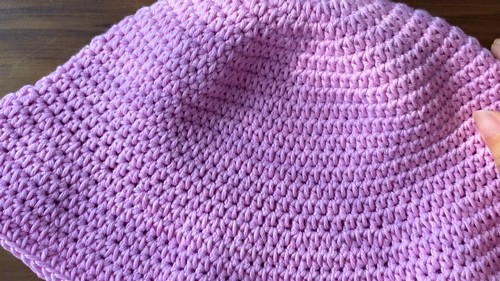
Rounds 5 to 12:
- Chain 2. Work one single crochet in each stitch around; no increases or decreases—this forms the main body of the hat and shapes the size. Continue for 8 rounds.
Ruffle Edge
Round 13:
- Chain 2. Begin ruffle using a sequence of two single crochets followed by two double crochets (dc) to create a textured band. Continue this pattern to end of round. Finish edge with slip stitch and fasten off yarn.
Flower Center
Flower Round 1:
- Work a magic ring and crochet 7 half double crochet (hdc) stitches into the ring. Pull tight to close.
Flower Round 2:
- Crochet 17 single crochet stitches in total around the ring, working two stitches in each of some stitches to build round shape.
Flower Round 3:
- Skip stitches accordingly while crocheting pairs of elongated double crochet stitches (wrap yarn 4 times around hook before pulling through loops), working 10 single crochet stitches interspersed between petals for texture.

Flower Petals
- In each petal section, wrap yarn 4 times around hook for each elongated stitch crochet worked under stitches of the previous round, pulling loops through two at a time for a textured, raised effect.
- Continue petals around flower base up to five petals, chaining between petals to create shaping.

Assembly
- Weave in all yarn tails using yarn needle and secure ends at back side of the hat and flower.
- Position flower on top center of the hat and sew securely with yarn needle and leftover yarn tails, wrapping thread under flower and over hat surface to anchor firmly.
- Hide loose yarn strands inside hat crown using the yarn needle to maintain neat finish.
Final Size and Care
- Hat diameter and height vary with hook size and yarn but generally fits newborn to infant heads.
- Flower diameter proportionate to hat size, approximately 3-5 inches across.
- Hand wash recommended to preserve yarn softness and shape.
Summary and Final Notes
- This baby hat pattern combines ease with elegant detailing.
- Simple increases shape the crown; steady rounds create smooth body.
- Textured ruffles add flair without complexity.
- Flower uses magic ring and elongated stitches for an appealing design accent.
- Perfect for gifting, photo shoots, or everyday wear.
- Adjust yarn weight and hook size to customize sizing.
- Finished project offers a soft, charming accessory with handmade charm.
Leave a Reply