
Refine your style with this Crochet Crescent Lace Shawl Pattern, featuring elegant curves, delicate lacework, and a sophisticated accessory perfect for any occasion.
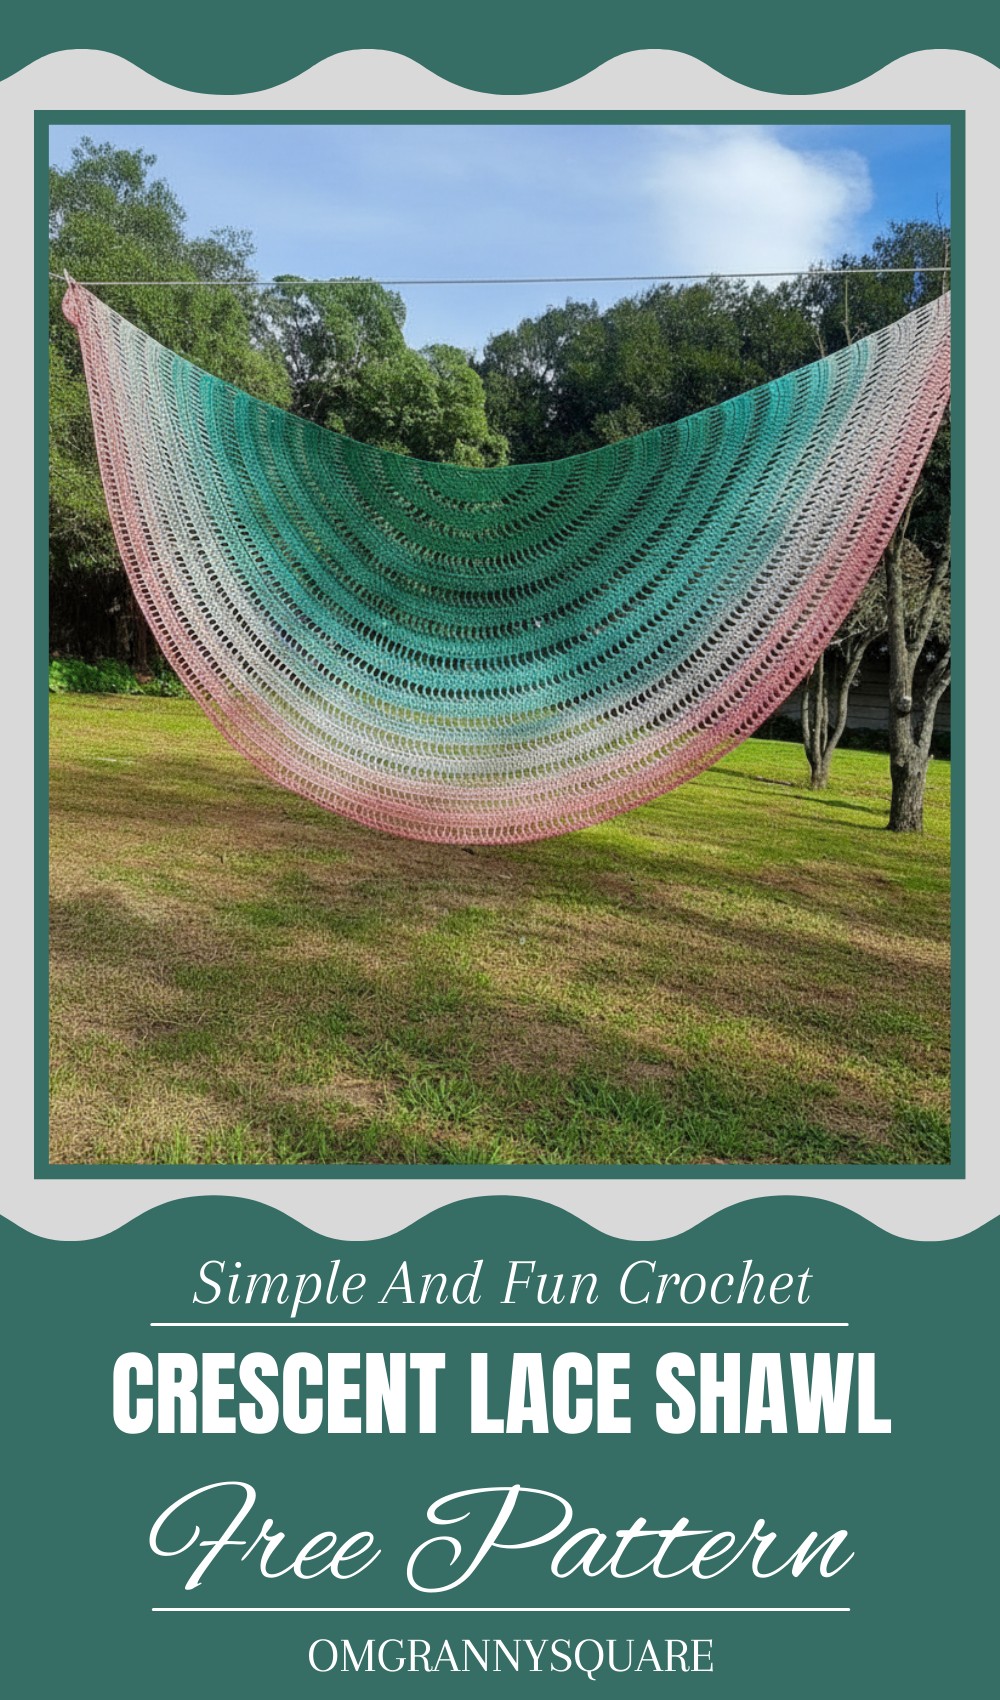
Pretty Crochet Crescent Lace Shawl Pattern That Looks Stunning
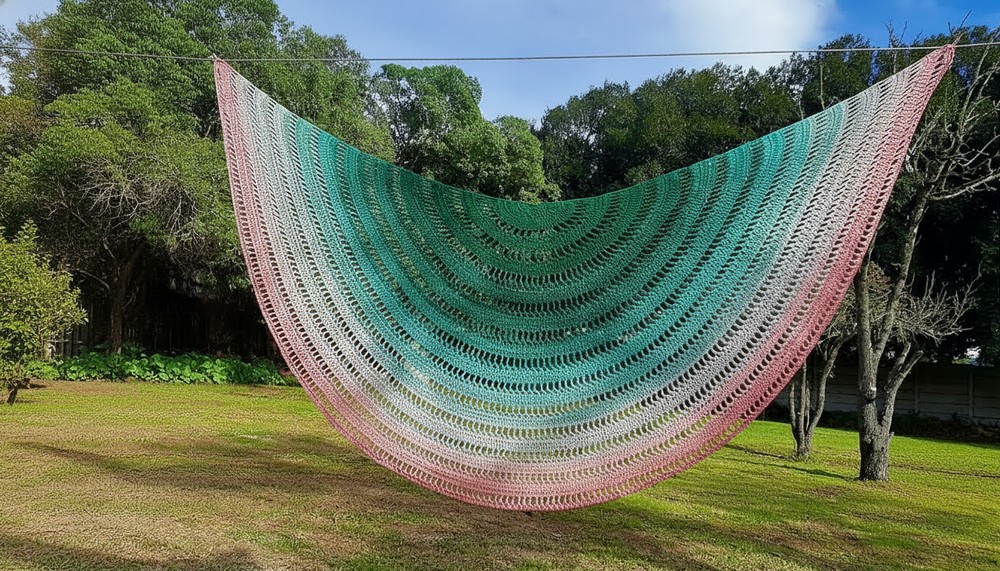
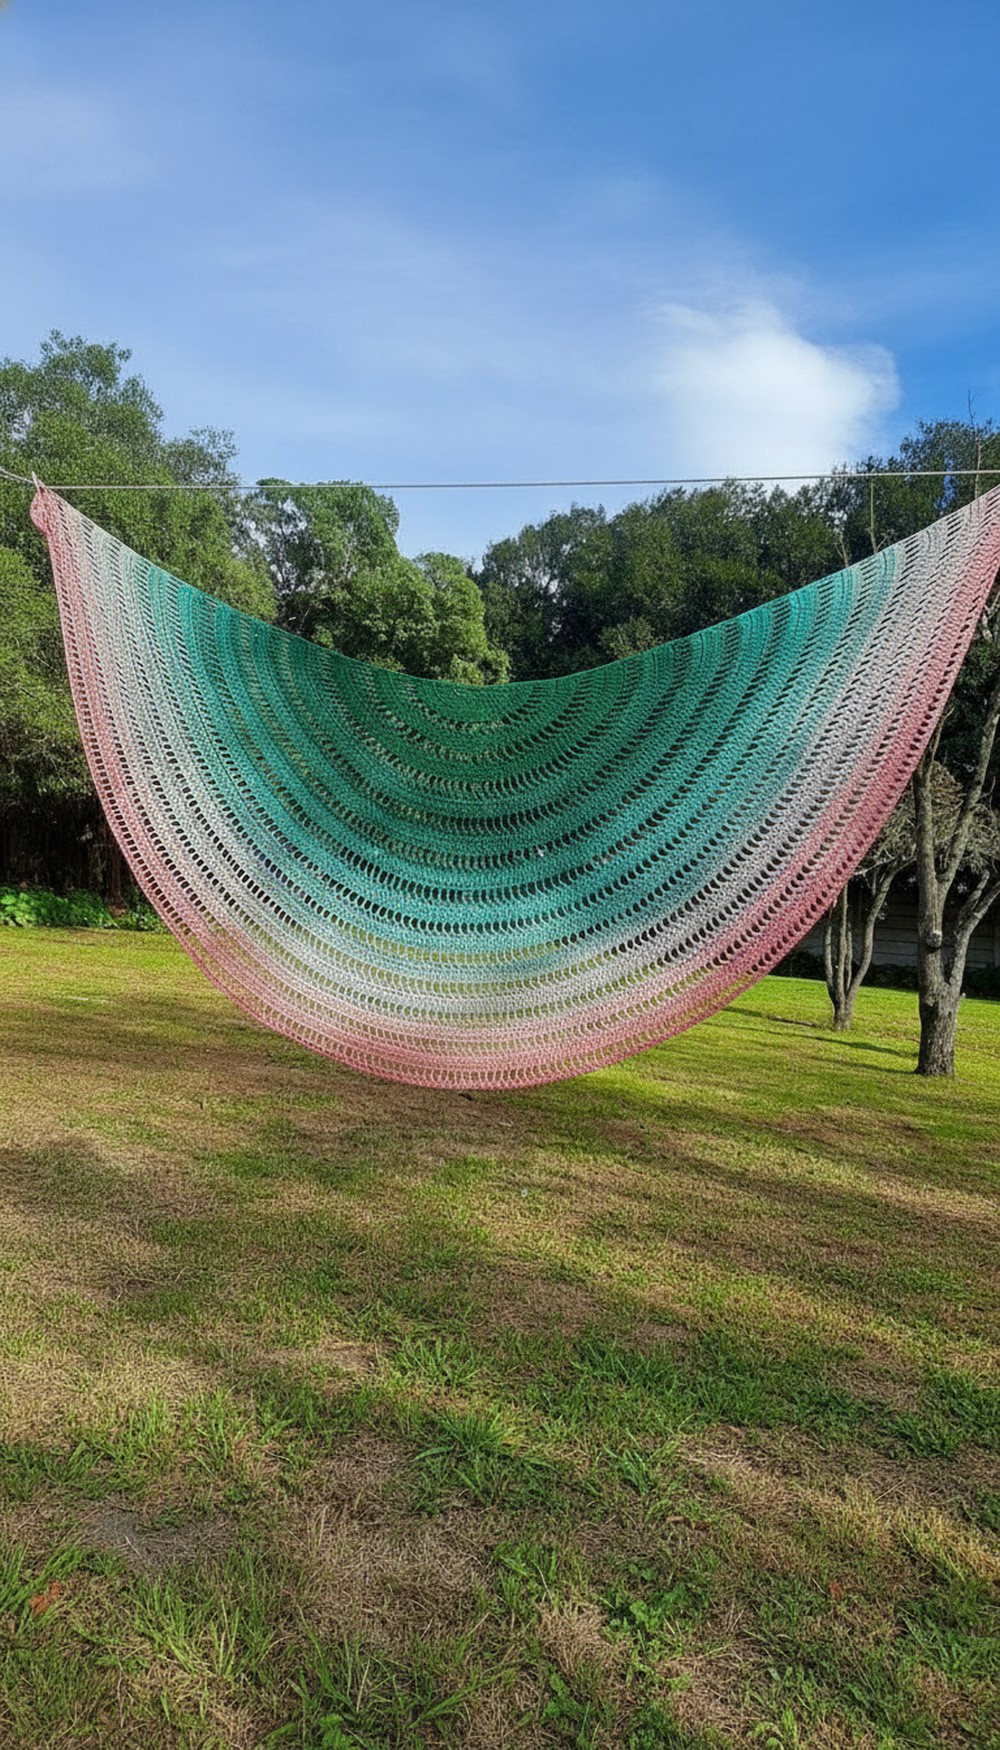
Soft curves and delicate details come together in this beautiful shawl that feels like a gentle hug around your shoulders. Its crescent shape creates a unique and elegant silhouette that drapes effortlessly, making it both stylish and comfortable to wear. The lace pattern adds an airy texture that looks intricate but is designed simply enough for beginners to follow along and enjoy each step.
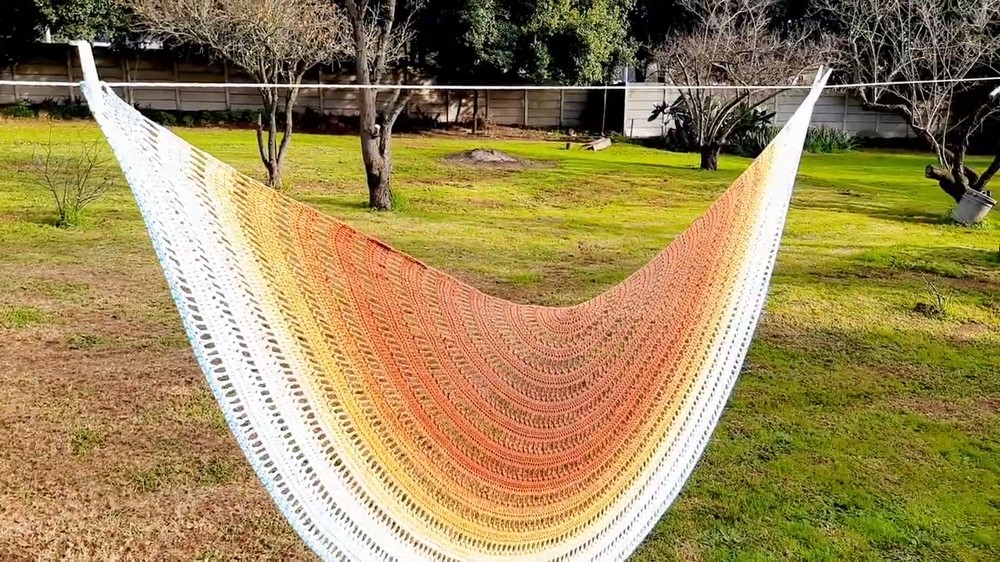
This shawl is perfect for adding a touch of sophistication to any outfit, whether layered over a casual top or paired with something dressier for a special occasion. Lightweight yet warm, it offers just the right amount of coziness without feeling bulky. Making this shawl is a rewarding experience that helps build confidence for those new to crochet, resulting in a timeless accessory that combines beauty and practicality with ease. It’s a charming piece you’ll reach for again and again.
Crescent Shawl Crochet Pattern with Optional Beads
Special Features
- Crescent shape construction for a flattering shawl wrap.
- Repetitive pattern of arches (chain 7 spaces) and two-double-crochet clusters.
- Optional beadwork adds elegance and sparkle.
- Uses yarn with or without sparkle (“bling”), and beads can be modified.
- Includes detailed stitch markers placement for easier counting.
- Gradual increases maintain the crescent shape.
- Versatile size; yarn length and row count control final size.
Difficulty Level
Intermediate:
Basic stitches but requires careful stitch counting, increases, and working with optional beads. Suitable for crocheters comfortable with double crochet and reading crochet charts or written rows.
Materials Needed
- 1 cake of 1000 meters (1094 yards), 250 grams (8.8 ounces) of cotton/acrylic or cotton/acrylic blend yarn (e.g., Yarn Art Flowers; 55% cotton, 45% acrylic)
- 3 mm crochet hook
- Size 10 steel crochet hook for bead application (if adding beads)
- Approximately 215 size 6 / 4 mm beads (optional)
- Wool/yarn needle for weaving ends
- Scissors
- Many stitch markers (highly recommended)
- Stitch markers to mark increases and row starts
Abbreviations
- ch – chain
- dc – double crochet
- sc – single crochet
- st(s) – stitch(es)
- inc – increase (2 dc in the same stitch)
- sl st – slip stitch
Gauge & Size
Gauge is flexible; shape controlled by increases and pattern repeats. The final size depends on the yarn used and rows worked; one 1000 m cake was used for the sample.
Pattern Instructions
Foundation (Row 1)
- Make a slip knot.
- Chain 4 (counts as a fake double crochet).
- In the first chain, work 7 double crochets (the first chain space becomes centre point).
- Total 8 stitches at the end of the row (3-ch counts as 1 dc + 7 dc).
Row 2
- Chain 1, turn work.
- Work 2 double crochets in each stitch across; total 16 stitches.
- Use stitch markers to mark first stitch for counting ease.
Row 3
- Chain 1, turn.
- Work pattern: 1 dc in first st, inc (2 dc in next st) repeat to end.
- Total 24 stitches.
Row 4
- Chain 1, turn.
- Work pattern: 1 dc in next 2 sts, inc repeat to end.
- Total 32 stitches.
Row 5
- Chain 1, turn.
- Work pattern: 1 dc in next 3 sts, inc repeat to end.
- Total 40 stitches.
Row 6
- Chain 1, turn.
- Work pattern: 1 dc in next 4 sts, inc repeat to end.
- Total 48 stitches.
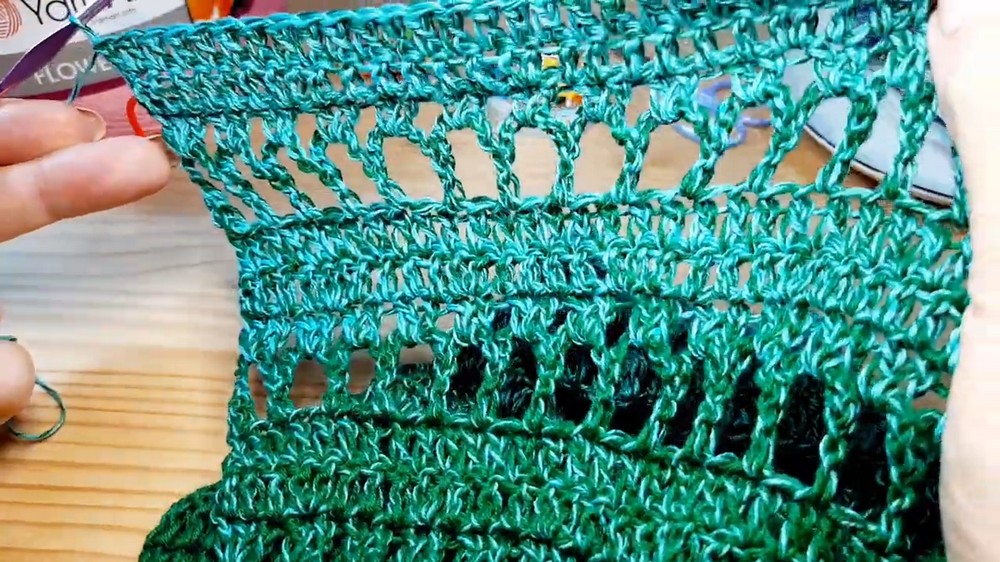
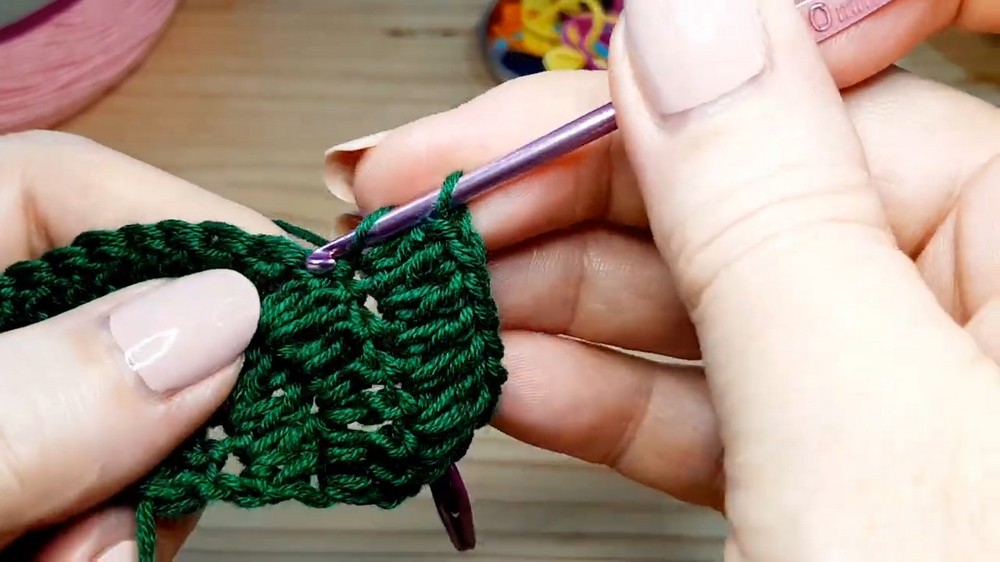
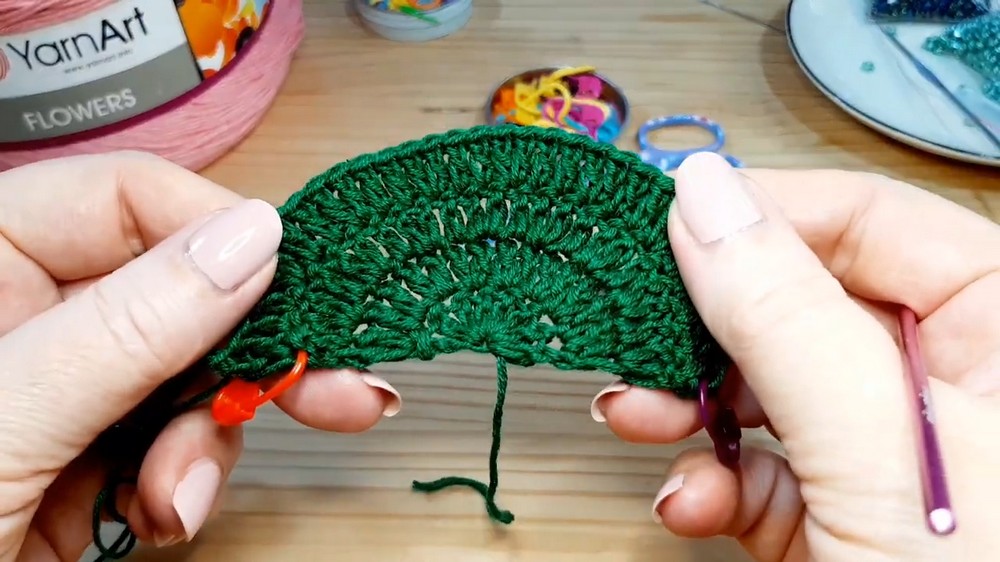
Row 7 (Arches Row)
- Chain 1, turn.
- dc in next st, ch 7, skip 1 st repeat across, ending with dc.
- You should have 24 arches.
- At the end there will be one stitch left: ch 7 and dc in last stitch.
- This forms chain arches for the next working row.
Row 8 (Cluster Row)
- Chain 1, turn.
- Slip stitch across first 3 ch of each arch to reach top.
- In each 7-ch arch: work 2 dc cluster (2 dc in arch top).
- Work 3 dc cluster in first and last arch.
- 48 stitches total (double previous arch count for clusters).
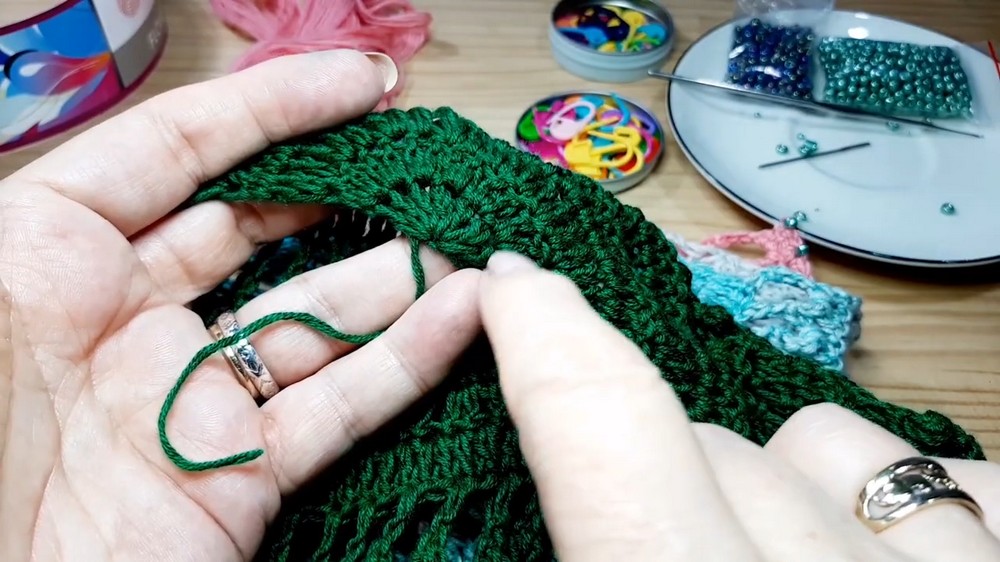
Row 9 to 44 – Repeating Pattern of Increases and Arches
- Continue repetition of increase rows and arches rows:
- Increase Rows: Work dc across with gradually increasing number of dc between increases.
- Arch Rows: dc, chain 7, skip 1.
- Cluster Rows: Work 2 dc clusters in each arch except first and last, which get 3 dc clusters.
- Increase pattern example by rows:
- Row 9: 1 dc in next 2 sts, inc; total 64 sts.
- Row 10: 1 dc in next 3 sts, inc; total 80 sts.
- Row 11: 1 dc in next 4 sts, inc; total 96 sts.
- Row 12: 1 dc in every stitch (no increase).
- Continue increasing dc between increases every few rows (6,7,8,9,10 dc etc.).
- Use stitch markers to mark increases to keep track while working.
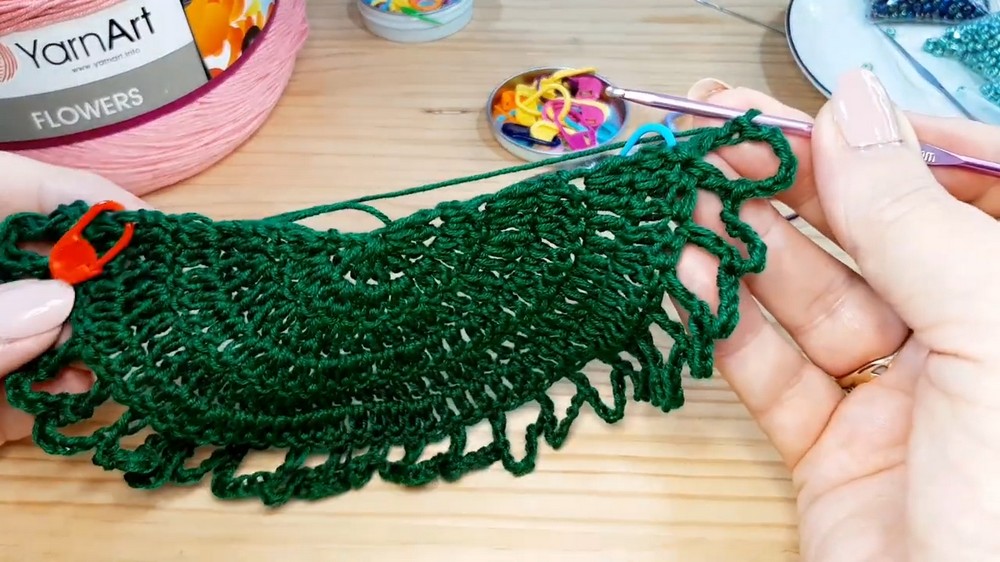
Rows Including Beads – Optional
- Row 30 and Row 42 (example bead rows):
- Work dc with beads on every second stitch (or per pattern).
- Use a small steel hook to place beads on the yarn before drawing through the stitch.
- Beads go on top of a dc, spaced evenly across the row.
- Continue normal pattern sequence with beads embedded.
- Placement and amount of beads are customizable.
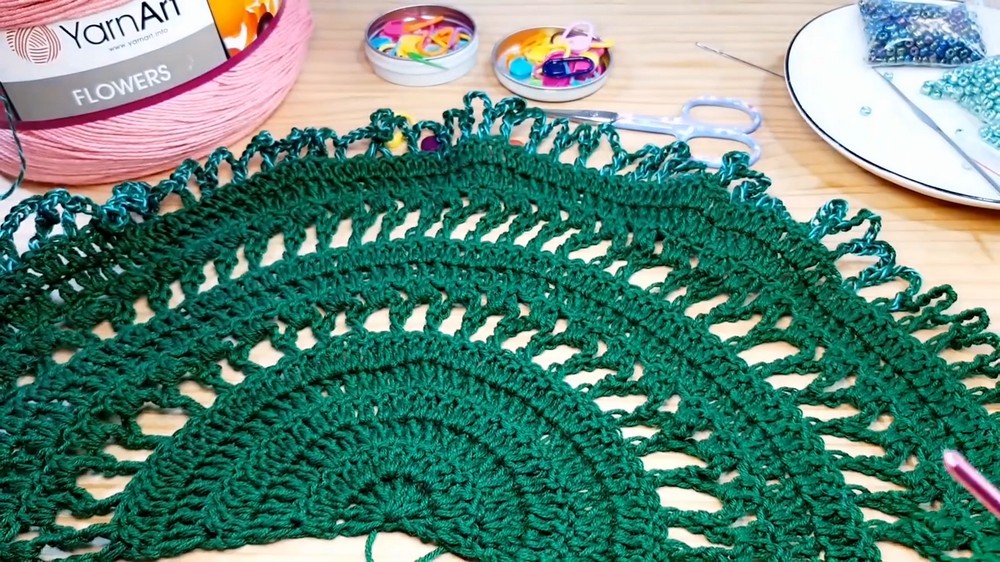
Finishing Rows 45 to 53
- Continue working rows as before:
- Increase rows with 9 dc between increases.
- Arch rows of chain 7 spaces.
- Cluster rows with 2 dc clusters and 3 dc in first and last arches.
- Final row (row 53) is a single crochet row with beads every second stitch.
- Bind off after last row and weave in all ends neatly.
Tutor’s Tips
- Use many stitch markers for easier counting and tracking increases.
- Chain 7 arches might look loose and scrunched during work but flatten beautifully after blocking.
- Allow the shawl to block gently to bring out the crisp crescent shape.
- For beginners, count stitches carefully every row to avoid mistakes; stitch markers help immensely.
- Beads are optional but add lovely sparkle and weight for an elegant finish.
- You can use yarn with built-in sparkle if you want to skip beads.
- Work slowly on bead rows to maintain neatness.
- Keep tension consistent throughout for even shaping.
Uses
- Elegant shawl wrap for special occasions or everyday use.
- Lightweight, comfortable, and breathable with cotton/acrylic yarn.
- Option to embellish with beads for a dressier look.
- Crescent shape flatters various body types and is versatile for styling.
Final Tip
Be sure to mark your increases and count clusters regularly — consistent stitch counts maintain your crescent shape and ensure the shawl grows evenly. For neat beadwork, practice picking beads onto the hook and placing them precisely on stitches.
Conclusion
With simple repeated patterns of increasing double crochets, arches, and clusters, this crescent shawl pattern combines beautiful shaping and optional sparkle through beads. Suitable for intermediate crocheters ready to deepen their skills, it results in a stunning, flexible piece that can be worn anywhere and treasured for years.
Leave a Reply