
Create an adorable and customizable bear with polymer clay, perfect for gifts, keychains, brooches, or simply as a cute handmade keepsake.
Last year, while searching for a creative gift idea for my niece, I stumbled upon the idea of crafting with polymer clay—a world bursting with possibilities. One of the easiest yet most delightful creations I made was a whimsical little bear. Why make one? It’s not just a fun craft but also an incredibly personal and heartfelt gift. Whether you’re making it for a loved one, decorating your home, or creating cute accessories, this tiny bear offers endless charm and versatility.
Design a Custom Polymer Clay Bear in Just a Few Steps
A polymer clay bear can become so much more than just a sculpture. Add a hole at the top, and it turns into an adorable keychain to carry everywhere. Flatten the back and glue on a pin, and voilà—you’ve got a sweet brooch that makes any outfit pop! It can also be styled into festive ornaments, home decoration accents, or even a centerpiece for your desk. From gifts to keepsakes, this bear invites you to explore your creativity.

Styling your bear offers limitless possibilities. You can experiment with different clay colors, textures, and patterns. Add tiny embellishments like bows, hats, or scarves for a seasonal touch or even miniature props to create a theme. The more you play with designs, the more character and charm your creations will radiate.
And there’s more—crafting with polymer clay is not only affordable but also therapeutic. You get to enjoy the soothing process of shaping, molding, and designing something beautiful with your hands. At the end of the day, the results are a one-of-a-kind piece that showcases your artistry and passion.
Making a polymer clay bear is an innovative way to express creativity, gift love, or add a cute, handmade touch to your personal space or accessories. It’s simple, fun, and totally worth the effort!
What is Important in Making a Polymer Clay Bear?
Below 9 important points that every one follow to complete this bear.
1. Choosing the Right Materials
Using high-quality polymer clay ensures durability, smooth shaping, and a polished final result. Select complementary colors like brown, yellow, and light brown to create a classic teddy bear look.
2. Precision in Shaping
Pay attention to shaping key parts like the head, body, arms, legs, hands, and feet. Proper proportions and symmetry make the bear visually appealing and professional-looking.
3. Attention to Detail
Small details, like the eyes, nose, and mouth, bring life and personality to your bear. Use tools such as a crafting knife or sculpting tools for clean and precise features.
4. Strong Assembly and Connectivity
Ensure each part—head, body, hands, and feet—is properly attached to prevent breaking or detachment during or after baking. Blending seams can help make connections look smooth and natural.
5. Compatibility with Accessories
Design your bear to accommodate features like a hole for a keychain or a flat surface for a brooch pin. This makes it versatile and functional, beyond being decorative.
6. Baking Correctly
Follow the manufacturer’s temperature and duration guidelines when baking the clay. Over- or underbaking can ruin the structure or finish of the bear.
7. Finishing and Protective Coating
Adding a gloss or matte sealant gives your teddy bear a professional look and provides protection for long-term use, especially if handled frequently (e.g., keychains or gifts).
8. Personalization
You can customize the bear’s colors, size, or features (e.g., adding patterns, bows, or accessories) to make it unique and tailored to your style or purpose.
9. Creativity and Patience
Crafting with polymer clay requires patience and creative expression. Taking time to refine each feature will elevate your project from simple to stunning.

Step-by-Step Guide: How to Make a Small Teddy Bear with Polymer Clay
Materials Needed
- Polymer Clay (Colors: Brown, Yellow, Light Brown, Black, and White)
- A small crafting knife or sculpting tool
- Optional: Needle (for brooch), Keyring (for keychain)
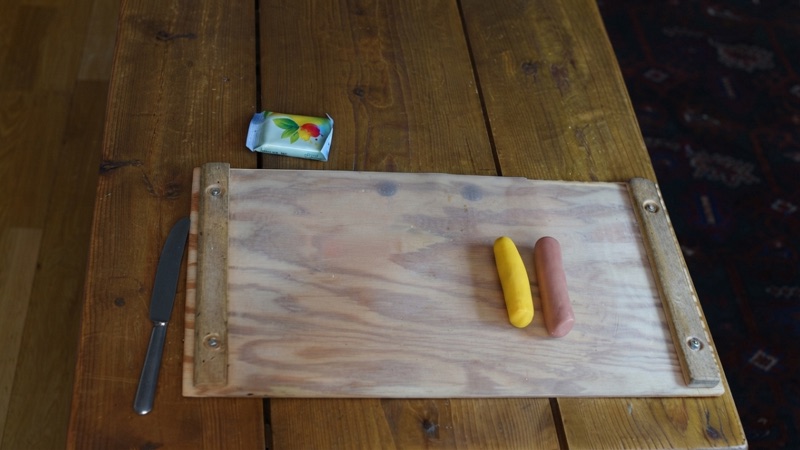
Tools Needed
- Clay roller or your hands for shaping clay
- Small knife for detailing
- Sculpting tools (optional for precision and design)
Step 1: Preparing Materials
Gather the required clay colors: brown for the teddy bear’s head, hands, and body details, yellow for the arms, light brown for the nose and ears, black for the eyes and nose, and white for creating finer accents (if needed). Ensure the work surface is clean and non-stick.
Step 2: Making the Teddy Bear’s Body
- Take a piece of yellow clay.
- Roll the clay into a smooth ball using your hands or a roller.
- Gently squeeze the ball to form a drop shape—this will serve as the teddy bear’s body.
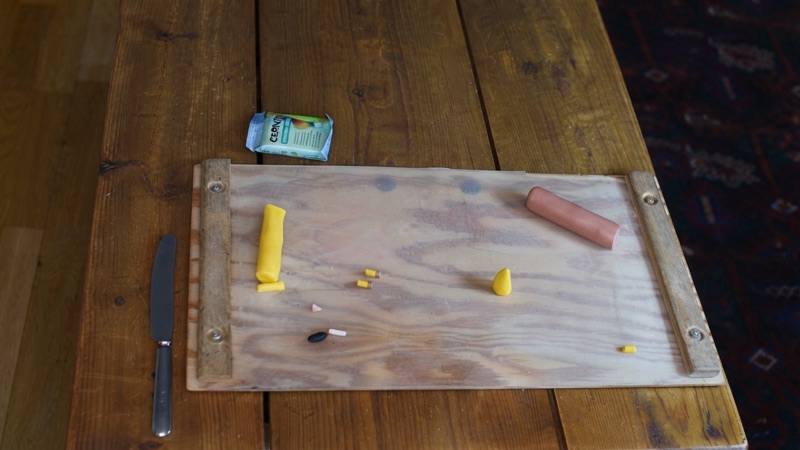
Step 3: Crafting the Arms and Hands
- For the arms, cut two small pieces of yellow clay.
- For the hands, cut two small pieces of brown clay.
- Attach the brown pieces to the yellow pieces and roll them together to create small tubes.
- Ensure the tubes are even and of the same size.
Step 4: Creating the Teddy Bear’s Head
- Roll a small ball of brown clay for the head.
- Take a piece of light brown clay for the nose and gently squeeze and attach it to the center of the head.
- Cut two identical small pieces of light brown clay for the ears.
- Roll them into small balls and attach them evenly to both sides of the head.

Step 5: Assembly of Body and Head
- Lightly squeeze the teddy bear’s yellow body to flatten the upper part a bit.
- Attach the head onto the body and gently roll the connection point with your fingers so the pieces stick securely together. Be careful not to push too hard.
Step 6: Adding Arms, Legs, and Feet
Arms:
- Attach the prepared yellow and brown arms to the sides of the teddy bear’s body.
Legs and Feet:
- Use a larger piece of brown polymer clay to make the legs and feet.
- Squeeze gently with your fingers to shape the feet at the ends of the legs.
- Bend the legs and position the teddy bear’s body on top of them.
- Adjust the placement of the legs so the bear looks properly seated.
Step 7: Adding Details (Eyes, Nose, Mouth)
- Roll a small piece of black clay into a ball for the teddy bear’s nose and lightly press it onto the light brown area of the head.
- Use tiny black dots as eyes and attach them to the darker brown part of the head.
- With a small knife, gently carve in a little mouth below the nose.
Step 8: Final Finishing Touches
- Adjust the ears by squeezing them gently so they attach better to the head.
- Smooth out any seams or rough edges to give the teddy bear a polished look.

Optional Decoration and Features
- Brooch: Cut the back flat and glue a small needle to create a brooch.
- Keychain: Make a hole near the top of the head to attach a keyring, converting it into a keychain.
Finishing Notes
- Bake the polymer clay teddy bear according to the manufacturer’s instructions to harden the clay and preserve its design.
- After baking, you can add gloss or matte clay finish for added durability and shine.
Features of Your Polymer Clay Teddy Bear
- Cute and compact design for accessories like brooches and keychains.
- Highly customizable (colors, size, shapes).
- Easy to make for beginners while providing room for detailing for advanced crafters.
Leave a Reply