
Freshen your room with lifelike Free Crochet Orchids With Pot Pattern for a cheerful touch that stays vibrant all year long without any fuss.
Have you seen a flower that always looks bright and never needs water still making any place feel special? Sweet purple petals rest softly above shiny green leaves standing inside a little pot that fits just right in your hand or on a shelf. The Crochet Orchid With Pot pattern lets you create a lifelike bloom that adds charm and color anywhere it sits. You can use your orchid for decorating tables brightening up windowsills or even making your desk look lively. It’s perfect as a loving handmade gift for friends or family and a special way to teach children about flowers without the worry of real plants.
Crochet Orchid Pot Pattern – Totally Free Access
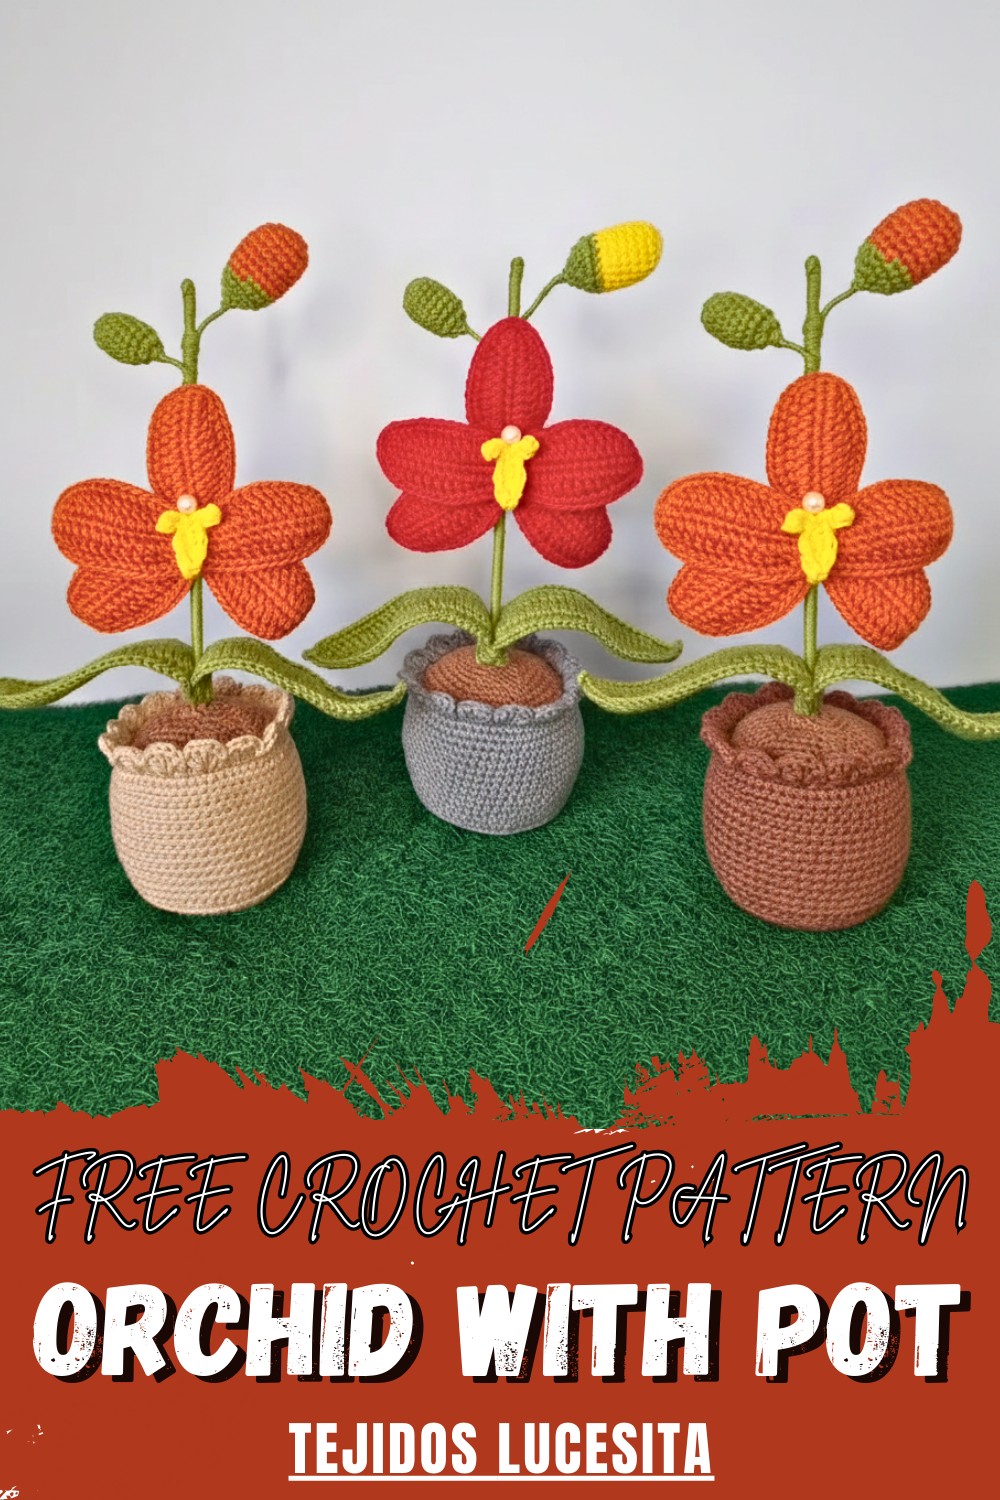
This unique pattern offers a beauty that never fades with each petal and leaf staying vibrant and soft forever. It brings calmness and joy to any room making everyone feel welcome. The specialty of this pattern is how easy it is to make while looking so real and beautiful. There’s no need for watering, sunlight or special care—just lasting loveliness. Crochet Orchid With Pot pattern is a wonderful way to create lasting smiles and decorate your life with something truly special and handmade.
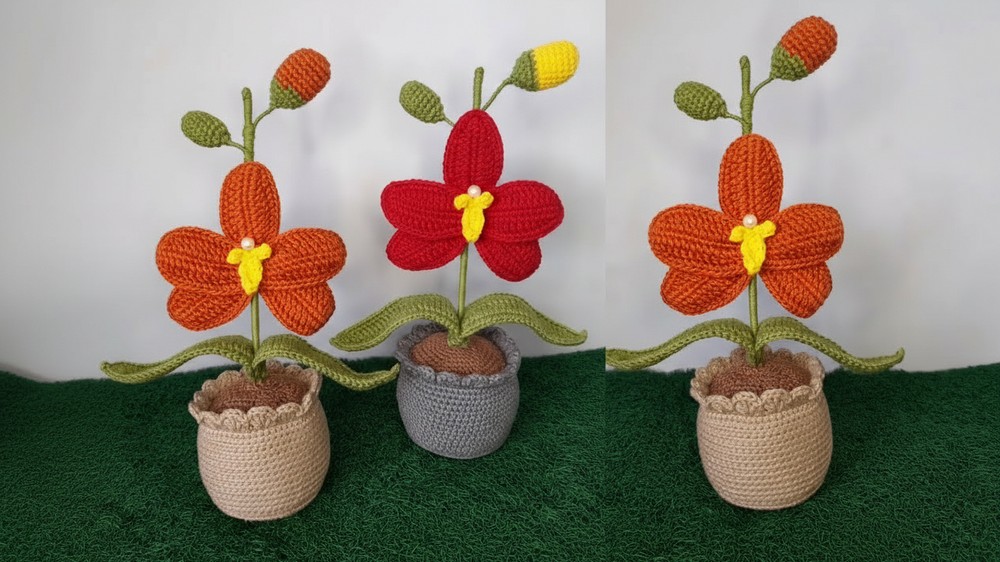
Free Crochet Potted Orchid Pattern
Materials
- Yarn: 4-strand 100% cotton in:
- Orchid flower color(s) (e.g., lilac, orange)
- Yellow (for flower center)
- Green (for leaves and stem wrap)
- Beige or brown (for pot and soil)
- Hook: 2.5 mm crochet hook
- Scissors
- Yarn needle (wool needle)
- Wire: 0.3 mm (silver for petals, green for leaves)
- Wooden stick: ~25–30 cm, for stem
- Hot or cold silicone glue
- Cardboard, EVA foam, or corospum: Cut in circles to fit base of pot (for structure)
- Sewing marker or stitch markers (optional)
- Polyester or synthetic stuffing
- Pearl bead: for flower center (optional)
Key Abbreviations (US Terms)
- MR: Magic ring
- ch: chain
- sc: single crochet
- hdc: half double crochet
- dc: double crochet
- inc: increase (2 sts in same st)
- dec: decrease (sc2tog, etc.)
- sl st: slip stitch
- st(s): stitch(es)
- beg: beginning
Special Notes
- Flowers and leaves are edged with wire to allow for shaping.
- The pot and inner disc are crocheted and stiffened with cardboard or foam for stability.
- Petals, flower center, and buds are made separately and sewn or glued together in assembly.
- For best results, block or shape petals and leaves after wiring.
Pattern Instructions
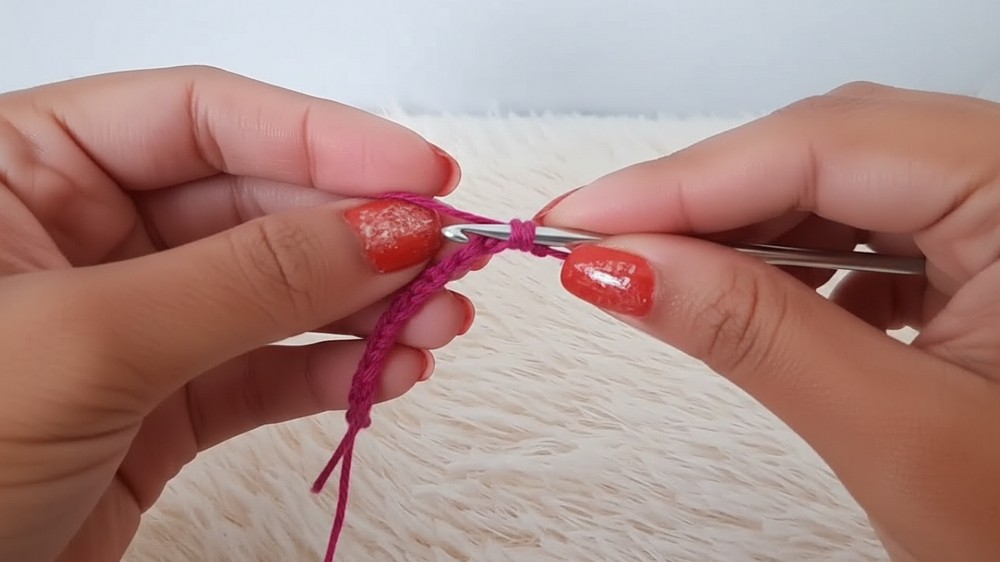
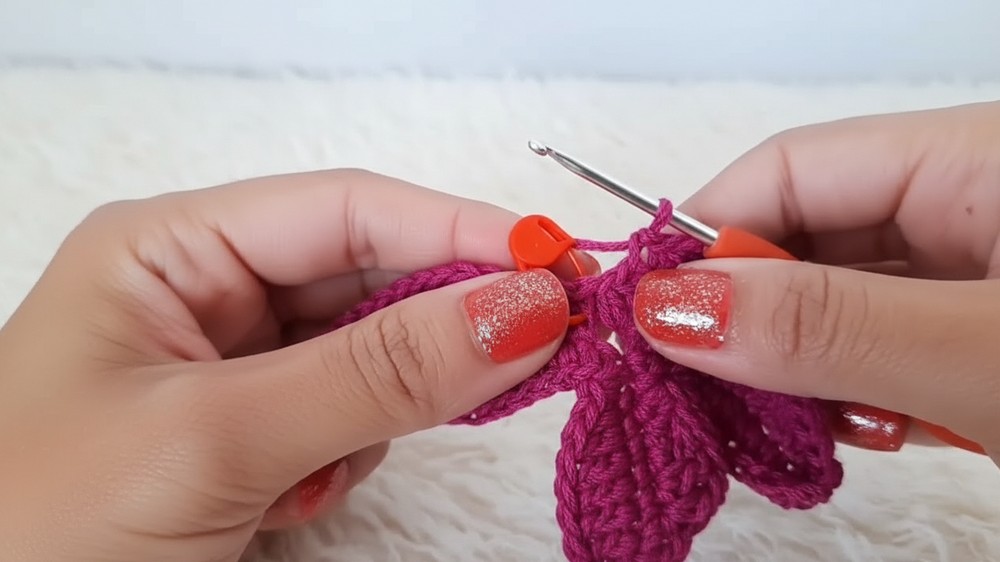
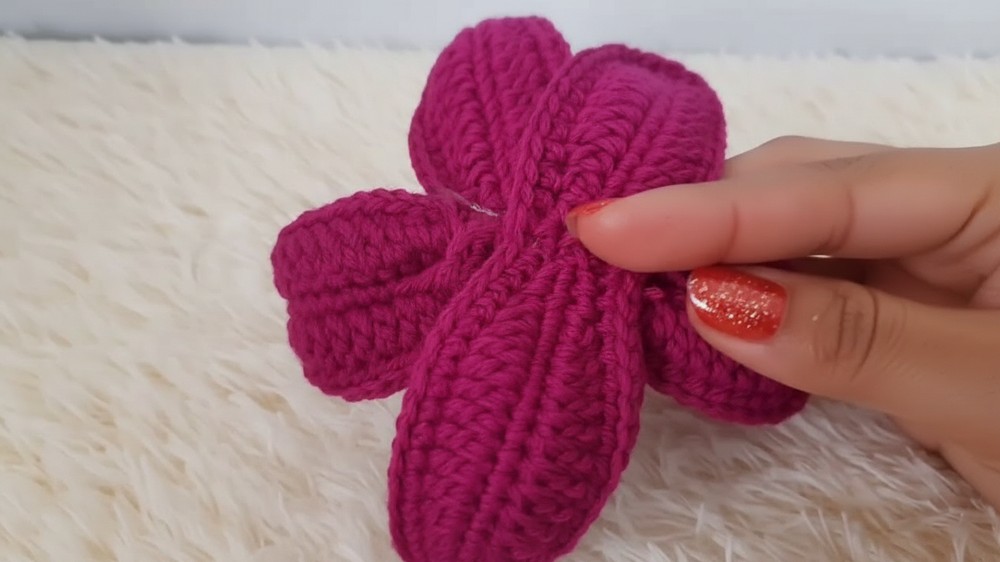
1. Orchid Petals (Make 1 Large, 1 Small; Large has 3 petals, Small has 2)
Base Petal Motif (Repeat x3 for large motif):
- MR, ch 15.
- Starting in 2nd ch from hook, sc in each ch back to ring (14 sc).
- Sl st in MR to anchor.
- Repeat Steps 1–3 two more times (for a total of 3 petals attached to same MR for large motif), or only once more for the small motif (2 petals).
- Pull MR closed, sl st to finish.
Shape Each Petal:
- In first st of first petal, sc, mark this st.
- Sc in next st.
- Hdc in each of next 2 sts.
- Dc in each of next 6 sts.
- Hdc in next 2 sts.
- Sc in last 2 sts.
- Ch 2, (turning ch), repeat Steps 6–11 (in mirror) on bottom of petal.
- Continue around all petals.
- After the last petal, fasten off. Repeat with small motif.
2. Wire Edging for Petals
- Using 0.3 mm wire, hold wire along edge of motif at starting point.
- With working yarn, sc around outer edge of all petals, encasing the wire as you work.
- At the tips (ch-2 turning chain), sc into them as well to fully cover with wire.
- Once around, sl st to first sc, fasten off, leaving wire tails. Cut wire the same length for each motif.
- Twist wire ends together at the base for attachment on stem.
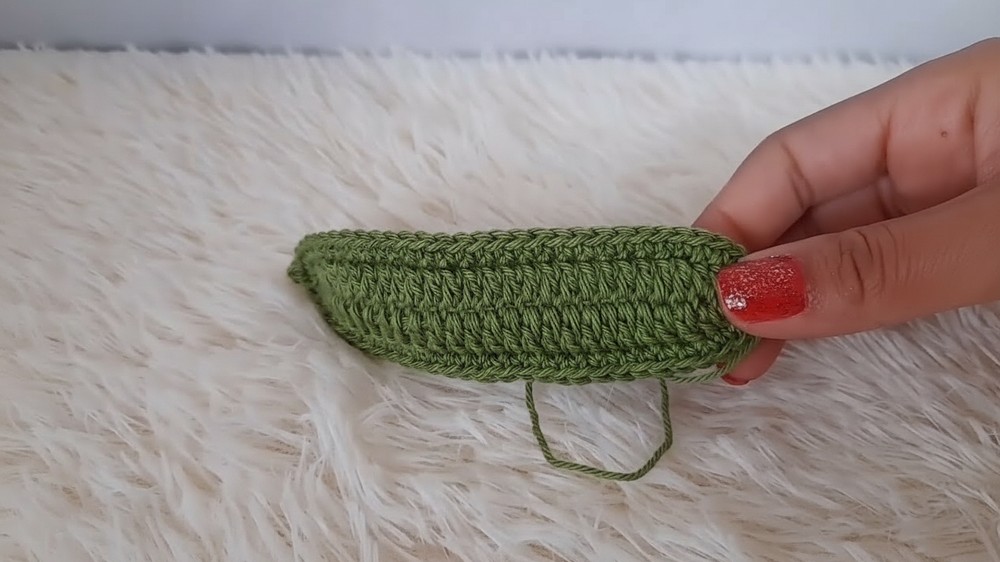
3. Leaves (Make 2)
- With green yarn, ch 30.
- Starting in 2nd ch from hook:
- Sc in next 2 ch.
- Hdc in next 2 ch.
- Dc in next 21 ch.
- Hdc in next 2 ch.
- Sc in last 2 ch.
- Ch 2, turn, repeat as mirror on other side:
- Sc in next 2 sts,
- Hdc in next 2 sts,
- Dc in next 21 sts,
- Hdc in next 2 sts,
- Sc in last 2 sts.
- Wire Edging:
- As for petals, lay 0.3 mm (green) wire along leaf edge, and sc around to encase. When reaching tip, work a picot (sc, ch 2, sl st in first ch, sc).
- Once around, cut and hide ends; leave a long tail for assembly.
4. Small Flower Bud
- With green yarn, MR, 6 sc in ring. [6]
- Round 2: 6 inc. [12]
- Rounds 3–8: Sc in each st. [12]
- Round 9: 6 dec. [6]
- Stuff lightly, thread doubled wire through the base, glue in place, pull yarn through front loops to close, fasten off, secure wire.
5. Large Flower Bud
- With flower color, MR, 6 sc in ring. [6]
- Round 2: 6 inc. [12]
- Round 3: (sc, inc) x6 [18]
- Rounds 4–8: Sc in each st. [18]
- Join green yarn: sc in each st for 2 more rounds [18]
- Next round: (sc, dec) x6 [12]
- Stuff lightly, switch to dec rounds:
- Next: (dec) x6 [6]
- Pull yarn through front loops to close, insert doubled wire, secure with glue, fasten off.
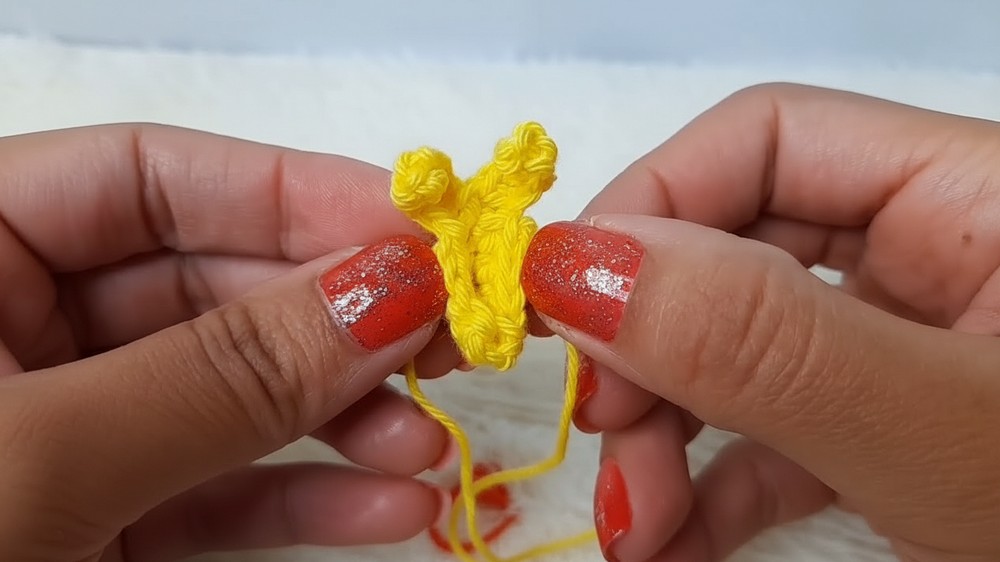
6. Center Column (Lip) of Orchid
- With yellow yarn, MR.
- Ch 5.
- Starting in 2nd ch from hook: sc in next 4 ch.
- Sl st to MR to form first “spoke.” Repeat 2 more times (total of 3 spokes).
- Pull MR closed.
- In one “petal,” sc in each st around (8 sc for full round), sl st, fasten off, leaving long tail for sewing.
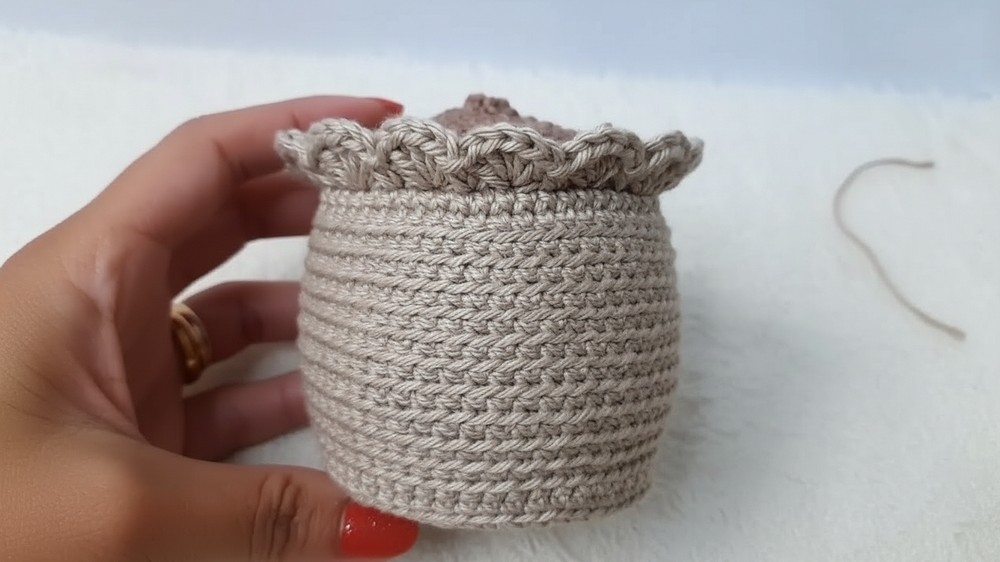
7. Pot
Round Base
- MR, 6 sc in ring.
- Round 2: 6 inc [12]
- Round 3: (sc, inc) x6 [18]
- Round 4: (2 sc, inc) x6 [24]
- Round 5: (3 sc, inc) x6 [30]
- Round 6: (4 sc, inc) x6 [36]
- Round 7: (5 sc, inc) x6 [42]
- Round 8: (6 sc, inc) x6 [48]
- Round 9: (7 sc, inc) x6 [54]
- Round 10: (8 sc, inc) x6 [60]
Begin Sides
- Round 11: Sc in BLO around [60]
- Rounds 12–23: Sc in BLO around [60] for flat sides.
- Round 24: Sc in each st through both loops [60]
Rim/Wave Edge
- Next round (through FL only):
- Sk 1 st, (5 dc in next st), sk 1 st, sc in next st; repeat around for ruffled edge.
- Finish round, sl st, fasten off and hide thread.
Pot Bottom Insert
- Cut cardboard, EVA foam, or corospum to fit inside base.
- Place at bottom for stability.
Pot Inner Closure/”Soil”
- Join brown yarn to leftover BL at base of rim.
- (8 sc, dec) x6 [54]
- (7 sc, dec) x6 [48]
- (6 sc, dec) x6 [42]
- (5 sc, dec) x6 [36]
- (4 sc, dec) x6 [30]
- (3 sc, dec) x6 [24]
- (2 sc, dec) x6 [18]
- (sc, dec) x6 [12]
- Dec x6, fasten off, leave long thread for sewing.
- Before closing, firmly stuff base with fiberfill.
8. Assembly
Flowers
- Sew together the large and small petal motifs at the base, anchoring wires to the central stem/stick.
- Attach the flower center (yellow column) in the center of the petals; sew securely.
- Glue or sew a pearl bead to column (optional).
Buds
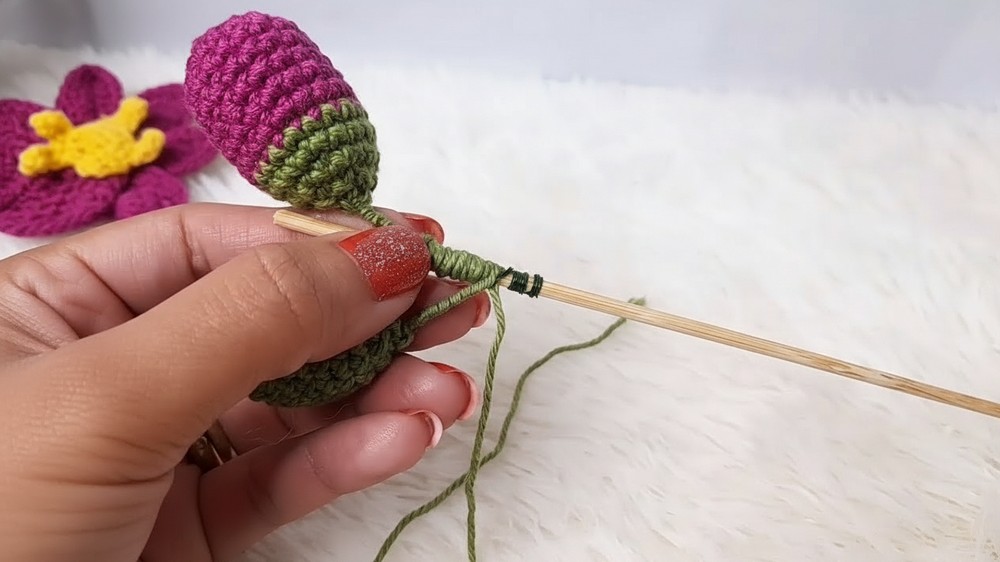
- Wrap green yarn around wired stems of both buds; glue in place as you wrap just below bud and down stem.
- Fix buds to stem with wire and green yarn (position at various heights as desired), securing with glue.
Mount to Stick
- Attach flowers and buds to top portion of stick, wrapping remaining wires and securing with glue and yarn.
- Wrap stem smoothly in green yarn (over stick and wire).
- Include any leftover flower/bud wires for extra stability.
Insert into Pot
- Position and glue leaves into pot, using wire tails to anchor.
- Place stick into center of pot, glue in place, and arrange leaves around.
- Secure all with glue, adjust for best balance, and hide any exposed wire.

Pattern Corrections
- Petal and leaf shaping: Ensure proper stitch counts at tips for symmetry.
- Wire lengths: Double check wire length before cutting; longer is easier to trim than splicing in extra.
- Pot rounds: To avoid a hexagonal pot bottom, stagger and divide the placement of increases in even rounds.
Tips
- Block petals and leaves after wiring to deepen natural curves and neatness.
- Use a yarn needle to hide thread ends inside petals, leaves, and pot construction.
- If desired, add extra cardboard/foam discs inside the pot for more stability.
- Glue dots at key join points will ensure strength and prevent flower or leaf movement.
Conclusion
This crocheted orchid brings together multiple techniques and materials to achieve a remarkably realistic appearance. With wired petals and leaves, a sturdy wrapped stem, shaped buds, and a secure pot, your finished orchid will be a lasting work of art. Adjust colorways to create beautiful arrangements or gifts.
Leave a Reply