
Make a workspace that moves with you, adapts to your needs, and simplifies organization in your projects. Whether you’re a seasoned craftsman or just setting up your first workshop, a mobile workbench is not just an upgrade; it’s a revolutionary change. It’s about transforming an ordinary space into a dynamic area that encourages creativity and efficiency. This project will guide you through upgrading a standard workbench into a mobile masterpiece, complete with a sturdy frame, ample storage, and even integrated power solutions.
Mobile Workbench Upgrade Project

Materials:
- An old butcher block countertop (or similar sturdy material) for crafting the bottom tray and work surface.
- Industrial locking casters to enhance mobility.
- Wood for side rails and new side braces (1 x 6 recommended).
- A power bar and cable winder for electrical integrations.
- Bolts and nuts for securing the structure.
Tools:
- Saw for cutting the butcher block and wood.
- Drill for creating bolt holes in wood and metal.
- Measuring tape to get precise dimensions.
- Sandpaper and varnish for finishing the wood surfaces.
Making Process
Buy the Frame
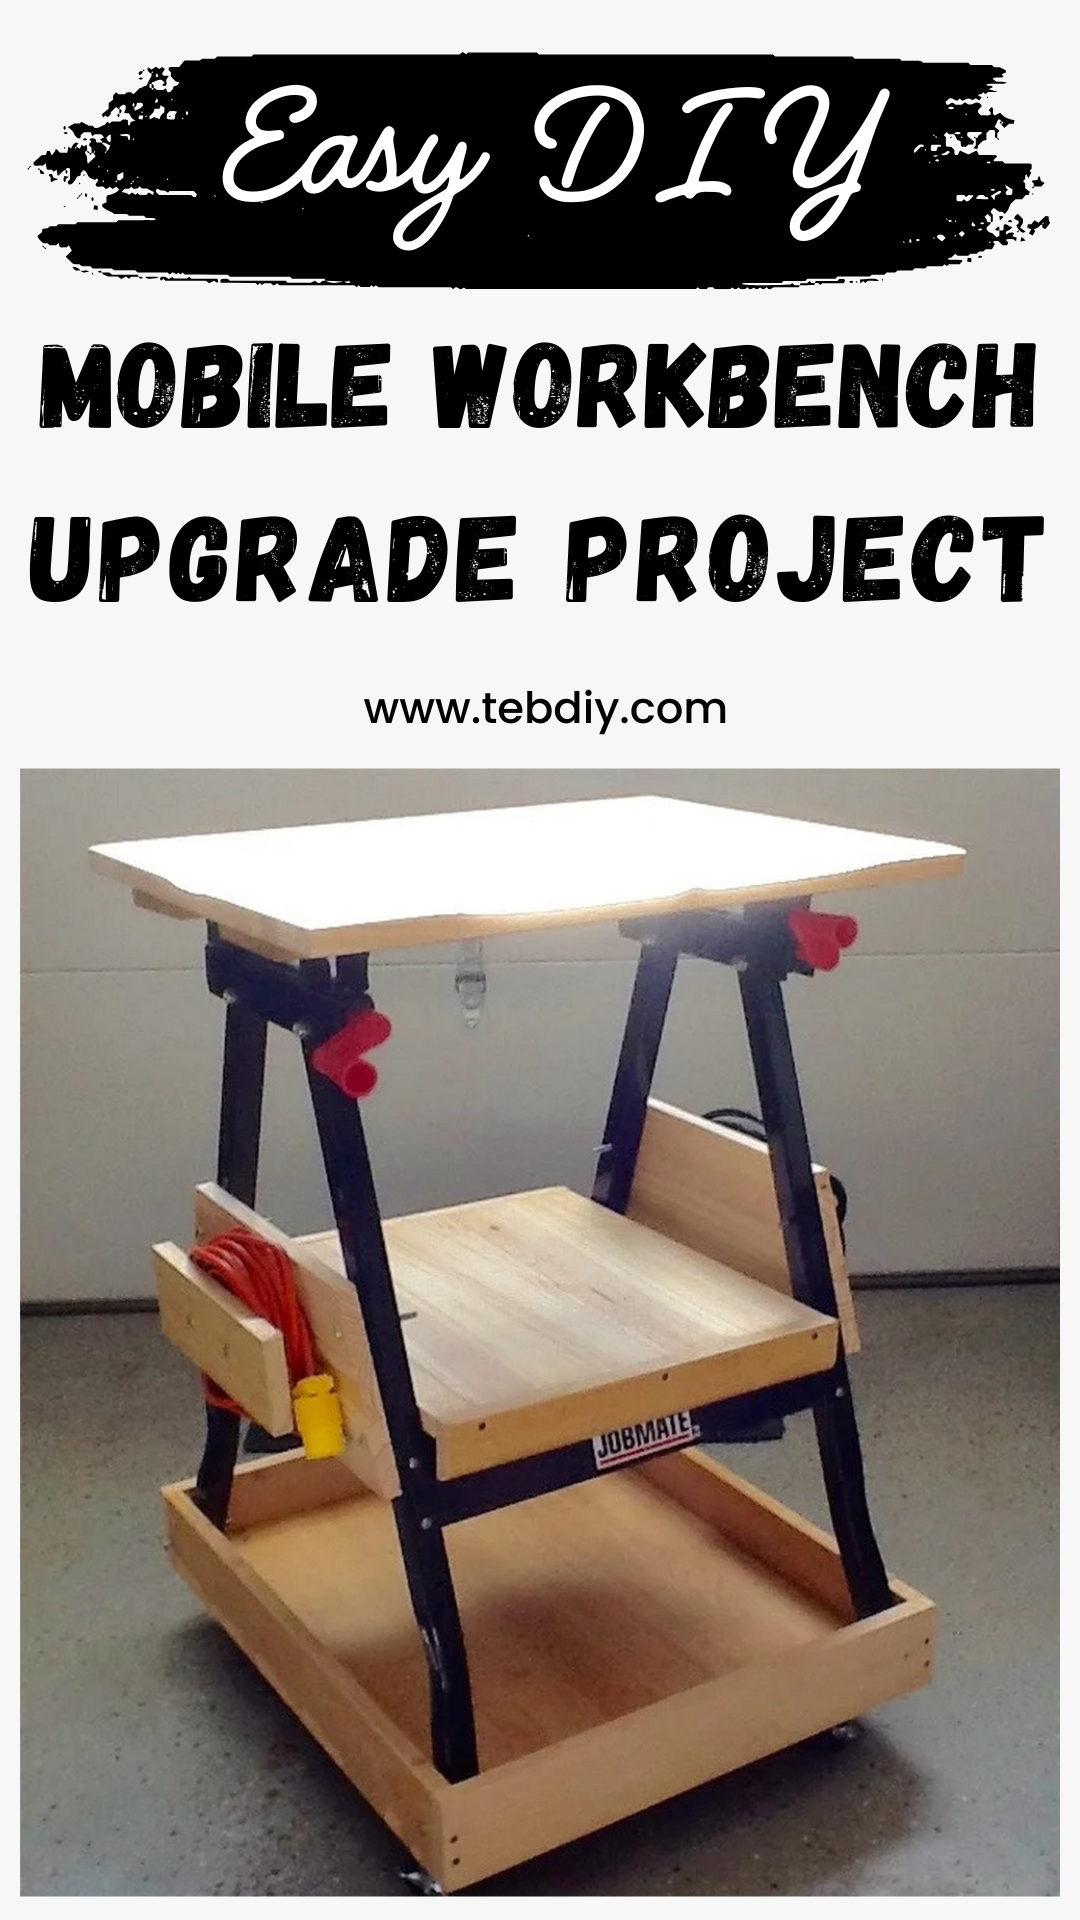
Start with a folding workbench that you can find at any large building or auto store. These are compact with a small work surface but lack stability and height. Remove the plastic feet from all four legs and measure the width and length at the bottom to prepare for the upgrade.
Build Bottom Tray
Create a tray that matches the inside dimensions you measured (e.g., 20 x 25 inches). Utilize an old butcher block countertop for durability. Add side rails for enhanced structure and attach industrial locking casters at each corner to ensure mobility. Place the workbench frame within this tray and secure it by drilling through each leg into the tray, then bolt it together.

Make a Work Surface
Cut another piece from the butcher block to fit the top of your frame, using the same dimensions for consistency. Include a cleat on the bottom of this new top so that it can easily clamp onto the existing table. This allows for quick removal or attachment, offering flexibility in your workspace setup.
Make a Shelf
To maintain access to the bottom tray, adjust the front and rear cross-braces higher on the legs by moving them to utilize the existing top hole as the new bottom hole, and drill a new top hole. Using the existing bolts, secure the braces in their new positions. Measure and cut a shelf to fit within this modified frame, adding more storage space.
Make New Side Braces
Remove the original metal side struts and replace them with sturdier wooden ones. After leveling the structure, measure or trace the leg profiles onto your wood, cut to fit, and secure them with bolts. This step significantly reduces flex and adds rigidity. Integrate a power block on one brace and a cord winder on the other for electrical tools, eliminating clutter and tripping hazards.

Finishing Touches:
Disassemble the bench, sand down all wooden parts, and apply a couple of coats of varnish. This not only prolongs the life of the wood but also gives your workbench a professional, aesthetic finish.
Conclusion
This mobile workbench upgrade project proves that with some creativity and elbow grease, you can transform a simple folding workbench into a versatile, sturdy workstation that meets all your needs. Whether it’s woodworking, car repairs, or any other DIY project, your upgraded mobile workbench will be ready to roll wherever your creativity takes you.

Leave a Reply