
Style your outfit effortlessly with crochet bag pattern that is simple to work on and brings charm while carrying your essentials with ease.

There’s something special about a bag that feels personal and unique, showcasing style and individuality. Crochet bag are both practical and eye-catching, perfect for carrying items and standing out in everyday moments. It can be used for casual outings, shopping trips, or to add a distinctive touch to your outfit. With so many crochet bag pattern to choose from, It always an option to suit different tastes and occasions.
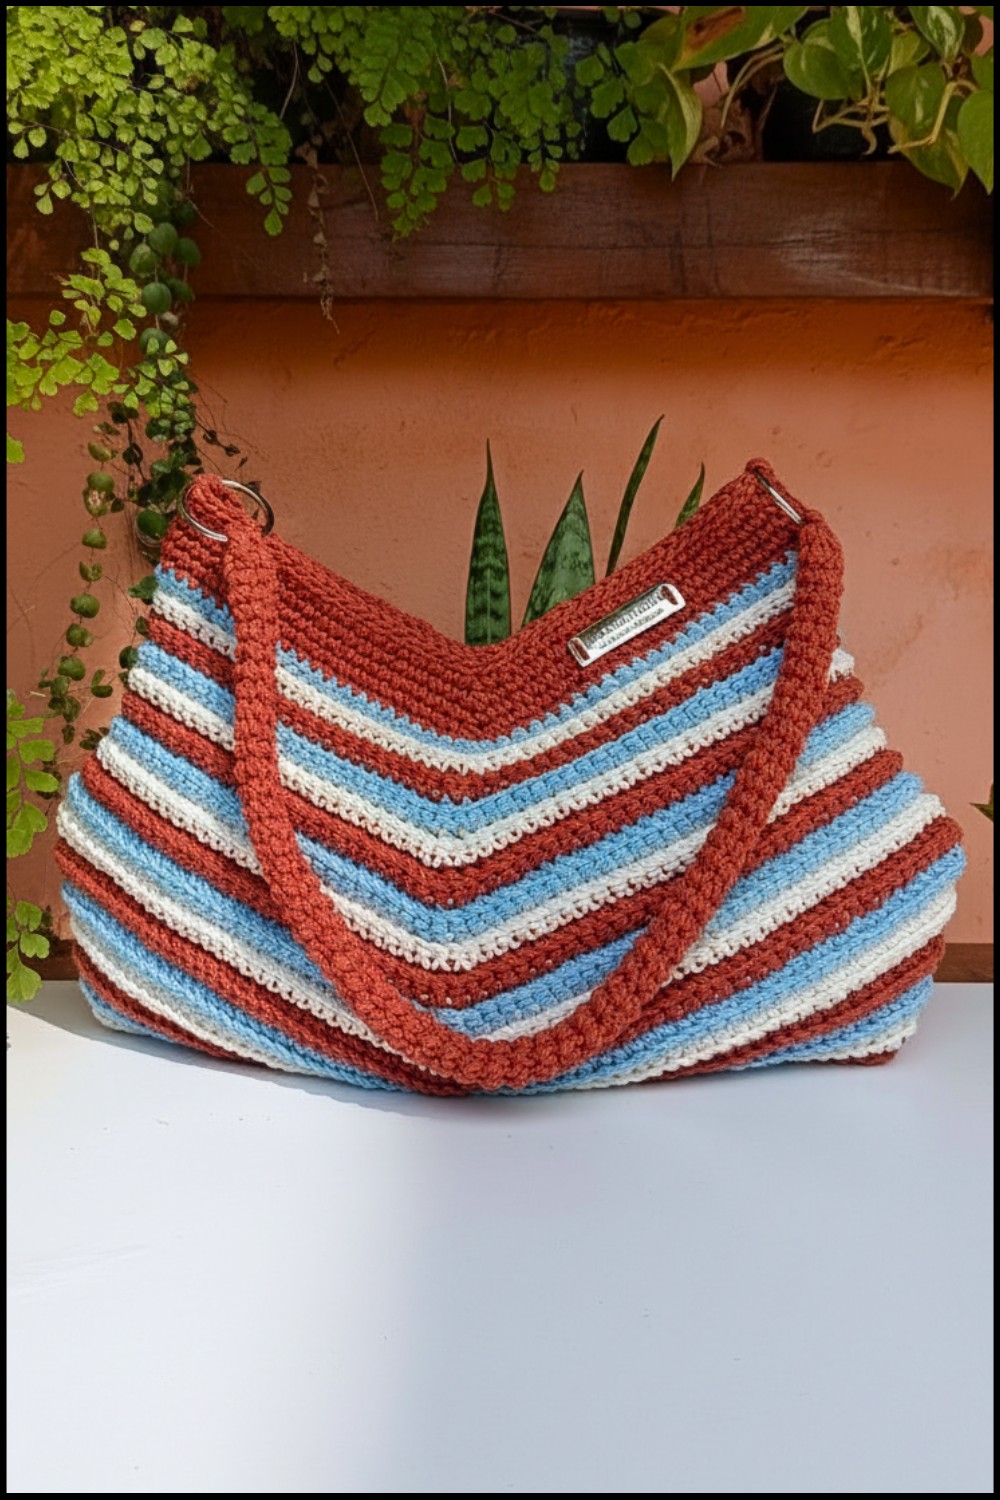
Compact Crochet Bag Pattern Ideal for On-the-Go Style
This bag are lightweight and easy to carry, with textures and designs that offer a sense of originality wherever you go. Its beauty lies in their ability to be functional while also offering something memorable and meaningful. Whether you’re looking for a simple design or something bold and colorful, this bag become a part of your story, offering both charm and utility.

Materials Needed
- Yarn: Size 6 yarn (Super Bulky) in three colors:
- Ecru
- Baby Blue
- Terracotta
- Crochet Hook: 4mm (or as needed for tension)
- Other Tools:
- Stitch markers
- Scissors
- Tapestry needle
- Magnetic button (optional, for closure)
- Rings (optional, for attaching the strap)
- Label (optional, for adding a designer touch)
Key Abbreviations
- ch: Chain
- sc: Single crochet
- st: Stitch
- sl st: Slip stitch
- rep: Repeat
- dec: Decrease (single crochet 2 together)
Special Notes
- Crochet tightly so the bag holds its shape.
- Always alternate between rows with increases and rows without increases.
- Use stitch markers to track the middle stitch for increases and decreases.
- Pay attention to color changes as outlined in the pattern sequence.
- When switching colors, cut the yarn and weave in the ends neatly on the wrong side.
- The base of the bag is worked in an oval shape; the sides are built up with alternating rows of increases.
Pattern Instructions
Step 1: Create the Base
- Chain Base:
- With the Ecru yarn, ch 50.
- Skip the first ch and sc into the second ch from the hook.
- Continue to make 1 sc in each ch across. You should have 49 sc at the end of the row.
- Work the Oval Base:
- Row 1 (Increase):
- Ch 1 (counts as the first sc). Turn your work.
- Make 24 sc into the back loop only.
- In the 25th st, make 3 sc in the same st to form the curve. Place a stitch marker on the middle sc of the 3 sc cluster.
- Continue working 1 sc into each of the next 24 sts.
You now have 49 sc on each side with a 3-sc increase in the middle curve (total: 51 st).
- Row 1 (Increase):
- Row Progression for Base (Increase Alternation):
- Row 2 (No Increase): Work sc in every st across, skip the middle stitch where the marker is placed, and place the marker in the same position.
- Continue alternating between rows with increases and rows without increases. For increase rows, work 1 additional sc on both sides (total: 3 middle sc as increases).
- Repeat until you have 22 rows and measure 33cm in length and 22cm in height.
- Color Changes for Base:
- After every two rows, switch colors in this sequence:
- Terracotta → Ecru → Baby Blue.
- Ensure each color section includes 2 complete rows.
- After every two rows, switch colors in this sequence:


Step 2: Build the Bag Body
- Work Without Increases:
- For the next section, eliminate increases and work point-by-point (1 sc in each st).
- Continue the color sequence (Terracotta → Ecru → Baby Blue).
- Total Rows: 22 continuous rows without increases.
- Check the Measurements:
- Ensure that the bag now has equal sides and start decreasing for the closure.

Step 3: Create the Bag Closure
- Work the Decreases:
- Row 1 (Decrease):
- Work 34 sc and then decrease in the middle (sc the previous, marker, and next st together).
- Do the same on the opposite side. You’ll now have 34 sc on each side, and the middle stitch is reduced.
- Row 2 (No Decrease): Work sc point-by-point without decreases.
- Row 3 Onwards: Alternate between a row with decreases and a row without decreases. Each time you decrease, reduce the middle point and move the marker up:
- Example: From 34 → 33 → 32… until you have 24 sc before and after the middle.
- Row 1 (Decrease):
- Finalize the Closure:
- Once you have 24 sc counting from the middle, tie off the yarn and ensure the bag lies flat.

Step 4: Assemble and Finish the Bag
- Sew the Sides:
- Turn the bag inside out (wrong side out).
- Use a tapestry needle and the matching yarn color to sew the sides using a whip stitch or your preferred method.
- Ensure no gaps are left and stitches are secure.
- Turn the Bag Right Side Out:
- After sewing, turn the bag right side out and check for symmetry.

Step 5: Create the Top Border
- Attaching the Border Yarn:
- Attach Terracotta yarn to any stitch at the top edge.
- Work a Border:
- Row 1: Work 1 sc into each st around.
- Row 2-6: Repeat row 1. As you pass the middle points, skip 1 st (decreasing slightly for structure).
- Finish with Slip Stitches:
- For the final row, work sl st in back loop only in each stitch.
- Fasten off and weave in all ends neatly on the wrong side.

Step 6: Add the Strap and Button
- Optional Strap:
- Use twine or crochet a matching strap using the same yarn.
- Attach a metal ring to the sides or sew the strap directly.
- Add Button:
- Sew the magnetic button (or similar closure) using a sewing needle.
- Add Label:
- Stitch a designer label for a personalized touch.


Conclusion
Congratulations! Your stunning crochet bag is complete! This pattern is versatile as you can customize the size, add unique labels, and play with colors.
Pattern Correction
If you notice uneven edges or incorrect stitch count, verify the placement of markers or recount crochet stitches periodically to maintain symmetry.
Tips
- Color Matching: Use harmonious tones for a sophisticated finish.
- Stitch Practice: Perfect your single crochet and slip stitch for a professional result.
- Durability: Use sturdy yarn and weave in ends properly to ensure the bag holds weight.
Leave a Reply