
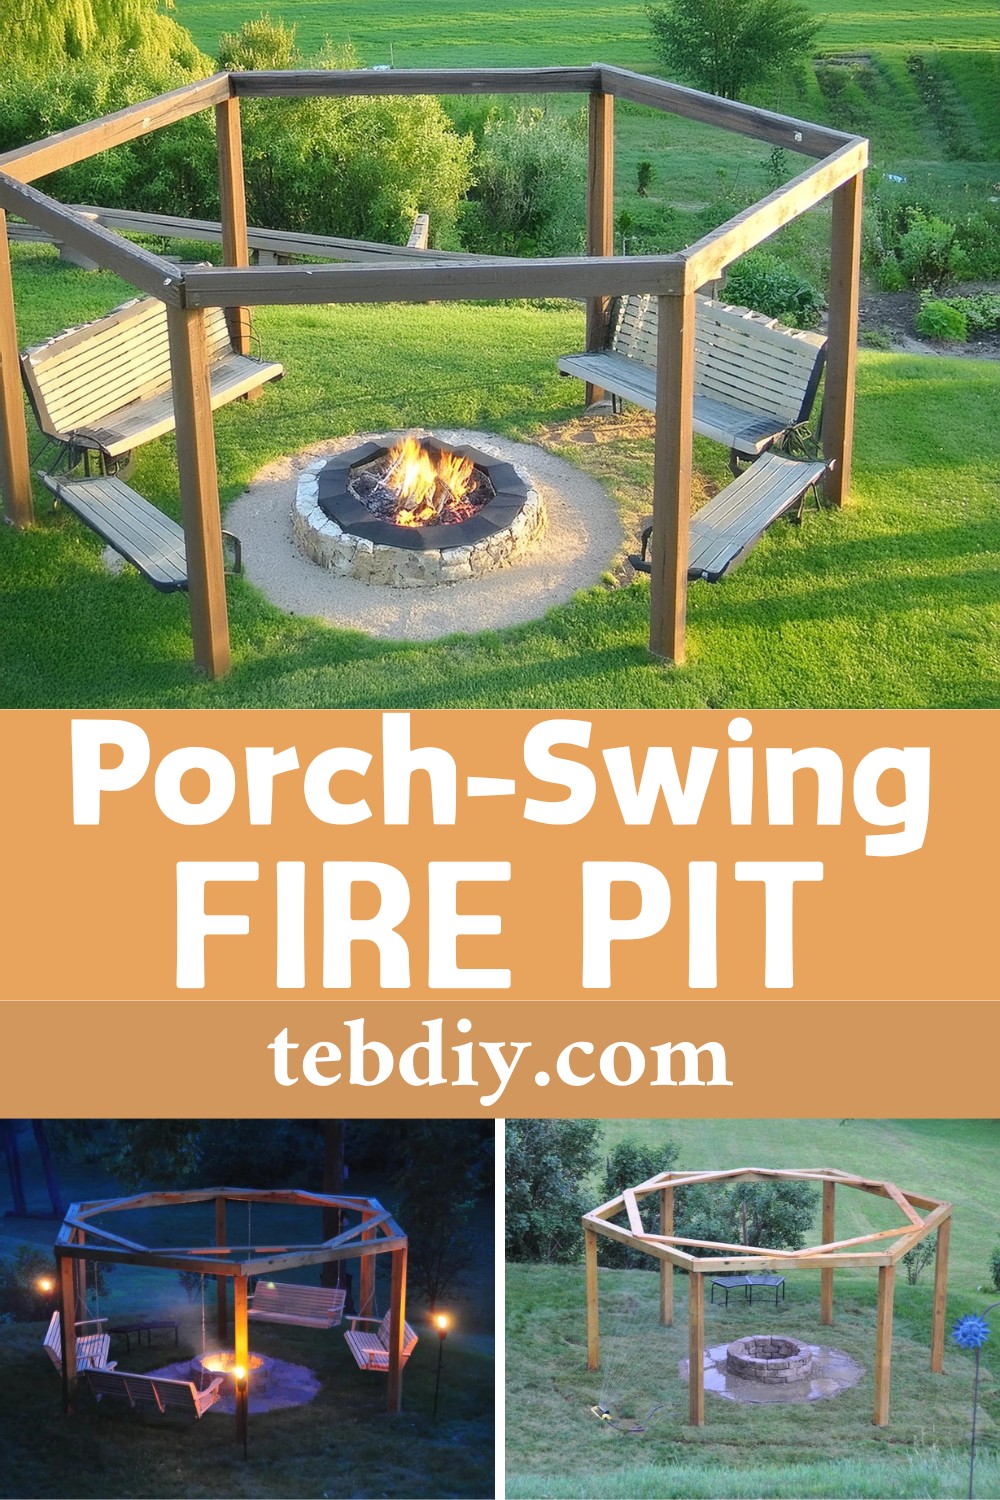
Sit in your calm backyard, listening to the gentle pops of a fire. You are under a sky full of stars, and everyone is telling stories and laughing together as easily as the fire’s glow. This DIY porch swing fire pit is special, like a little piece of magic. It’s like it invites your family and friends to come close and feel its warmth. You can roast marshmallows, talk about your day, or enjoy the quiet space that feels like your secret getaway. Making this fire pit with swings around it will turn your yard into a cozy spot you can enjoy any time of the year.

DIY Porch-Swing Fire Pit

Materials Required:
- Posts: 6″ x 6″ x 10′ pressure-treated boards (6 qty)
- Beams: 6″ x 6″ x 8′ pressure-treated boards (6 qty)
- Braces: 2″ x 6″ x 8′ pressure-treated lumber (6 qty)
- Lag Bolts and Washers: 1/2″ x 8″ galvanized (24 each)
- Deck Screws: 4″ (24 qty) and 3″ (24 qty) for beams and braces, respectively
- Additional Screws: A generous quantity of additional 3″ deck or drywall screws
- Auxiliary Braces: 2″ x 2″ x 8′ white pine boards (10-14 qty)
- Concrete: 50-60 pound bags (6-8 qty)
- Drainage: Paver base (6 qty)
- Center Marker: A 4-foot-long steel re-bar
- Stain/Water Seal: Your preferred brand and color
- Fire Pit Material: Varies per personal aesthetic choice
- Landscape Adhesive: For assembling the fire pit
- Surround Material: Slate, pea gravel, or similar
- Soil and Seed/Sod: To repair any landscaping post-construction
- Swings: Galvanized or stainless eye bolts or swing hangers with locking nuts and washers for hanging (with a length of at least 7 inches)
Tools Required:
- A-Frame Ladders: A couple of reliable ones
- Saw: Power miter saw, preferably a 12″ sliding compound
- Diggers: Post hole digger and a shovel
- Hammer: Sledge hammer for driving stakes
- Levels: Post level, line level, and a box beam level (6-foot+ ideal)
- Tape Measure: For accurate distance tracking
- Markers: Layout string, speed square, carpenter’s pencil, marking paint
- Concrete Mixing Tools: Large plastic mixing bin and hoe
- Drill: Cordless with bits suitable for deck screws
- Drill Bits: Long drill bits for lag bolts (3/8 in, 12 in) and swing hangers
- Forstner Bit: 1 1/4 inch for countersinking
- Pilot Bit: #8 bit for deck screws
- Socket Wrench: For lag bolts
- Stain Brushes: For applying finishes
- Safety Gear: Gloves and goggles
- Extras: Router with round-over bit, belt sander, and tarps (optional, based on preference)
- Heavy Machinery: Rental of a 2-man power drill with an 8 or 10-inch auger bit and extension

Making Process
Site Selection
Choose a level area approximately 25 feet across for this charming fire structure. Forego leveling the ground beforehand; it’s more efficient to do it post-construction. Consider seasonal use and shade availability when selecting your location. Remove any obstacles, such as old swing sets, if necessary.
Planning Your Hexagon
With a layout focused on a central point, start your hexagon by cutting and laying out beams on a flat surface for precision. Verify symmetry by ensuring all parallel beams are evenly spaced and mark the center points of each beam for future reference. Utilize a circular marking from the center to determine post positions.
Positioning the Posts
Transfer your beam placement to the ground. Use stakes or scrap pieces of wood to visualize where your posts will rise from the earth. Ensure uniform distance from the center and between each marked spot to maintain a perfect hexagon.
Earthwork and Foundation
Time to rent a power auger for post-hole creation. Dig six holes, maintaining alignment with the planned spots, to a depth beyond the frost line—typically 3 feet. Use tarps to minimize lawn damage and contain excess dirt.
Raising the Posts
Plant the posts firmly in their holes, filling with concrete for a solid foundation. Remember to check for plumb and level as you go, allowing the concrete to cure as instructed by the manufacturer.
Affixing the Beams
Joining the substantial 6″ x 6″ beams to the posts comes next. Fasten them securely with galvanized lag bolts, ensuring all hardware is tightened and beams are level.
Bridging the Beams
Attach the cross braces atop your structure for added rigidity. Use the 2″ x 6″ lumber cut earlier, adhering to the centered markings made during planning.
Setting Up for Swings
Drill through the beams to install eye bolts or swing hangers. Make sure they penetrate completely for maximum strength and longevity.
Finishing Touches
Now, stain or seal your wooden structure, protecting it from the elements. Assemble your chosen fire pit materials in the center, using landscape adhesive to bond the construction.
The Finale – Adding the Swings
Once the structure has dried and the fire pit is set, attach the swings and hang them evenly around your new inviting centerpiece.
With this project completion, your backyard is now proudly featuring a yet more charming, alluring hanging fire pit, beckoning for gatherings, stories, and warmth. Now, sit back, relax, and watch the sparkles of fire mirror the twinkling stars above as you swing gently into countless evenings of bliss and comfort.
Leave a Reply