
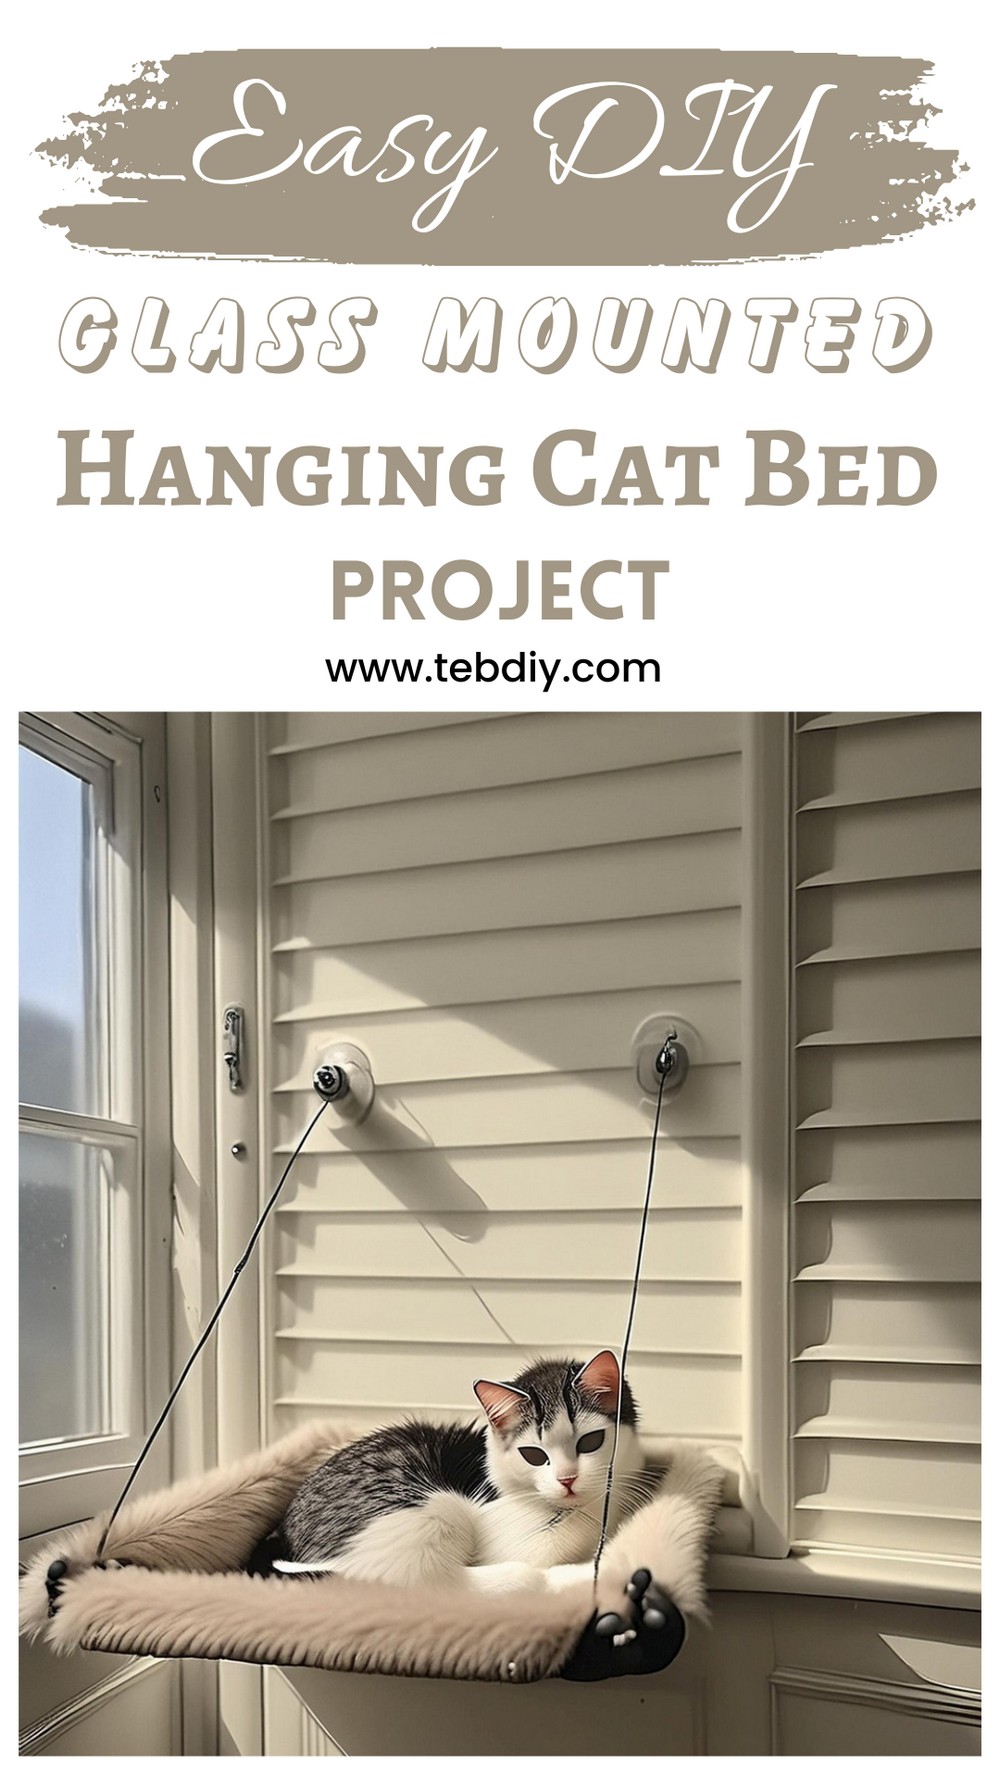
Gift your feline friend with a cozy nook perched upon the glass panes of your home, a spot where they can bask in the golden glow of the sun, survey their kingdom, and, as is a cat’s wont, whimsically drift into slumberous bliss. That’s exactly what we’ll achieve with this DIY glass mounted hanging cat bed. This Project, blends simplicity with comfort, making it a delightful addition to your home. It will be a heaven hanging in mid-air, not only will your cat adore it, but it will also add a unique touch to your decor.
DIY Glass Mounted Hanging Cat Bed Project
Materials List
- PVC pipes, 1” diameter (1.4 meters length total) *Alternatively, 1/2″ pipes may be used
- Two 1” 90° elbow fittings (L-shape)
- Two 1” tee fittings
- Two 25mm screws
- Two 90 mm diameter glass-mounted suction cups
- Two 40 mm diameter glass-mounted suction cups
- Woven fabric, 70 x 70 cm
- Sewing thread
- Steel cable, 1.5mm diameter (1.5 meters length) **A plastic-coated clothesline type works well
Tools Required
- Hacksaw
- Drill
- Measuring tape or ruler
- Screwdriver
- Scissors
- Sewing needles
- Cutter (for steel cable)
Crafting Steps
Measuring and Cutting the PVC Pipes
Measure and mark your 1-inch PVC pipes to lengths of approximately 35 cm each. Four pieces are required for this project. Cutting them with a hacksaw, you may find that smoothing the edges with sandpaper will result in a cleaner finish.
Preparing the Smaller Suction Cups
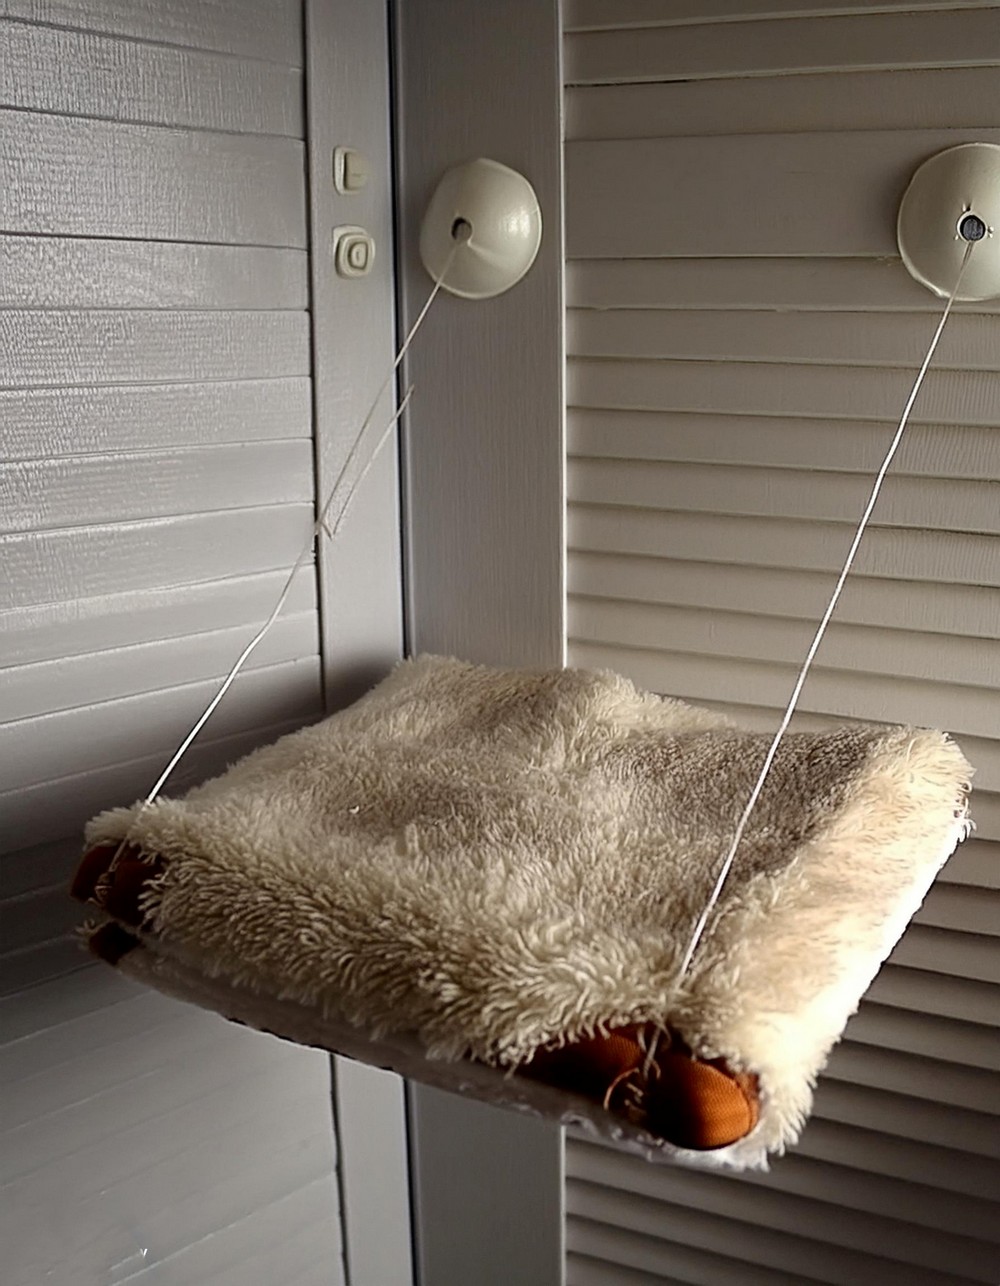
Place the smaller suction cups onto the tee fittings by first marking the exact center spot. Use a drill to pierce through the spot, creating a guide hole with a nail if necessary. Then, affix the suction cups onto the tees using the 25mm screws.
Preparing the Larger Suction Cups
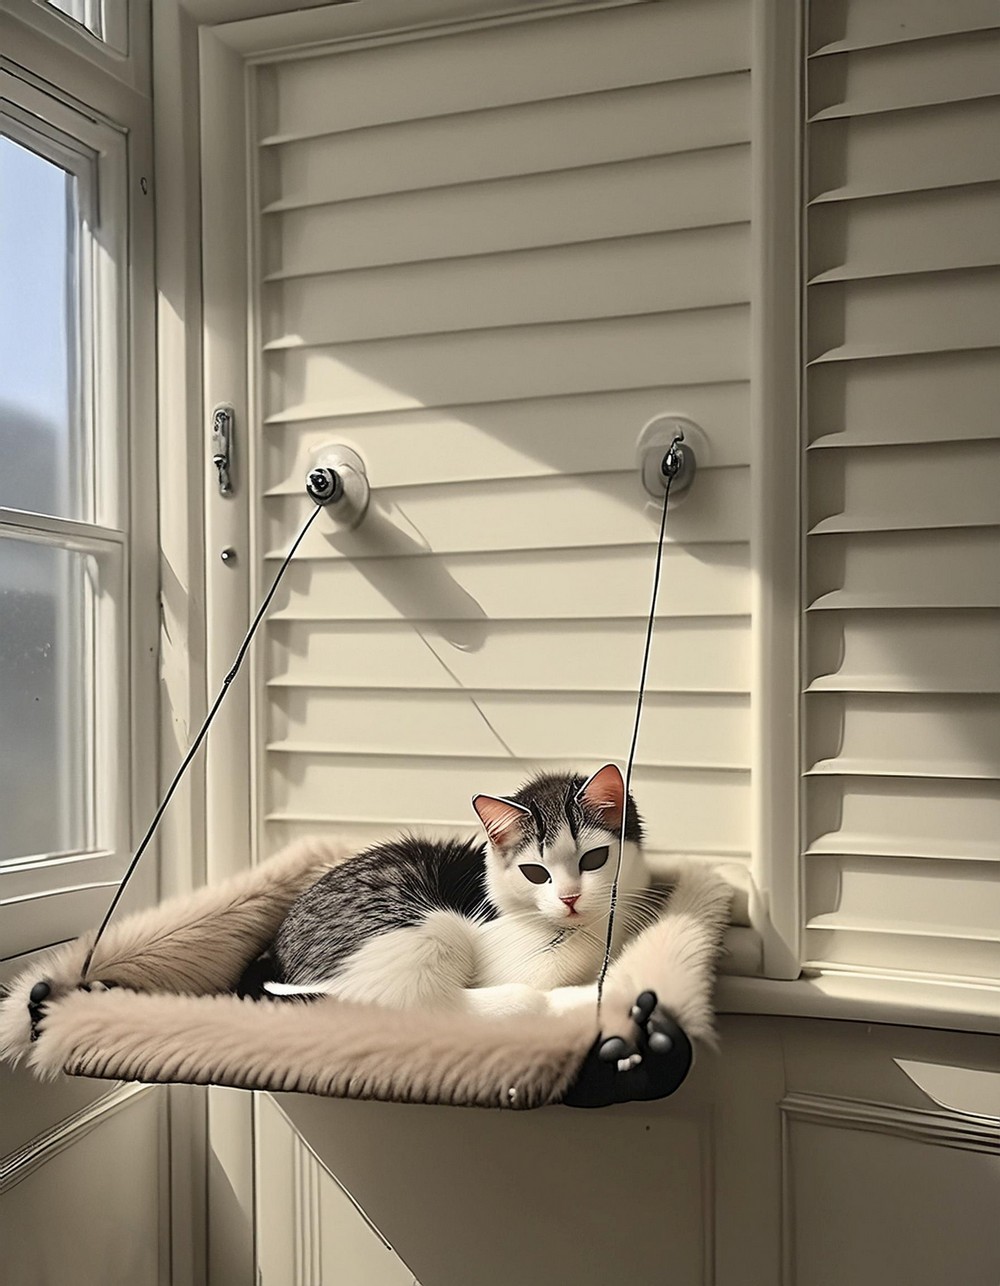
For the larger suction cups, which will bear the majority of the load, cut the steel cable into two 70 cm sections using a cutter. Fasten one end of each cable to the bolt of a suction cup, securing it tightly with a nut. The remaining loose ends will connect to the pipe frame later.
Assembling the Cloth Cradle
Lay out the fabric and trim it to size, according to the dimensions correlating with the length of your pipes. Once cut, you can now stitch the fabric to create a secure encasement that will later be mounted onto the frame.

Constructing the Frame
Connect your pipes and fittings to form a rectangular frame. First, attach the tees (with pre-mounted smaller suction cups) to two of the pipes. Slide these pipes through hemmed spaces in the fabric. Fasten a 90-degree elbow to each end of these pipes, and connect a third pipe between the two tees, threading it through the fabric as well. Similarly, connect a fourth pipe between the elbows, and at this point, attach the steel cables to the structure.
Installing the Bed
Choose a suitable window and adhere the smaller suction cups horizontally. Next, fix the larger suction cups with the steel cable taut, ensuring the bed hangs level. The glass surface and suction cups should be cleaned for optimal grip. Remember, the bed should not be mounted too high for your cat’s safety.
Welcoming Your Cat
Introduce your cat to their new hanging bed. Place a comfortable blanket over the fabric cradle, and position the bed near a ledge or piece of furniture your cat can jump from. This will ease their access and guarantee that your pet warms up to their new sleep sanctuary.
Conclusion
With these steps, you’ve created not just an airy hanging cat bed but also an observation deck for your furry overlord. Prepare for your cat to bask in the luxury of their new realm and for you to bask in their contentment. Enjoy the new addition to your home and the even deeper bond with your pet that comes with it!

Leave a Reply