
Give your hair a playful touch with this Free Crochet Puff Flower Scrunchie Pattern, perfect for making a soft, stylish, and fun accessory.
Elevating your everyday hair accessory never looked so charming as with a scrunchie bursting with delicate puff flowers. This pattern uses puff stitches combined with single crochet, forming soft, rounded petals that add a playful texture to a simple elastic band. The contrast between tightly stitched base rows and airy puff petals draws attention and brings a handmade elegance to your look without much hassle.
More Projects to Try
This stitch combination offers versatility beyond just scrunchies. Puff stitches give a unique texture to coasters, decorative borders on blankets, or textured scarves that feel cozy and look stunning. The skill of crocheting over elastic bands can easily transfer to crocheting bracelets or decorative loops for home décor accents. These techniques expand your crochet abilities while adding wonderful tactile details to a variety of projects.
Colorful Crochet Puff Flower Scrunchie Pattern for Pocket Styling
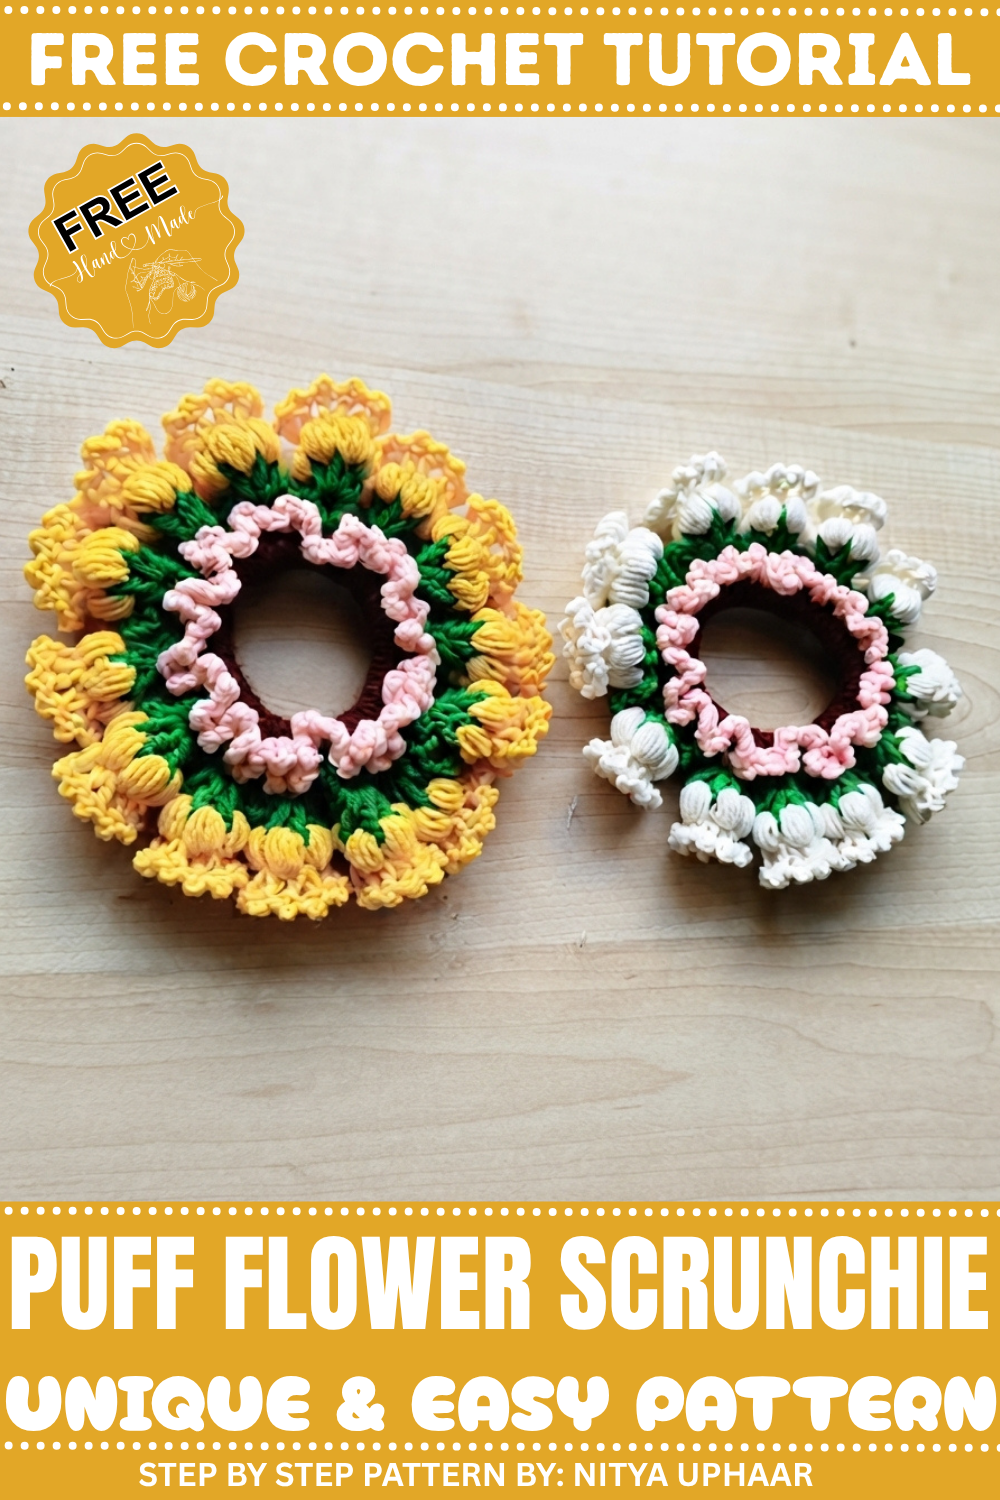
Beginning with single crochet stitches snugly wrapping around the elastic provides a sturdy yet flexible foundation. Then, working through front or back loops exclusively, puff stitches add volume and dimension, turning a plain hair tie into a floral statement piece. This technique produces a lightweight, comfortable accessory that shines at celebrations, weddings, or even casual days when you want a hint of flair.

Crochet Pattern: Flower Corset Hair Tie
Add elegance and charm to your hairstyle with this handmade flower-shaped corset hair tie. Whether it’s for a wedding, a festival, or a casual outing, this practical yet stunning hair accessory is designed to enhance your look. This pattern is beginner-friendly and uses simple crochet techniques like single crochet (sc), chains (ch), and puff stitches, making it an exciting project for anyone interested in crocheting handmade gifts or accessories.
Skill Level & Terminology
- Skill Level: Beginner
- Terminology: US Crochet Terms
This pattern is made using foundational crochet techniques such as single crochet (sc), slip stitches (sl st), and decorative techniques like puff stitches.
Materials & Tools
- Yarn:
- Four colors: green, pink, brown, and purple (all 4-ply).
- Note: If the yarn is thin, double it to match the weight.
- Hook:
- 2.5 mm crochet hook (Hook Number 4).
- 3 mm crochet hook (Hook Number 5).
- Other Materials:
- Scissors.
- Elastic band (thick or thin).
Gauge
Gauge is not critical for this project. However, ensuring even tension provides a more polished and refined appearance.
Abbreviations
| Abbreviation | Meaning |
|---|---|
| ch | Chain |
| sc | Single Crochet |
| sl st | Slip Stitch |
| puff st | Puff Stitch |
Special Stitch Instructions
Puff Stitch (puff st):
- Yarn over and insert the hook into the stitch. Pull up a loop.
- Repeat this step five times into the same stitch. (There will now be 11 loops on the hook.)
- Yarn over and pull the yarn through all the loops on the hook. Secure it with a chain.
Finished Size
- The hair tie is approximately 3-4 inches in diameter, depending on the elastic band size and the number of flowers worked.
What You’ll Learn
This pattern teaches a variety of crochet skills:
- How to crochet a base with single crochet stitches.
- Working in front and back loops to achieve layered designs.
- Creating puff stitches to shape petals with texture and volume.
- Joining different yarns for multi-colored designs.
The Pattern Itself
Step 1: Creating the Base (Round 1)
- Attach the Yarn to the Elastic Band:
- Use the doubled brown yarn for the base.
- Make a slip knot and pull the loop through the elastic band.
- Secure the yarn with a ch 1.
- Single Crochet (sc) Around the Elastic Band:
- Insert the hook through the elastic band, grab the yarn, and pull up a loop. Yarn over and pull through both loops.
- Repeat this until the elastic band is completely covered.
- Ensure Proper Stitch Count:
- For every flower, work 4 single crochet stitches.
- Multiply the desired number of flowers by 4 to know the total number of single crochet stitches. For example, for 12 flowers, crochet 48 sc (4 × 12). Adjust according to the size of your band.
- Finish:
- Join the first sc stitch to the last one with a sl st, then ch 1 and fasten off.


To complete the foundation, ensure you’re crocheting tightly enough to fully cover the elastic band. The first round lays the groundwork for the design that follows.
Step 2: Adding Front Loop Design (Round 2)
- Change to Pink Yarn:
- Double the pink yarn and create a slip knot.
- Work in Front Loops (fl):
- Insert the hook into the front loop only (flo) of any stitch and attach the pink yarn using sl st. Secure with ch 1.
- Work the Pattern:
- Insert the hook into the front loop only of the next stitch and work:
- 1 sc, ch 3.
- Move to the next stitch and repeat: sc, ch 3.
- Insert the hook into the front loop only of the next stitch and work:
- Complete the Round:
- Continue this pattern in the front loops only for all 48 stitches (or your total count). Join the last stitch to the first stitch with a sl st, then fasten off.

This creates a beautiful design of loops all around the elastic band. If you prefer, you can keep the hair tie as it is at this stage!
Step 3: Adding Dimension (Round 3)
Use green yarn for this round.
- Work in Back Loops (bl):
- Attach the green yarn in any back loop (blo) left in Round 1. Secure with ch 1.
- Work the Pattern:
- In the same back loop, work:
- 1 sc, ch 5, skip 1 stitch, sc in the next stitch.
- In the same back loop, work:
- Repeat Around the Round:
- Follow this pattern: sc, ch 5, sk 1, sc around.
- At the end, join the last stitch to the first stitch with a sl st, fasten off, and hide the thread ends.


The green layer adds a lace-like detail to the hair tie, creating an elegant base for the flowers in the upcoming steps.
Step 4: Flower Petals (Round 4)
Use purple yarn for the flower petals.
- Begin with a Puff Stitch:
- Attach purple yarn into the first opening of the green layer with ch 2. Begin the first puff stitch (puff st) (refer to the Special Stitch Instructions) and close it with a ch.
- Work Across the Hole:
- Make 5 puff stitches into the same hole, evenly spaced.
- Secure the Flower:
- Fold the puff stitches into a circular form and join the last puff stitch to the first with a sl st.
- Move to the Next Opening:
- Skip the green chains and repeat the sequence to create another flower.
- Repeat Around:
- Continue creating flowers until all 12 openings (holes) are filled with puff stitch flowers.


This is the highlight of your hair tie, creating beautiful, decorative flowers stitched securely into place.
Assembly & Finishing
- Hide Loose Ends:
- Use a darning needle or a thin crochet hook to weave in all threads securely. Trim any excess.
- Adjust Flowers & Elastic Fit:
- Ensure your flowers sit evenly around the band and the elastic fits snugly but not too tightly.
Why I Love This Pattern
This flower corset hair tie is a wonderful fusion of practicality and elegance. I love the layered floral design, the way the puff stitches bring each flower to life, and how versatile it is for gifting or use during festive celebrations. The pattern is easy to customize with different colors and layers, making it a perfect project to express creativity while crafting something functional and beautiful.
Leave a Reply