

The pig is a lovely choice for anyone who enjoys farm animals, cute amigurumi, or small handmade characters. Its cheerful face can add a fun touch to a room without taking up much space. It can even become part of a growing collection of crochet animals.
This tiny pig can also make a thoughtful handmade gift. Give it to a child, friend, sibling, or animal lover for a birthday, holiday, or simple surprise. A small crochet animal can feel extra special because it carries the charm of something made by hand.

If you enjoy cute animal projects, this one could be a wonderful addition to your crochet list. The Free crochet Pig Pattern is a fun choice for creating a friendly little character with plenty of charm. Give it a try and enjoy making a pig that can bring a smile wherever it goes.
Crochet Pig with a Knife Pattern
This pattern will guide you step-by-step through creating a charming crochet pig holding a knife, using a 2.5 mm crochet hook and light pink yarn for the pig with added color details for the knife and pig’s nose. The amigurumi project features the head and body worked seamlessly in continuous rounds, alongside separately crafted ears, arms, legs, tail, nose, and a detailed crochet knife. The pattern is designed to give a neat and precise finish and is excellent for crocheters aiming to expand their skills in shaping and assembly of small crocheted figures.
Quick Overview Of Pattern
- The head and body are crocheted continuously using single crochet rounds with structured increases and decreases for shaping.
- Ears, arms, legs, tail, and nose are made individually and sewn on.
- The knife consists of two parts: blade and handle, crocheted separately then assembled.
- Detailed assembly instructions ensure a tidy and professional look.
Notes
- Keep stitches consistent and count diligently to maintain the shaping.
- Use a stitch marker at the beginning of each round if needed to track rounds easily.
- Stuff parts firmly before closing to preserve the shape, avoiding overstuffing which can distort stitches.
- Change yarn colors clearly and fasten off securely.
- When folding and sewing the knife blade, make edges neat for a realistic look.
- Use small, tight stitches for details like nose and tail for definition.
Skill Level
Intermediate
Experience with the following is recommended:
- Working in a magic ring (MR)
- Single crochet (sc)
- Working increases (inc) and decreases (dec)
- Half double crochet (hdc) and double crochet (dc)
- Back loop only (BLO) crochet
- Sewing parts together
- Basic assembly and finishing techniques
Materials
- Light pink yarn (main body color)
- Dark pink yarn (for pig’s nose)
- White yarn (for knife blade)
- Blue yarn (for knife handle)
- Crochet hook size 2.5 mm
- Fiberfill stuffing
- Yarn needle
- Scissors
- Stitch markers (optional)
Measurements / Sizing
- Finished pig stands approximately 10 cm (4 inches) tall.
- The knife measures about 4 cm (1.5 inches) long.
Gauge (and Stitch Pattern)
- Gauge is not critical but maintain consistent tension for uniform stitches.
- Mostly worked in single crochet (sc) rounds, sometimes worked flat for the ears and tail.
Stitch Abbreviations
| Abbreviation | Meaning |
|---|---|
| ch | Chain |
| sc | Single crochet |
| hdc | Half double crochet |
| dc | Double crochet |
| inc | Increase: 2 sc in one stitch |
| dec | Decrease: single crochet 2 stitches together |
| BLO | Back loop only (crochet into the back loop only) |
Special Stitches
- Magic Ring (MR): An adjustable ring to start crocheting in the round with no gap in the center.
- Invisible Decrease: A decrease method that creates a neat, less visible join (commonly used but implicit in the pattern).
- Back Loop Only (BLO): Making stitches only through the back loop to create texture or shaping effects.
The Crochet Pattern!
1. Head and Body (Light Pink)
Round 1:
- Create a magic ring (MR).
- Crochet 6 single crochet (sc) into the ring. (6 stitches)
Round 2:
- Increase in each stitch: 2 sc in each stitch around. (12 stitches)

Round 3:
- Repeat (1 sc, 1 inc) 6 times. (18 stitches)
Round 4:
- Repeat (1 sc, 1 inc, 1 sc) 6 times. (24 stitches)
Round 5:
- Repeat (3 sc, 1 inc) 6 times. (30 stitches)
Round 6:
- Work 30 sc evenly around.
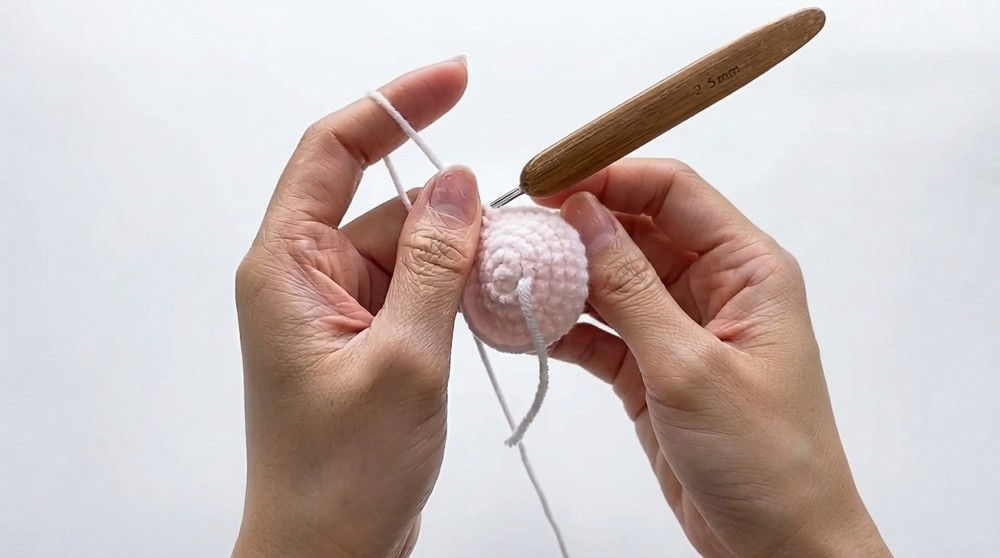
Round 7:
- Repeat (2 sc, 1 inc, 2 sc) 6 times. (36 stitches)
Rounds 8-9:
- Work 36 sc each round.
Round 10:
- Repeat (5 sc, 1 inc) 6 times. (42 stitches)
Rounds 11-13:
- Work 42 sc evenly each round.
Round 14:
- Repeat (5 sc, 1 dec) 6 times. (36 stitches)
Round 15:
- Repeat (2 sc, 1 dec, 2 sc) 6 times. (30 stitches)
Round 16:
- Repeat (3 sc, 1 dec) 6 times. (24 stitches)
Round 17:
- Repeat (1 sc, 1 dec, 1 sc) 6 times. (18 stitches)

Round 18:
- Repeat (1 sc, 1 dec) 6 times. (12 stitches)
Stuffing:
- Add fiberfill stuffing firmly to the body.
Round 19:
- Work 6 decreases evenly to close the top. (6 stitches) Fasten off.
2. Ears (Light Pink)
- Chain 4 (ch 4), turn.
- Skip 1 chain; work 1 sc, 1 half double crochet (hdc), 1 double crochet (dc) in the next stitches.
- Chain 1 (ch 1), cut yarn and fasten off.
3. Arms (Light Pink)
Round 1:
- Start with magic ring, work 7 sc into ring. (7 stitches)
Round 2:
- Work 7 sc evenly around. Fasten off.
4. Legs (Light Pink)
Round 1:
- Start with magic ring, work 8 sc into ring. (8 stitches)
Round 2:
- Work 8 sc evenly around. Fasten off.
5. Tail (Light Pink)
- Chain 5 (ch 5).
- Skip 1 chain, then work 4 sc into remaining chains.
6. Nose (Dark Pink)
- Chain 4 (ch 4).
- Work around chain:
- 2 sc,
- 3 sc in last chain,
- 1 sc,
- 2 sc in last chain.
- Fasten off.

7. Knife
Blade (White):
- Round 1 (R1): 6 sc into magic ring. (6 stitches)
- Round 2 (R2): 6 increases (2 sc in each stitch). (12 stitches)
- Round 3 (R3): Repeat (1 sc, 1 inc) 6 times. (18 stitches)
- Fold the blade piece lengthwise and sew together neatly to form the blade shape.
Handle (Blue):
- Round 1 (R1): 6 sc into magic ring. (6 stitches)
- Rounds 2-3 (R2-R3): Work 6 sc evenly around.
- Round 4 (R4): Work 6 back loop only (BLO) sc to give texture and shape.
- Fasten off and sew handle to the blade securely.

Assembly & Finished Size
- Sew the ears onto the head at suitable positions on either side.
- Attach the arms to the upper sides of the body.
- Sew legs at the bottom to provide balance.
- Attach the tail at the backside lower area of the body.
- Securely sew the nose onto the front center of the face.
- Attach the completed knife in one arm’s “hand” by sewing carefully.
- Weave in and tuck all yarn ends for a polished finish.
Finished pig stands approximately 10 cm (4 inches) tall with the knife measuring roughly 4 cm (1.5 inches) long. The cute pig with a knife makes an adorable, whimsical accessory or gift and is sure to bring smiles.

Conclusion
You’ve completed a delightful crochet pig holding a knife, showcasing your intermediate amigurumi skills, from creating smooth continuous rounds for head and body to shaping detailed tiny parts such as ears, nose, and knife components. The pattern’s clear structure emphasizes stitch consistency, careful assembly, and finishing touches that enhance personality and professional appearance. This project is perfect for collectors, gift makers, or anyone loving cute and quirky handmade creations.
Leave a Reply