
Capture attention with this free crochet bag keychain pattern that’s designed to blend functionality and stylish details perfectly in a compact accessory.
It’s always special to create something with your own two hands, especially when it’s super tiny and cute! If you love little crafts, you will absolutely adore making a miniature crocheted tote. The awesome team at the DIY Maycraft YouTube channel shares a wonderful Free Crochet Bag Keychain Pattern that helps you whip up this adorable little accessory in no time. It’s a fantastic project for making a tiny charm that looks just like a real handbag.
This little bag charm is designed to look like a shrunken-down version of a stylish tote. It has a neat, square shape with two tiny handles at the top, making it look incredibly realistic. The crochet stitches give it a wonderful, textured feel that is soft and slightly squishy to the touch. Its standout feature is its amazing detail; it’s not just a flat shape but a proper little 3D bag. The style is incredibly charming and handmade, perfect for adding a cozy and personal touch to your belongings.
Bag Keychain Pattern: Free Crochet in Cute Colors

The best part about this miniature bag keychain is how many fun ways you can use it. Of course, it’s perfect for holding your keys and making them easier to find in a big purse. You can also clip this cute charm onto your backpack zipper for a unique bit of decoration that shows off your personality. It even works as a sweet little tag on a gift bag or as an accessory for a doll. It’s a small item that brings a big smile.
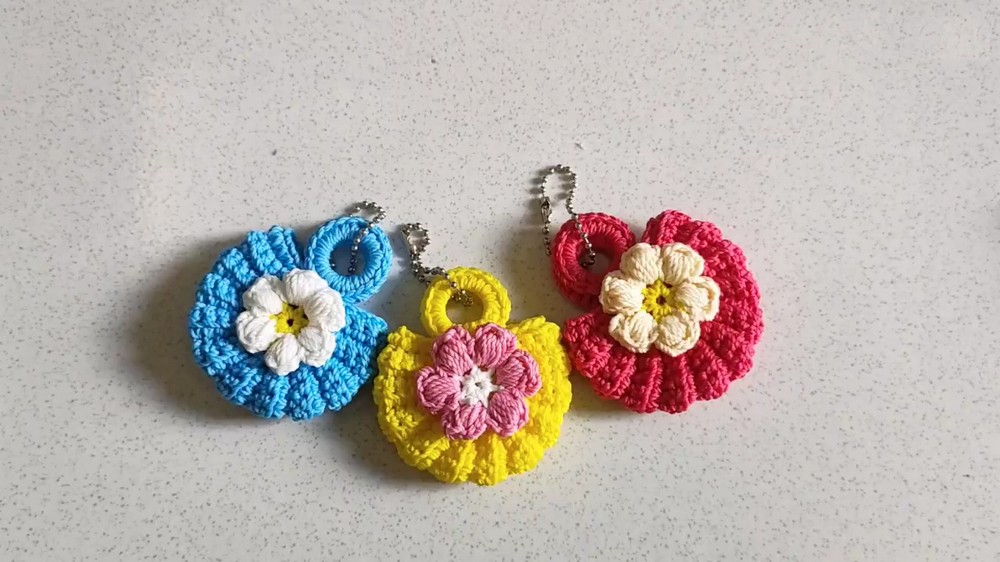
Making this tiny bag is a really joyful experience. You get to watch a piece of yarn transform into a perfectly formed, cute accessory. It’s a simple and quick DIY craft that leaves you with a special, handmade treasure you can carry with you or give to a friend as a thoughtful, tiny present.
Mini Envelope-Style Keychain Bag Crochet Pattern Using Polycherry Yarn
This charming mini envelope-style bag is designed to function as a delightful keychain accessory. Crafted with Polycherry yarn and a 4/0 Tulip crochet hook, it features a compact structure formed by joining two circular panels with a textured back-and-forth stitch pattern creating the bag’s body. The piece is finished with plastic ring attachments and an elegant flower decoration, making the accessory both functional and visually appealing.
Quick Overview of the Pattern
The project begins with crocheting two fully covered plastic rings, which serve as functional attachment points. Next, two small circular panels are constructed using double crochet stitches joined into circles. These circles are joined with a connecting strip worked back and forth in single crochet, with stitches worked in the back loop only (BLO) to create texture and structure. The final step involves securing the rings to the bag and embellishing it with a delicate puff stitch flower featuring puff-stitch petals. The entire process combines basic crochet techniques with decorative special stitches, resulting in a sophisticated miniature bag perfect as a keychain or small pouch.
Notes
- This project utilizes a combination of rounds and rows with simple stitch repeats and joining techniques.
- Consistent tension is important for the circular panels and the joining area to achieve a neat finish.
- The plastic rings are entirely covered with single crochet stitches to embed them seamlessly into the bag’s design.
- Working single crochet stitches in the back loop only (BLO) during the joining rows creates a subtle ribbed texture and bag structure.
- The puff stitch petals require deliberate yarn overs and loops to build volume and softness—practice this stitch before working the petals.
- Ends should be secured carefully; a lighter is used to seal yarn ends safely.
Skill Level
This pattern is suitable for beginner to lower intermediate crocheters who are familiar with:
- Creating slip knots and working in rounds.
- Basic stitches: chain (ch), single crochet (sc), double crochet (dc), slip stitch (sl st).
- Working in the back loop only (BLO).
- Joining rounds and panels with slip stitches.
- Creating puff stitches and magic rings.
- Attaching plastic rings securely with crochet.
Materials
- Polycherry yarn: Suggested colors include base tones and pink for floral decoration.
- Hook: 4/0 Tulip crochet hook (~2.5 mm).
- Two plastic rings, 2 cm diameter.
- Scissors, lighter (for sealing ends), tapestry needle for weaving in ends.
Measurements / Sizing
- Diameter of circular panels: approximately 5 cm.
- The finished bag’s height including the body section: approximately 6–7 cm.
- Width approximates the plastic ring diameter (~2 cm) times two, plus the body section in between.
Gauge and Stitch Pattern
- The gauge is flexible; tension should be firm enough to cover rings tightly but still soft for the flower.
- Circular panels are worked in joined rounds of double crochet.
- The body/joining strip is created by working rows of 9 single crochets in back loops only (BLO), giving banded ribbing and firmness.
- Puff stitch petals include multiple grouped yarn overs and loop pulls for a raised petal effect.
Stitch Abbreviations
- ch = chain
- sc = single crochet
- dc = double crochet
- sl st = slip stitch
- BLO = back loop only
- puff stitch = yarn overs and loop pulls to create raised clusters
- magic ring = adjustable loop to start rounds worked into a central ring
- rep = repeat
Special Stitches
Puff Stitch
- Yarn over, insert hook into designated stitch, yarn over, pull up a long loop.
- Repeat 5 times (total 5 loops), yarn over, pull through all loops on hook.
- Chain 3 and slip stitch into the base stitch to secure the puff.
Magic Ring
- Create an adjustable ring with yarn wrapped over fingers.
- Work stitches inside ring.
- Pull tight to close ring neatly.
The Crochet Pattern!
Step 1: Covering the Plastic Rings
- Attach your yarn to one plastic ring using a slip knot.
- Work single crochet (sc) stitches evenly spaced around the entire circumference of the ring. Continue until it is completely covered and the plastic is no longer visible.
- Join the last stitch with a slip stitch (sl st) to the starting stitch to close the round.
- Cut the yarn leaving a small tail and use a lighter carefully to seal the end to prevent unraveling.
- Repeat the entire process for the second ring.
Step 2: Creating the Circular Bag Panels
- Make a slip knot and chain 5.
- Join with a slip stitch (sl st) into the first chain to form a circle.
- Chain 3 (counts as first double crochet).
- Work 11 double crochets (dc) into the circle, for a total of 12 stitches including the chain 3.
- Join to the third chain of the beginning chain 3 with a slip stitch (sl st).
- Cut and secure the yarn.
- Repeat the same steps to make a second identical circular panel but do not cut the yarn at the end of the second circle—leave it attached for the next step.

Step 3: Joining the Panels with the Body
- With the second circle still attached to your yarn, chain 9.
- Join this chain to the first circle by slip stitching (sl st) into the first circle’s stitch to create a connecting strip.
- Chain 1, then work 9 single crochet stitches (sc) into the 9-chain segment you just made.
- Slip stitch into the next stitch of the first circle to secure.
- Chain 1 and turn your work.
- Work 9 single crochet stitches into the back loop only (BLO) of the previous row’s stitches.
- Turn and repeat the 9 sc BLO stitches back and forth in rows, building up a textured strip connecting the circles.
- Continue this alternating row pattern for 12 rows, resulting in a total height of approximately 23 rows including the initial circle rounds.
- This creates the sides or “body” of the mini bag with a neat ribbed texture.

Step 4: Attaching the Plastic Rings to the Bag
- After finishing the joining strip, attach each previously covered plastic ring securely at the top edges of the panels.
- Work 6 single crochet (sc) stitches through both the plastic ring and the top panel to firmly join the ring to the bag.
- Repeat for the second ring, ensuring symmetry and strength.

Step 5: Adding the Flower Decoration
Flower Center:
- Begin with a magic ring.
- Chain 1, then work 6 single crochet (sc) stitches into the ring.
- Join with a slip stitch to the first sc and secure the round. Do not cut yarn.
Petals:
- Attach your chosen pink yarn to any stitch on the flower center.
- Chain 3.
- Work 5 puff stitches into the next stitch:
- For each puff stitch, yarn over, insert hook, pull up loops as per puff stitch, finish, and chain 3 before slip stitching back into the same base stitch.
- Repeat the petal creation 6 times around the flower center evenly to form the petals.
- End by securing the final yarn tail. Use a lighter carefully to seal the yarn ends.
Assembly & Finished Size
When completed, the mini envelope-style bag measures approximately:
- Diameter of front and back circular panels: 5 cm
- Height of the bag including the joining strip: approximately 6 to 7 cm
- Width corresponds roughly to twice the plastic ring diameter plus joining strip width.
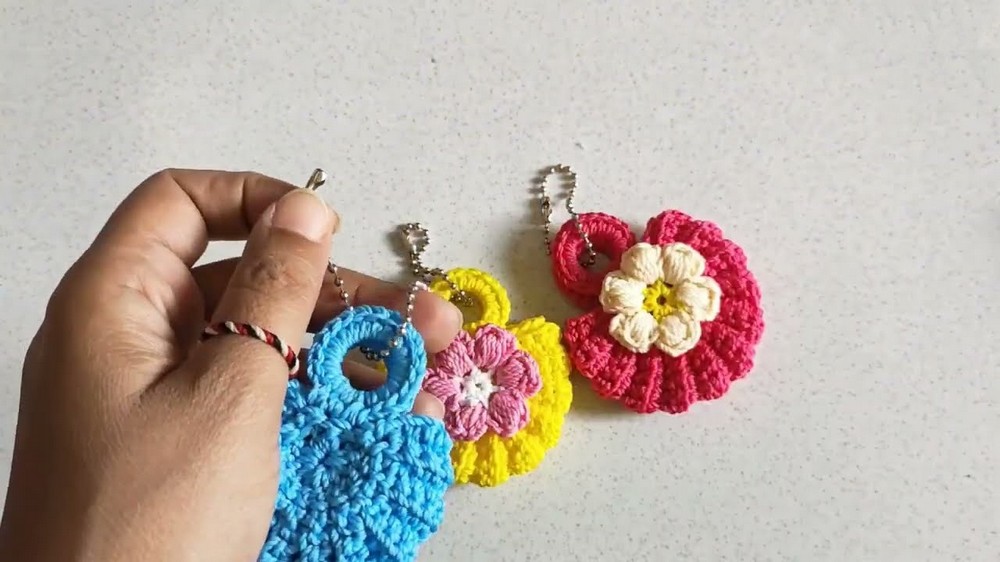
The compact size makes it perfect as a decorative keychain bag. The decorative flower adds an elegant touch. The covered plastic rings ensure durable attachment points for key rings or chains.
Conclusion
This mini envelope-style bag pattern offers a charming project that combines crocheting in rounds, constructing joins with textured stitch rows, and decorative finishing with puff stitch petals. Using Polycherry yarn and a fine 4/0 Tulip hook produces a delicate yet sturdy accessory, perfect for beginners advancing in their skills.
By carefully covering plastic rings, working double crochet circles, and mastering the back loop only joining technique, you create a neat structural bag. The puff stitch flower decoration offers fun experience working textured stitches and enhances the overall appeal.
Take your time to practice each stitch and enjoy assembling this unique piece. This pattern demonstrates how simple stitches combined thoughtfully can result in an attractive and functional miniature bag—a perfect gift or personal project.

Leave a Reply