
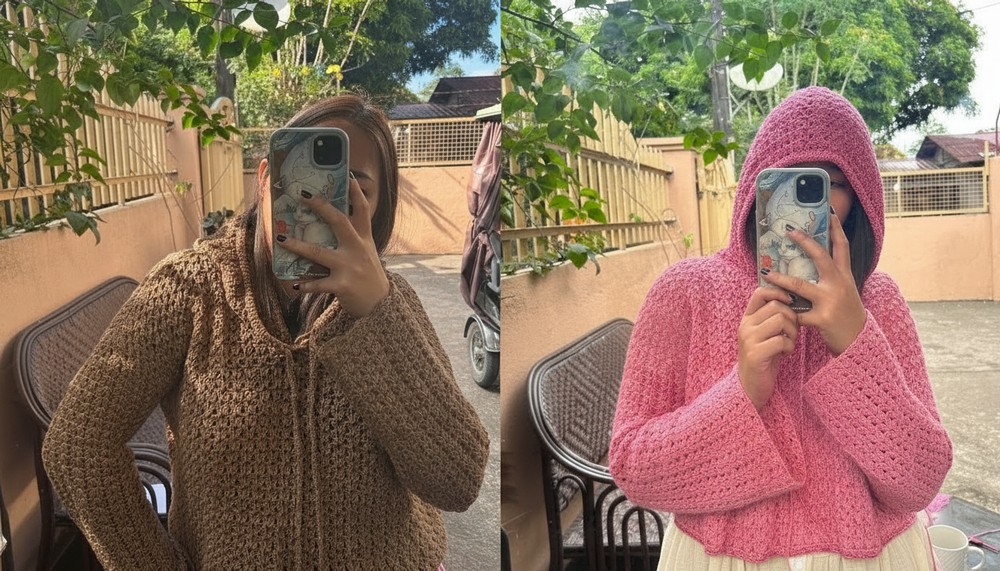
Cozy up with this fun and easy crochet sweater hoodie pattern that brings comfort and style together for chilly days and relaxed moments outdoors.
On a chilly morning, wrapping yourself in warmth feels like a gentle hug from a close friend. Imagine slipping on a soft, thick sweater that not only keeps the cold away but also makes you look effortlessly stylish. This sweater hoodie is made with love, featuring cozy yarn that feels gentle on your skin and a hood that offers extra comfort when the wind blows. Its beautiful crochet patterns create a unique texture that catches the eye and brings a special charm to your outfit.
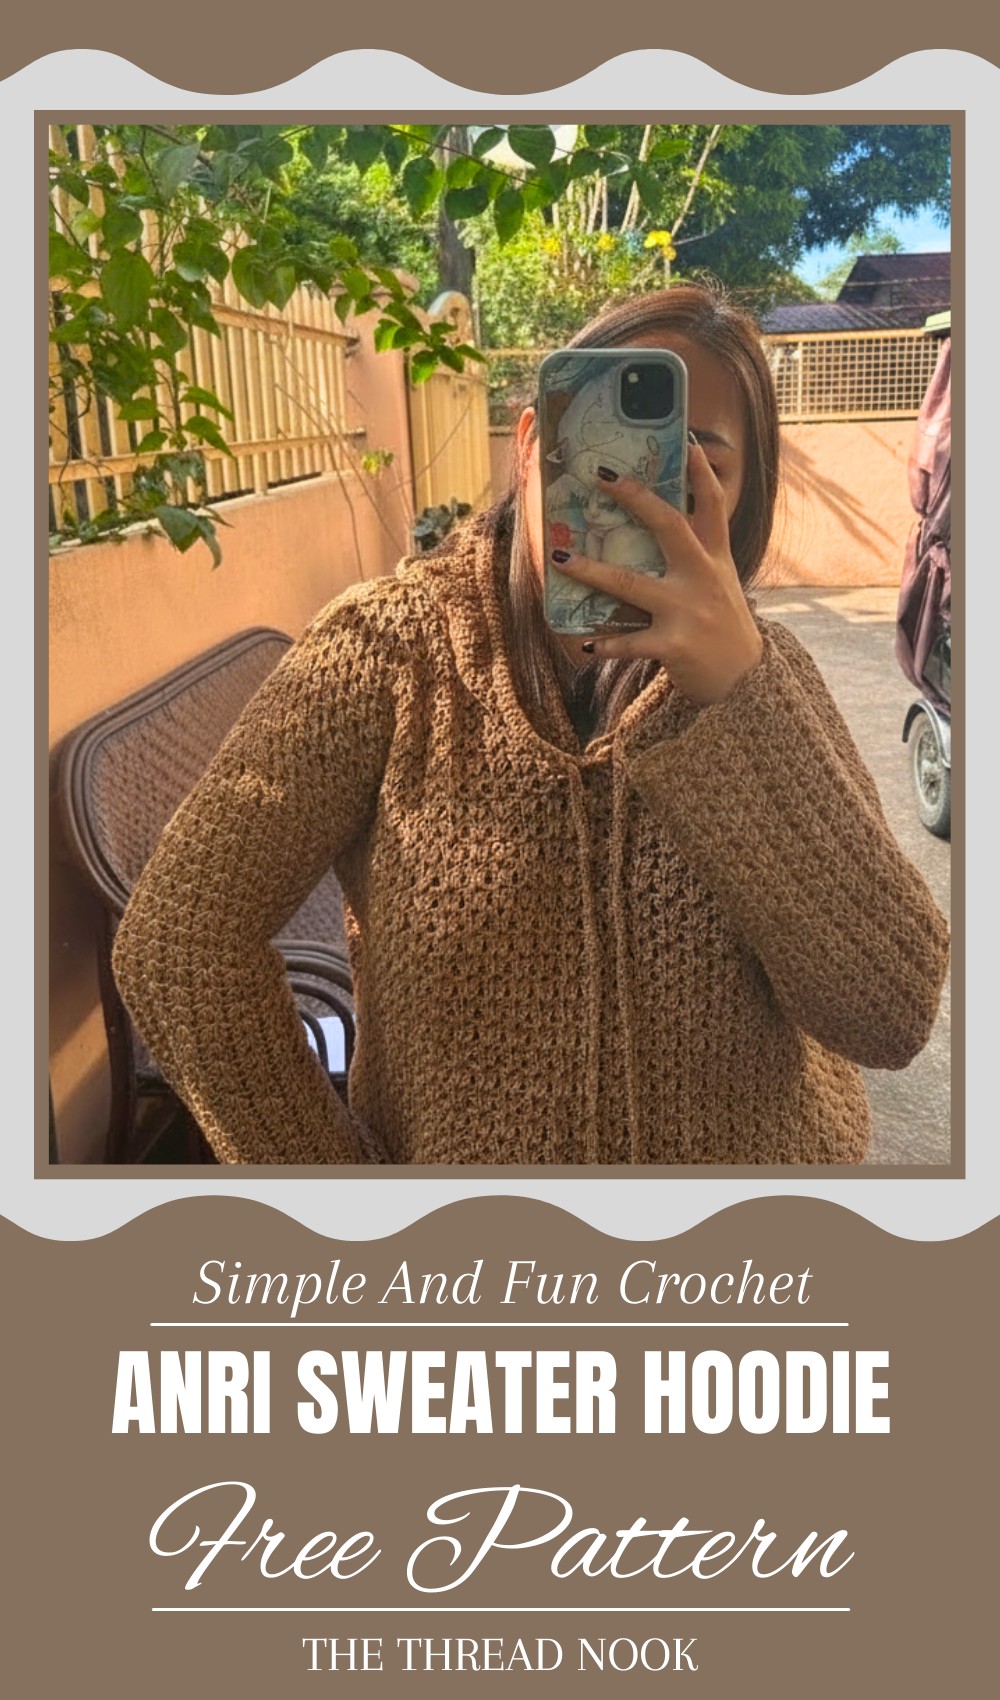
Crochet Anri Sweater Hoodie Pattern for Stylish Layers
Whether you’re heading out for a crisp morning walk or relaxing at home with a hot drink, this sweater is your perfect companion. Easy to wear with your favorite pants or leggings, it adds both warmth and style to every day. Feel the joy of wearing something both comfortable and beautiful—made just for those moments when you want to feel cared for and confident.

Crochet Enry Sweater Pattern
Materials Needed:
- Sport weight yarn (e.g., Crochet by Ces 12 Fly fine cotton yarn) — about 600-700 g for size Large to XL
- Crochet hook 4 mm (and 3.5 mm for drawstring)
- Pair scissors
- Stitch markers
- Tape measure or ruler
Special Features:
- V-stitch pattern for beautiful texture
- Convenient armhole and sleeve shaping with decreases
- Hood construction with overlapping V-stitch shaping
- Elegant edging and drawstring hood cord
Difficulty Level:
Intermediate — requires knowledge of double crochet, chain stitches, working in back loops, and shaping with decreases.
Step-by-Step Pattern
Step 1: Start Foundation Chain
- Begin with a slip stitch to join your yarn.
- Chain the length for Measurement A (Bust circumference ÷ 2). The number of chains must be a multiple of 3.
- Example: For 38” bust, chain 96 (or your size’s appropriate number).
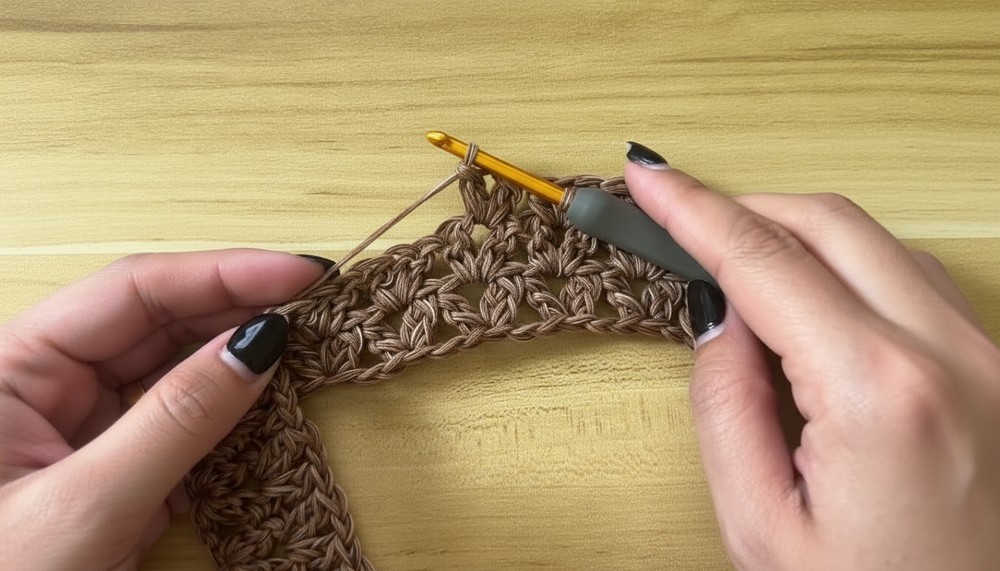
Step 2: Row 1 – Begin V-Stitch Pattern
- Skip 5 chains, then on the 6th chain insert your hook using the back loop only.
- Make a V-stitch (2 double crochet together with chain 1 in between) in this stitch’s back loop:
- Yarn over, insert hook, pull up a loop, yarn over, pull through 2 loops, yarn over, insert again in the same back loop, yarn over, pull through 2 loops, yarn over, pull through all 3 loops.
- Chain 1, repeat the V-stitch in the same back loop.
- Skip 2 chains, repeat V-stitch in the next chain (back loop only).
- Continue the pattern until you have 3 stitches left.
- Skip 2, double crochet in last chain (back loop).
Step 3: Row 2 – V-Stitch in Chain Spaces
- Chain 3 (counts as first double crochet), turn work.
- Make a V-stitch in each chain-1 space from previous row.
- End with one double crochet on top of the beginning chain 3.
Step 4: Repeat Row 2
- Continue repeating Row 2 for the number of rows indicated for your size (displayed on screen or adjusted to desired length).
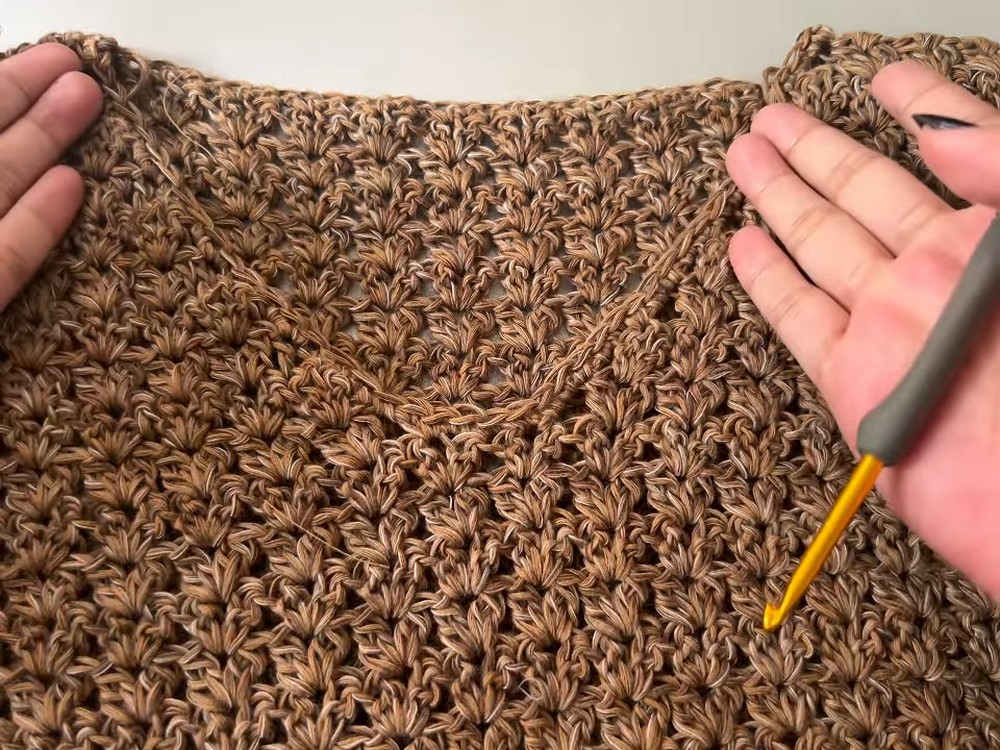
Step 5: Find Centre and Start Decreases
- Count V-stitches to find the middle and place a stitch marker.
- Continue pattern until 2 V-stitches remain.
- On the second last, make one V-stitch; on the last, make one double crochet (no chain).
Step 6: Decrease & Non-Decrease Rows
- Alternate between a decrease row (skip 3 stitches at the end, crochet last double crochet) and a non-decrease row (regular pattern).
- Continue repeating these two rows until you complete number of decrease rows.
Step 7: Finish Front Panel
- End with the non-decrease row.
- Cut yarn and finish off.
Step 8: Make Back Panel
- Chain the same length as front panel foundation chain (Measurement A).
- Work straight V-stitch rows without decreases for a rectangular panel matching front’s row count.
- Add single crochet edging around the rectangle’s border.
Step 9: Sew Front and Back Panels
- Lay panels flat with right sides facing up (back panel inside up).
- Match edges and armhole measurements using stitch markers.
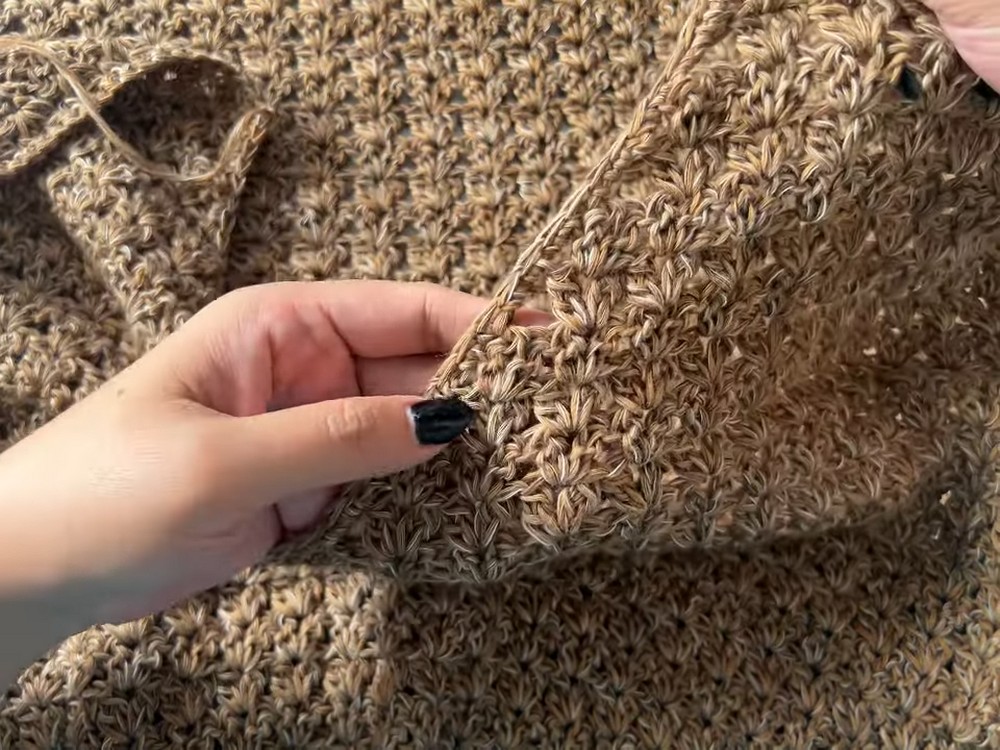
- Sew together using invisible stitch method along shoulders and sides, leaving armholes open.
Step 10: Sleeve Construction
- Attach yarn to bottom of armhole with hook.
- Chain 3 (counts as first double crochet) then skip 2 stitches and make V-stitch in next stitch around the armhole.
- Repeat pattern around armhole, slip stitch to join.
- Repeat rounds until sleeve reaches desired length (30 rows = 16.5 inches approx.).
Step 11: Sleeve Edging
- For last row, chain 3, make 5 double crochets in chain spaces alternating with single crochet in next space.
- Slip stitch into chain 3 at beginning to finish row.
- Cut yarn and finish off.
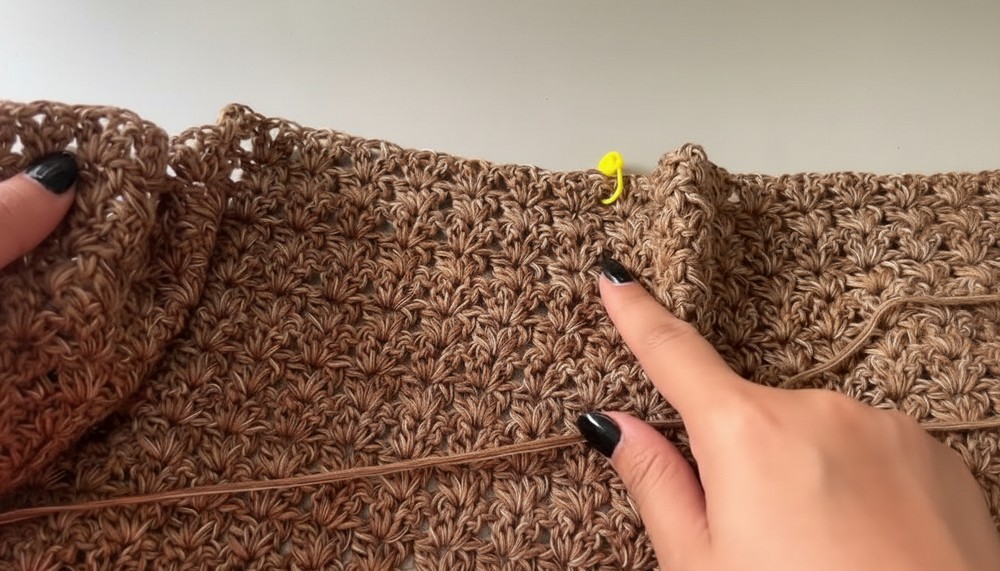
Step 12: Hood Panel
- Find center front of neckline.
- Attach yarn to right side using back loop only for all stitches.
- Chain 3, skip 1, make V-stitch in next, only through the back loop.
- Repeat around neckline, slip stitch to join.
- Next row: chain 2, decrease in first stitch, continue V-stitch pattern skipping 1, double crochet in third stitch, and repeat till end. Chain 2 to turn.
- Continue repeating decreases on designated rows to shape hood until it reaches size for your head.
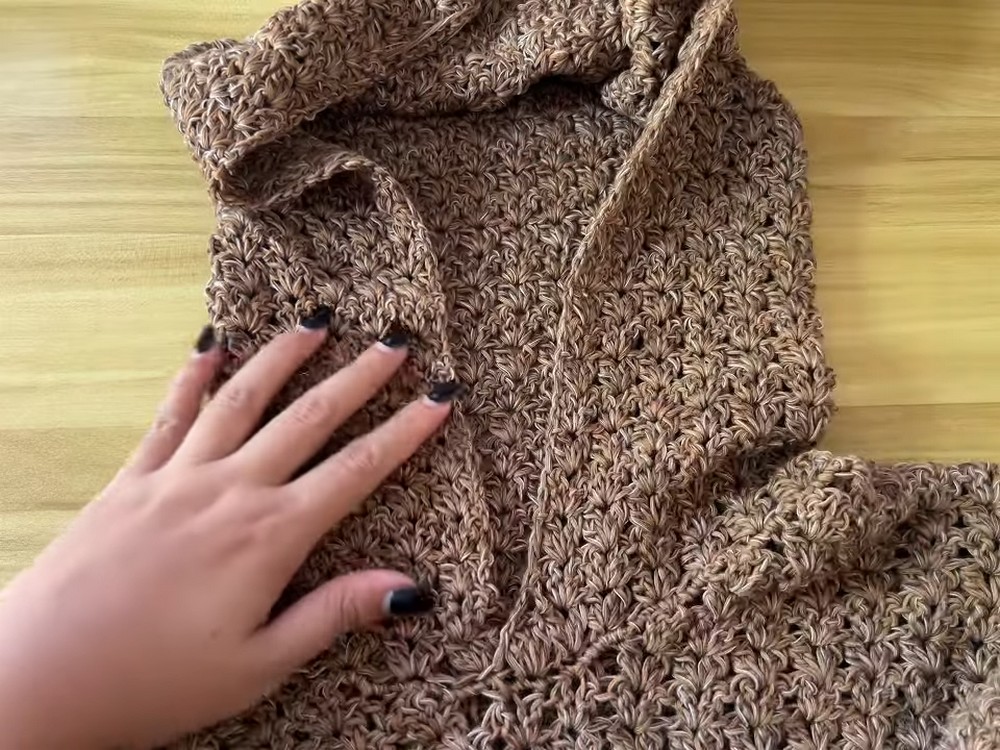
Step 13: Sew Hood and Edging
- Fold hood right sides together and sew along top edge for tip of hood.
- Single crochet around edge of hood.
- Attach drawstring (Romanian cord or preferred cord) by crocheting around hood opening and creating casing for cord insertion.
Step 14: Drawstring Attachment
- Chain 6, single crochet 5 stitches skipping each chain.
- Slip stitch to create a loop, turn, and single crochet back across.
- Repeat rows to desired length.
- Attach cord using a yarn needle or crochet hook through the hood casing.
Tutor’s Suggestions:
- Adjust chain count and row numbers to fit your measurements perfectly for a custom fit.
- Use stitch markers liberally to keep track of decreases, centers, and pattern repeats.
- Blocking after finishing will help even out stitches and shape the garment nicely.
- Keep tension consistent especially when working back loops only for neat edges.
Uses of this Sweater:
- Casual everyday wear with a unique handmade touch
- Layering piece for mild to cool weather
- Great gift idea for crochet lovers or beginners looking to advance skills
Final Tip:
To avoid frustration with decreases and shaping, always measure your work against your body or sample swatch often! Adjust rows and stitches before assembling panels for the best fit.
Conclusion:
The Enry Sweater crochet pattern combines textured V-stitch work with clever shaping for a cozy and stylish garment. This step-by-step guide ensures you can confidently create your own sweater with hood—perfect for anyone wanting to level up their crochet and achieve a custom, wearable piece.
Leave a Reply