
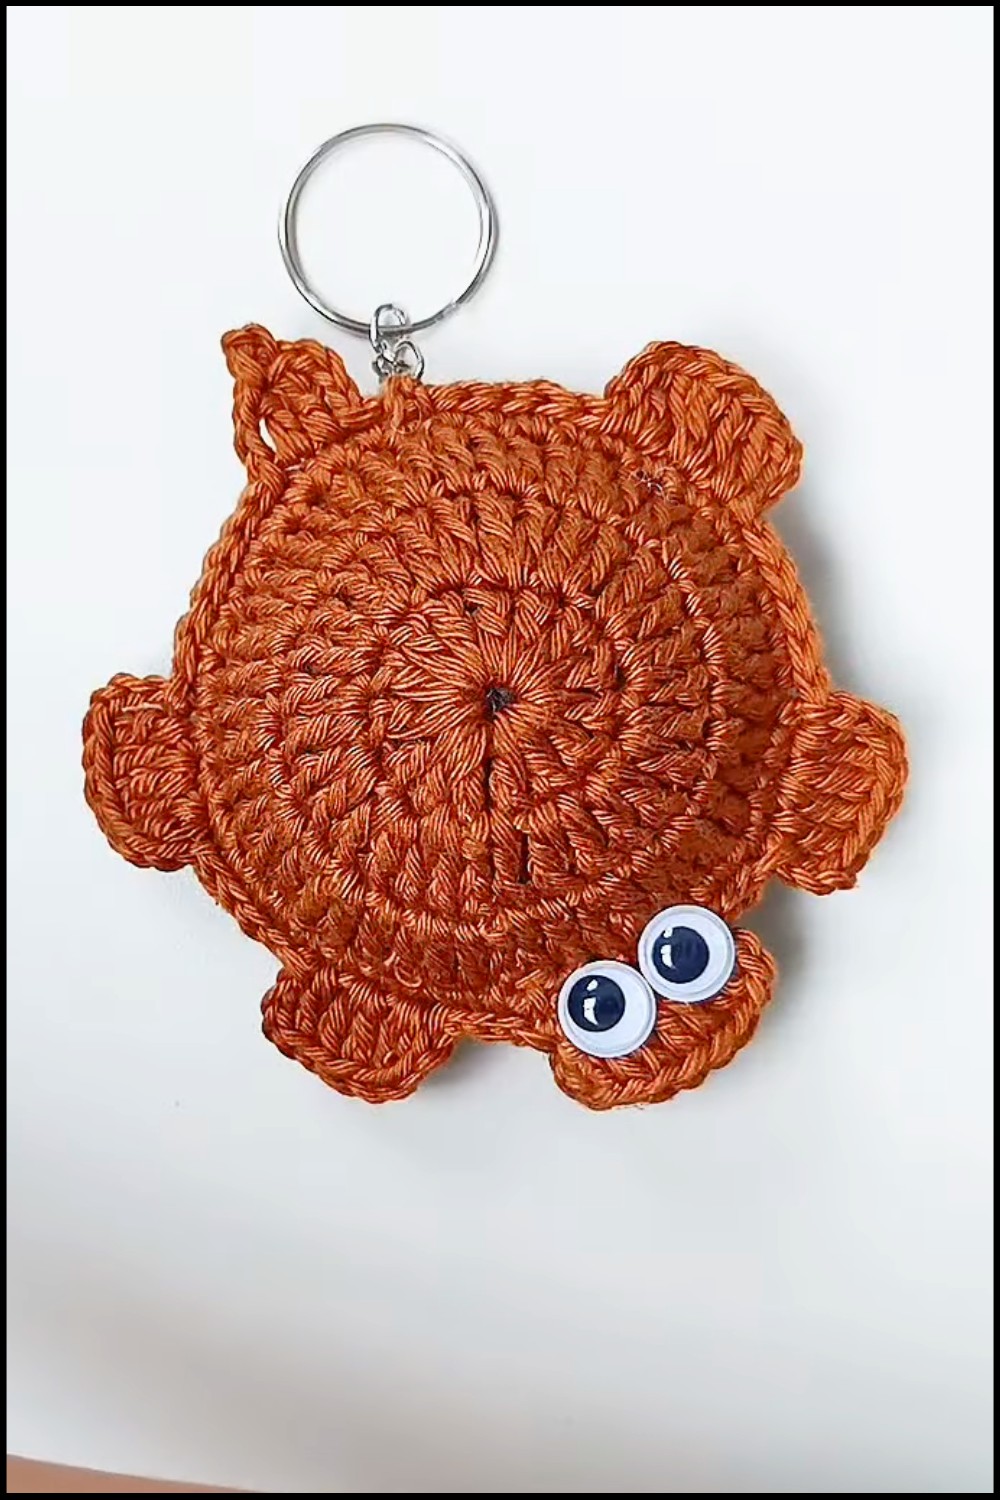
Personalize your keys with this Crochet Turtle Keychain Pattern perfect for a cute ocean friend that gives a playful touch to your style.

A small sea friend made from soft thread brings a bright smile to anyone who sees it. This little toy has a round shell and a sweet face that looks like it is swimming through the air. Making one is a joy because you can use any color you like, from ocean blue to sunny yellow. This Crochet Turtle Keychain pattern helps you build a tiny, sturdy companion that fits right in your hand.
Mini Crochet Turtle Keychain Pattern Small Size Big Ocean Vibes
You can hang this cute animal on your bag to show off your hard work or use it to keep your keys safe and easy to find. It is a wonderful gift for a child because it is soft and fun to play with. Each tiny stitch builds a shell that feels bumpy and interesting to touch. Putting one on a zipper makes a boring bag look special and full of life. It is a lovely way to share a bit of handmade happiness with every person you meet.

Materials List
- Yarn:
- Charme yarn (cotton-based yarn preferred for stability).
- Alternative yarns: Dune, silky thread, or any cotton-based yarn.
- Hook: 2mm crochet hook (you can also use 2.5mm for larger turtles).
- Optional Items:
- Handcrafted eyes (can be purchased at craft stores).
- Silicone glue (recommended), or hot glue for attaching the eyes.
- Keychain ring (optional).
- Magnet (optional, for fridge decor).
- Other Tools:
- Tapestry needle (for sewing assembly and weaving ends).
- Scissors.
- Polyester stuffing (light stuffing recommended).
Key Abbreviations
- ch: Chain
- sc: Single Crochet
- dc: Double Crochet
- sl st: Slip Stitch
- rep: Repeat
- st: Stitch
Special Notes
- When stuffing the turtle, avoid overfilling to maintain softness.
- Use cotton yarn for durability if making toys or keychains.
- The body and shell are made separately and joined with single crochet stitches.
Pattern Instructions
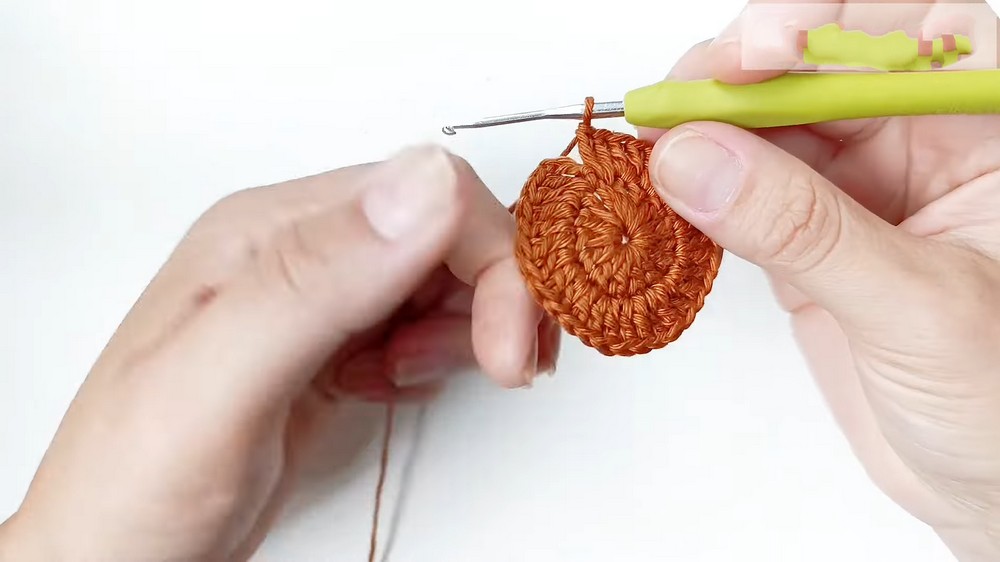
Step 1: Creating the Shell
- Foundation Ring:
- Make a slip knot.
- Ch 6, join into a ring with a sl st in the first chain.
- Round 1:
- Ch 3 (counts as the first dc).
- 15 dc into the ring.
- Join with a sl st to the top of the ch-3.
- You now have 15 dc.
- Round 2:
- Ch 3, dc into the same st (counts as 2 dc).
- Work 2 dc into each st around (increase in every stitch).
- You should have 30 dc by the end of the round.
- Join with a sl st to the top of the ch-3.
- Round 3:
- Ch 3, dc into the same st.
- Next st: Work 1 dc.
- Next st: Work 2 dc into the same st.
- Alternate between 1 dc and 2 dc around the round.
- You now have 45 dc.
- Join with a sl st to the top of the ch-3.
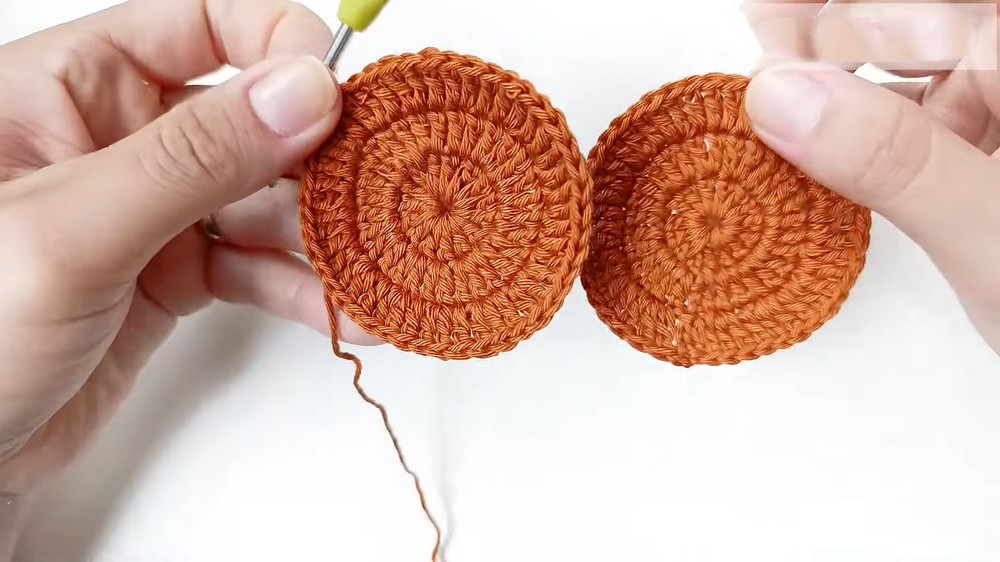
- Make 2 Shell Pieces:
- Repeat Rounds 1-3 for a second identical shell piece. You will join these later as part of the turtle’s body.
Step 2: Assembling the Body
- Joining the Shell Pieces:
- Place the wrong sides of both shell pieces together.
- Using a tapestry needle or crochet hook, start joining the edges with sc.
- Insert the hook through both layers, pull yarn through, and complete a sc.
- Continue this process until you have joined most of the edge.
- Stuffing:
- Leave a small opening before finishing the edge join.
- Insert appropriate stuffing into the shell. Ensure it is firm but flexible.
- Finish the edge completely with sc.

Step 3: Head
- Foundation Head:
- Ch 3, join into a ring with a sl st.
- Ch 3 (counts as the first dc).
- Work 2 dc into the same st, and then work 2 dc into each st around.
- You should have 8 dc.
- Finish with 2 ch, and close with a sl st.
- Attach Head to Shell:
- Position the small head at one edge of the shell, ensuring it faces forward.
- Sew securely using the tapestry needle to prevent it from falling off.

Step 4: Legs
- Each Leg:
- Ch 3, begin working 2 dc into each base st (total: 6 dc for one leg).
- At the end of the stitches, ch 2, and finish with a sl st.
- Attach each leg evenly around the turtle’s body at four points (front, back, left, right).

Step 5: Tail
- Foundation Tail:
- Ch 3, work 2 dc.
- Ch 2, close with a sl st to the base.
- Attach the tail to the rear of the turtle’s shell using the tapestry needle.

Step 6: Details
- Eyes:
- Position handcrafted eyes on the turtle’s head. Use silicone glue to attach the eyes securely.
- Let the glue dry completely.
- Keychain Assembly (Optional):
- Use a tapestry needle to sew the keychain ring securely to the shell’s top or tail area.


Conclusion
Congratulations! You’ve successfully created a crochet mini turtle. This adorable project is versatile in use—perfect as a keychain, party favor, fridge magnet, or small decorative toy. Customize colors for personal flair or themed designs.
Pattern Corrections
- Ensure proper stitch counts for the shell in each round to avoid uneven shaping.
- Use stitch markers to identify head and leg placement areas for symmetry.
Tips
- Customization: Use contrasting thread colors for the legs, tail, or head to add personality to your turtle.
- Durability: For keychains, sew parts tightly using cotton yarn to avoid wear and tear.
- Eyes: If handcrafted eyes aren’t available, embroider eyes with black or white yarn for a classic touch.
Leave a Reply