
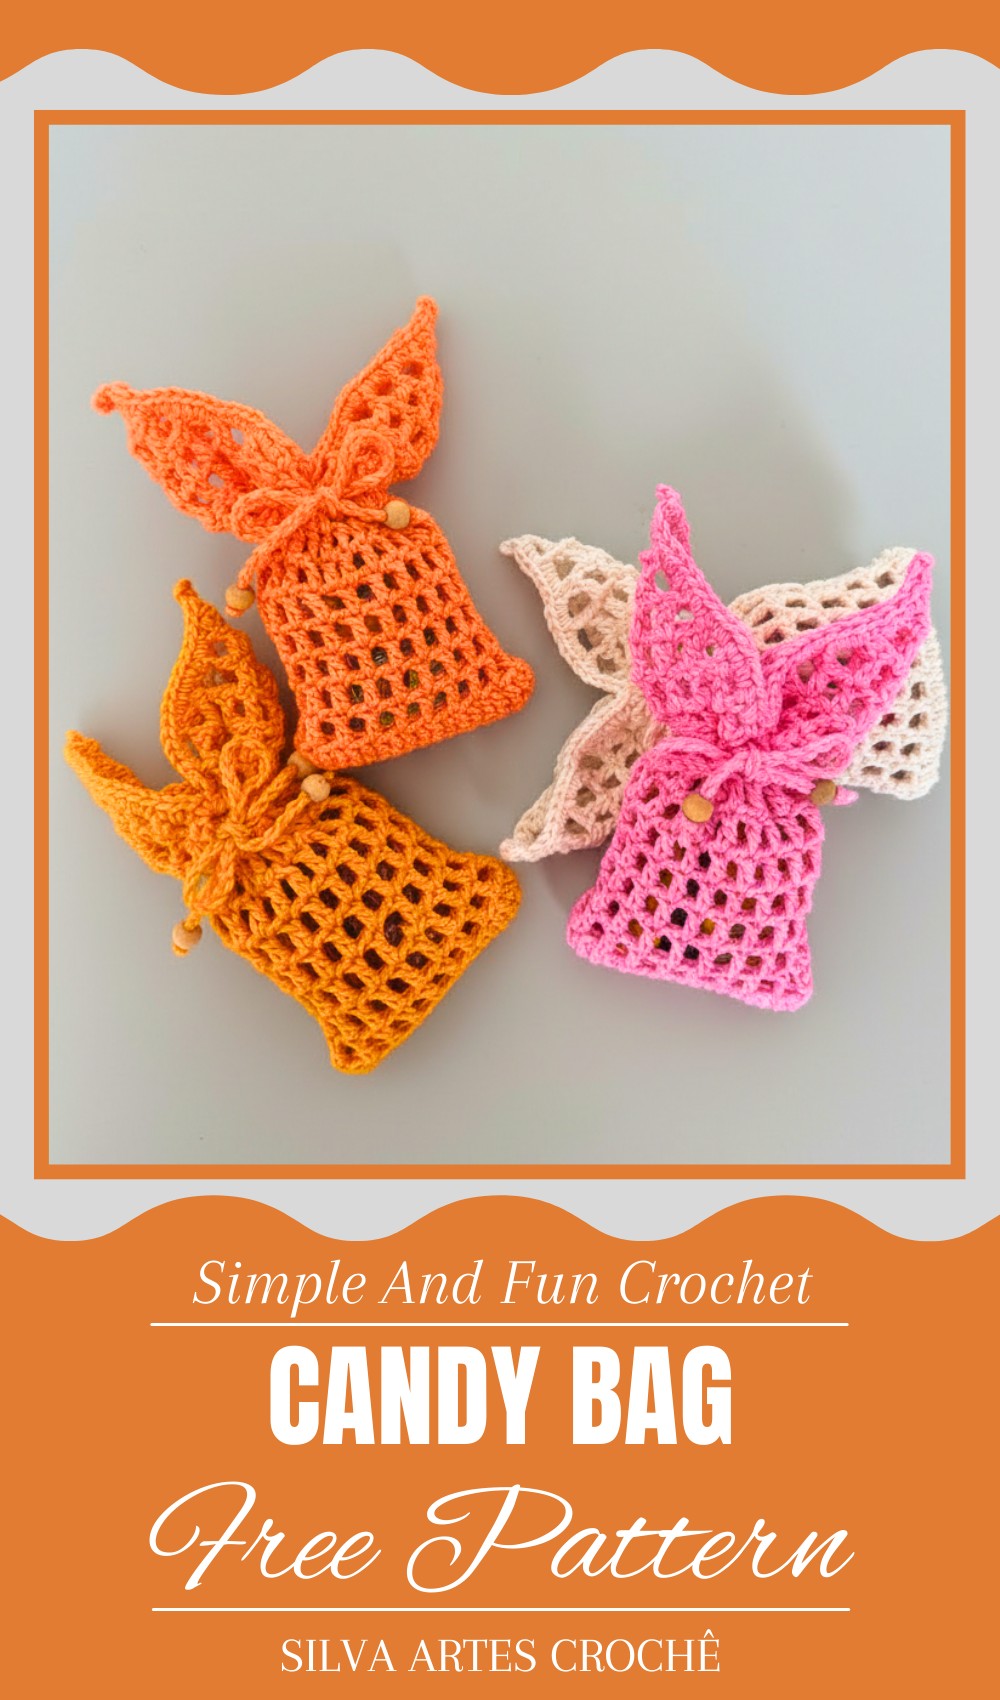
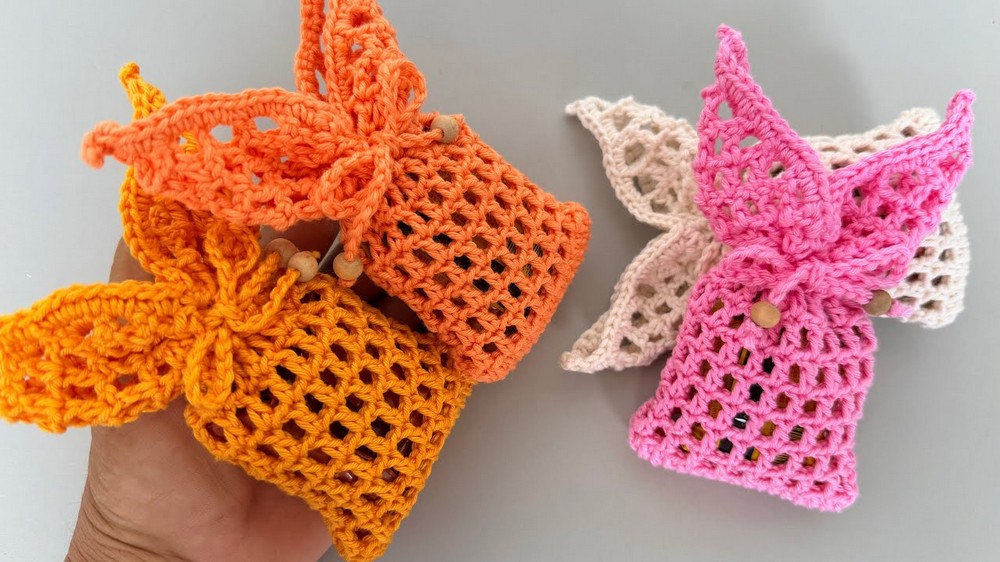
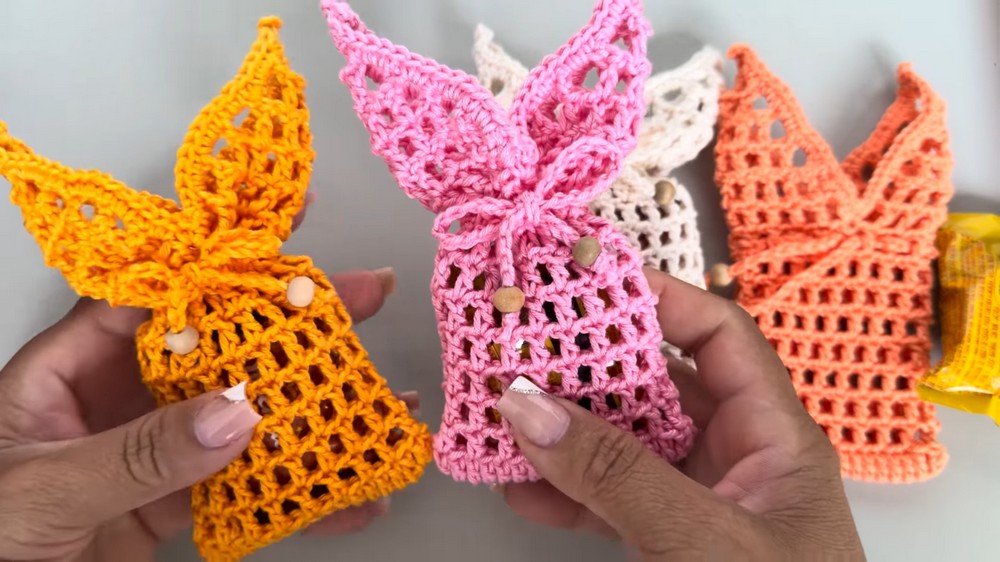
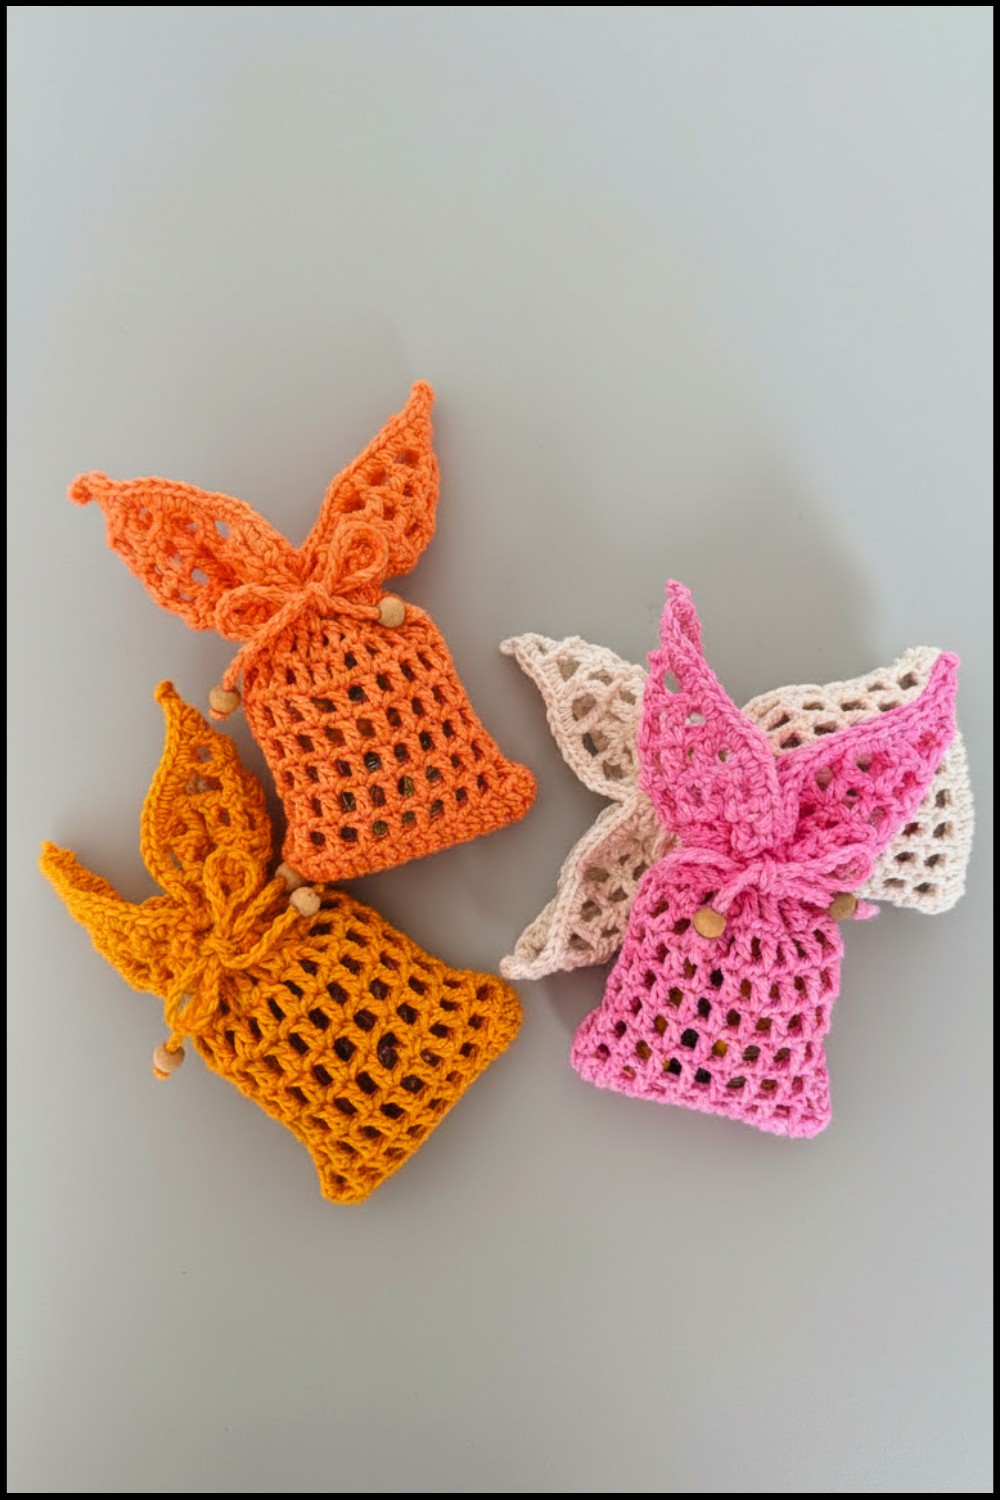
Perfectly suited for special moments this crochet candy bag pattern offers functionality for storing treats or gifting with ease and style.
A small buzzing marketplace had a stall that stood out with its display of colorful, unique treasures. Among them was a crochet candy bag, designed with intricate patterns and great attention to detail. This bag wasn’t just a container—it was a piece of art, meant to bring elegance and a thoughtful touch to any occasion. Its soft texture, vibrant colors, and timeless design reflected the maker’s exceptional skill.
Cute Crochet Candy Bag Pattern to Match Your Party Theme
It was reusable, eco-friendly, and extremely versatile. Perfect for holding candies or treats during weddings, birthdays, or festive celebrations, it also worked beautifully as a small gift pouch, keepsake holder, or decorative piece. Its customizable style allowed it to suit any theme, adding a personal and charming touch to special moments. What made it truly special was its ability to combine practicality with beauty. This unique treasure wasn’t just useful—it was an expression of care, creativity, and elegance, adding joy to every moment it touched.
Materials List
- Yarn:
- Amigurumi yarn: Tex 492 or any lightweight 2 yarn
- Primary color of your choice for the body, and optional accent yarn for decorative details
- Crochet Hook: 2.5 mm (US Size)
- Scissors: For cutting thread ends
- Tapestry Needle: For weaving in ends
- Optional Enhancements: Small beads or pom-poms to add to the drawstring ends
Key Abbreviations
- Ch: Chain
- Sc: Single Crochet
- Dc: Double Crochet
- Sl st: Slip Stitch
- Rep: Repeat
- St(s): Stitch(es)
- Sk: Skip
- RS: Right Side
Special Notes
- The pattern uses US crochet terminology.
- Check your tension to ensure even stitches and crisp edges for the candy bag.
- This small project is perfect for colorful yarn scraps or small amounts of leftover yarn.
Step-by-Step Pattern
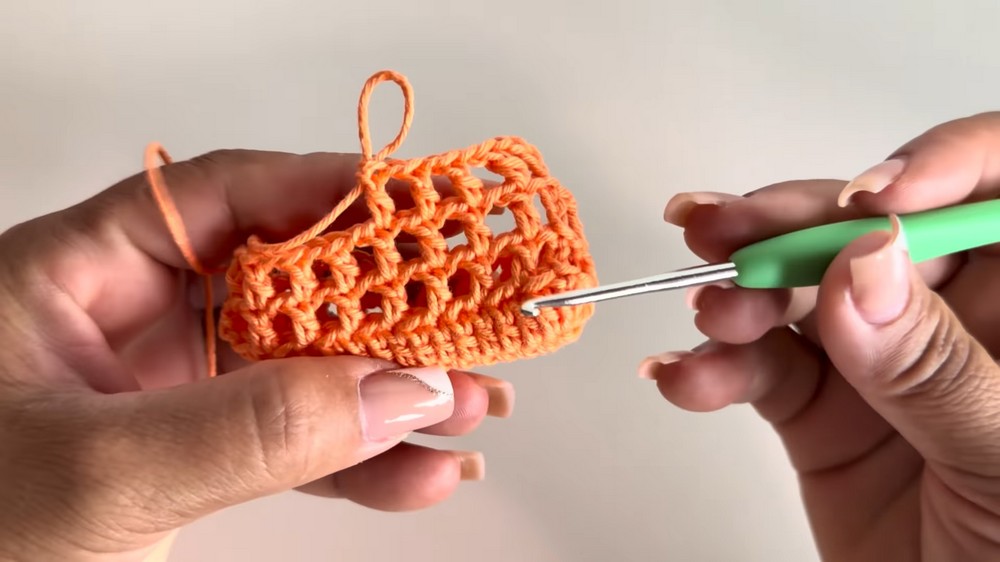
Step 1: Start the Candy Bag Base
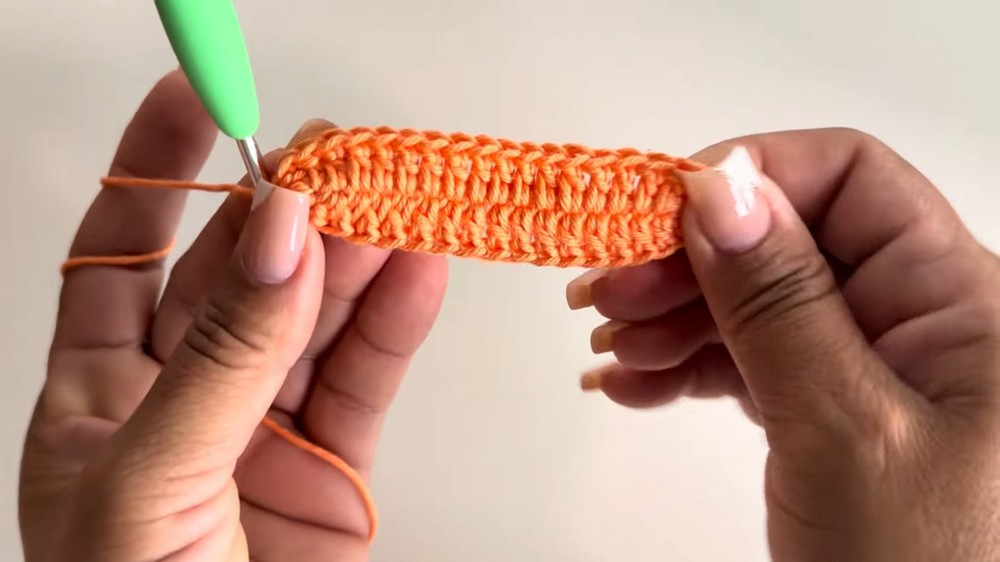
- Create a slip knot, then Ch 20 for the base.
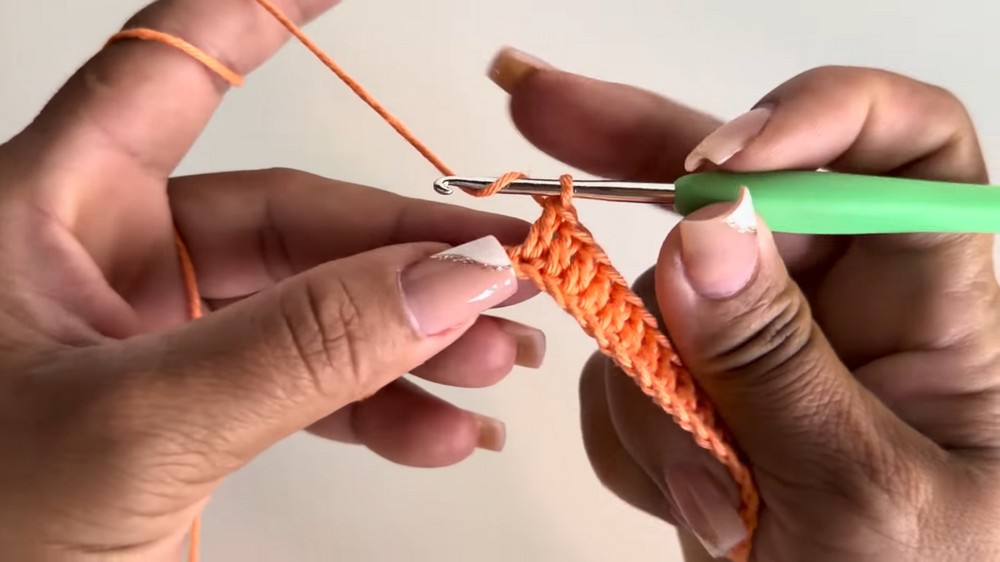
- Dc in the 5th Ch from hook to create the first Dc of the row.
- Work 1 Dc in each Ch across until you get to the last Ch.
- At the last Ch, work 3 Dc in the same stitch to create the rounded turn for the base of the bag.
- Continue working 1 Dc in each stitch along the opposite side of the chain foundation until you reach the starting Ch.
- When you reach the last Ch on this side, work 2 Dc in the last Ch to complete the turn.
- Join the round with a Sl st to the starting Dc.
Step 2: Create the First Row of Blocks
- Ch 4 (this counts as 1 Dc + 1 Ch).
- Sk 1 St, Dc in the next St.
- Ch 1, Sk 1 St, Dc in the next St.
- Continue this pattern: (Ch 1, Sk 1 St, Dc in next St) until you work all the way around to the start of the round.
- Finish the row by skipping the last stitch and joining with a Sl st to the 3rd Ch of the starting Ch-4.
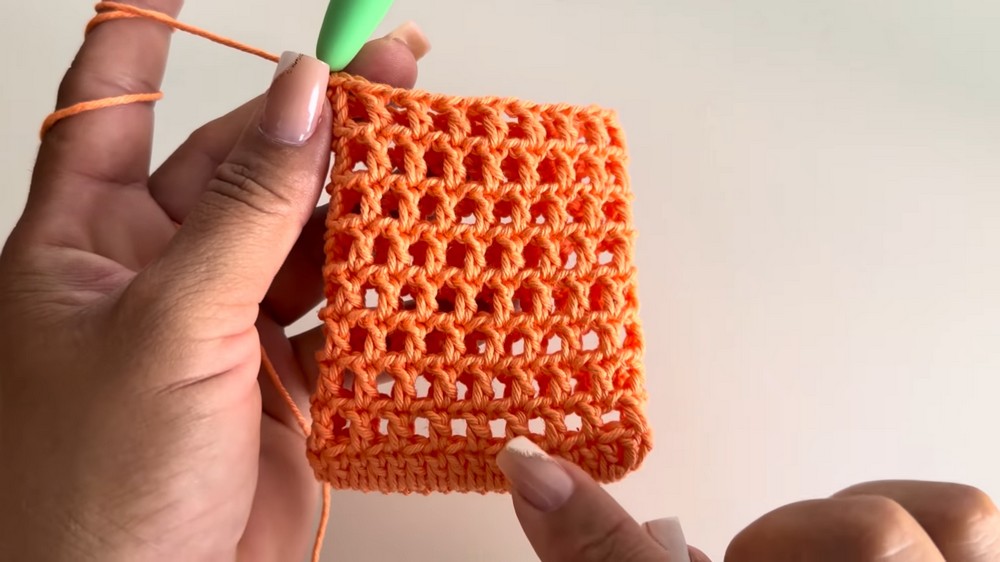
Step 3: Build the Bag with Block Rows
- For each new round, start with:
- Ch 4 (counts as 1 Dc + 1 Ch).
- Dc in the first open Dc of the row below.
- Continue the pattern: (Ch 1, Dc in every open Dc from the row below) all around.
- After completing the row, join with a Sl st to the 3rd chain of the starting Ch-4.
- Repeat this pattern until you have 8 total rows of blocks (or more, depending on your desired bag height).
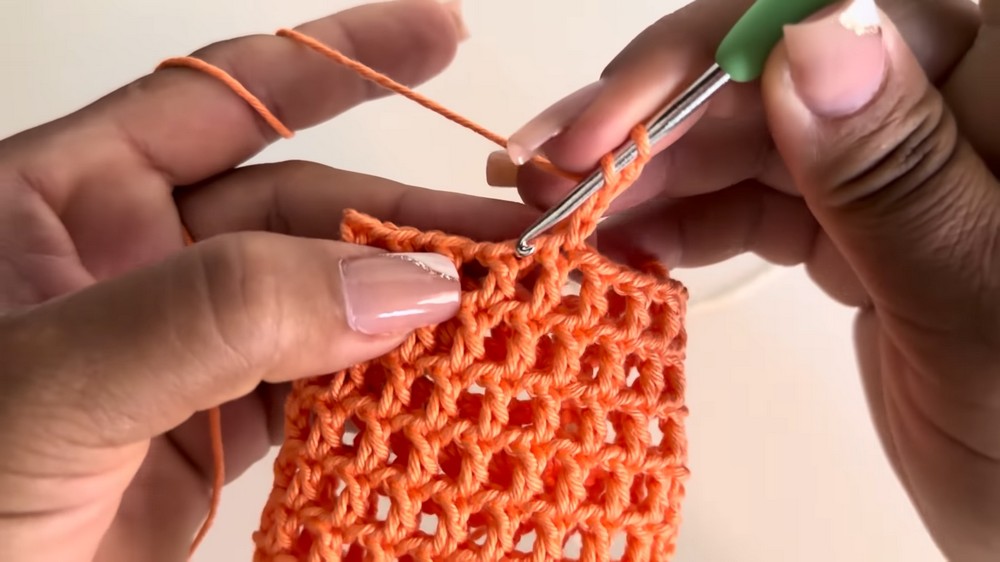
Step 4: Shaping the Bag Ears
- Begin creating the ears by marking the sides of the bag:
- Fold the bag flat, ensuring the bottom seam is aligned.
- Mark points on both sides of the fold with a stitch marker at the 5th Dc from the edge.
- Attach yarn to the first stitch (based on your marker):
- Ch 4, work 1 Dc in the next St.
- Ch 1, Dc in next St, repeated for 10 Dcs across, including the marked stitches.

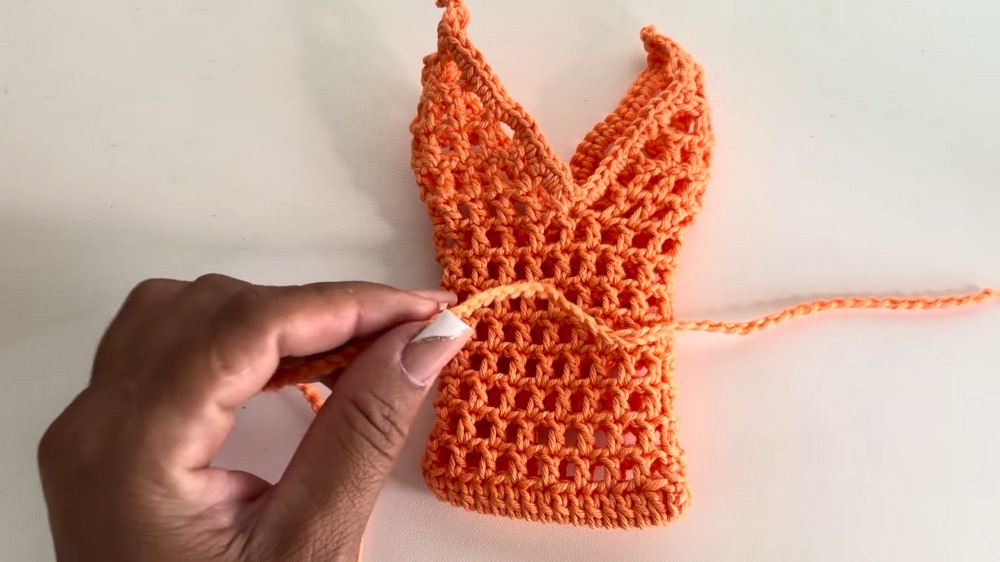
Step 5: Ear Rows
- To shape the ears, decrease the rows gradually:
- Row 1: Work 10 Dcs with Ch-1 separations.
- Row 2: Ch 3, turn.
- Skip the first St and begin Dc pattern across, decreasing by skipping 1 St at the start and at the end of the row.
- Rep these decreases on each row until only 3 Dcs remain at the top of the ear.
- Complete the row by fastening off the yarn.
- Repeat steps 4 and 5 for the other side of the bag to create the opposite ear.
Step 6: Finishing the Bag
- Attach yarn to the base of one ear to create a Sc edging for the entire bag.
- Work 2 Sc in each open space, and 1 Sc in each knot or edge stitch along the ears and sides of the bag.
- At the top points of the ears, add a picot for decoration:
- Sc, Ch 3, Sl st into the first Ch to make a small point.
- Work all the way around the bag, including both ears, ending with a Sl st at the start of the round.
Step 7: Add the Drawstring
- Make a simple chain cord of 60 chains (or adjust to your preference).
- Weave the drawstring cord through Row 7 of the bag (2 rows from the top) by alternating under and over the Dc stitches of the blocks.
- Tighten and tie a bow to secure the bag once filled.
- Optional: Attach small beads, pom-poms, or buttons to the ends of the drawstring cord for extra decoration.
Conclusion
This crochet candy bag is quick, charming, and versatile! The addition of “ears” gives it a playful touch—perfect for gifting during Easter or any festive event. You can make it more elegant or whimsical depending on your choice of yarn, colors, and finishing touches.
Pattern Correction
- Ensure your Dc stitches are evenly spaced to avoid leaning or slanted rows.
- Stitch markers are essential in this project for symmetrical placement of the ears and to maintain structure.
Tips
- Customization: Experiment with color changes after every 2 or 3 rows for a striped effect.
- Blocking: For a crisp finish, lightly block the bag to enhance its structure.
- Yarn Choice: Use sturdy, non-stretchy yarn to avoid drooping when the bag is filled.
- Quick Fix for Errors: If alignment is off, adjust the marked fifth stitches on each side to keep both ears symmetrical.
Leave a Reply