
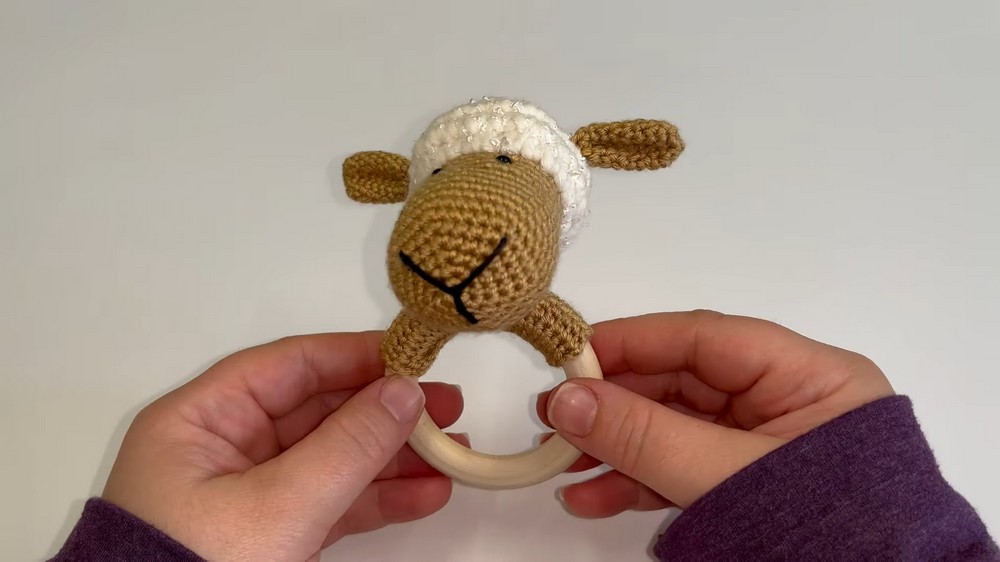
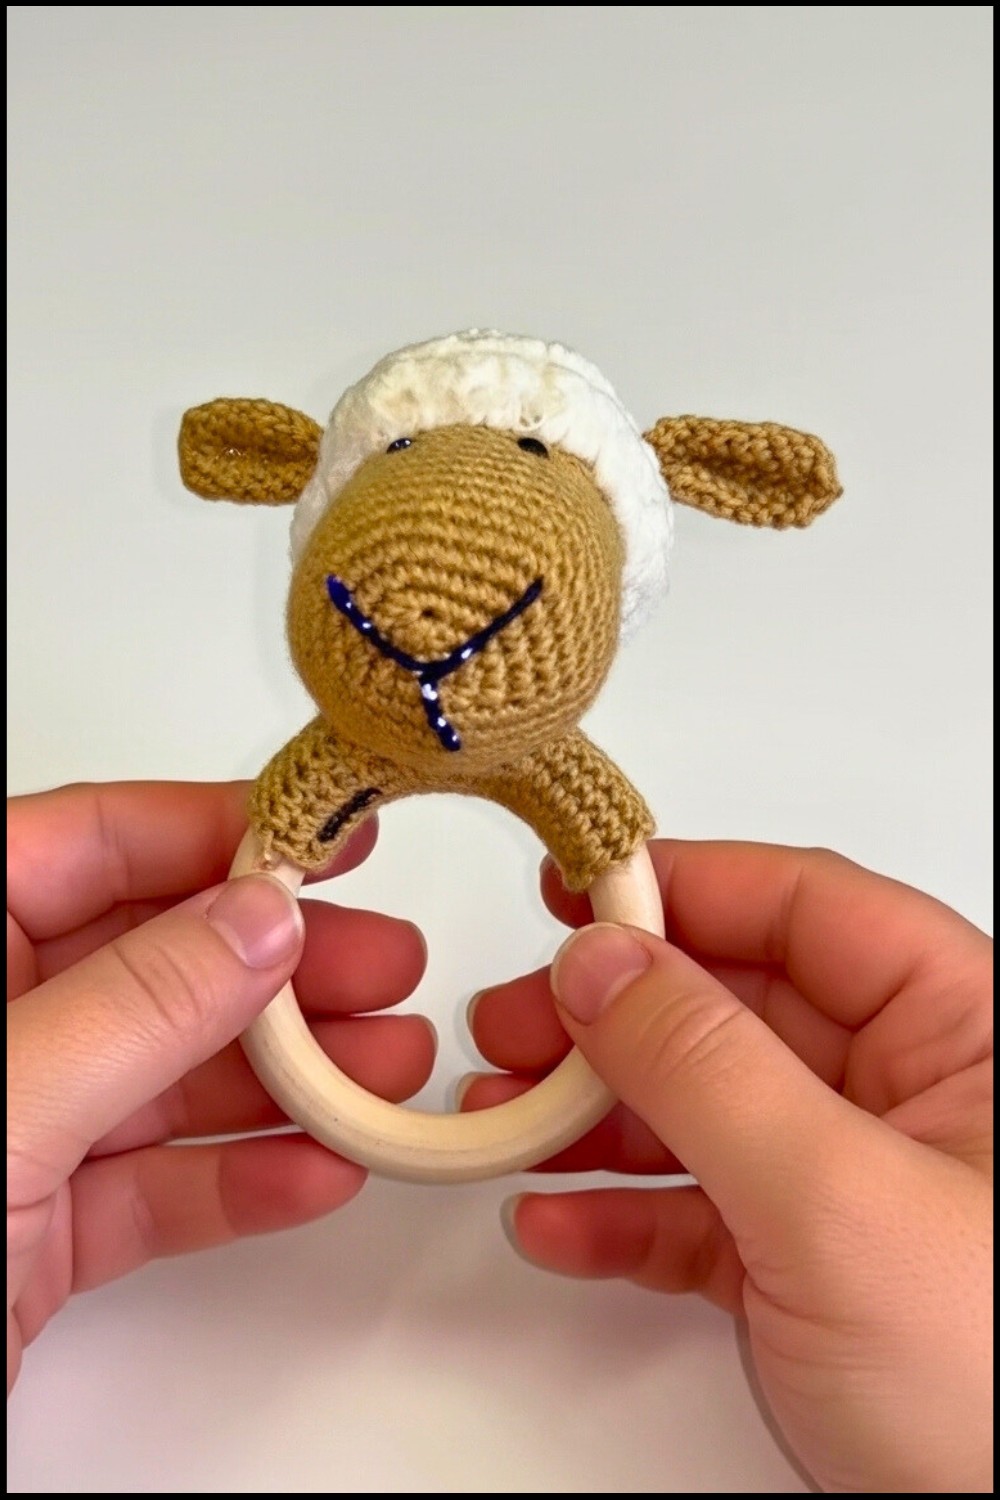
Bring joy to your baby’s teething moments with this crochet sheep teether pattern perfect for adding charm and comfort to their everyday.

This beautiful and meaningful creation is perfect for bringing comfort and joy to your little one. Its soft texture and adorable sheep shape make it a charming addition to any nursery or baby gift set. The crochet sheep teether pattern is ideal for soothing teething babies, offering gentle relief while keeping them entertained with its playful design. Lightweight and easy to hold, it’s perfect for tiny hands to explore during playtime, on-the-go moments, or quiet cuddle times.
Beginner-Friendly Crochet Sheep Teether Pattern for Loving Moms
Beyond its functionality, it’s easy to create and becomes a delightful keepsake that holds precious memories for years to come. Whether used daily or crafted as a thoughtful handmade gift, it’s a wonderful way to pair comfort with cuteness. Simple yet heartwarming, it’s the perfect companion for both babies and parents, combining soothing relief with a touch of creativity.
Materials List
- Yarn:
- Cotton yarn (small amounts).
- Baby yarn (soft and safe for babies).
- Hooks:
- 2.5 mm crochet hook.
- 4.5 mm crochet hook (or 4 mm for baby yarn).
- Extras:
- Poly-Fil (stuffing material).
- Tapestry needle.
- Stitch markers.
- Safety eyes.
- Teething ring (70 mm diameter).
- Rubber rattle insert (optional).

Key Abbreviations (US Terminology)
- ch: chain
- sc: single crochet
- inc: increase (2 single crochet in one stitch)
- dec: decrease (single crochet two stitches together)
- sl st: slip stitch
- st: stitch
Special Notes
- Working in Rounds: For this project, continuous rounds are used to form the sheep’s head and ears. Avoid joining rounds unless specified.
- Safety Eyes: Place the safety eyes between specific rounds, ensuring they are secure and baby-safe.
- Customization: Adjust the stuffing amount to your preference for firmness and shake sound.
Finished Measurements
- Diameter of the sheep’s head: approximately 7 cm.
- Teething ring diameter: 7 cm.
Pattern Instructions
Head
- Magic Circle
- Make a magic circle.
- Ch 1, then work 6 sc inside the magic circle.
- Round 2: Increase
- Work 2 sc in each stitch around (12 sc).
- Round 3:
- Sc in the first stitch, 2 sc in the next stitch.
- Repeat (18 sc).
- Round 4:
- Sc in the first two stitches, 2 sc in the third stitch.
- Repeat (24 sc).
- Round 5:
- Sc in the first three stitches**, 2 sc in the fourth stitch.
- Repeat (30 sc).
- Round 6:
- Sc in the first four stitches**, 2 sc in the fifth stitch.
- Repeat (36 sc).
- Rounds 7-12:
- Sc in each stitch around (36 sc per round).
- Round 13: Start decreasing
- Sc in the first three stitches, dec in the fourth stitch.
- Repeat (30 sc).
- Rounds 14-15:
- Sc in each stitch around (30 sc).
- Round 16:
- Sc in the first two stitches, dec in the third stitch.
- Repeat (24 sc).
- Insert Safety Eyes:
- Position eyes between Rounds 14 and 15, leaving 4 stitches between.
- Rounds 17-19:
- Sc in each stitch around (24 sc).
- Round 20:
- Sc, dec.
- Repeat (18 sc).
- Round 21:
- Dec around (6 sc).
- Stuff the Head: Add Poly-Fil stuffing.
- Finish:
- 6 sc decreases. Cut yarn, leaving a long tail. Sew to close.


Ears (Make 2)
- Magic Circle
- Make a magic circle.
- Ch 1, then work 6 sc inside the magic circle.
- Round 2:
- 2 sc in each stitch around (12 sc).
- Rounds 3-9:
- Sc in each stitch around (12 sc per round).
- Leave a long tail for sewing. Sew ears onto the head around the third row.


Muzzle
- Foundation Chain
- Ch 24.
- Row 1-9:
- Sc in second chain from hook, sc across (23 sc).
- Leave a long tail for sewing. Attach to the center of the head.

Assembly
- Sew the ears to the head.
- Attach the muzzle to the center of the head.
- Ensure all pieces are securely sewn and use the tapestry needle to weave in any loose ends.
Attaching to Teething Ring
- Chain 24:
- Start with a chain.
- Single Crochet Rows:
- Sc in the second chain from the hook, and continue sc rows for 9 rows.
- Wrap:
- Wrap around the teething ring and secure with sl st.
- Attach sheep head securely using a strong stitch yarn.


Conclusion
Your crochet sheep rattle with a teething ring is complete! This adorable baby toy is enhanced by the unique teething function, making it both practical and fun for little ones.
Pattern Corrections
- Make sure to keep a consistent stitch count, especially during increase and decrease rounds.
Tips
- Safety: Always ensure that the safety eyes are securely fastened, and all parts are sewn tightly to avoid a choking hazard.
- Stuffing Density: Adjust the Poly-Fil amount to control the firmness and sound of the rattle.
- Customization: Feel free to switch colors or add more details like bows, tiny buttons (ensuring they’re baby-safe).
Leave a Reply