
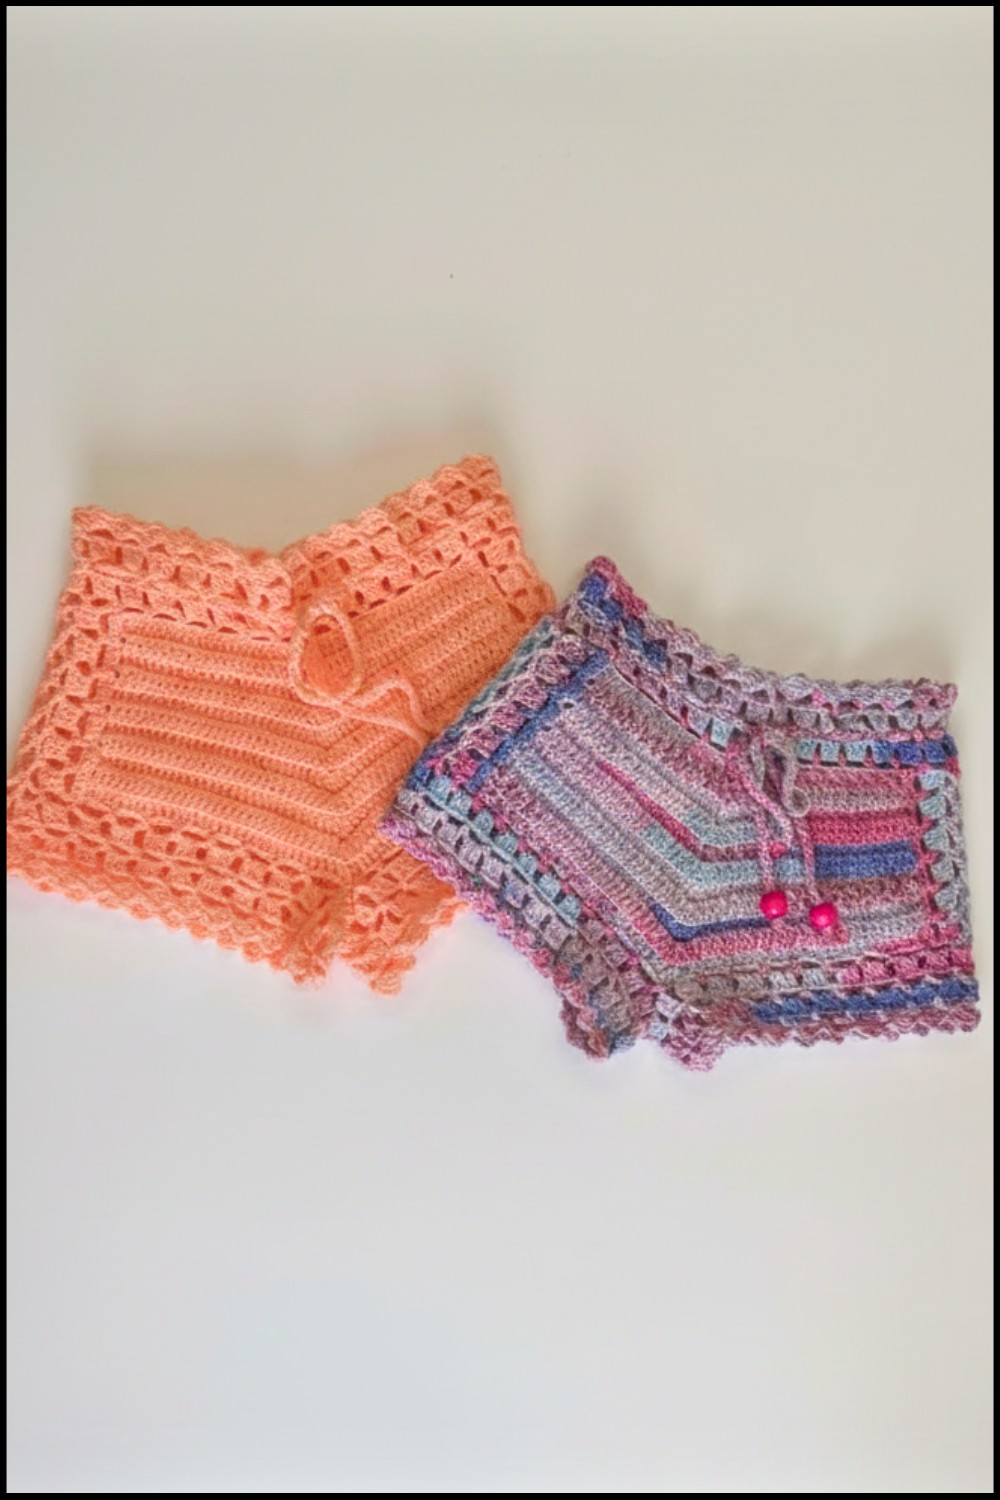
Breathe freshness into your wardrobe with this free crochet shorts pattern perfect for all skill levels and ideal for breezy summer days.
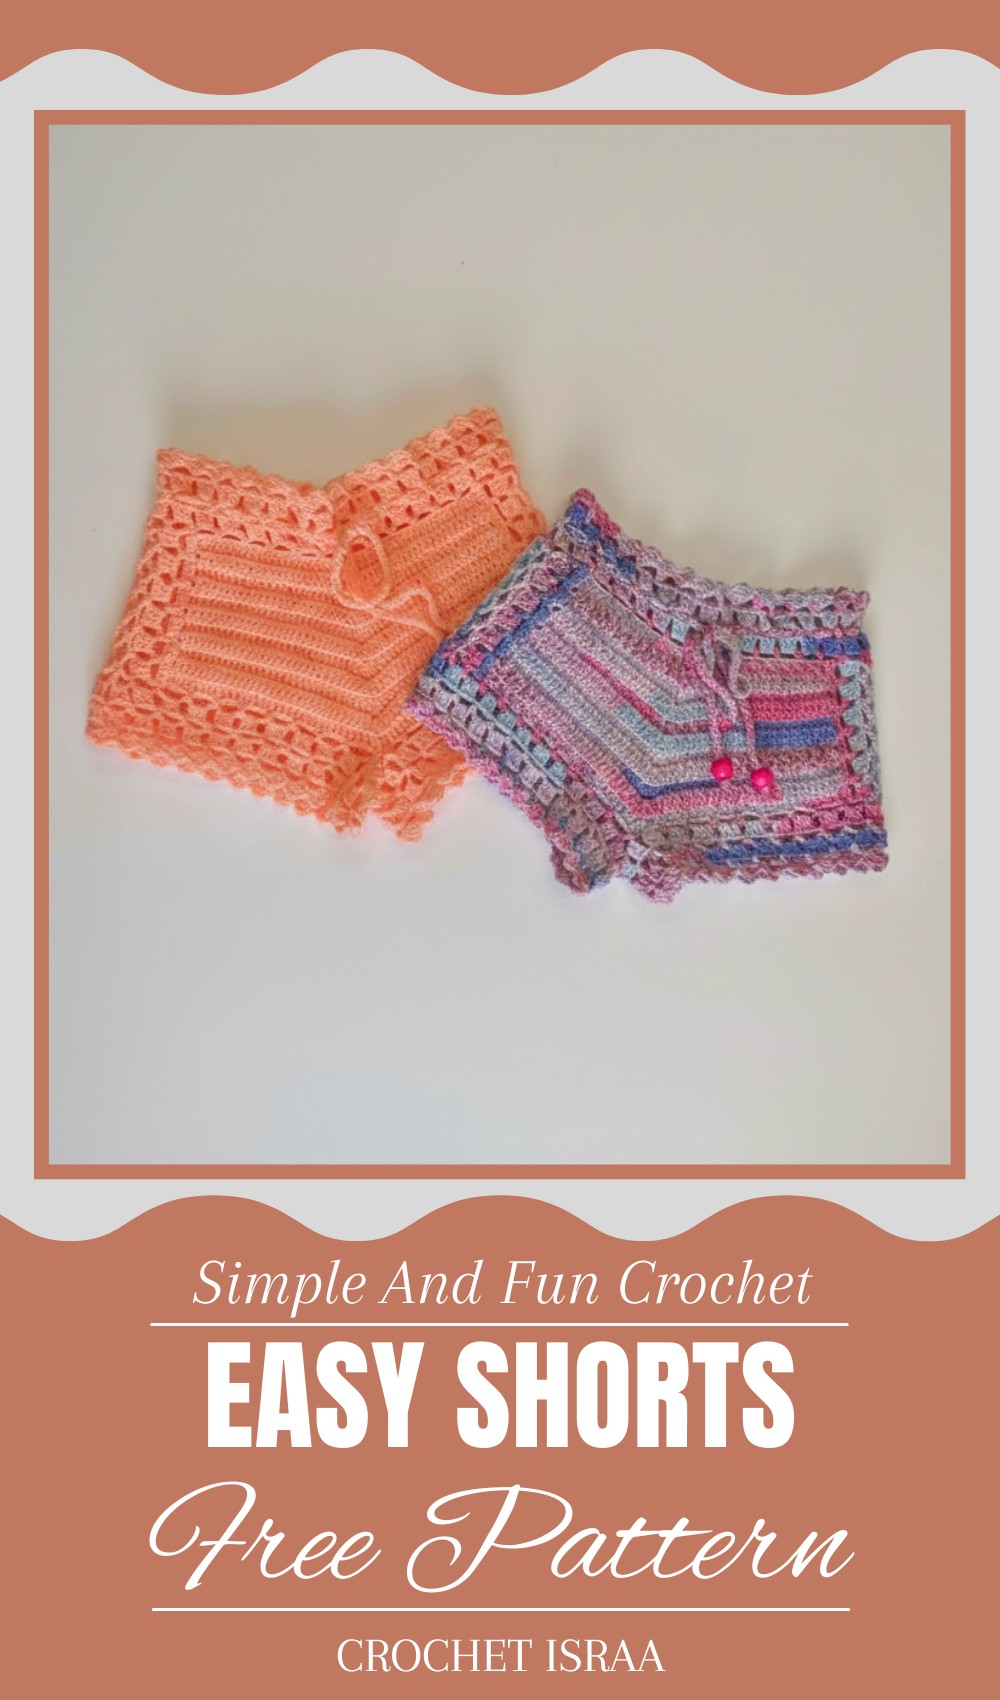
Soft and comfortable handmade shorts bring style and charm to any wardrobe with their unique and beautiful look. Using a Crochet Shorts pattern, you can create these cozy and stylish pieces that are perfect for summer fun and casual outings. The gentle yarn and neat stitches create a special design that stands out from ordinary clothes. Perfect for warm summer days, beach trips, relaxing at home, casual walks, or holiday outings, they are easy to wear and allow free movement.
Relaxed Crochet Shorts Pattern for Every Season
Pair them with simple tops, blouses, or tank shirts to create a fresh and trendy outfit. Light colors give a calm and cool feel, while bright shades add fun and energy, making them suitable for every mood and occasion. The handmade touch adds a special charm that store bought clothes cannot offer. These shorts bring comfort, style, and creative beauty together in one simple and adorable piece.

Materials List
- Hook Size: 2 mm for size 9-12 months
- For larger sizes:
- Size 2 years: 2.5 mm hook
- Size 3 years: 3 mm hook
- For larger sizes:
- Yarn Type: 100% cotton yarn (ensure it’s a size appropriate for the hook being used)
- Optional Materials:
- Stitch markers (to mark edges and center stitches)
- Measuring tape
- Scissors
- Tapestry needle (for weaving in ends)
Key Abbreviations (US Terminology)
- ch: Chain
- sc: Single crochet
- dc: Double crochet
- inc: Increase (2 sc in the same stitch)
- sl st: Slip stitch
- st: Stitch(es)
- bp: Back Loop Only
Special Notes
- The listed size measurements for 9-12 months shorts:
- Waist: 22 cm
- Hips: 27 cm
- Length: 17 cm (from waistline to hem).
- The back piece is slightly wider than the front piece to account for fit and comfort. Both pieces are 11 cm in length.
- Use stitch markers to mark the first stitch, last stitch, and the center stitch of each panel for easier reference while shaping.
Measurements for Larger Sizes
For larger sizes, adjust the hook size and foundation chain count as follows:
- Size 2 years: 2.5 mm hook
- Size 3 years: 3 mm hook
Pattern Instructions
Front Piece (9-12 Months)
- Foundation:
- Make a slip knot, and work 47 chains (17 cm).
- Add 3 chains for turning.
- Row 1:
- Starting from the 5th chain from the hook, work 1 dc.
- Continue working dc in each st across the row.
- Mark the first st, last st, and center st. The total count: 47 stitches.
- Row 2:
- Turn, and in the first st work 1 sc and ch 1.
- Work 1 dc in the back loop only of each st until the center marker.
- At the center marker, work 3 dc in the back loop. Mark the 2nd st of the 3 dc group to identify the new center.
- Continue working dc in the back loop only to the end of the row.
- Mark the first and last stitch for reference in the next row.
- Rows 3-11 (or until the length is 11 cm):
- Repeat Row 2 across all rows:
- Work 1 sc and ch 1 at the start.
- Work dc in the bp until the center marker.
- Work 3 dc in the bp at the center.
- Work dc in the bp to the end of the row.
- At the end of Row 11, cut the yarn.
- Repeat Row 2 across all rows:

Back Piece (9-12 Months)
- Foundation:
- Make a slip knot, and chain 53 stitches (21 cm).
- Add 3 chains for turning.
- Row 1:
- Starting from the 5th chain from the hook, work 1 dc.
- Continue working dc in each st across the row.
- Mark the first st, last st, and center st. The total count: 53 stitches.
- Repeat Rows 2-11:
- Repeat the steps from the Front Piece (Rows 2-11), using the same instructions for the center 3 dc increase technique.
- At the end of Row 11, cut the yarn.
Assembling Front and Back Pieces
- Lay the front and back pieces flat. The back piece will be wider than the front.
- Sew Side Seams:
- Sew one side seam completely.
- Begin Shaping for Legs:
- With the shorts flat, fold and mark the center of the front and back to create two leg openings. Sew the shorts together along the crotch seam, leaving the leg holes open.

Leg Edging
- Round 1:
- Attach yarn to the leg opening.
- Work 5 chains, skip 3 stitches, and sc in the 4th stitch.
- Repeat this all around the leg hole.
- Rounds 2-5:
- For each round, work a sl st into the first chain space.
- Ch 3, then make 2 dc in the same space.
- Work 1 chain, then 3 dc in the next chain space around.
- Last Round:
- For the final round, continue the same sequence but add:
- Single crochet, ch 3, 2 dc in one chain space.
- Repeat in each space around.
- For the final round, continue the same sequence but add:
- Repeat the same instructions for the other leg opening.

Waistband/Belt
- Make the Drawstring Belt:
- Using a 4 mm hook, chain 150-160 chains.
- Cut yarn, fasten off, and weave in ends.
- Thread the drawstring through the top edge of the shorts.


Conclusion
Congratulations! You’ve completed your crochet shorts! These cute shorts can now be customized further with colors, decorative edgings, or additional elements to make them unique.
Pattern Corrections & Tips
Corrections:
- Ensure stitch counts are correct after each row/round to avoid shaping issues.
- Keep track of marked stitches, especially the center increases, to maintain symmetry.
Tips for Best Results:
- When joining the legs, ensure both leg openings are evenly curved.
- Use a lighter shade of yarn for summer designs or darker shades for a winter-friendly look.
- Practice working in back loops if you are not yet comfortable — this makes the texture pop beautifully.
Leave a Reply