
Tiny wings and happy stitches come together in this Free crochet Bumblebee Pattern with easy instructions & a handmade look for gifts & decor.
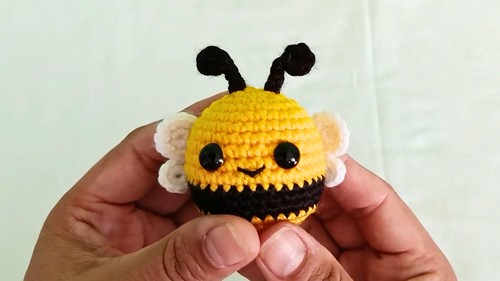
Bright stripes buzzing softly with charm, this tiny bumblebee pattern brings a cheerful buzz to any space. Made using the single crochet stitch, its rounded body, delicate wings, and whimsical antennae come together in a way that’s both simple and captivating. The combination of yellow and black yarn coupled with soft white wings instantly lifts the spirit of handmade creativity. Perfect for adding a fun pop of color to your keys, desk, or as a thoughtful gift, this little bee pattern offers warmth and joy with every stitch.
More Adorable Creatures to Make
Beyond this bumblebee, the techniques you practice here open the door to a variety of small amigurumi critters. Whether it’s colorful butterflies, playful ladybugs, or other garden friends, you can adjust colors and sizes to build a delightful collection. These projects brighten both living spaces and hearts, offering endless options for simple yet meaningful handmade gifts and decorations.
Cozy Crochet Bumblebee Pattern for Handmade Smiles
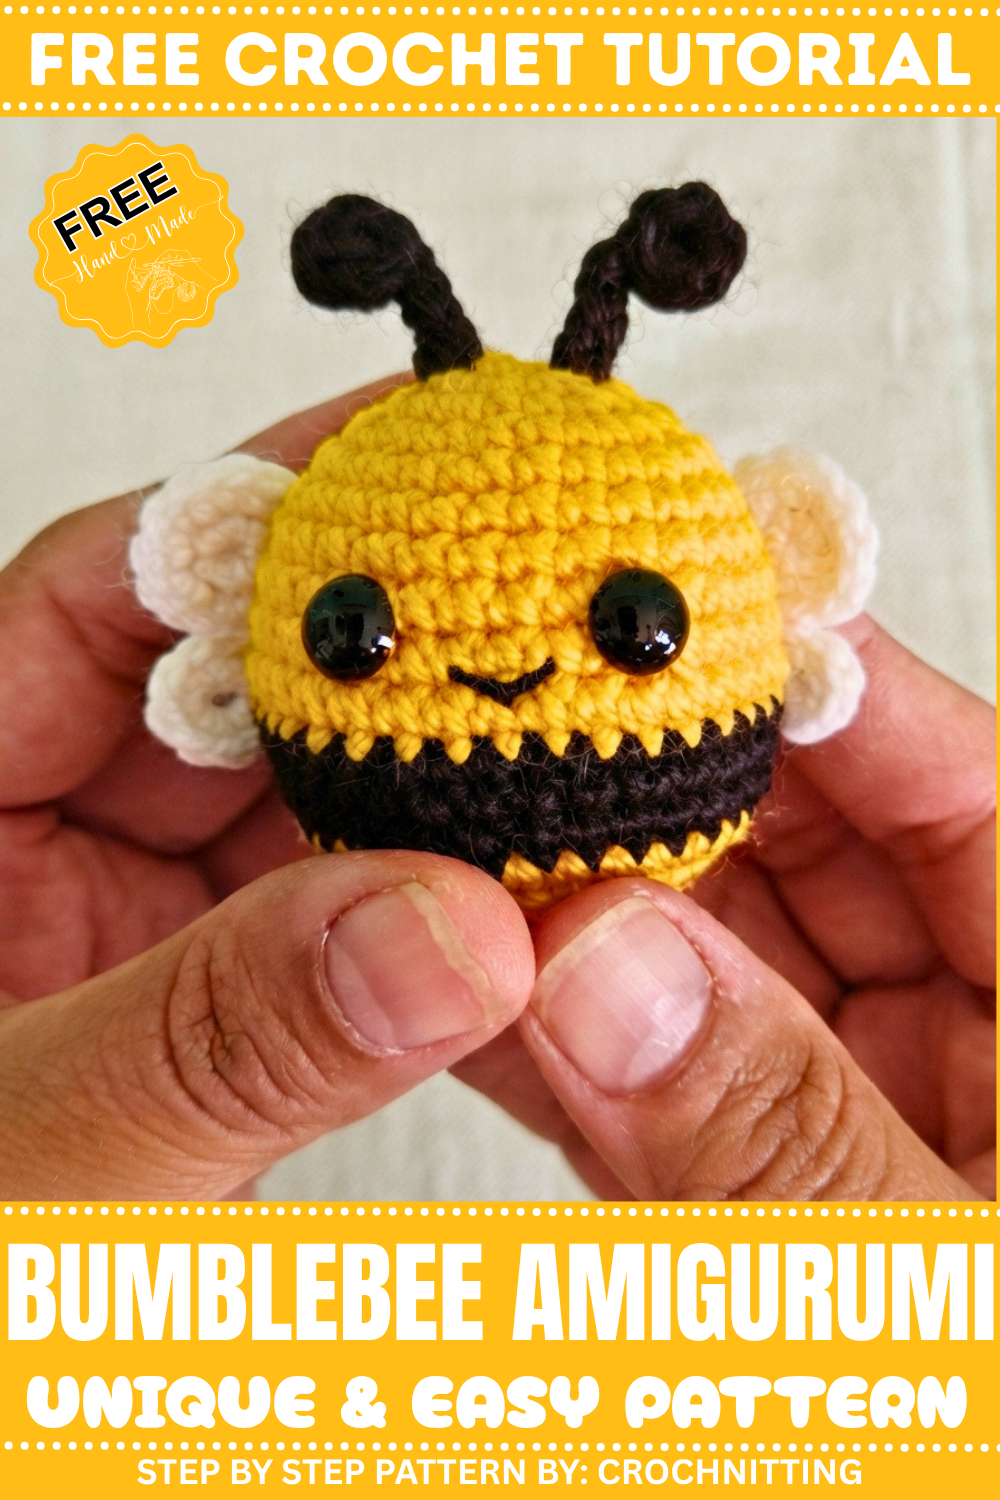
Designed with beginners in mind, the pattern carefully guides you through each step starting with a magic ring to form the bee’s rounded body, followed by precise increases and decreases that shape its form perfectly. The antennae, fashioned with a fine wire for gentle stiffness, bring an extra touch of personality. Detailed instructions for attaching safety eyes and embroidering a tiny smile bring the bee’s face to life, rounding off an enchanting little piece. Along the way, you’ll enhance your crochet skills in a relaxed, friendly way.
Crochet Pattern: Cute Mini Honeybee
Bring your creations to life with this delightful crochet honeybee pattern! This beginner-friendly pattern will guide you through the steps to crochet the body, antennae, and wings, and even show you how to assemble the finished piece. With simple techniques like magic rings, single crochet, increases, and decreases, you’ll have a charming bee in no time.
This adorable honeybee is perfect as a toy, decoration, or a thoughtful handmade gift. Let’s grab our yarn and hooks, and fall into this buzzing project!
What You’ll Learn from This Pattern
- How to create a magic ring for starting amigurumi projects.
- Master techniques for designing shapes with increases and decreases.
- How to change colors seamlessly in the round.
- Sewing and assembly techniques for attaching small pieces.
Skill Level & Terminology
- Skill Level: Beginner
- Terminology: US Crochet Terms
Materials & Tools
- Yarn:
- Worsted weight yarn (Category 4):
- Yellow: for the top and bottom parts of the body.
- Black: for the middle stripe and the antennae.
- White: for the wings.
- Worsted weight yarn (Category 4):
- Crochet Hook:
- 5 mm hook.
- Additional Tools:
- 0.4 mm wire (optional): for stiffening the antennae.
- Scissors.
- Stitch marker: to track the beginning of rounds.
- 8 mm safety eyes.
- Black cotton thread: for the embroidered smile.
- Tapestry needle: for sewing parts together and weaving in ends.
Gauge
Gauge is not crucial for this amigurumi project, but ensure your stitches are tight to prevent the stuffing from showing through.
Abbreviations
- ch – Chain
- sc – Single Crochet
- inc – Increase (work 2 single crochet stitches in the same stitch)
- dec – Decrease (single crochet two stitches together)
- sl st – Slip Stitch
- st(s) – Stitch(es)
- MR – Magic Ring
Special Stitch Instructions
Magic Ring (MR):
- Wrap yarn around your index finger, forming an “x” shape.
- Insert hook under the first loop and pull up the second loop.
- Yarn over and pull through to create a chain that secures the ring.
Single Crochet Decrease (sc dec):
- Insert hook into front loop of the next stitch; pull up a loop.
- Insert hook into the front loop of the next stitch; pull up a second loop (3 loops on hook).
- Yarn over and pull through all three loops.
Finished Size
- Approximately 9 cm (3.5 inches) in length, depending on yarn and hook size.
How You Start & Stitches Used
You’ll begin by creating the antennae using a magic ring and wire for optional stiffening, followed by the body of the bee worked in the round using single crochet increases and decreases. Next, you’ll crochet two small wings and two large wings, which are sewn onto the bee’s body. Eyes and a smile complete this adorable crochet honeybee.
Steps to Crochet the Honeybee
Step 1: Crochet the Antenna
- Cut two pieces of the 0.4 mm thick wire to approximately 9 cm in length (optional).
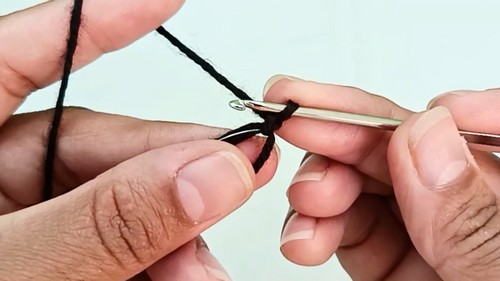
- Make a magic ring: Wrap your yarn around your finger, pull a loop through, and chain one.
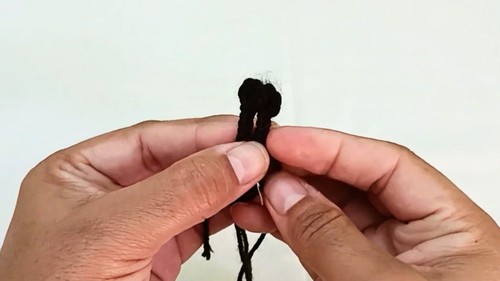
- Pass the wire through the first chain and crochet 5 single stitches into the magic ring around the wire.
- Adjust the wire ends to equal length, tighten the thread, and close the round with a slip stitch. Repeat the pattern for both antennae.
- Leave a long loop to later attach the antenna to the body.
Step 2: Create the Body
- Start the magic ring for the body and chain one.
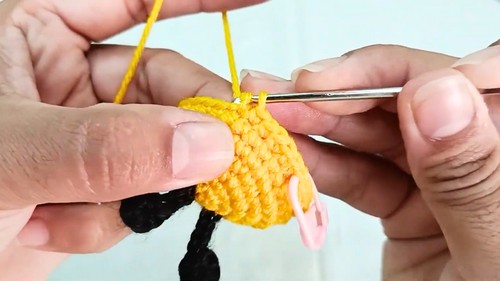
- Work 6 single crochets into the magic ring and begin crocheting in spirals without slip stitches.
- Attach a stitch marker to keep track of rounds.
- Round 1: Make 6 increases (one additional single crochet on every stitch). Total: 12 stitches.
- Round 2: Alternate one single crochet and one increase to form 18 stitches.
- Round 3: Create a set pattern of one single crochet, one increase, one single crochet. Repeat to have 24 stitches.
- Add rows of single stitches while maintaining stitch counts for body height.
- Switch colors: Attach black yarn for the middle part, continue same counts for two rounds, then switch back to yellow yarn for the bottom part.
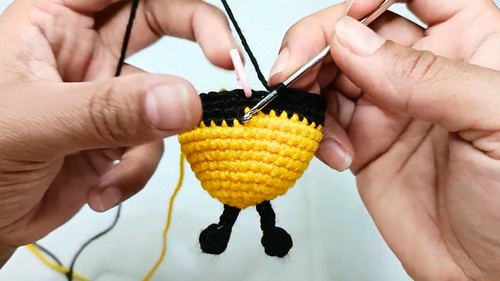
Step 3: Stuff the Body
Before continuing with smaller rounds, fill the body with stuffing to give the honeybee a firm, rounded shape.
Step 4: Attach the Antennas
- Secure and attach each antenna between the second and third rounds of the body.
- Pull the loops and wires through the body stitches, knot them, and tighten securely.
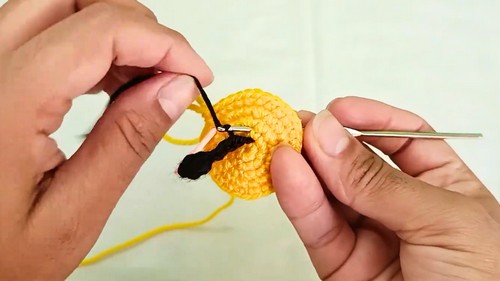
Step 5: Decrease Stitches for the Base
- Use decreasing stitches to gradually narrow the bottom of the body
- For example, alternate 3 single stitches with 1 decrease, repeating this set until you reach 6 stitches.
- Close the final hole by sewing it tightly using a needle.
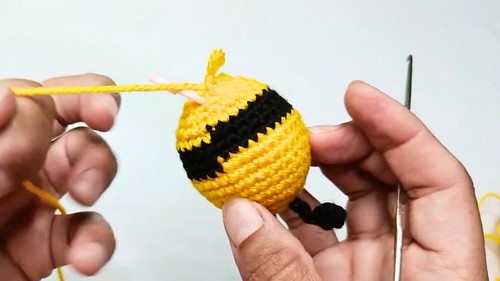
Step 6: Add Eyes and Smile
- Attach the safety eyes between the eighth and ninth rounds. Place them 5 stitches apart.
- Use black cotton thread and a sewing needle to embroider the honeybee’s smile.
Step 7: Crochet the Wings
- Small Wings:
- Begin with a magic ring and chain one.
- Work 8 single crochets into the ring, attach at the first stitch with a single crochet, and finish off.
- Large Wings:
- Begin with a magic ring and chain one.
- Crochet 6 single crochets, tighten the ring, and attach at the first stitch with a slip stitch.
- In the second round, work 6 increases (2 single stitches at each stitch) to form 12 stitches.
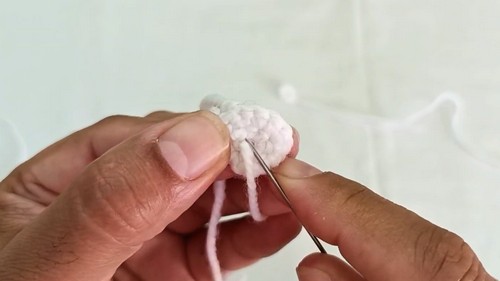
Step 8: Attach the Wings
Attach the wings between the designated rounds:
- Large Wings: Between the 7th and 8th round.
- Small Wings: Between the 8th and 9th round.
Secure them tightly with stitches to ensure proper placement.
Tutor’s Suggestions
- Follow every stitch carefully and use a stitch marker to track rounds.
- Stuff the bee firmly for a smooth and even finish.
Why I Love This Pattern
This cute mini honeybee is a delightful project that’s fun, quick, and a fantastic introduction to amigurumi. I love how versatile it is—you can customize with different colors, add extra embellishments, or even create a swarm of friendly bees! It’s the perfect combination of adorable and beginner-friendly, making it a joy to create.
Conclusion
By following the steps, you can crochet a charming honeybee for yourself or as a thoughtful handmade gift. The combination of simple shapes, vibrant colors, and detailed features creates a lovely design. Share your creations and connect with other crochet enthusiasts for feedback!
Crochet Tip
When switching yarn colors, pull the loop of the new color through the two loops of the last stitch for a seamless transition.
Leave a Reply