
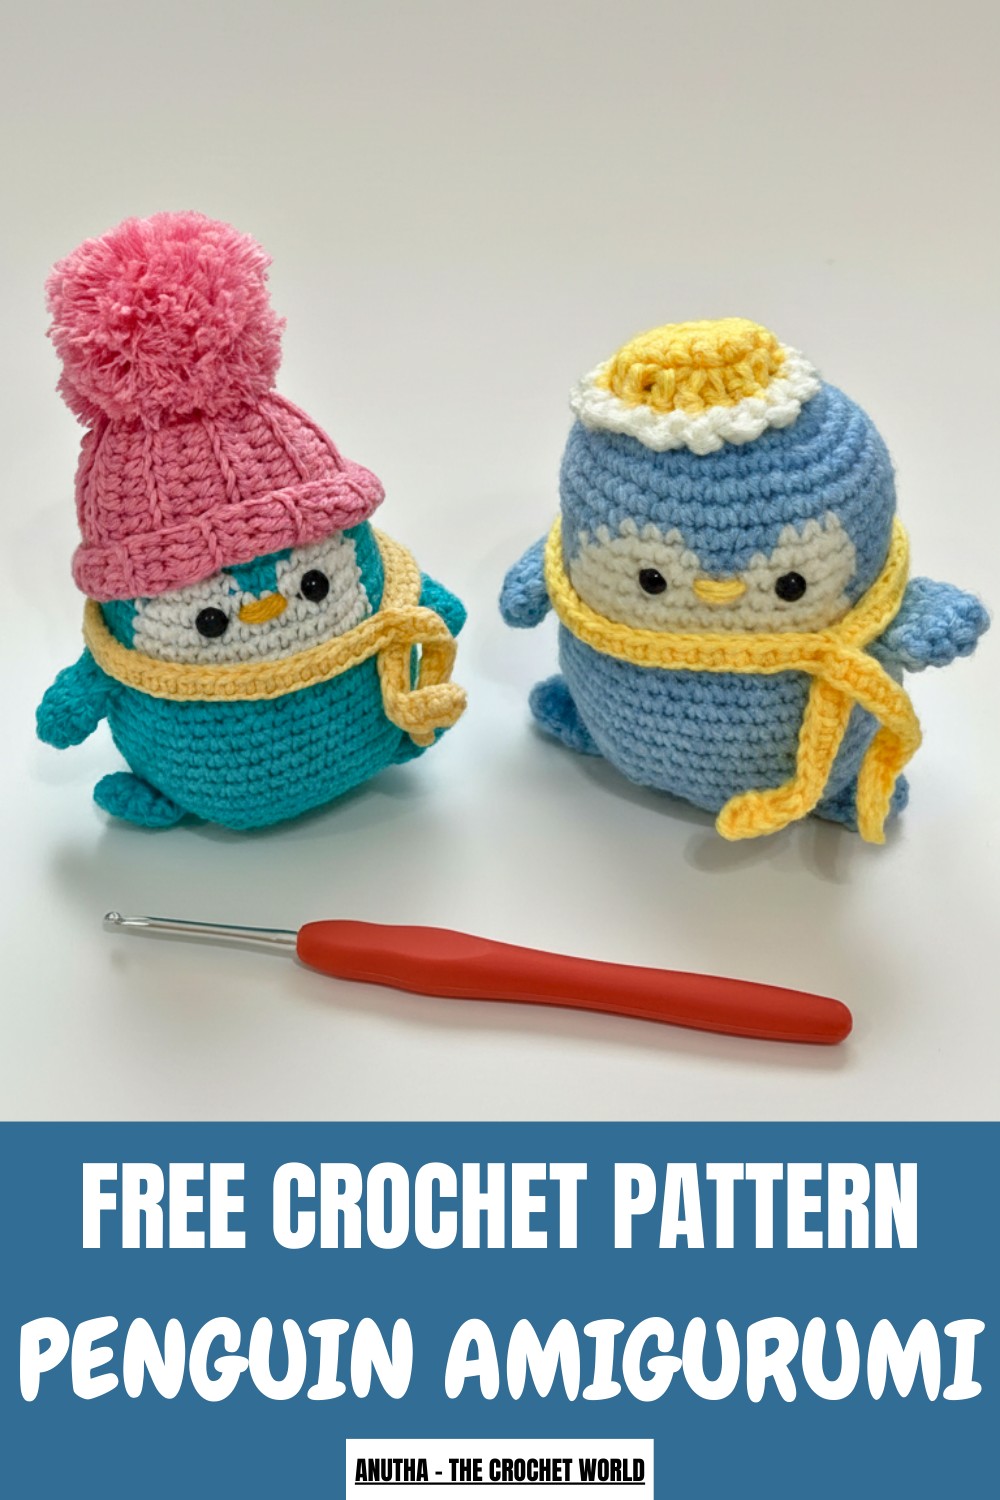
Chilly stitches bring adorable fun to life with this Free Crochet Penguin Amigurumi Pattern, perfect for crafting a cute, cuddly friend.
Who doesn’t love adding a touch of charm to their space with adorable décor? This Free Crochet Penguin Amigurumi Pattern offers a fun and practical way to bring personality to your home or joyful gifts to loved ones. Featuring a delightful plush penguin pattern, it serves as the perfect item for gifting, decorating shelves, or even delighting kids as a cozy handmade toy. Perfectly suited for both beginners and experienced crocheters, this project provides straightforward instructions, giving you the chance to bring a lovable creation to life quickly.
Learn the Crochet Penguin Amigurumi Pattern for a Delightful Finish
The process involves simple stitches and techniques, resulting in a soft, huggable piece with plenty of options for customization—think different yarn colors, scarves, tiny hats, or even seasonal accents. Its benefits go beyond aesthetics. It promotes mindfulness and relaxation through crochet while leaving you with a rewarding, tangible result.
You don’t need to invest in expensive materials; a few basic supplies like yarn, stuffing, and safety eyes are all you need. Whether it’s a thoughtful gift for a friend or a cute addition to your workspace, this pattern offers endless charm and utility. Bright, cheerful, and full of personality, this hands-on favorite is perfect for spreading smiles wherever it goes
Materials Needed
- Blue, white, and yellow yarn.
- 2.2 mm crochet hook (or appropriate size for your yarn).
- Stitch markers.
- Needle for finishing.
- Stuffing material (soft toy filling).
- Accessories: Safety eyes, optional locks (for securely attaching eyes).
Special Features
- Customizable Design: Colors and size can be easily adjusted to suit your preferences.
- Complete Kit Convenience: The pattern utilizes a kit containing yarn, stuffing, accessories such as safety eyes, a hook, stitch markers, and more (though substitutes can be used).
- Cute Detailing: Includes features like a scarf, a tiny hat, and wings for added charm.
Skill Level
- Beginner to Intermediate: Ideal for those with basic crochet experience, as the tutor includes detailed explanations about patterns, techniques (like magic circles, single crochets, and slip stitches), and assembly.
Step-by-Step Instructions
1. Begin with the Body
- Start with a Blue Magic Circle: Create a magic circle and secure it with a chain.
- Round 1: Crochet six single crochets into the magic circle.
- Round 2: Work two single crochets into each stitch from the previous round (12 total stitches).
- Rounds 3-8: Continue increasing as per the pattern, alternating between rounds of one and two single crochets into each stitch.
- Adding the White Belly: Switch to white yarn during Round 9, work 16 blue stitches, switch to white for three stitches, go back to blue for four stitches, and then continue alternating colors following the stated stitch counts.
- Progress and Shaping: After several more rounds (up to Round 14), cut and secure the white yarn. Stuff the body with the filling after shaping the top section, nearing the final rounds.
- The gradual decrease (like in Rounds 24-30) ensures a rounded shape for the penguin.

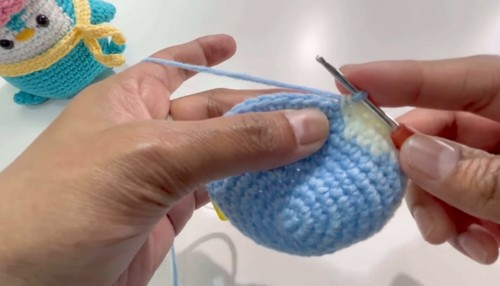
2. Prepare the Head
- Continue crocheting in spiral rounds, ensuring even tension. Add safety eyes between Rounds 3 and 4 (approximately two stitches apart from the white section). Attach the eyes securely using locks or equivalents if needed.
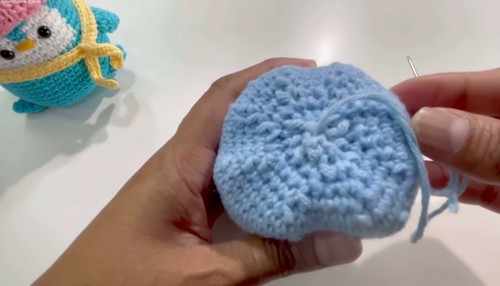
3. Add the Wings
- Wings Creation: Start with another magic circle in blue yarn:
- Round 1: 6 single crochets.
- Subsequent rounds: Alternate between increasing and decreasing stitches (details provided above).
- Flatten and seal with single crochet stitches at the end, leaving a tail for attaching.
- Placement: Attach the wings around Round 16 of the penguin body (counting from the top).
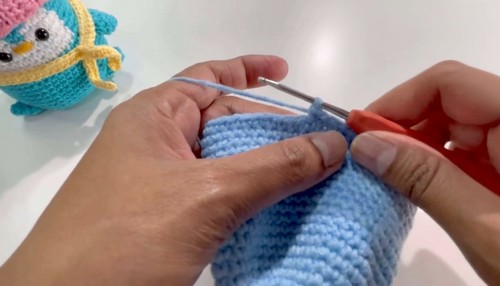
4. Make the Feet
- Use yellow yarn and the magic circle technique:
- Round 1: 6 single crochets.
- Round 2: Alternate between regular single crochets and increases to transition to 8 total stitches.
- Round 3: Single crochet all the way around.
- Flatten the circles and close with crochet. Attach the feet to the lower part of the penguin (between Rounds 4 and 5 from the bottom), ensuring spacing between the feet.
5. Crochet the Scarf
- With yellow yarn, chain 71 stitches. Begin crocheting in rows:
- First chain: Skip; work two single crochets into the second.
- Remaining chains: Crochet one single crochet in each until the second-to-last.
- On the last chain, work three single crochets to allow curvature. Repeat this optional step for bulkier scarves.
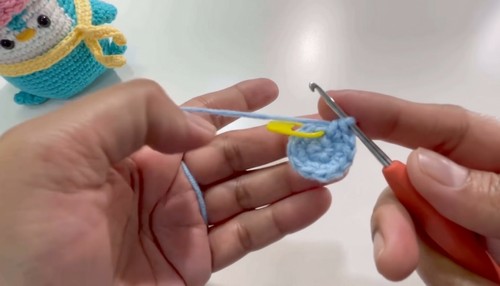
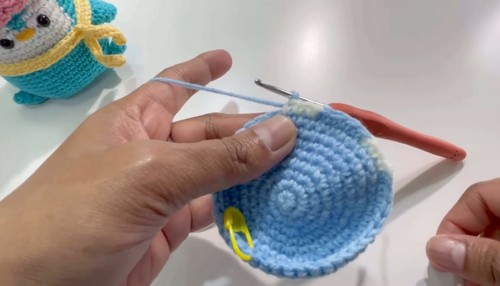
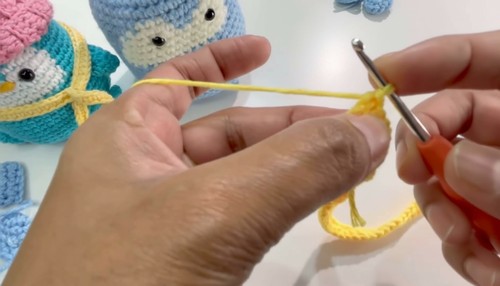
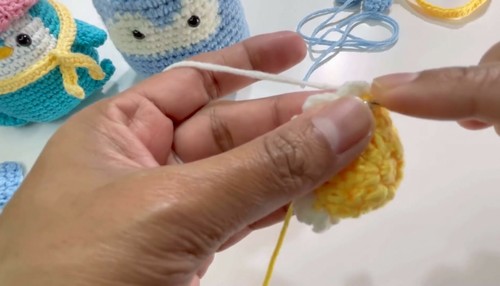
6. Create the Hat
- Start with a magic circle in yellow:
- Round 1: 6 single crochets.
- Rounds 2-3: Work increases to grow the circle into a base size. Alternate between slip stitching around the base (to create a curved “hat edge”) and securing it with a white yarn trim.
7. Final Assembly
- Attach Scarf: Wrap the scarf around the penguin’s neck, tacking it into place with a yarn needle.
- Fix Hat: Secure the miniature hat on top with stitches around its base.
- Finishing Touches: Carefully weave in any remaining yarn ends to ensure a polished look.

Tutor’s Suggestions
- Tightening the Magic Circle: Avoid gaps at the center by properly securing the magic circle.
- Secure Eyes Properly: Use locking backings for safety eyes, especially if this penguin will be a child’s toy.
- Use Stitch Markers: This is especially helpful for beginner crocheters working in spirals.
- Keep Tension Even: This ensures consistent stitches and a polished final look.
- Practice Decreases Carefully: The invisible decrease method adds to the professional shaping of the penguin.
Uses
- A thoughtful, handmade gift for children or loved ones.
- A decorative piece for shelves, nurseries, or desks.
- A seasonal figurine, especially with the hat and scarf, for use during holidays or wintertime.
Tip
When switching yarn colors, avoid over-tightening the carry strands at the back. Leaving enough slack ensures the penguin doesn’t lose its shape or appear stretched.
Conclusion
This Penguin Amigurumi Pattern is a delightful project for crochet lovers at any skill level. Its step-by-step simplicity, combined with the charm of tiny details, makes it a rewarding creation for gifting, collecting, or adding a touch of handmade whimsy to any space. Follow the instructions carefully, enjoy the creativity, and you’ll have an adorable crochet masterpiece in no time!
Leave a Reply