
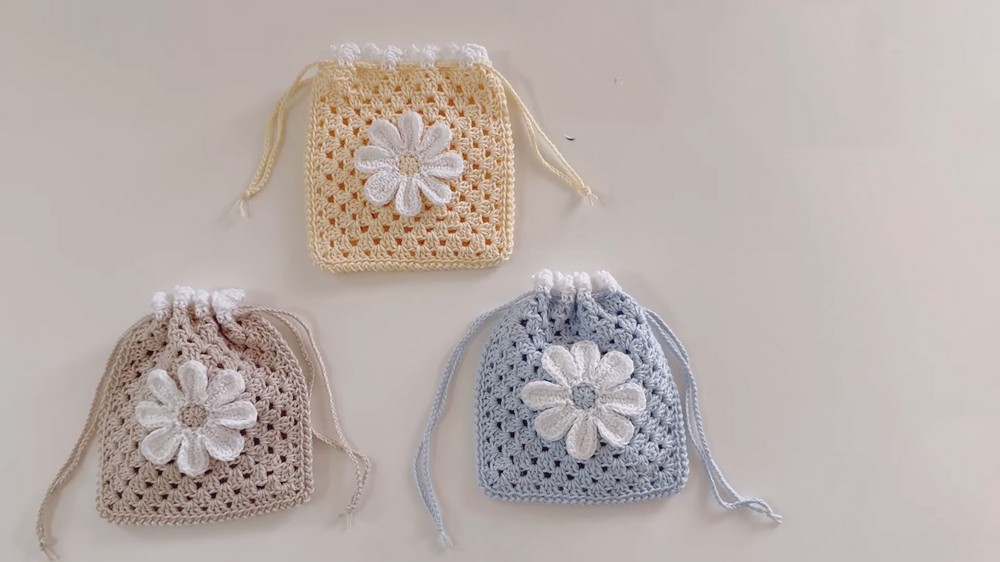
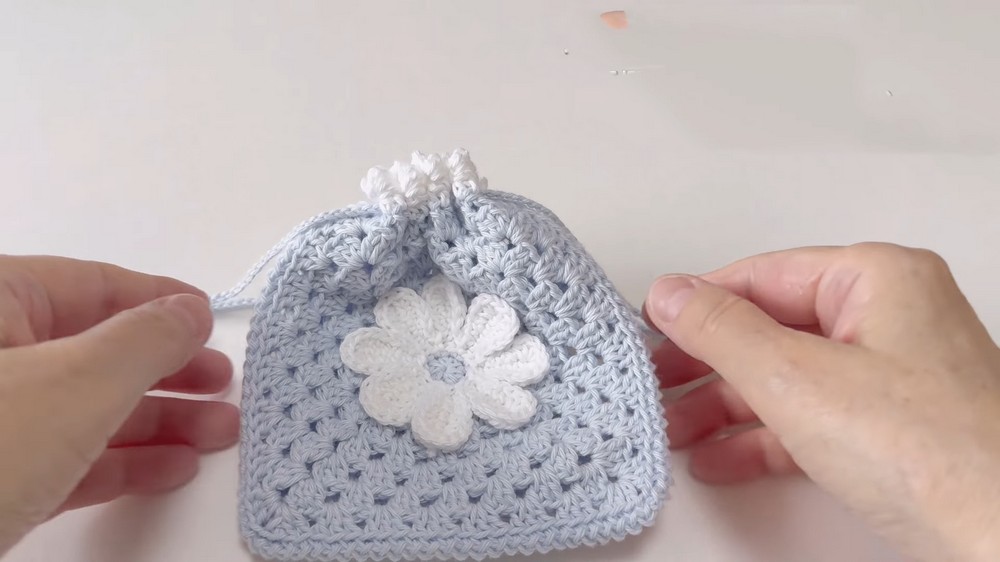
Organize small items with this Crochet Drawstring Pouch Pattern to add a cute touch to your bags and shelves and brighten your everyday use.
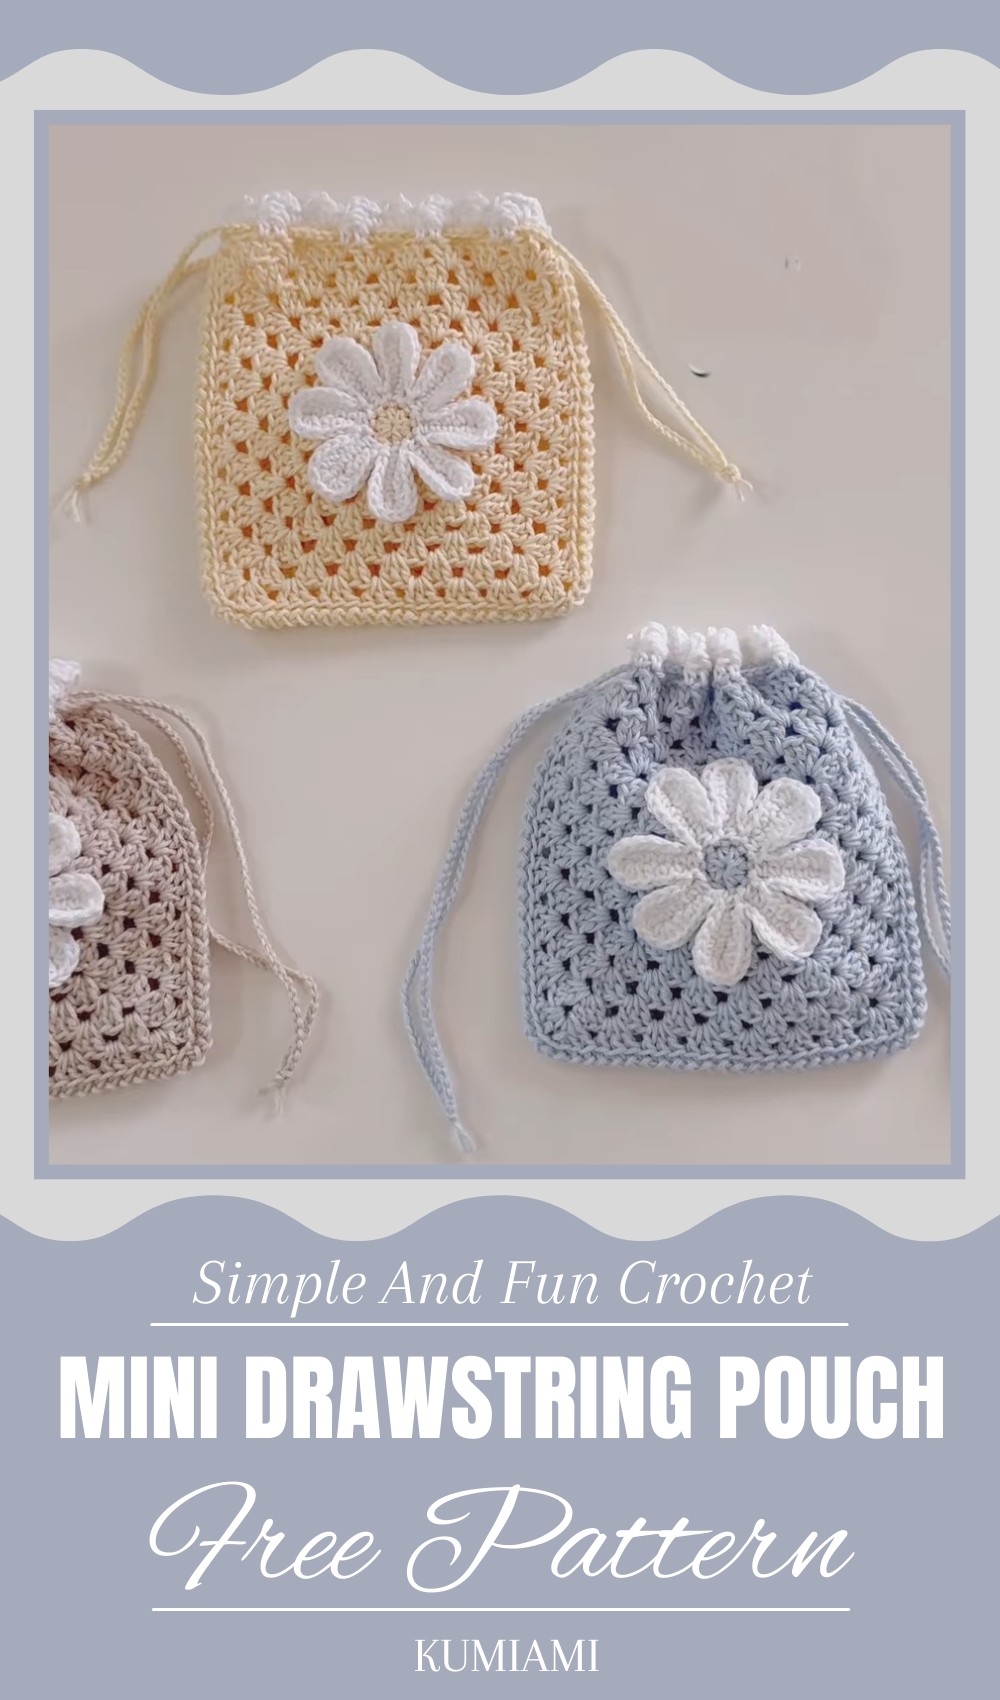
There’s something truly special about handmade creations that bring both beauty and purpose into your daily life. This unique design combines charm and usefulness in the simplest way. A crochet drawstring pouch pattern is a wonderful piece that you can use to store coins, jewelry, or other small belongings. Its lovely design adds elegance and its soft texture makes it feel personal and meaningful.
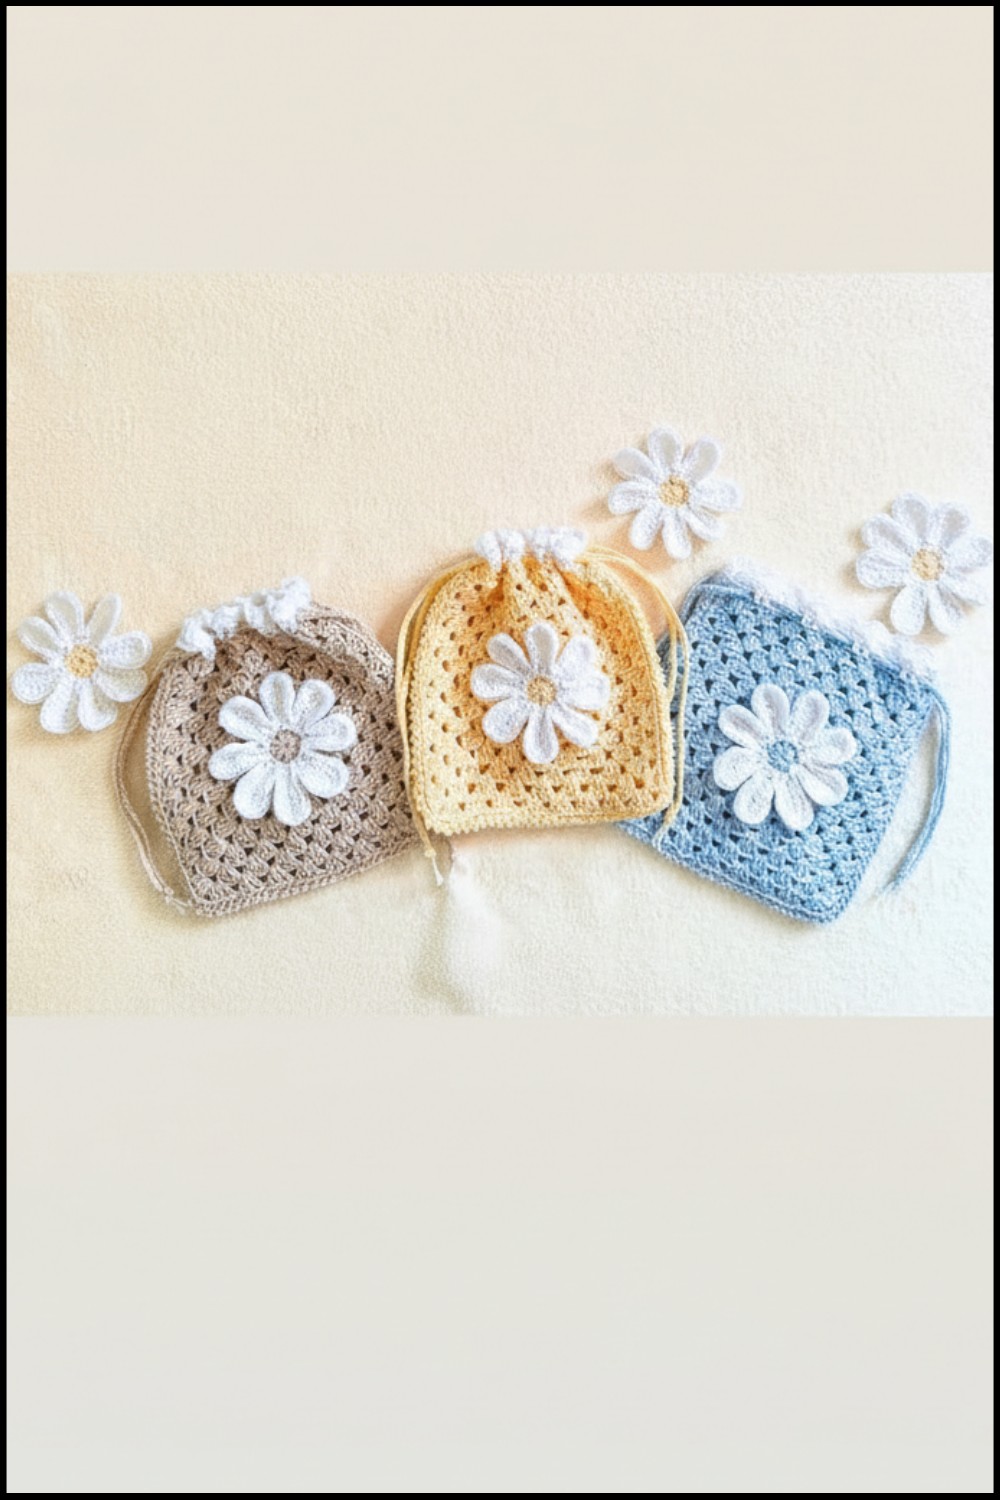
Unique Crochet Drawstring Pouch Pattern for Everyday Essentials
Whether you keep it in your bag, place it on a shelf, or give it as a gift, it’s a delightful way to stay organized while showcasing creativity. You can even use it for special occasions or as a keepsake holder that carries sentimental value. This handmade pouch is more than just an accessory; it’s a tiny treasure that brightens everyday moments. Designed with care and made with love, it brings charm to your spaces and adds a touch of uniqueness to your life.
Materials
Yarn
- New Cotton Baby Yarn: 100% cotton.
- Color 1 (Yellow): Yarn used for base and granny stitches.
- Color 2 (White): Yarn used for petals and decorative stitches.
- Approximate Weight: 50-100 grams of each color.
Hooks
- 4 mm Crochet Hook: For the main body and motifs.
- 3 mm Crochet Hook: For the drawstring cord.
Additional Tools
- Tapestry Needle: For weaving in ends and threading the string.
- Scissors
Key Abbreviations (US Terminology)
- ch: Chain
- sc: Single Crochet
- dc: Double Crochet
- sl st: Slip Stitch
- sp: Space
- tr: Treble Crochet
- dec dc: Decrease Double Crochet
Special Notes
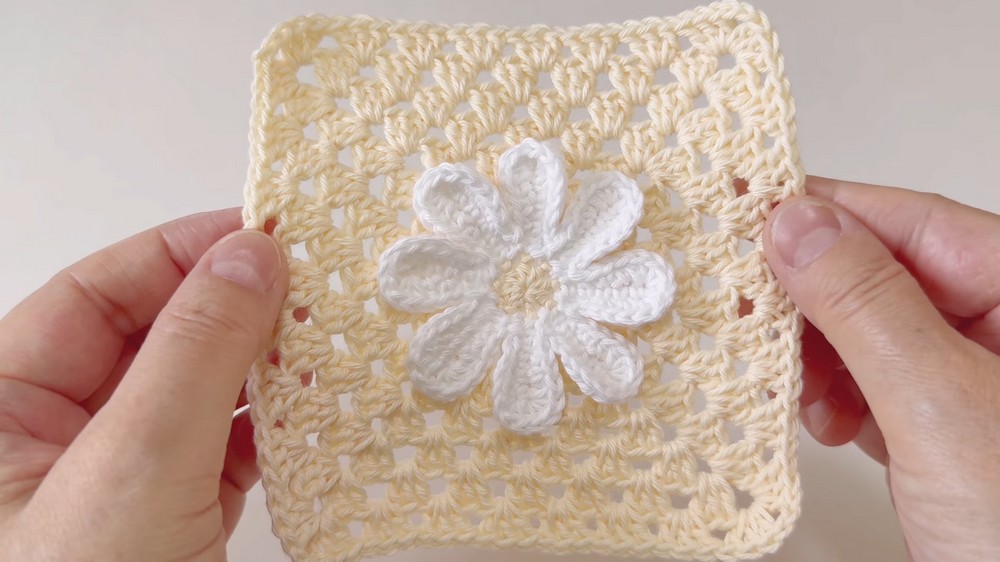
- Motifs: The bag is constructed using 8 flower petals interconnected with granny stitch rounds.
- Tension Control: Maintain even tension for uniform motifs.
- Customizable Size: You may increase or decrease rows in the granny stitch section to adjust the bag’s height.
Step-by-Step Pattern Instructions
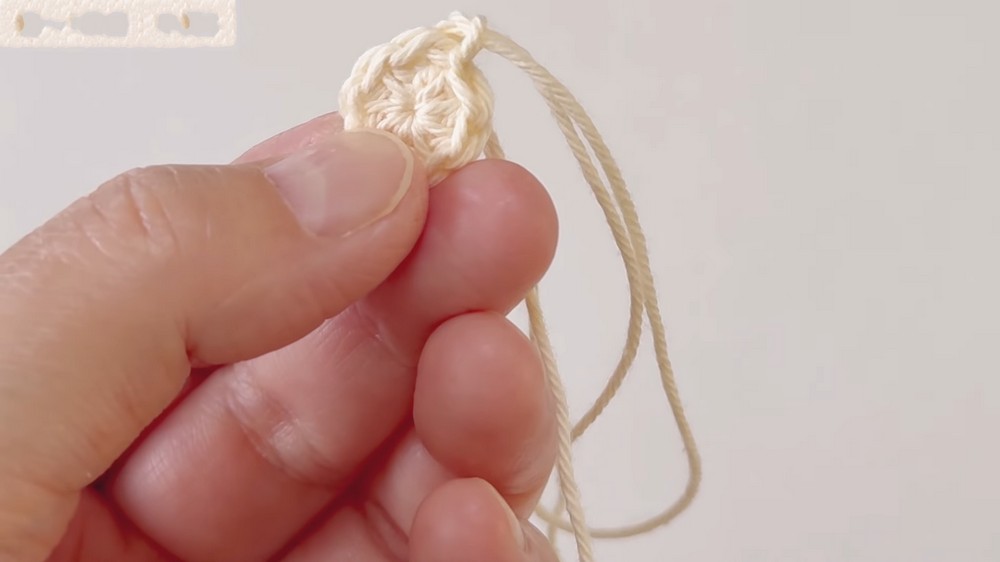
Step 1: Center Ring for Flower Motif (Yellow)
Foundation Ring
- Lightly loop the yarn around your index finger twice to form a magic ring, or chain 6 and join with a sl st to create a circle.
- Chain 2 (counts as your starting height for dc this round).
Round 1: Double Crochet Base
- Work 8 dc into the circle.
- Pull the tail of the magic ring to tighten the loop and close the circle.
- Join the round with a sl st to the top of the first dc.
- Chain 1 to secure and fasten off the yellow yarn.
Step 2: Petals (White)
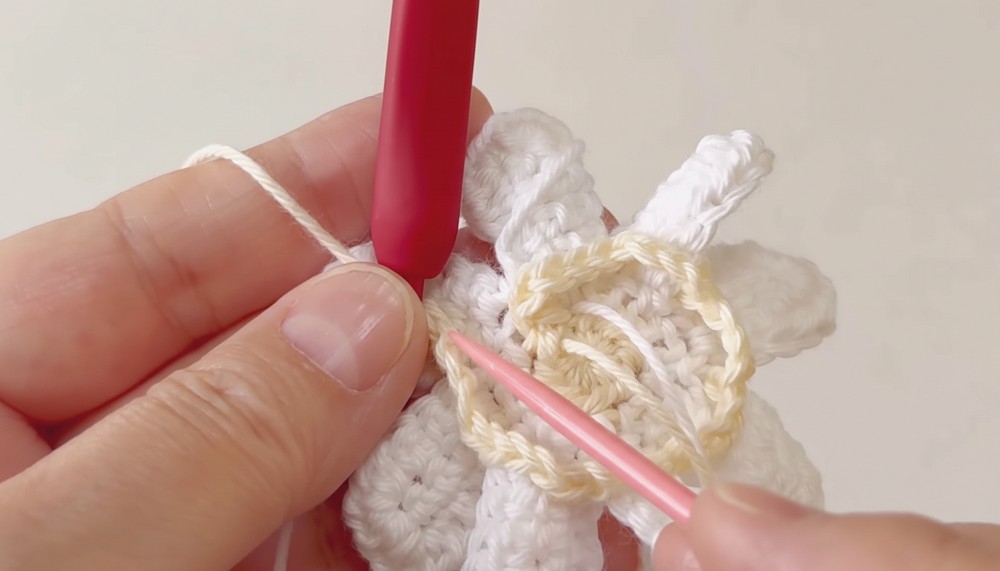
Round 2: Base for Petals
- Attach the white yarn to the head of any dc from the previous round. Chain 6.
- Starting in the 2nd ch from the hook, work:
- 5 sc down the chain (these stitches form the base for one petal).
- Insert your hook into the head of the next dc from Round 1 and secure the petal base with a sc.
- Repeat this process around the circle to create 8 petal bases.
- Join the last stitch to the starting point with a sl st.
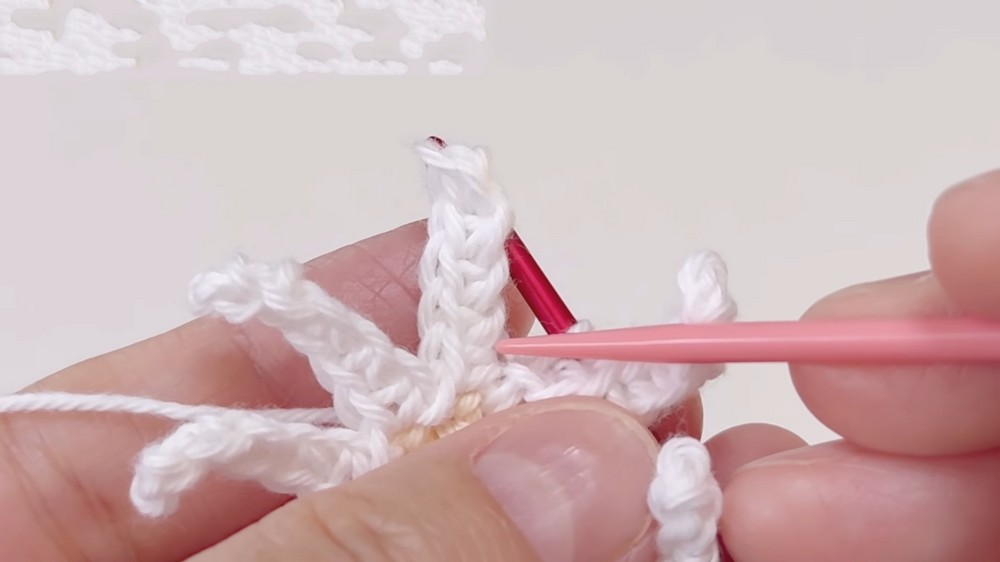
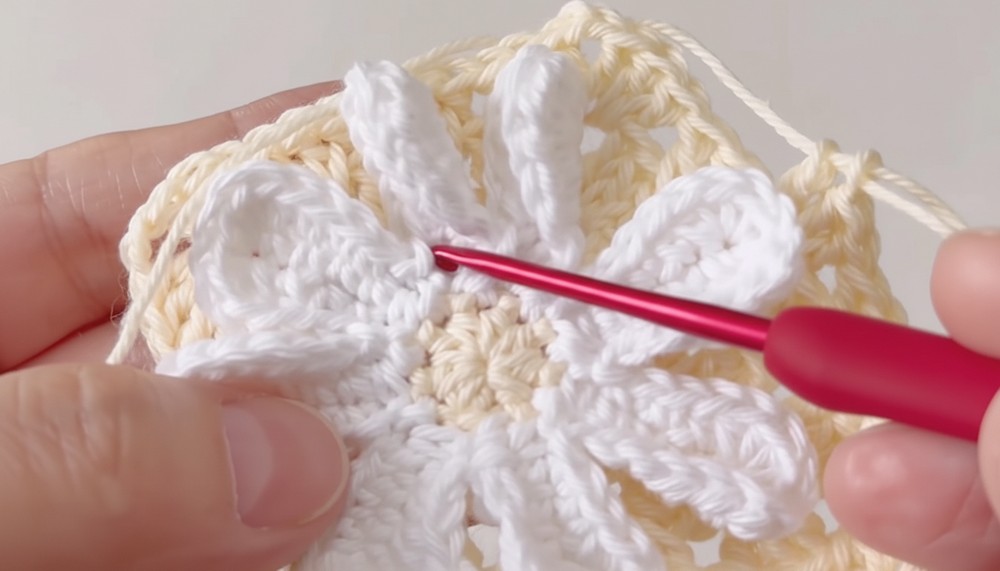
Round 3: Forming the Petals
- In each petal base (5 sc stitches worked in Round 2):
- Work: 1 sl st, 1 sc, 2 dc, 1 sc (into each of the 5 stitches).
- Finish by working 1 sl st at the base of the petal.
- Repeat for all 8 petal bases to complete the motif. Fasten off.
Step 3: Adding Granny Stitch Rounds (Yellow)
Round 4: Granny Stitch Base
- Attach the yellow yarn in between two petals (the base of the petal).
- Chain 3 (counts as a dc), and work:
- 3 dc in each space around all petals.
- In each corner (4 corners of the motif): Work 3 dc, ch 2, 3 dc to form corners.
- Repeat this pattern around the circle and join with a sl st.
Rounds 5-10: Granny Stitch Expansion
- Continue working granny stitches (clusters of 3 dc) in all spaces, maintaining the same corner increase:
- 3 dc, ch 2, 3 dc in each corner space.
- Adjust the number of rows based on your desired size. For this bag, work a total of 6 rounds of granny stitches.
Step 4: Create and Assemble Two Motifs
- Repeat Steps 1 through 3 to create a second identical motif.
- To assemble, place the motifs back-to-back and join with slip stitches or sc around the edges.
- Leave the top edge unjoined for an opening.
Step 5: Adding the Drawstring Hole Row
- Connect white yarn to the top edge of the bag.
- Work 1 dc in each stitch, but add ch 1 spaces between clusters to create holes for the drawstring.
- Continue around the top of the bag, join with a sl st, and fasten off.
Step 6: Edge Decoration
- Reconnect the white yarn.
- Work a sc + picot stitch (ch 3) in each stitch around for a decorative edge.
- Fasten off and weave in ends.
Step 7: Crochet Drawstring
- Use a 3 mm hook with yellow yarn. Chain approximately 45 cm in length (or your preferred length for the drawstring).
- Slip stitch back along the chain for added strength.
- Create two drawstrings and weave them through the drawstring holes in opposite directions.
- Tie both ends and trim neatly.
Conclusion
Congratulations! Your Margaret Motif Drawstring Bag is complete. This stunning bag features intricate flower-like motifs, making it perfect as a decorative or functional accessory. It is customizable, allowing you to add more motifs or granny stitch rounds based on your preferences.
Pattern Corrections
- When working the petals, ensure the stitches are worked tightly to keep their structure prominent.
- For granny stitch rows, double-check corner increases for consistent growth and symmetry.
Tips for Success
- Blocking: Block each motif before assembling for the cleanest results.
- Yarn Choice: Cotton yarn is ideal for motif definition and durability.
- Customize: Use multiple colors for a more dynamic effect, such as alternating colors for petals and granny stitches.
Leave a Reply