
Learn a free crochet Cherry Keychain Pattern that guides you through making a small cherry charm to brighten bags and everyday accessories.
I still remember spotting a bright little cherry charm hanging from a friend’s backpack and wondering how something so small could be so full of life and color. This cute crochet cherry keychain captures that joyful feeling with its round, plump shape and cheerful red and green colors. What I love about this pattern is how it uses single crochet and half double crochet stitches to form the cherry’s smooth body and crisp leaves. The shapes come together in a way that’s easy to follow and satisfying to make, even if you’re new to crochet.
Other Fun Projects to Try
This cherry pattern is a great jumping-off point for other small crochet creations. You can use the same technique to make different fruit keychains like strawberries, apples, or lemons by adjusting colors and stitch counts. This pattern also works well for ornaments, zipper pulls, or colorful decorations for your home or gifts. Playing with yarn types and colors opens up endless possibilities to crochet unique and playful accessories that add a personal touch to everyday items
Mini Crochet Cherry Keychain That’s So Satisfying
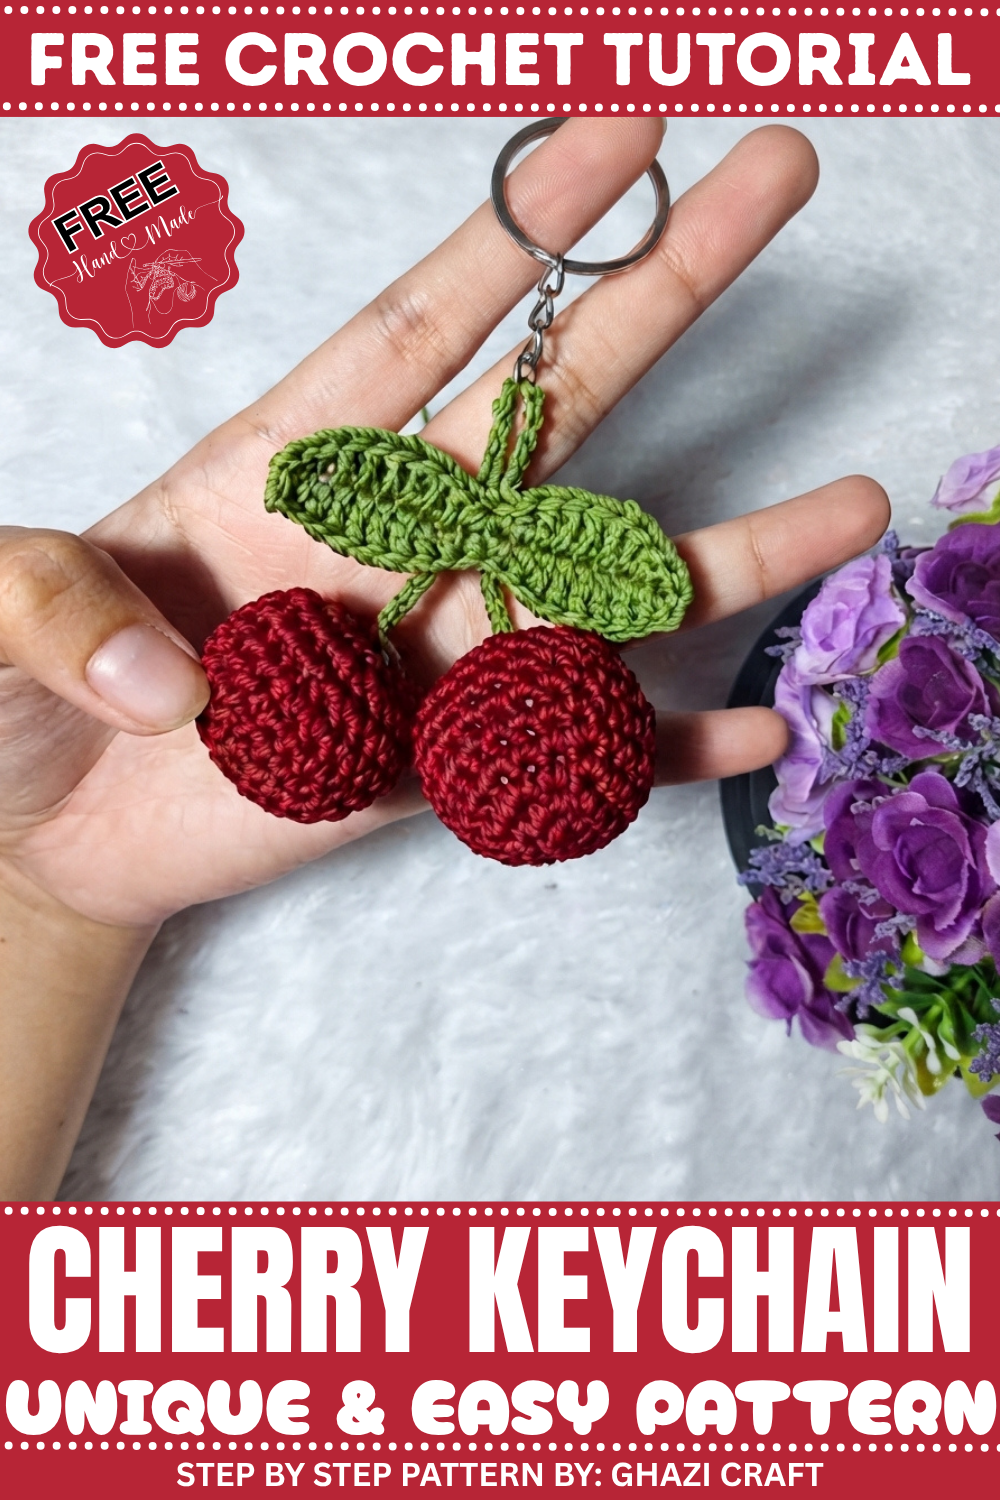
Beginning with a chain foundation, the cherry’s round shape is built with stitches gradually increasing to give it fullness. Switching between single crochet for the body and double crochet for the leaves adds texture and dimension that makes the cherry feel almost real. The keychain can brighten up your keys, accessorize bags, or even become a sweet little gift for friends and family. The step-by-step method and simple stitches invite beginners to practice while creating something truly adorable.
Crochet Cherry Keychain – Step-by-Step Pattern (US Terms)
This crochet cherry keychain pattern is a delightful project that’s quick to make and perfect for gifting or accessorizing your bag or keys. With rounded cherries, a cute leaf stem, and clean assembly, this project is both fun and beginner-friendly! This step-by-step guide will walk you through every detail, so you’ll confidently create your own beautiful keychain.
Uses of This Pattern
- Practical keychain for organizing keys.
- Decorative bag charm or zipper pull.
- Great gift for friends and family.
- Can be sold in craft markets or used as a stash-busting project.
Skill Level & Terminology
- Skill Level: Beginner
- Terminology: US Crochet Terms
This pattern includes basic stitches such as single crochet, half double crochet, double crochet, slip stitch, and chains, making it an ideal project for beginners.
Materials & Tools
To complete this project, you will need:
- Yarn: Medium-weight (Category 4) yarn in red (for the cherries) and green (for the stem and leaves).
- Red yarn (~10g), Green yarn (~5g).
- Hook: 3.0 mm crochet hook or a size suitable for your yarn.
- Fiberfill Stuffing: For filling the cherries.
- Tapestry Needle: For weaving in ends and sewing parts together.
- Keyring Accessory: To attach the finished cherries to keys.
- Scissors: For cutting the yarn.
- Optional: Lighter to carefully seal the ends of the yarn.
Gauge
Gauge is not critical for this project, but tight stitches are recommended. The stitches should be dense enough to prevent the stuffing from showing through.
Finished Size
The final cherry keychain will measure approximately 4–5 cm (1.5–2 inches) per cherry, with a connecting stem of about 7 cm (3 inches) in length.
Abbreviations List (US Terms)
| Abbreviation | Meaning |
|---|---|
| ch | Chain |
| sc | Single Crochet |
| hdc | Half Double Crochet |
| dc | Double Crochet |
| sl st | Slip Stitch |
| st(s) | Stitch(es) |
| MR | Magic Ring |
| inc | Increase (2 sc in the same st) |
Special Stitch Instructions
Magic Ring (MR):
- Wrap the yarn around your fingers to form a loop.
- Insert your hook into the loop, yarn over, and pull through.
- Chain 1 to secure the loop. Work the specified number of stitches into the ring, then pull the starting yarn tail tightly to close the ring.
Increase (inc):
- Work two single crochet stitches into the same stitch.
What You’ll Learn From This Pattern
- Creating amigurumi-style cherries using basic stitches.
- Adding texture with leaf and stem details.
- Assembly techniques for attaching parts and creating a finished accessory.
Step-by-Step Instructions
Follow these instructions to crochet the two cherry spheres, the stem, and the leaf before assembling the final keychain.
Part 1: Crochet the Leaf (Green)
-
Start Chain: Make a Slipknot. Chain 20.
-
First Side of Chain: Skip the first stitch from the hook.
-
Work 1 single crochet (sc) in the next stitch.
-
Work 1 half-double crochet (HDC) in the next stitch.
-
Work 5 double crochet (dc) stitches, one in each of the next 5 stitches.
-
Work 1 HDC in the next stitch.
-
Work 1 sc in the next stitch.
-
Skip 1 stitch.
-
-
Second Side of Chain (Repeat):
-
Work 1 sc in the next stitch.
-
Work 1 HDC in the next stitch.
-
Work 5 dc, one in each of the next 5 stitches.
-
Work 1 HDC in the next stitch.
-
Work 1 sc in the next stitch.
-
Chain 1.
-
-
Finish: Slip stitch into the first sc of the row. Chain 1 and cut the yarn.


Part 2: Crochet the Cherry Spheres (Red) – Make 2
Work in continuous rounds (unless otherwise noted). Leave a long tail for sewing when finished.
-
Round 1: Create a Magic Ring (MR) and work 6 single crochet (sc) stitches inside (6 st).
-
Round 2: Work an increase (inc) in every stitch (12 st).
-
Round 3: Work (1 sc, inc) around (18 st).
-
Round 4: Work (2 sc, inc) around (24 st).
-
Round 5–8 (Straight Rounds): Work 1 sc in every stitch for four straight rounds (24 st).
-
Round 9: Work (2 sc, decrease – dec) around (18 st). Stuff the sphere with fiberfill.
-
Round 10: Work (1 sc, dec) around (12 st).
-
Round 11: Work 6 decreases (dec) around (6 st).
-
Finish: Cut the yarn, leaving a long tail. Use the tapestry needle to weave the tail through the remaining stitches, pull to close the hole, and knot securely.


Part 3: Crochet the Stem (Green)
-
Start and Chain: Create a Slipknot, leaving a long tail. Chain 30.
-
Finish: Cut the yarn, leaving a long tail.
Part 4: Assembly
-
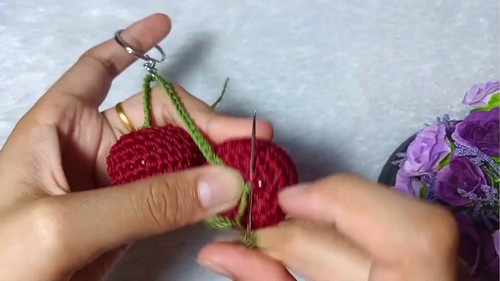
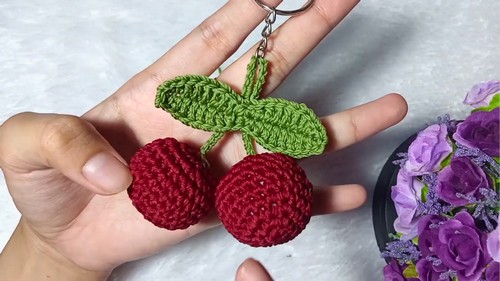
Attach Stem to Cherries: Use the yarn tail at one end of the chain (stem) and the tapestry needle to sew the stem securely to the top center of one red cherry. Repeat with the other end of the chain and the second cherry.
-
Attach Leaf: Locate the center of the stem. Use the tapestry needle and the yarn tail from the leaf to sew the base of the leaf onto the center of the stem, securing the piece in place. Hide and trim the excess yarn.
-
Attach Keychain: Use one of the yarn tails (from the leaf or stem) to tie or attach the keychain ring hardware to the stem near the leaf.
Tip
Secure the Keychain Hardware: When you attach the keychain ring, use the green yarn to wrap tightly around the ring base and the stem multiple times. Then, tie a very secure knot and hide the tail inside the stem to ensure the hardware does not easily come loose from the crocheted piece.
Tutor’s Suggestions
The tutor offers valuable advice to streamline your crocheting and assembly:
-
Leave Long Tails: Always leave a long tail of yarn when finishing the cherries, stem, and leaf pieces. You use these tails later for securely sewing the parts together.
-
Prepare Stem Tails: When starting the stem and cutting the yarn, ensure you leave long tails at both ends. You use these tails to connect the two cherries and the leaf to the main stem.
-
Stuff Lightly: Stuff the cherry spheres just enough to give them shape without stretching the stitches. This prevents the stuffing from showing through and maintains the small, neat appearance.
Why You’ll Love This Pattern
Crocheting this cherry keychain is easy, quick, and rewarding. The bright, cheerful design brings a touch of fun to your accessories, while the small size makes it a practical project for last-minute gifts or fun crochet fair inventory. You’ll love experimenting with different yarns and colors to create your own playful variations!
Leave a Reply