
One creative idea is to alternate bold contrasting shades for a tile-like effect, or blend subtle tones for a soft, flowing look. Interestingly, mosaic crochet draws inspiration from traditional tiling patterns, yet adapts seamlessly to contemporary projects, offering a playful way to sharpen skills while producing pieces that are both artistic and functional.
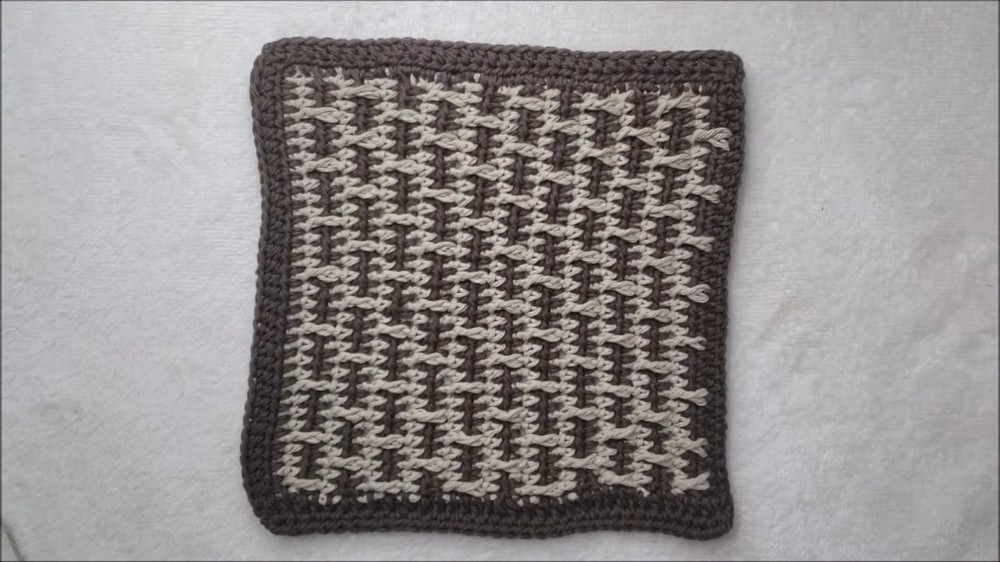
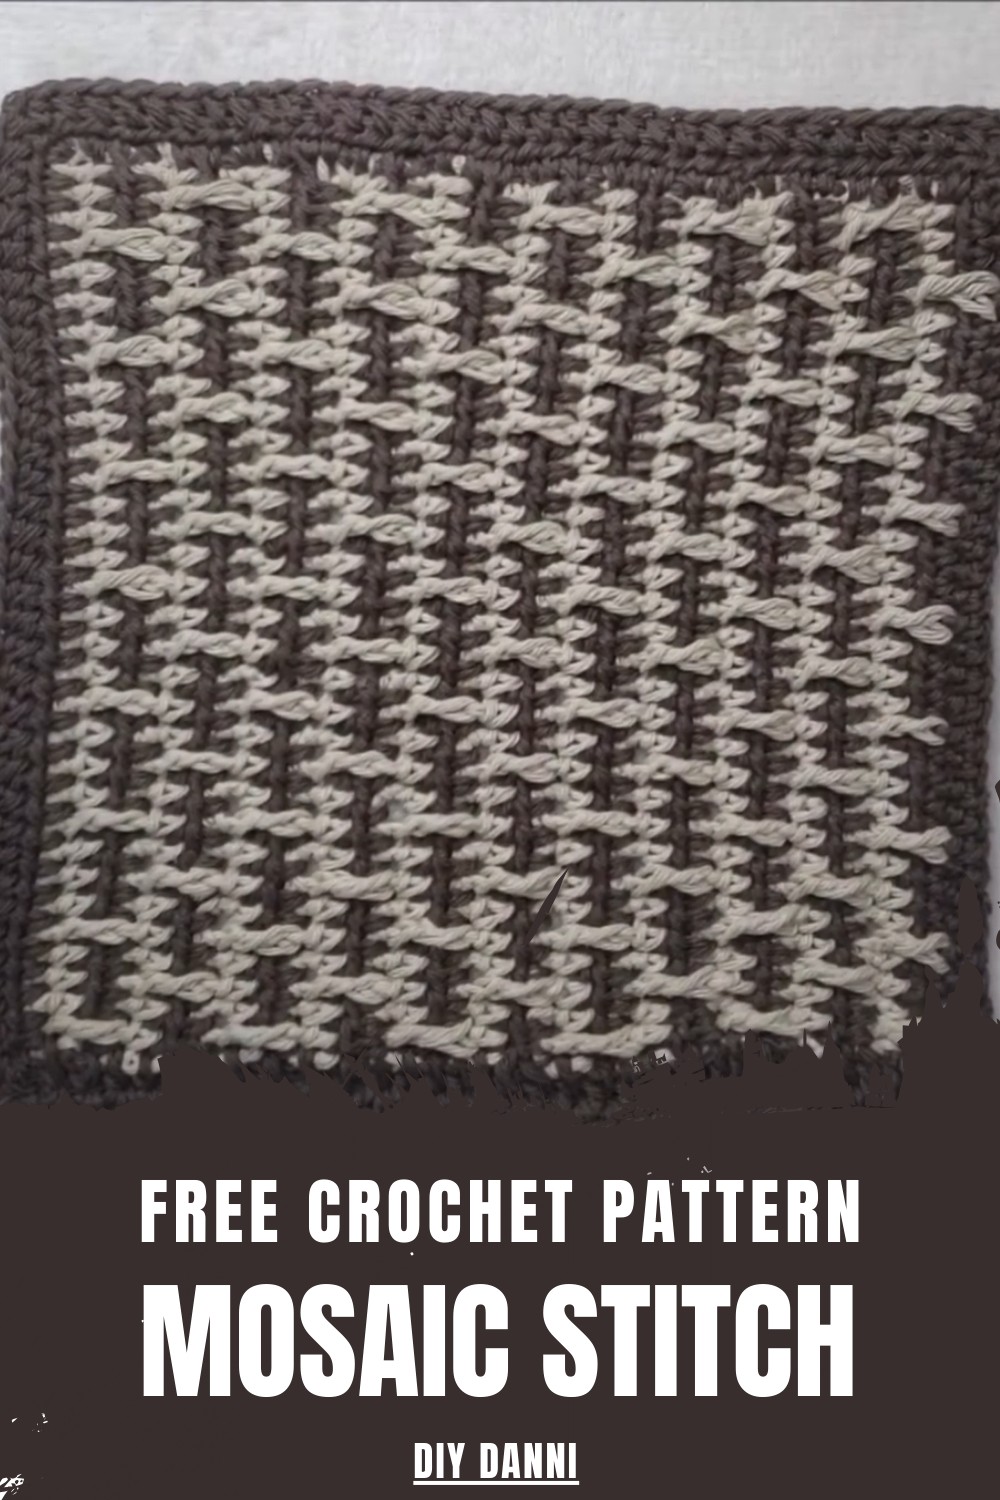
Crochet Pattern for Mosaic Stitch Tea Towel
Materials
- Yarn:
- Bernat Handicrafter cotton yarn (or similar worsted weight yarn, 4-ply) in 2 colors (e.g., two shades of brown).
- Hook:
- 4 mm crochet hook (US G/6).
- Additional Tools:
- Scissors.
- Yarn needle (for weaving in ends).
Skill Level
Intermediate – This pattern requires understanding of basic stitches, working post stitches, and color changes.
Key Abbreviations (US Crochet Terminology)
- CH: Chain
- HDC: Half Double Crochet
- FPDC: Front Post Double Crochet
- ST: Stitch
- SLST: Slip Stitch
- YO: Yarn Over
Special Notes
- This pattern is worked in multiples of 4 + 2. Adjust the number of starting chains depending on project width.
- Carry the unused color by crocheting over it in rows worked with the alternate color.
- Add borders along all sides of the work for neat finishing and additional structure.
Pattern
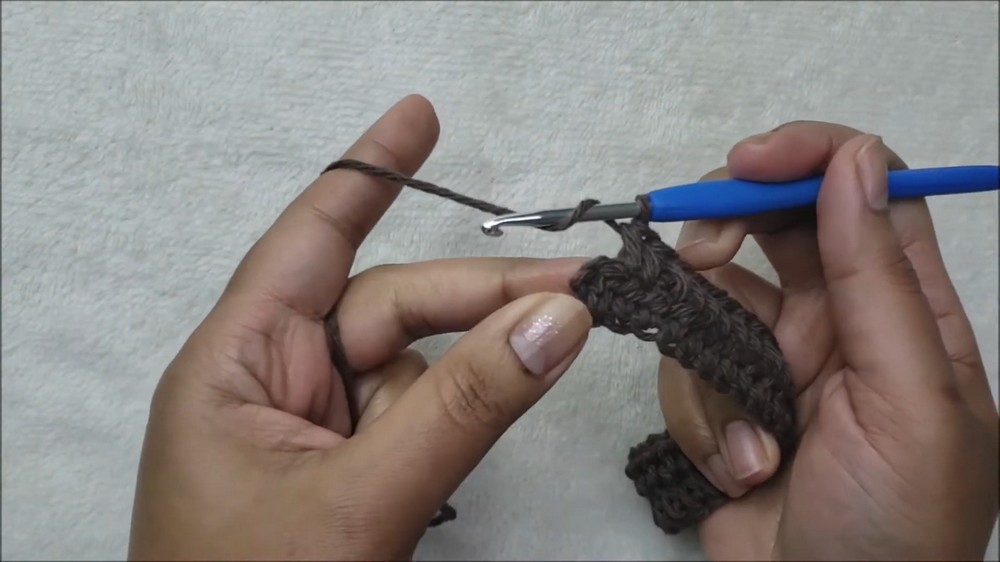
Foundation Row
- Using Color 1 (darker shade):
- CH 34 (or multiples of 4 based on project size).
- Add 2 more chains for turning (final count: CH 36).
- Row 1:
- Work HDC into the 3rd chain from the hook.
- Continue working 1 HDC into each chain across.
- Total stitches: 34 HDC.
- Row 2:
- CH 2, turn work (counts as the first HDC).
- Work 1 HDC into each stitch across, ensuring the straight edge remains intact.
- At the end, prepare for a color change: on the last stitch, YO and pull through the new color (Color 2).
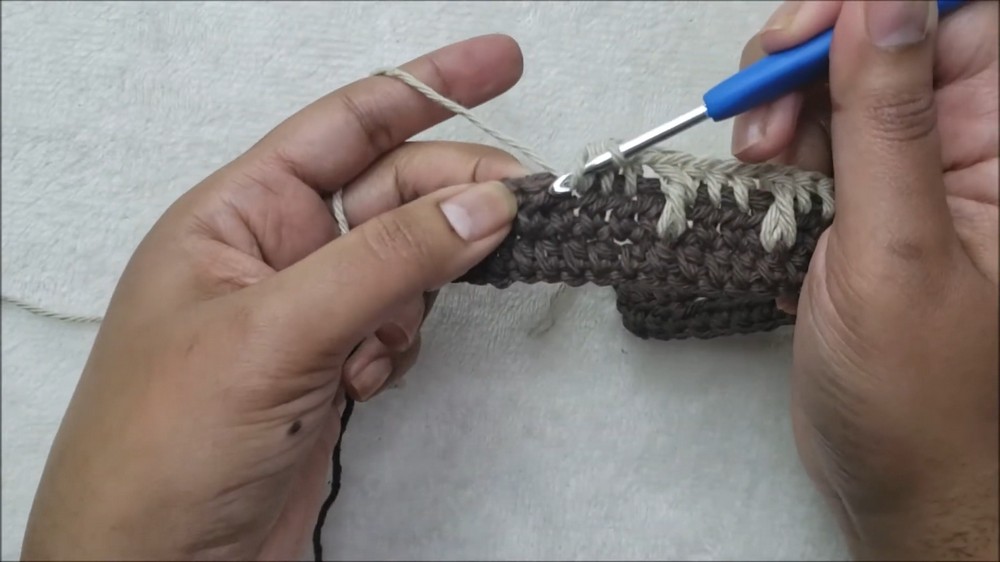
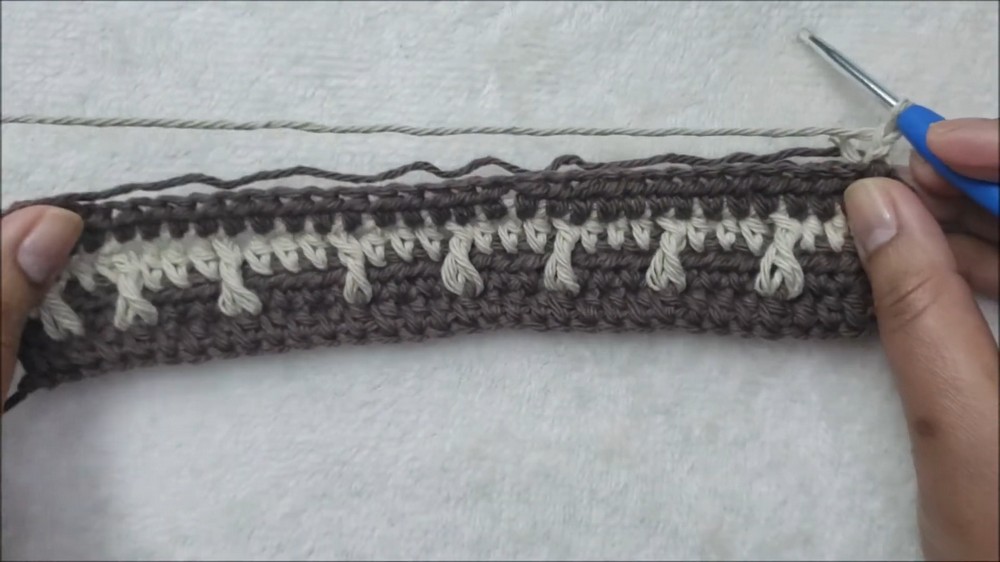
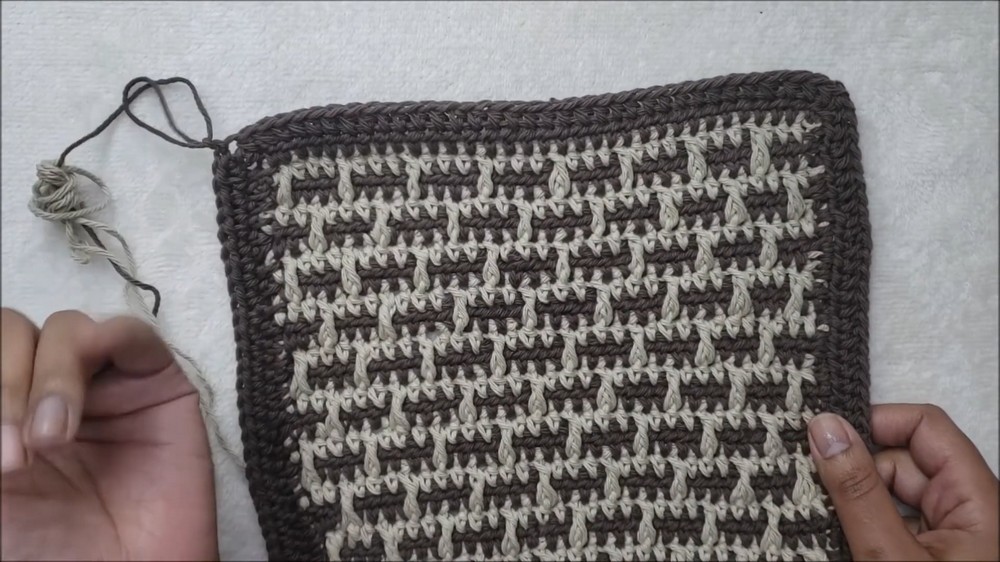
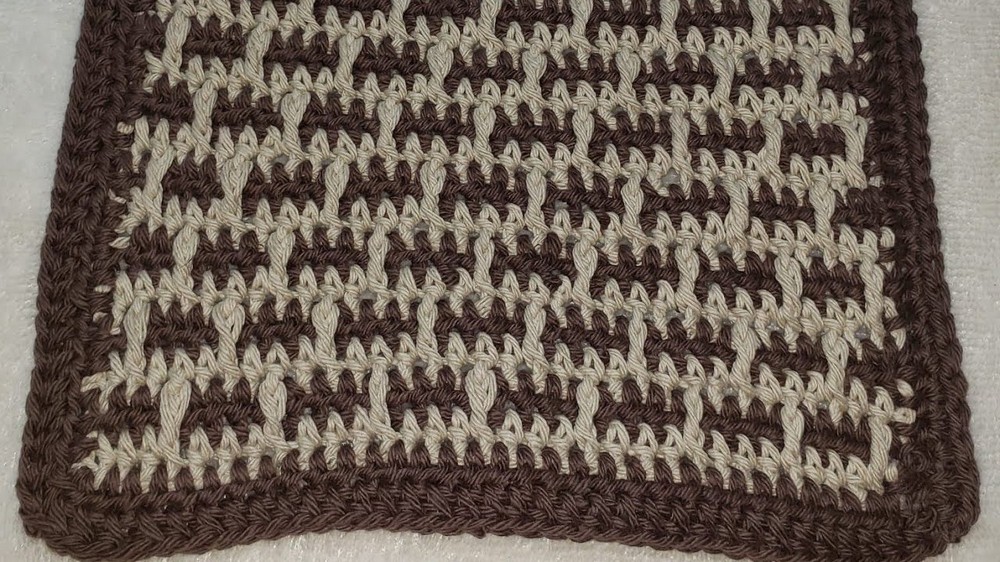
Row 3: Incorporating Mosaic Stitch
- CH 2, turn work (counts as the first HDC).
- Start working across:
- Work 1 HDC into the first stitch.
- Continue working 1 HDC into the next two stitches.
You will have worked 3 HDC in total. - FPDC:
- Skip the 4th stitch on the current row and locate the 4th stitch of Row 1 below.
- Work a Front Post Double Crochet (FPDC) around that stitch (YO, insert hook from the front around the post, pull loop through, YO and pull through 2 loops twice).
- Note: Skip the corresponding stitch on the current row after working the FPDC.
- Continue the sequence:
- 3 HDC: Work into the next 3 stitches of the row.
- FPDC: Again, skip the 4th stitch and make a FPDC into the post of Row 1 below.
- Repeat 3 HDC, 1 FPDC pattern across the row.
- At the end of the row, work the FPDC and finally 1 HDC into the top of the turning chain from the previous row.
- Switch back to Color 1:
- Before completing the last stitch, pull through Color 1 to finish.
Row 4: Solid Row with Carrying Yarn
- CH 2, turn work.
- Carry Color 2 by positioning it on top of your stitches as you work.
- Work 1 HDC into every stitch across, ensuring the unused yarn is securely crocheted over.
- Adjust carrying yarn tension before completing the last stitch to ensure it lies flat.
- Finish the row with a color change, pulling through Color 2.
Row 5: Alternating FPDC Placement
- CH 2, turn work.
- Start working:
- 1 HDC into the first stitch.
- FPDC: Locate the post stitch from Row 3 and work an FPDC around it.
- 3 HDC: Work into the next 3 stitches on the row.
- FPDC: Skip the current 4th stitch and work into the post stitch created in Row 3 (center stitch between FPDCs).
- Repeat 1 FPDC, 3 HDC across the row.
- End with 3 HDC after your last FPDC placement.
- Switch back to Color 1 (repeat color change instructions).
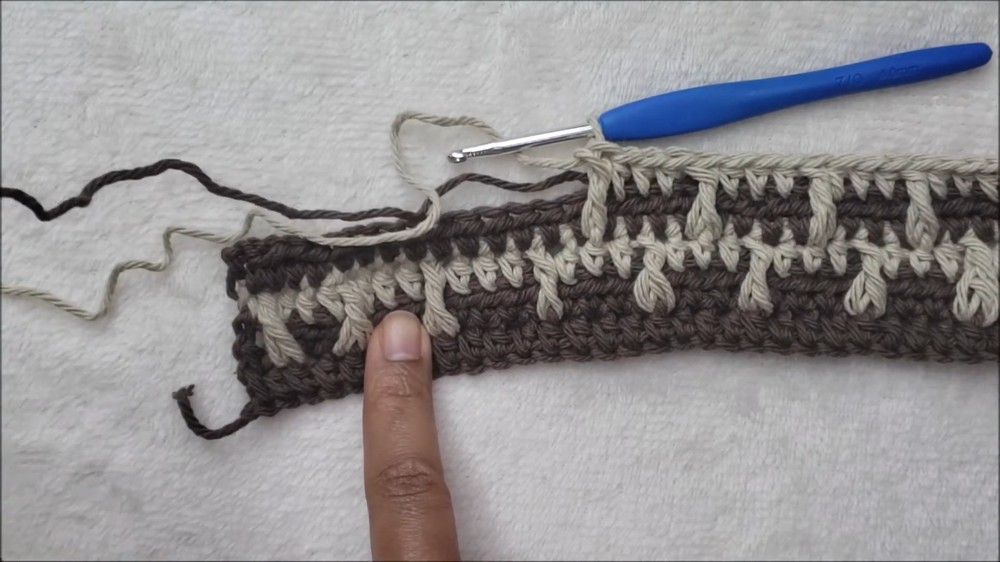
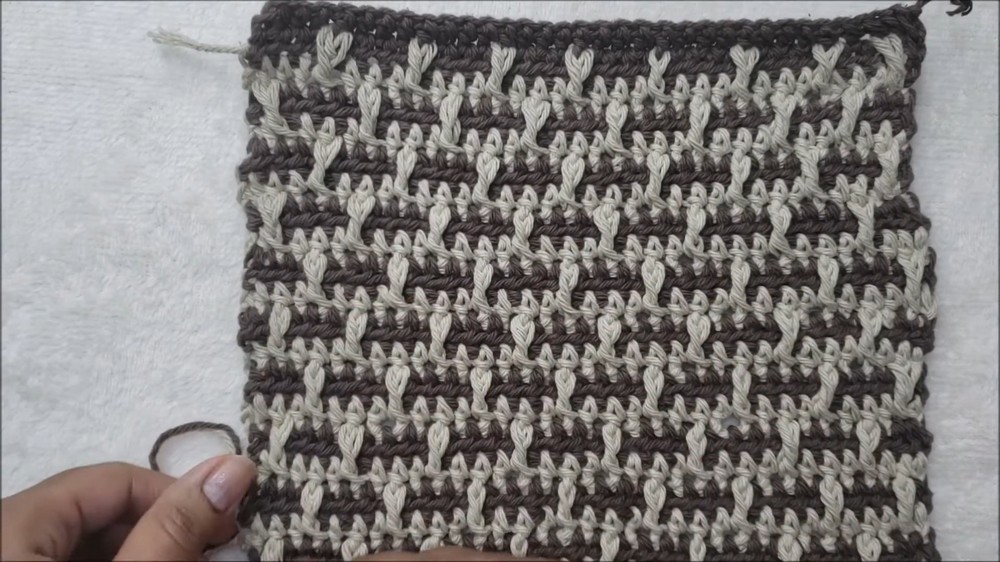
Repeat Rows 3, 4, and 5
- Continue repeating these three rows to lengthen the project to desired size.
- Finish on a solid HDC row (Row 4).
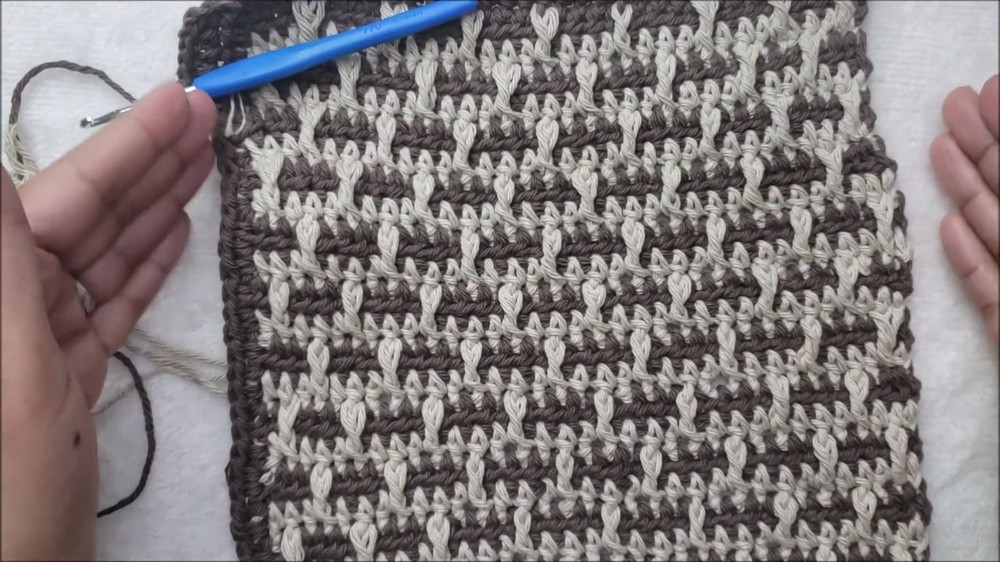
Adding Borders
- Begin with CH 1 and turn your work to start a new row along the edge.
- Work HDC evenly along the edge:
- Insert hook into each available stitch or space along the side of the project.
- Ensure consistent spacing for neat edges.
- Complete two rows along each edge to achieve symmetry.
- At corners:
- Work 3 HDC into the corner stitch to turn smoothly.
Finishing
- Once borders are complete, cut yarn and leave a long tail.
- Weave in all loose ends using your yarn needle. Ensure color transitions are secure and invisible.
Conclusion
You’ve now created a beautiful mosaic stitch project with an elegant textured pattern and neat borders. Perfect for use as a tea towel, scarf, blanket, or rectangular home décor piece.
Pattern Corrections
- Ensure correct alignment of FPDC stitches from previous rows for uniform patterns.
- Avoid skipping stitches incorrectly; count frequently.
Tips
- Color Management: Keep tension uniform when carrying yarn across rows to prevent loose or tight strands.
- Blocking: Lightly block your project after finishing to set the stitches and emphasize the texture.
- Customization: Adjust width and length based on project type. Larger multiples of 4 + 2 work well for blankets or afghans.
Leave a Reply