
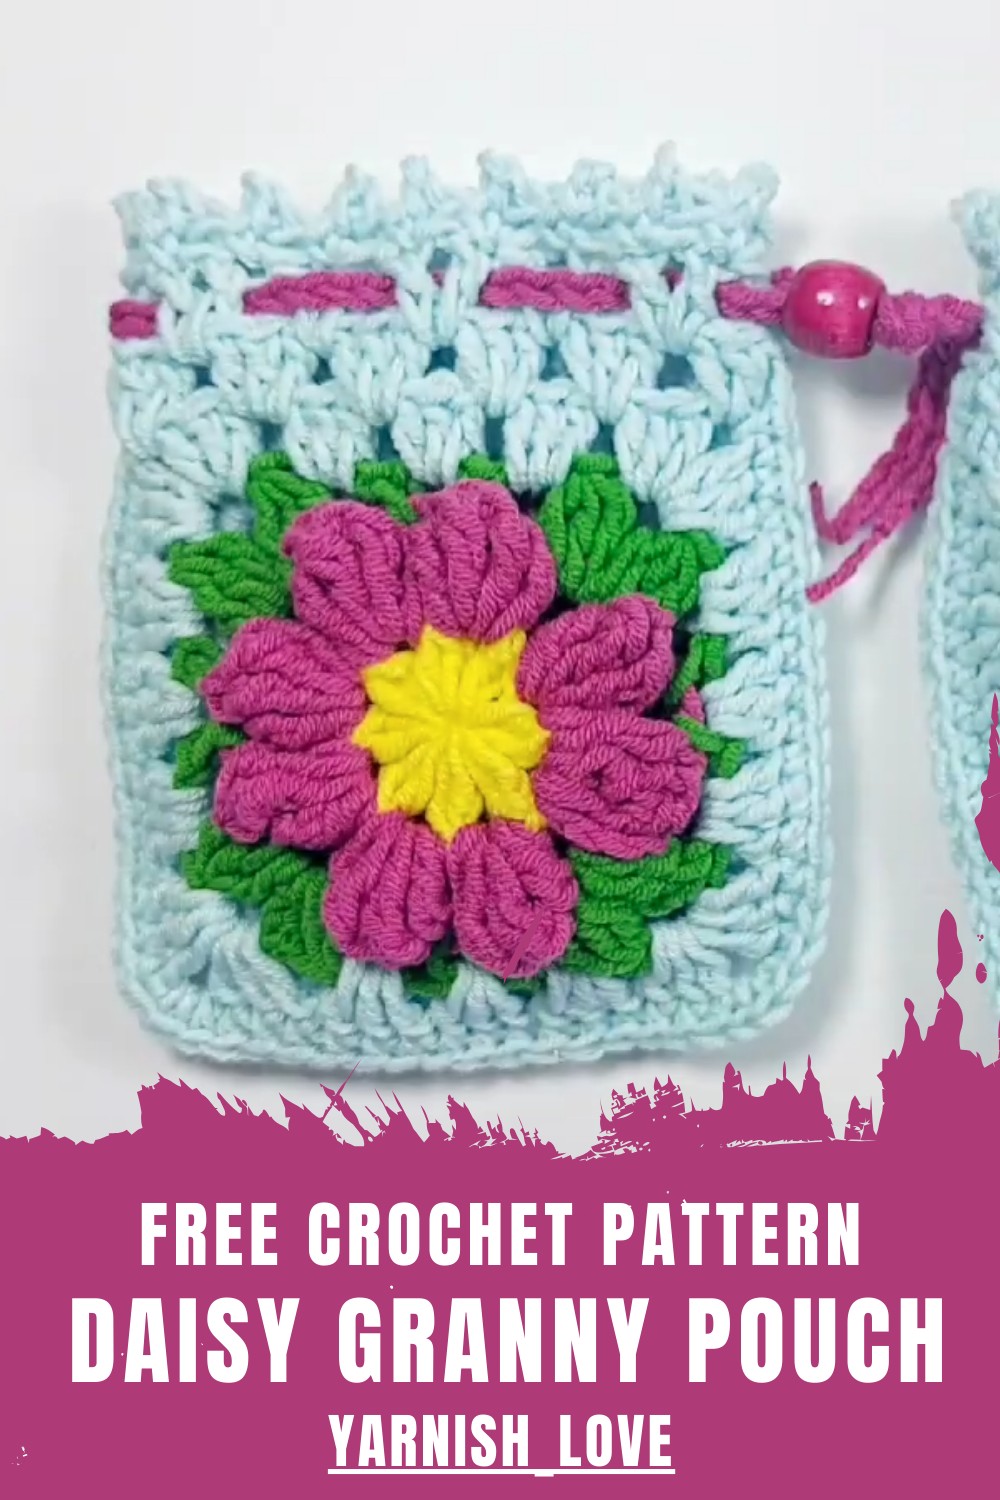
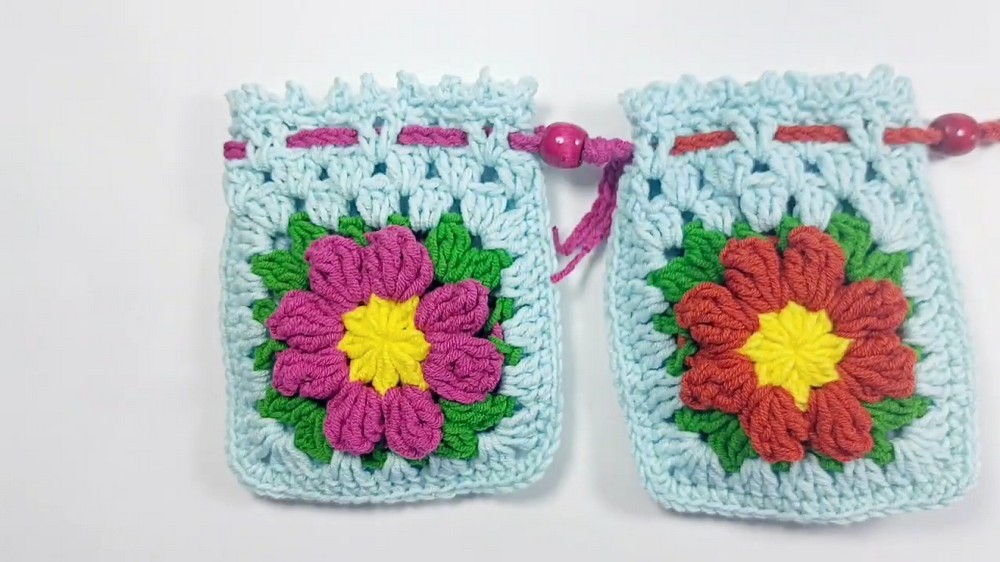
Spruce up your accessories with this Free Crochet Daisy Granny Pouch Pattern that’s perfect for carrying small treasures with a personal touch.
A cheerful and practical pouch can brighten your day and keep your essentials organized. The Free Crochet Daisy Granny Pouch Pattern helps you create a stunning accessory featuring delicate daisy flowers and an elegant granny square design. Its compact, functional size makes it perfect for carrying coins, small cosmetics, or treasured keepsakes, while the soft texture and vibrant colors add beauty and charm.
Daisy Granny Pouch Crochet Pattern for Holding Your Essentials
This pouch combines both style and convenience, making it a thoughtful handmade gift or a delightful addition to your personal collection. Crocheting it is easy and fun, even if you are just starting out, and it lets you express your creativity with every stitch. Functional yet stylish, this daisy granny pouch is not just an accessory, it’s a small token of handcrafted joy, perfect for any occasion.
Daisy Flower Pouch – Step-by-Step Crochet Pattern
Skill Level
- Intermediate: Requires knowledge of granny square construction, joining techniques (single crochet), and finishing details with edging.
Materials
- Yarn:
- Alize Cotton Gold Yarn (or any light DK-weight cotton/acrylic blend). Use multiple colors as desired.
- Hook Size:
- 3 mm crochet hook.
- Additional Items:
- Tapestry needle (for weaving in ends).
- Scissors.
Finished Size
- Approximate size of the pouch depends on the size of your granny squares. Each square in this tutorial is based on a Daisy Granny Square, and the approximate finished pouch size is 6×6 inches (15×15 cm).
Key Abbreviations (US Terminology)
- ch = Chain
- sl st = Slip Stitch
- sc = Single Crochet
- dc = Double Crochet
- yo = Yarn Over
- sp = Space
- st(s) = Stitch(es)
Special Notes
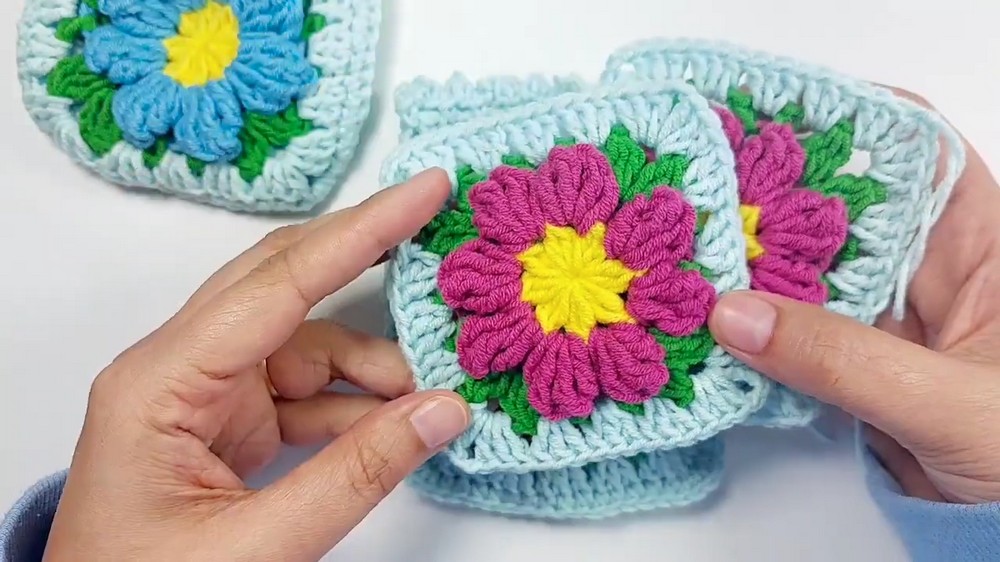
- Starting Point: This pattern assumes you already have two completed Daisy Granny Squares. If not, follow the granny square tutorial available (as mentioned in the transcription).
- Join As You Go: Do not fasten off the second granny square after completing it; the joining process begins immediately.
- Flexible Customization: This pouch can easily be resized by making larger or smaller granny squares or adding more rounds.
Pattern Instructions
Part 1: Preparing the Completed Daisy Granny Squares
- Ensure you have two daisy granny squares of the same size and color. Both squares should be complete and flat.
- Do not fasten off after completing the second square. You will immediately start the joining process.
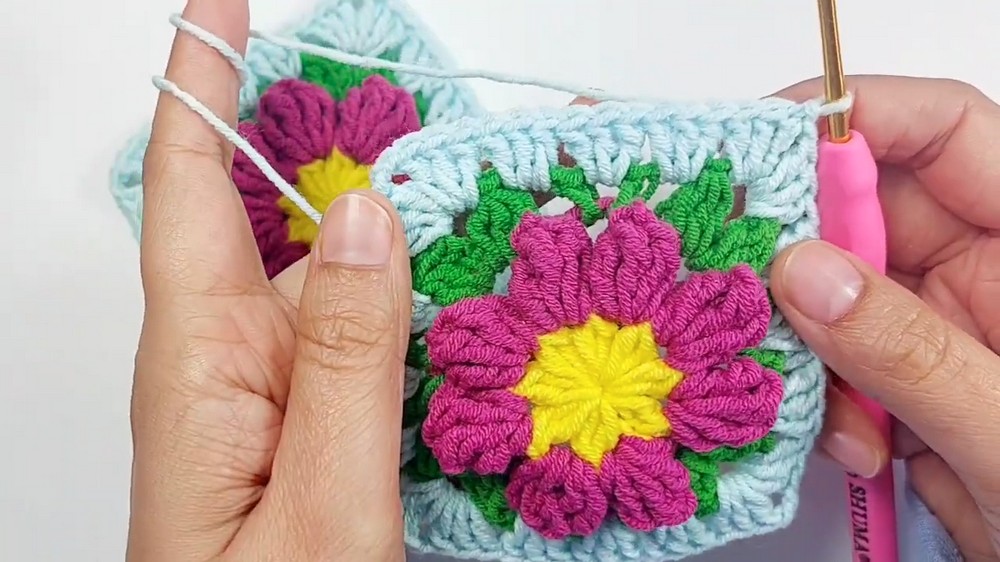
Part 2: Joining the Squares
- Positioning the Squares:
- Arrange the two granny squares so that the back sides face each other and the front sides are outward.
- Align the edges of the squares carefully.
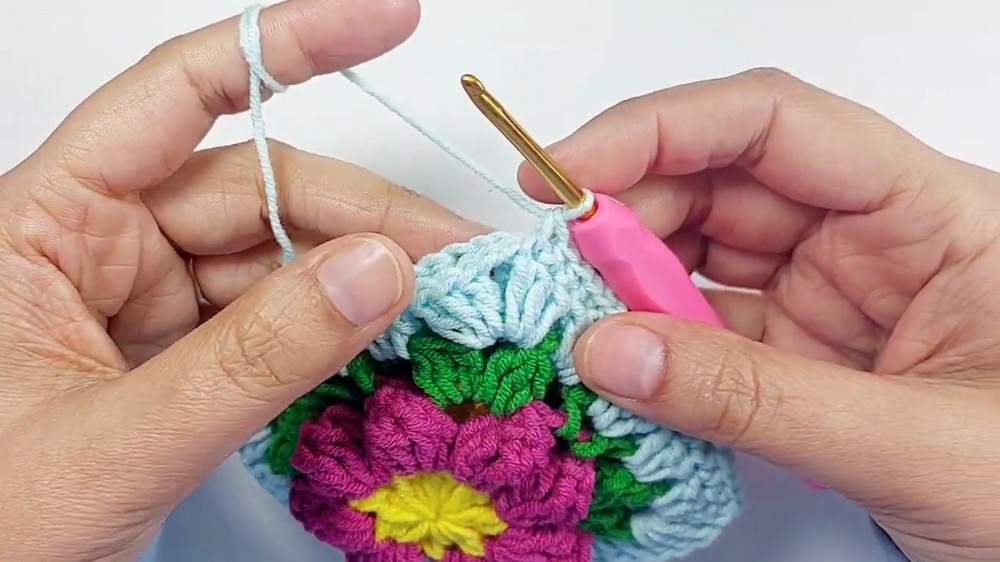
- Corner Join – Start the Seam:
- Ch 1, and insert the hook into the corner chain space of the first square. Then insert the hook into the corresponding corner chain space of the second square.
- Yarn over (yo) and pull through both spaces to make a single crochet (sc).
- Join Side Edges:
- Insert your hook into the next st of the first square and the corresponding st on the second square.
- Yarn over, pull through both sts, and make an sc.
- Repeat this along the entire edge to join both squares together. Work carefully to align stitches on both squares.
- Corner Stitches:
- When you reach a corner, place 3 sc in the corner chain space (going through both squares) to create a smooth corner.
- Continue working along the next edge, joining the squares with sc.
- Repeat Join Process:
- Continue this process on three sides of the squares.
- Leave the top side open to form the opening of the pouch.
Tip: Ensure the stitches are snug but not too tight, as this could distort the shape of the pouch.
Part 3: Edging Round 1
- Begin Edging Round 1:
- Starting at any open corner, ch 3 (counts as 1 dc).
- Work 2 dc into the same corner space.
- This forms the first cluster of 3 dc.
- Work Along the Top Edge:
- Skip the stitches and instead work into the spaces between the dc clusters from the granny square.
- In each space, work a group of 3 dc.
- Continue this pattern across the top edge.
- Join Last Space:
- When you reach the last space, join with a slip stitch into the top of the starting ch-3.
Part 4: Edging Round 2
- Start Round 2:
- Ch 4 (counts as dc + ch 1), then work 1 dc into the same space. This forms a V-stitch.
- Create V-Stitches Across Rows:
- Skip the next cluster of dc.
- In the next space between clusters, work 1 dc, ch 1, 1 dc (another V-stitch).
- Repeat this pattern across the edge.
- Join:
- At the end of the round, join with a slip stitch into the third chain of the starting ch-4.
Part 5: Final Round (Decorative Edging)
- Start Decorative Edge Round:
- Ch 3, then immediately sl st into the first chain to create a tiny loop.
- Work Picot Edging:
- Skip the next st, and sc into the next st.
- Ch 3, sl st into the first chain, skip 1 st, and sc into the next st.
- Repeat this pattern (ch 3, sl st into first ch, sk 1, sc in next) across the edge.
- Finish:
- When you reach the last st, sl st into the first sc. Cut the yarn and fasten off.

Part 6: Create the Strap
- Strap Foundation:
- Create a slip knot and attach the yarn to a corner of the pouch opening.
- Ch 70 (or desired length), then fasten the chain to the corresponding corner on the opposite side of the pouch with a sl st.
- Optional Strengthening:
- Work back along the foundation chain with sl sts or sc to make the strap stronger.
Finishing
- Weave in all loose ends with a tapestry needle.
- Check the alignment, ensuring the pouch is symmetrical and neat.
- Steam block lightly (if using acrylic yarn) to give the pouch a clean finish.
Conclusion
Congratulations! You’ve now made a Daisy Flower Pouch—a decorative and functional way to store small items like earphones, jewelry, or accessories. This project demonstrates the versatility of granny squares and allows for ample customization through color choices and edging designs.
Pattern Corrections
- The transcription mentions “chain 3” followed by “2 dc” in Round 1 of the edging, which is clarified to form groups of 3 dc clusters.
Tips for Success
- Neat Joining:
Take care while joining squares with single crochet to ensure stitches are evenly aligned. - Customization:
- Adjust the strap length or thickness to suit your needs.
- Use contrasting colors for the edging and strap to make your pouch stand out.
- Additional Embellishments:
Add tassels, buttons, or small pompoms to the pouch opening or strap for extra flair.
Leave a Reply