
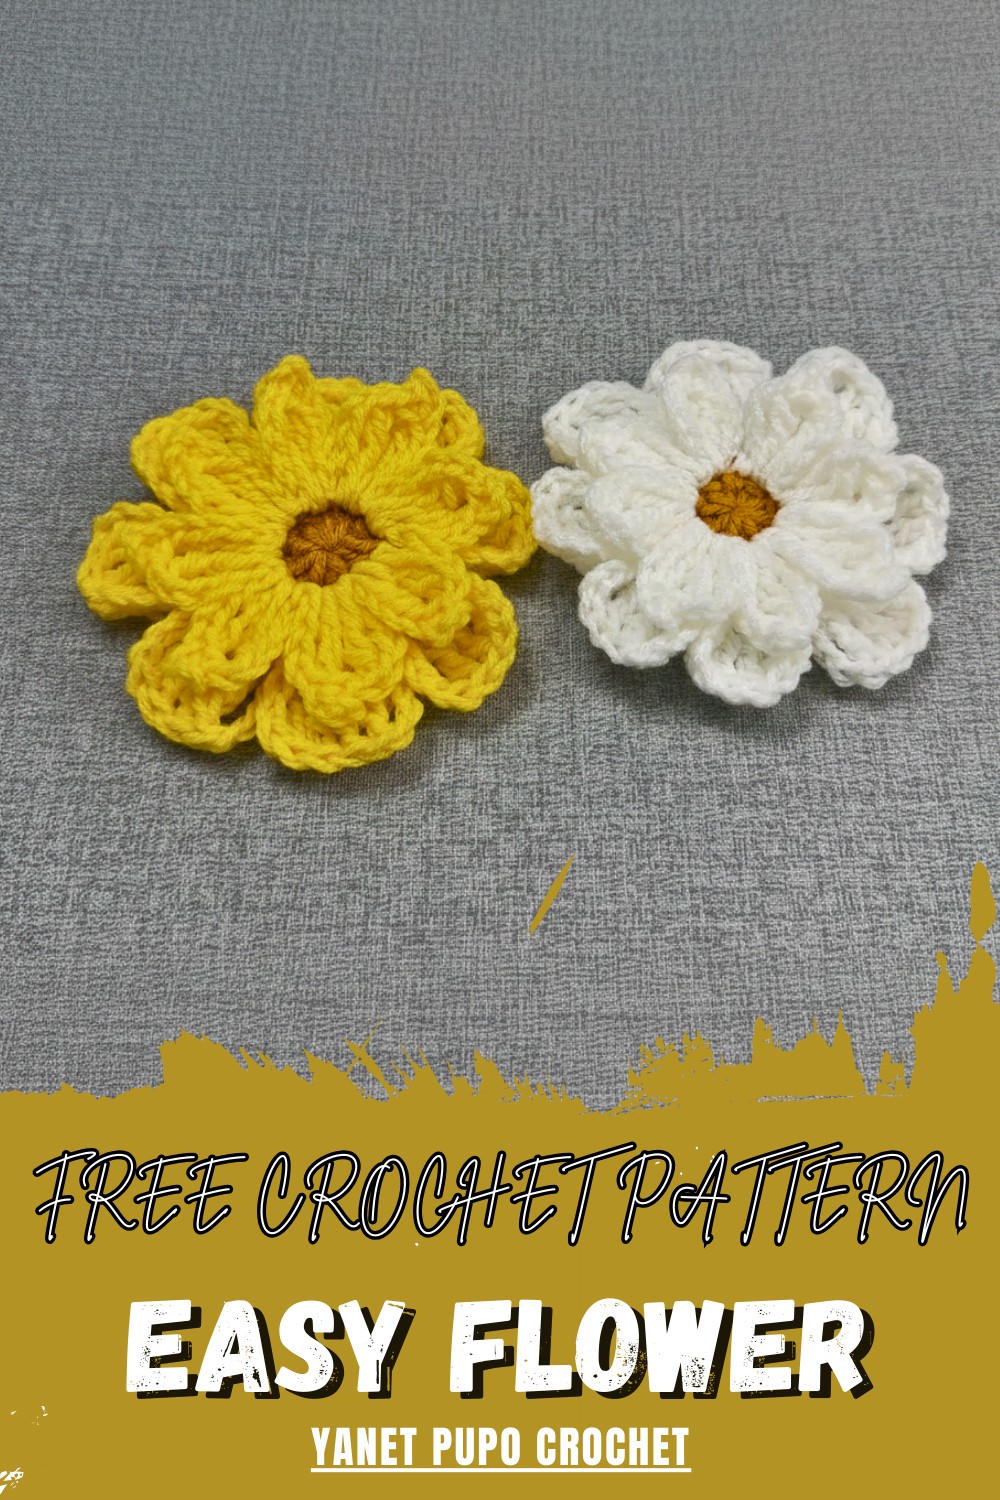
Sprinkle beauty into your day with this free crochet Flower pattern that’s easy and brings cheerful color and handmade charm to any space.
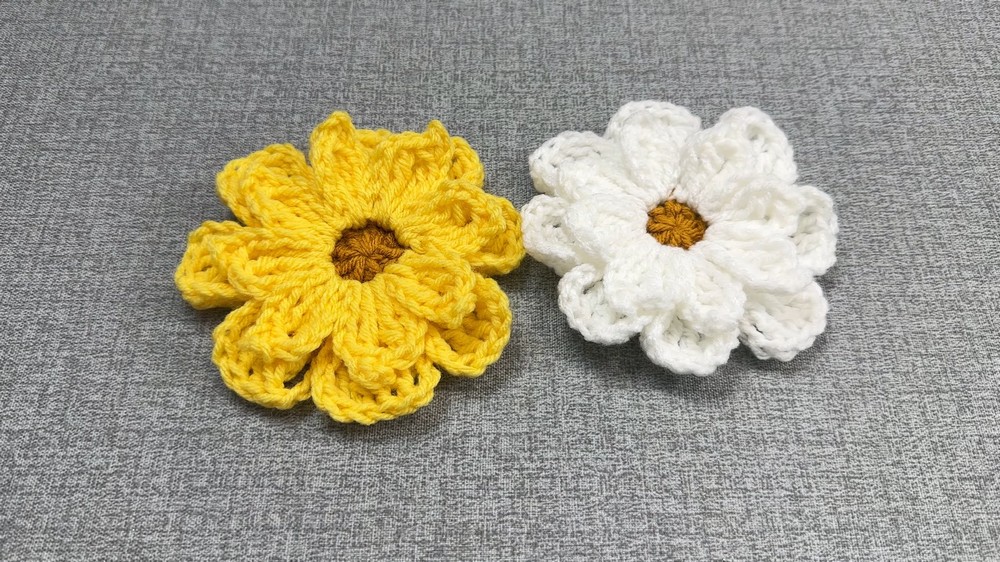
Yarn in gentle loops comes together to shape a pretty blossom right in your hands. This small flower looks almost real with petals that stay bright and cheerful every day. Using a crochet Flower pattern lets you make such a lovely piece easily. The finished flower can brighten up a hat purse hairband or pillow It brings a special touch to home decorations and wall hangings making everything feel more joyful.
Modern Free Crochet Flower Pattern for Every Occasion
Giving this flower as a gift shows care and brings a smile to anyone. You don’t need to worry about watering it or keeping it fresh—its beauty lasts. With clear and simple steps the crochet Flower pattern turns simple yarn into something beautiful and useful. Each blossom feels unique gentle and warm. A single flower like this fills any space with color and happiness making everyday moments a little brighter.
Layered Petal Crochet Flower Pattern
Materials
- Yarn: Worsted weight (#4) yarn, approx. 10g total (use as many colors as desired)
- Crochet Hook: 3.75mm aluminum hook (US F-5)
- Tapestry needle (optional, for weaving in ends)
- Scissors
Key Abbreviations (US Terms)
- MR – Magic ring
- ch – chain
- sl st – slip stitch
- sc – single crochet
- dc – double crochet
- tr – treble (triple) crochet (yarn over 3 times)
- st(s) – stitch(es)
Special Notes
- Flower is worked in rounds from the center outward.
- Each round forms a distinct petal layer, providing a 3-dimensional effect.
- The numbers and form ensure the flower has a nice, “giant” look.
- Petals and rings are anchored with slip stitches for stability.
- Tension should be relaxed for fuller petals.
Step-by-Step Pattern
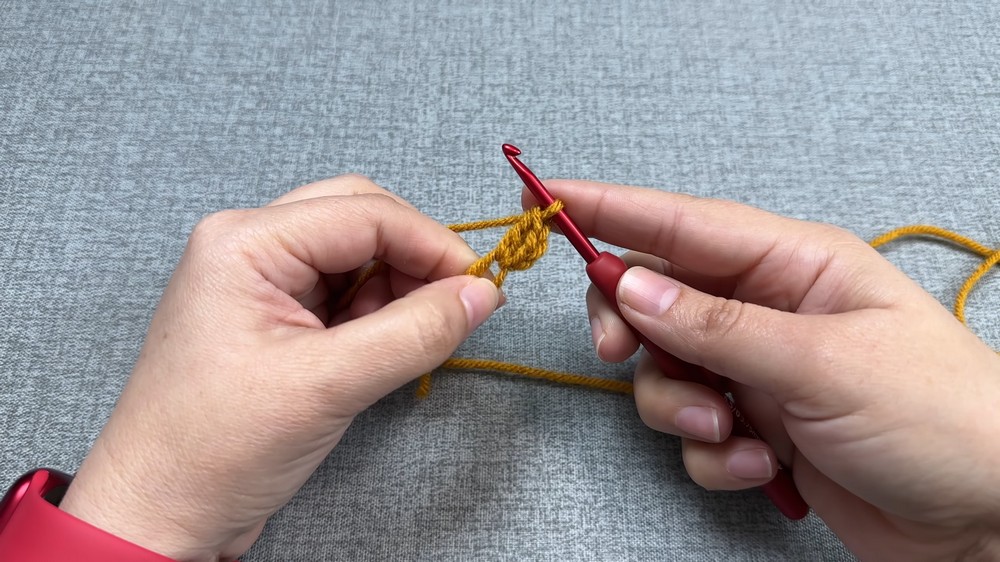
1. Center Circle
With center color:
- Make a magic ring (MR).
- Ch 2 (does not count as a stitch).
- Work 8 dc into the ring.
- Pull ring tight to close.
- Sl st to first dc to close the round.
- Fasten off and cut yarn.
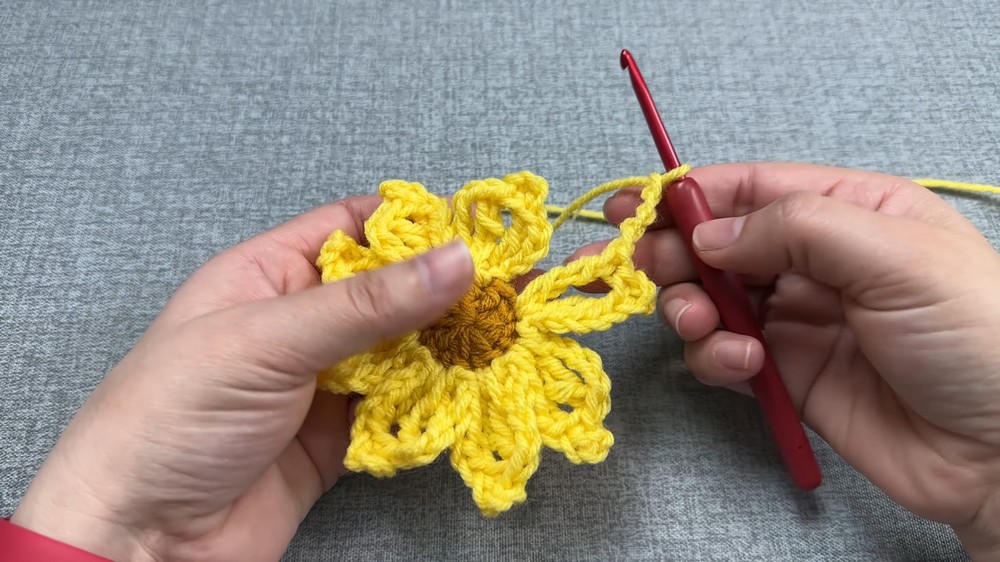
2. Small Petal Layer (Second Color)
Join second color in any dc:
- Ch 4 (petal start).
- Yarn over twice (double loop), tr in same st (insert, yo and pull up, [yo and draw through 2] x 3).
- Ch 3.
- Insert hook through the two top loops of the tr, sc (forms a small picot at top of tr).
- Yarn over twice, tr in same st.
- Ch 4, sl st in same st (petal complete).
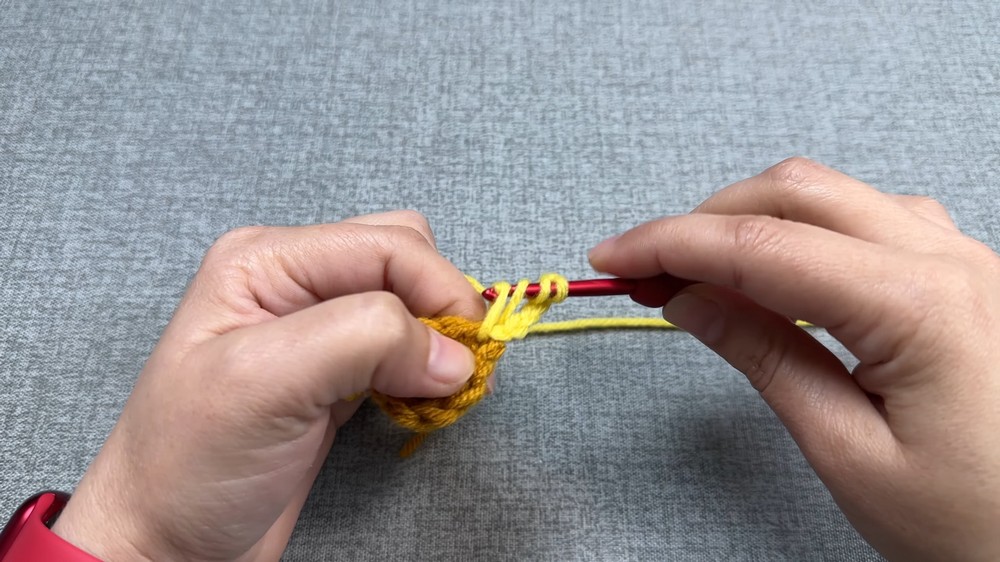
Repeat for each dc around:
- Sl st to next dc, repeat petal steps above.
Continue until you have 8 petals (one in each base dc).
After the last petal, sl st, fasten off and cut yarn.
3. Create Back Rings for Large Petals
Still with second color (or new color):
- On the back of flower, sl st into the base between two petals to start.
- Ch 4, then from behind pass hook between the next two petals (into the space between petals from back), sl st to anchor.
- Repeat: [Ch 4, sl st in space between petals from back] around, forming 8 back rings.
- Sl st to first ring to close the round.
4. Large Petal Layer (New or Previous Color)
Work large petals into each back ring:
For each petal:
- Sl st into ring to start.
- Ch 5 (for height).
- Yarn over 3 times, work 4 tr into the same ring (each: yo, insert, yo and pull through 2, four times).
- Ch 5.
- Sl st into same ring to anchor and complete petal.
Repeat in each back ring (8 petals in total).
After final petal, sl st to close, fasten off, and cut yarn.
5. Finishing
- Using a tapestry needle, weave in all ends securely on the flower’s back.
- Arrange petals for maximum dimension—fan out petals so the large ones are behind small petals.
Conclusion
This easy and bold two-layered flower is perfect for embellishing hats, scarves, bags, or home décor. Linked petals and rings give it structure, variety, and a lovely three-dimensional effect. Petite or giant, it stands out in any project.
Pattern Correction
- Ensure each layer is worked in the correct spaces (front for first petals, back for large petals).
- Always have 8 petals in each layer for perfect symmetry.
- Work loosely for more volume; if your stitches are tight, petals may shrink.
Tips
- Choose colors with high contrast for a dramatic look.
- For even more dimension, try a third layer of petals using a new color and longer starting chains.
- Attach securely with yarn or sew on a pin to make a brooch.
- Use scraps or leftover yarn for a multicolored effect.
Leave a Reply