
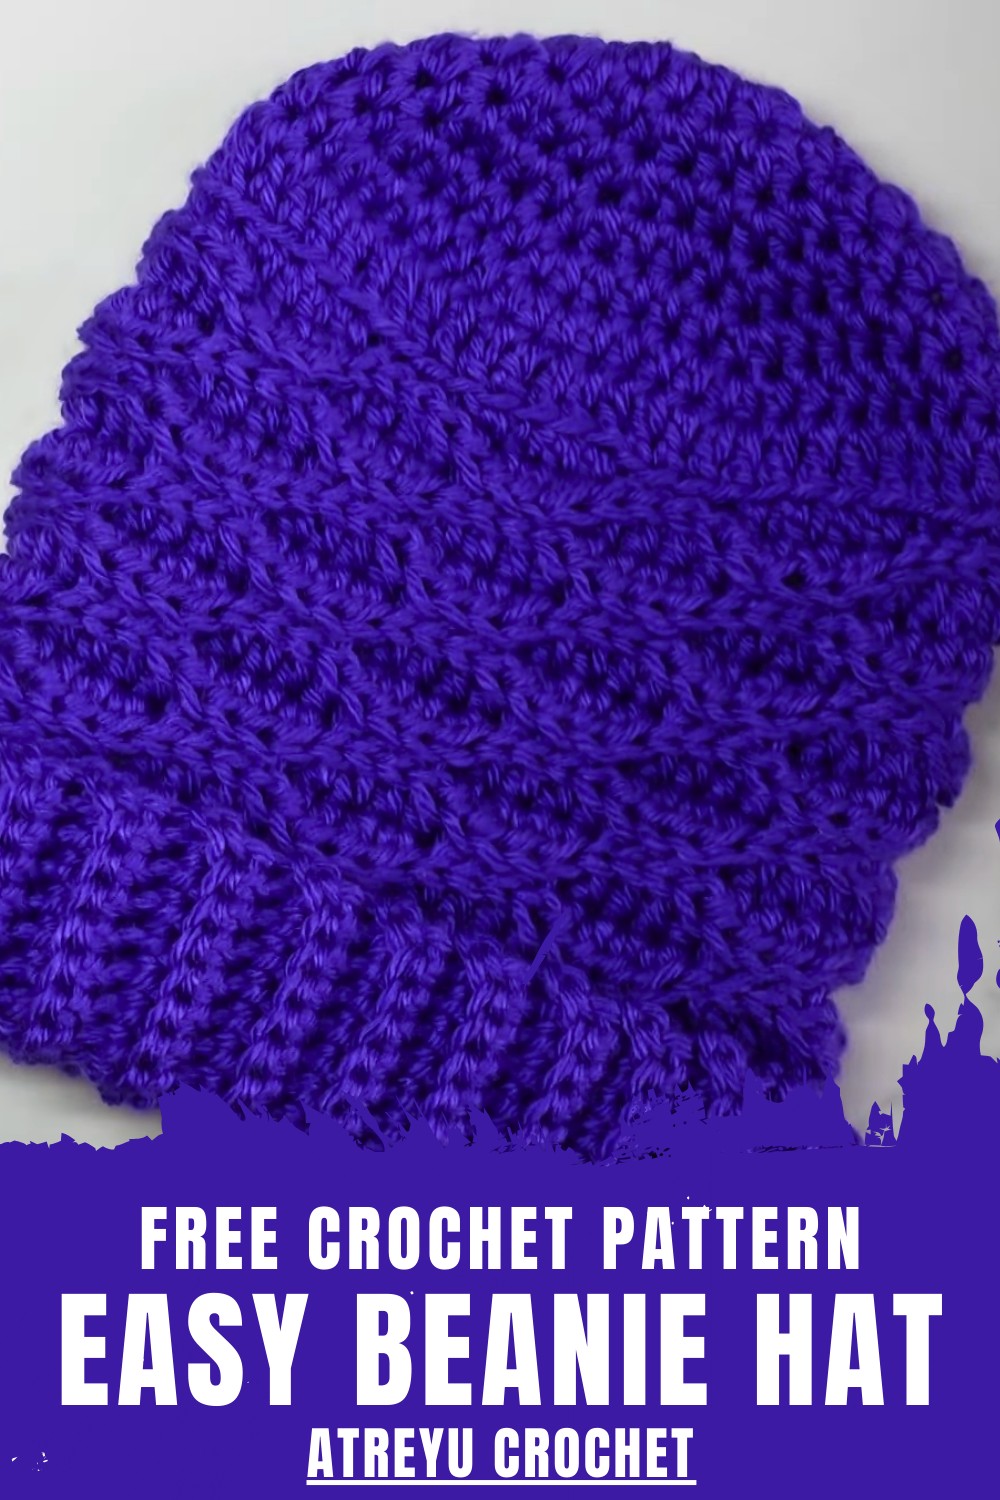
Show your cozy style easily with free crochet beanie hat pattern that gives warmth and personality for every outing or relaxing day at home.
A soft cozy hat that keeps your head warm while making you look stylish and happy. A crochet beanie hat pattern helps you make a hat that is not just pretty but also useful. This hat comes in any color and size you like so you can pick a bright shade or a calm tone that matches your style. The hat is shaped to fit your head perfectly and gives a snug comfortable feel all day long.
Ultimate Free Beanie Hat Crochet Pattern for Everyone
With a crochet beanie hat pattern you can create a special hat for yourself or someone you care about. People use this hat for chilly weather outdoor walks or simply to add a bit of fun to their day. The pattern is simple and anyone can learn it step by step. Adding your own touch such as a pom-pom or stripes makes your beanie unique and special. A handmade beanie hat always brings warmth and care wherever you go.

Almond Stitch Beanie Crochet Pattern
Materials
- Yarn: Medium 4 (worsted weight) yarn; sample uses approx. 6 oz/171g/315 yds (288 m)
- Hook: Size I/9 (5.5 mm) crochet hook (or size recommended on yarn)
- Notions:
- Scissors
- Tapestry/darning needle (for weaving and sewing)
- At least 1 stitch marker (recommend a few)
- Tape measure
Key Abbreviations
- ch – chain
- sl st – slip stitch
- sc – single crochet
- hdc – half double crochet
- dc – double crochet
- st(s) – stitch(es)
- rep – repeat
Special Notes
- This is a top-down, seamless beanie, worked in joined rounds.
- The almond stitch is made by alternating groups of slip stitches and half double crochets, always in the back loop only and matching/alternating groups every other round.
- Turning work at the end of each round is essential to replicate the matching scarf’s look.
- Pattern is very stretch-friendly; measure or try on as you go!
Pattern Instructions
1. Crown: Magic Ring & Increase Rounds
- Start with a magic ring.
- Ch 1.
- Round 1: Work 8 hdc into the ring. Join with sl st to first st. Place a stitch marker in the first hdc after joining. Pull yarn tail to close ring. (8 sts)
- Round 2: Ch 1. Work 2 hdc in each st around. Join with sl st to first st. Move marker up. (16 sts)
- Round 3: Ch 1. (1 hdc in next st, 2 hdc in next st) around. Join with sl st to first st, move marker. (24 sts)
- Round 4: Ch 1. (1 hdc in each of next 2 sts, 2 hdc in next st) around. Join and move marker. (32 sts)
- Round 5: Ch 1. (1 hdc in each of next 3 sts, 2 hdc in next st) around. Join and move marker. (40 sts)
- Round 6: Ch 1. (1 hdc in each of next 4 sts, 2 hdc in next st) around. Join and move marker. (48 sts)
- Round 7: Ch 1. (1 hdc in each of next 5 sts, 2 hdc in next st) around. Join and move marker. (56 sts)
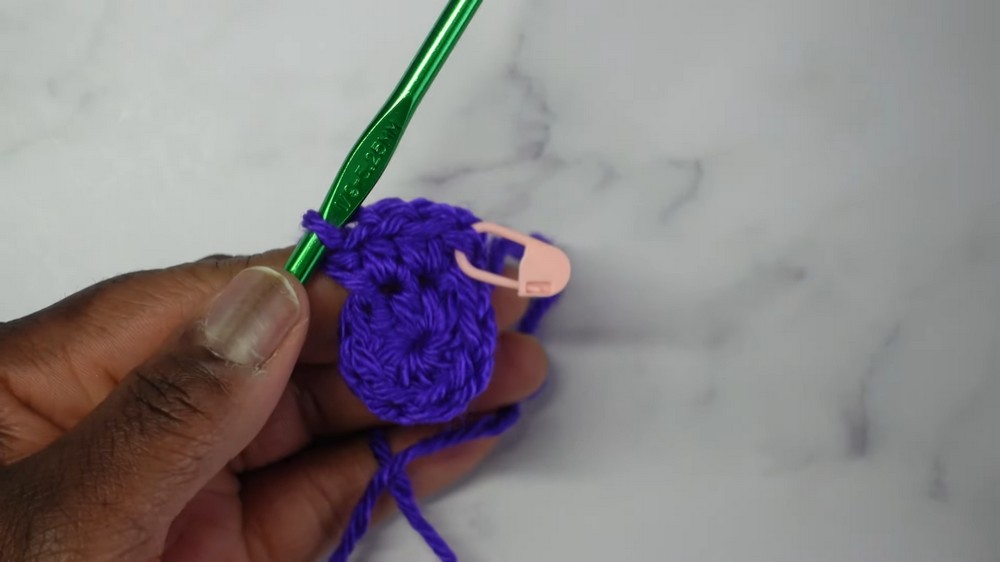
Tip: For custom sizes, the formula is: [round number] × 8 = total sts in that round. Stop increasing when crown measures approx. 6–6½” (15–16 cm) across, or as fits the head.
2. Transition Round
- After last increase round (for adult, often 56 sts), Ch 2, then work 1 dc in each st around. Join with sl st to first dc. (Ch 2 does not count as a st.)
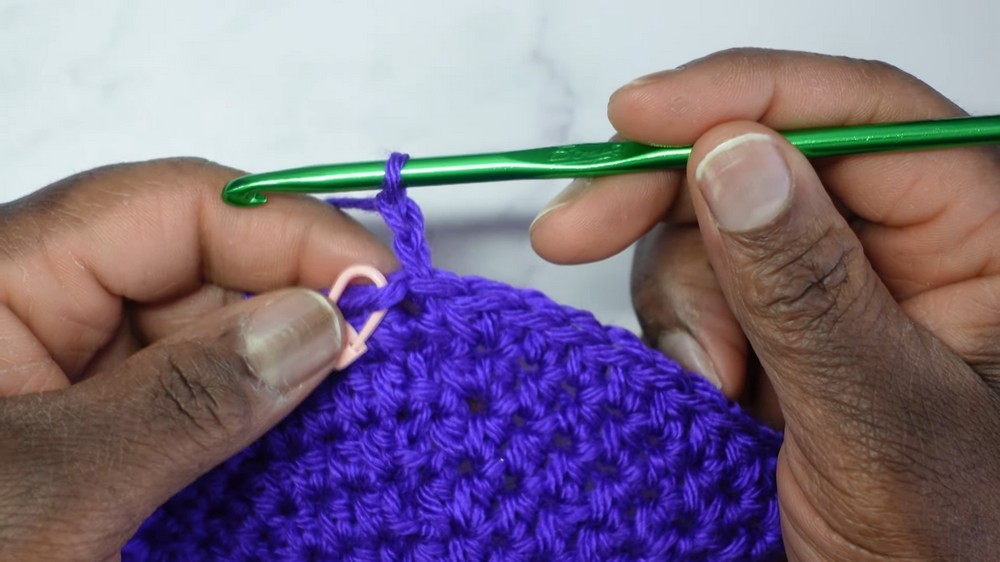
3. Almond Stitch Section
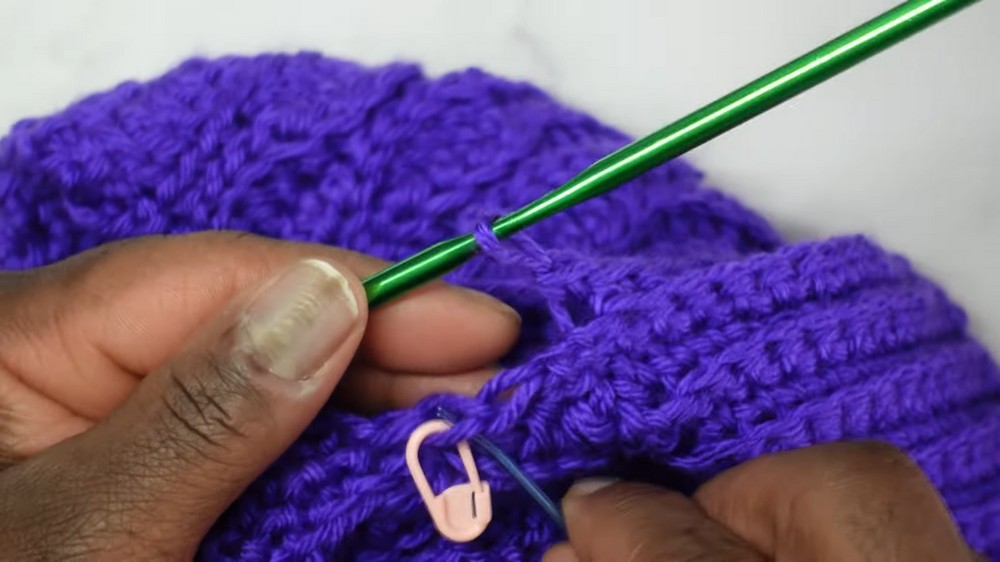
This section creates the almond pattern by alternating 4 sl st (in BLO) and 4 hdc (in BLO) around, turning after every round to mimic working in rows.
Almond Pattern Rounds:
- Ch 1, turn.
- [Sl st in BLO of next 4 sts, hdc in BLO of next 4 sts]—repeat around. Join with sl st to first slip stitch.
- Place a marker in the first slip stitch.
- Ch 1, turn.
- Matching round: [sl st in BLO of sl st below, hdc in BLO of hdc below]—continues grouping as established. Join.
- Move marker up.
- Ch 1, turn.
- Alternating round: Start with hdc group if you ended last round with sl sts, or sl st group if you ended with hdc group; alternate groups of 4 to end.
- Join and turn.
- Repeat previous two rounds, always alternating/matching the groups, until this almond section (body of the hat) measures about 7–8″ (18–20 cm) or until your desired depth—try on to check fit.
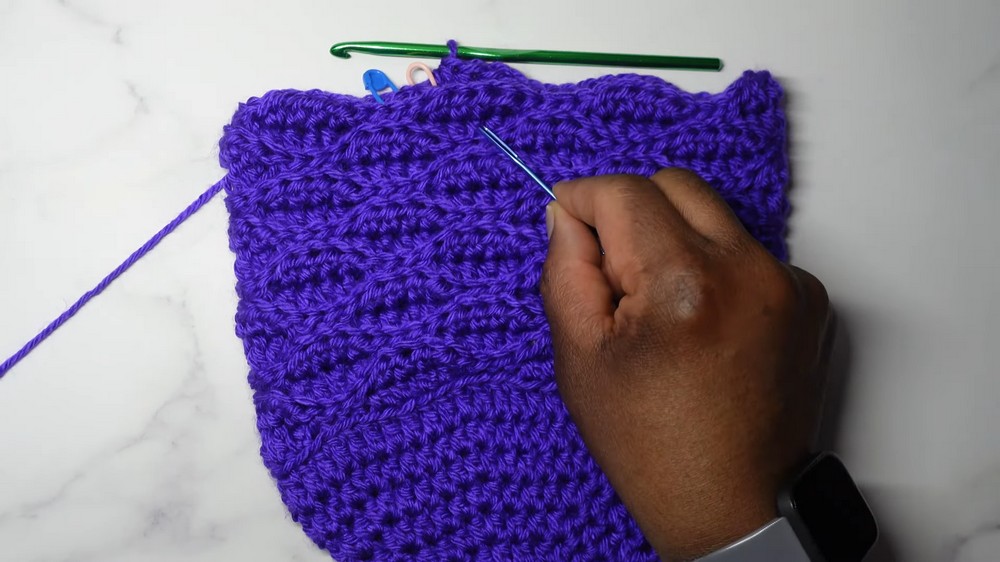
- The sample uses 16 rounds of almond stitch section.
4. Finishing the Body (Optional)
- If you wish, stop here, fasten off, and weave in the ends for a wave-edged beanie.
- OR: Continue to brim/ribbing below.
5. Optional Ribbed Brim
- Ch 15 (or any odd number for desired brim depth).
- Starting in 2nd ch from hook, work 1 sc in each ch back to hat edge. (14 sc in sample.)
- Slip stitch into next 2 stitches of hat to join the brim row.
Brim Rows:
a. Ch 1, turn.
b. Work sc blo in each st up the brim row (back loops only). (14 sc)
c. Ch 1, turn, sc blo down.
d. At hat edge, sl st into next 2 sts, repeat.
Repeat steps a–d around the hat edge until all sts are worked and brim overlaps/start met.
Final Join:
- Slip stitch or sew foundation edge of brim to final brim row, working through front loop of last row and chain edge.
- Fasten off, weave in all ends neatly.
6. Finishing
- Weave in all ends, using tail at crown to go around center and secure if needed (help keep the ring tightly closed).
- Block gently if desired.
Finished Measurements
- Total depth (with brim): approx. 12″ (30 cm)
- Hat body (before brim): approx. 8″ (20 cm)
Conclusion
Congratulations!
You have made a richly textured almond stitch beanie that coordinates perfectly with the matching almond scarf. You can make it with or without the ribbed brim, customizing colors and the fit for anyone.
Pattern Corrections & Tips
- Pattern Correction: Always work slip stitches and half double crochets in the back loop only for almond sections.
- Turning after each round is essential for the authentic almond stitch pattern.
- Stitch markers help keep track of your first and last stitches throughout rounds, especially on slip stitches.
- Keep slip stitches loose so they’re easy to work into next round.
- Try on your hat as you go to adjust height for a perfect, custom fit.
- For beginners, use extra markers at the start of each round and on the brim.
Leave a Reply