
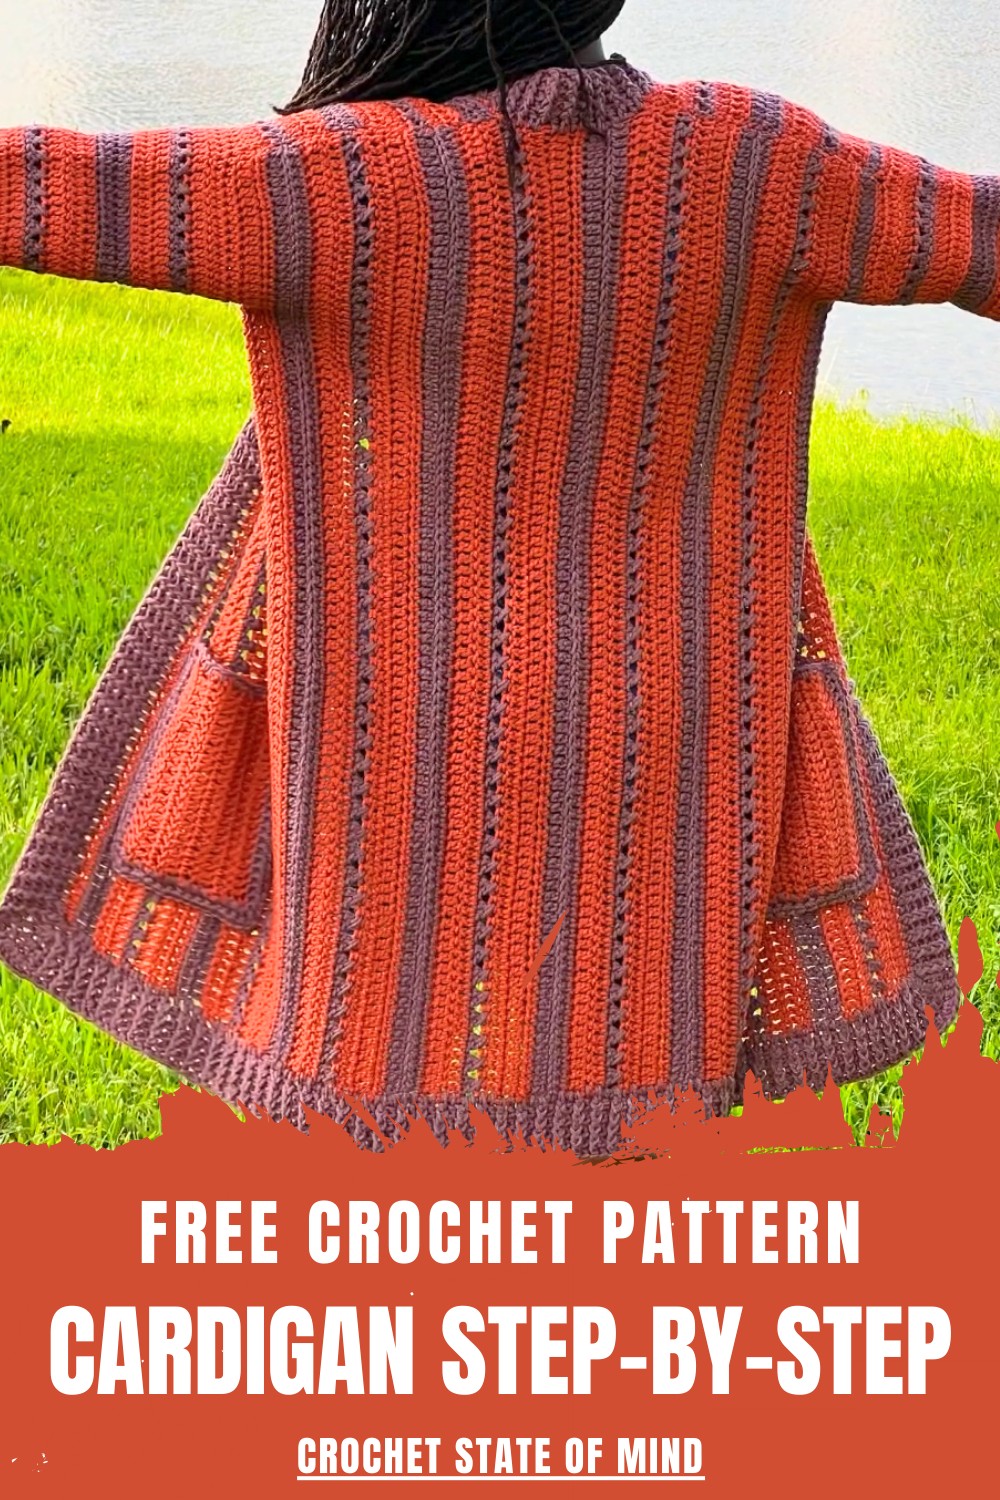
Soft textures and inviting colors come together in a free crochet cardigan pattern, for cozy layer that feels stylish and welcoming everyday.
There’s something truly charming about a cardigan that stands out for its warm look and delightful style. Gentle patterns and cheerful colors bring life to every crochet cardigan pattern, making it unique and full of personality. This lovely piece goes beyond just clothing—it becomes a favorite layer for keeping cozy or adding a pop of color to anything you wear. Adding a crochet cardigan pattern to your collection means enjoying both comfort and a fresh style, perfect for daily life or special occasions.
Free Crochet Cardigan Pattern for a Modern Touch
Its light and airy design makes it easy to put on when you need a bit of extra warmth or want to add a stylish touch to your outfit. Even those who have never tried making clothes before can appreciate how simple and inviting this cardigan is. Beauty, comfort, and usefulness come together, making this cardigan a joyful and practical choice for everyone.
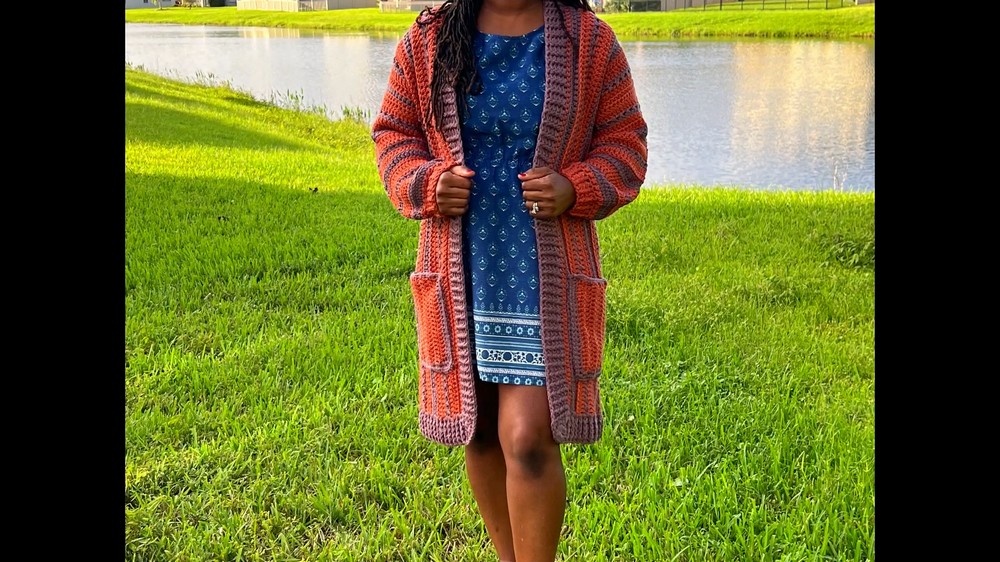
October-Themed Crochet Cardigan with Pockets
Materials
- Yarn: Medium worsted weight (4), 100% acrylic
- Hobby Lobby JN B Soft and Sleek Low-Pill Fiber
- Color A: Bruschetta (approx. 3.5 skeins, 232 yds/skein)
- Color B: French Lilac (approx. 3.25 skeins, 232 yds/skein)
- Hook: 6 mm (J/10) crochet hook
- Notions:
- Measuring tape
- Stitch markers
- Scissors
- Darning needle
- Optional: Video tutorials for foundation half double crochet, color changes, and front/back post double crochet, available online
Abbreviations (US Terminology)
| Term | Meaning |
|---|---|
| ch | chain |
| st | stitch |
| sc | single crochet |
| hdc | half double crochet |
| dc | double crochet |
| fhdc | foundation half double crochet |
| xdc | cross stitch double crochet (see “Special Stitches”) |
| exhdc | extended half double crochet (see “Special Stitches”) |
| exsc | extended single crochet (see “Special Stitches”) |
| fpdc | front post double crochet |
| bpdc | back post double crochet |
| sl st | slip stitch |
| rep | repeat |
Special Stitches
Stacked Single Crochet (counts as first dc):
- Sc into first stitch, insert hook into left leg of that sc, sc again.
Cross Stitch Double Crochet (xdc):
- Skip 1 st, dc in next, dc in sk st behind previous dc—forms an “X”.
Extended Half Double Crochet (exhdc):
- Yarn over, insert hook in st, yo, pull up a loop (3 loops on hook).
- Yo, pull through 1 loop (creates a “chain 1”), yo, pull through remaining 3 loops.
Extended Single Crochet (exsc):
- Insert hook into stitch, yo, pull up loop.
- Yo, pull through 1 loop (chain 1 made), yo, pull through remaining 2 loops.
Special Notes
- Cardigan is made to measure. Use a tape measure and adjust panel width/length, armhole depth, or sleeve rounds to match your fit preferences.
- No turning chains for body panels. Use stacked single crochet in place of ch-2 at the start of rows.
- Eight-row repeat: Follow for the main body and sleeves.
- Color changes: Use the “magic join” or your preferred method.
- Armholes: Created by chaining stitches at sides and working across them.
- All instructions are written in US crochet terms.
PATTERN
Cardigan Construction Overview
- Body is worked as one piece: first front panel → back panel → second front panel.
- After main rectangle shaped, fold at shoulders, seam, then add sleeves and border.
- Sleeves worked in rounds, border and pocket added last.
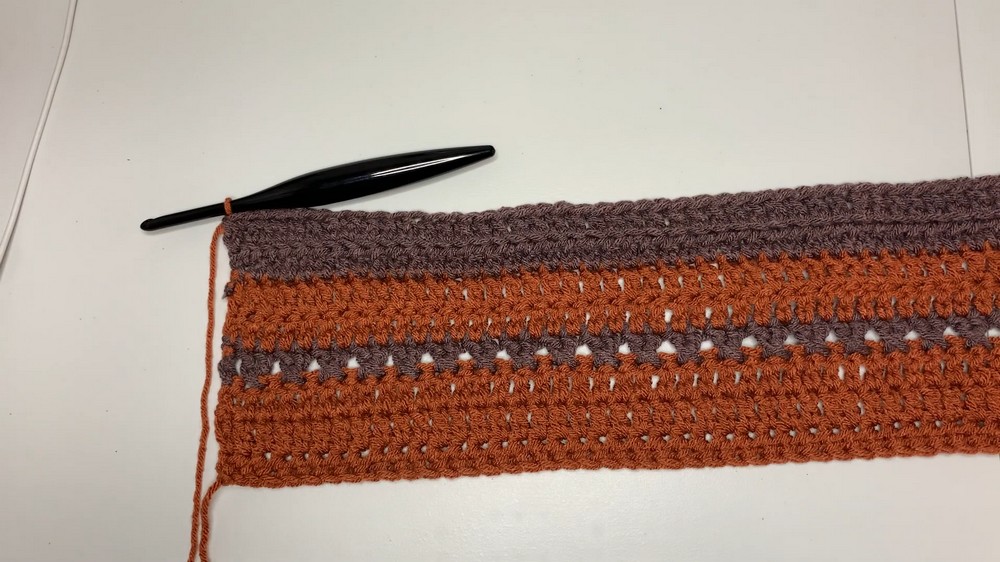
1. Main Body
First Front Panel
- Foundation:
- Work 90 fhdc or as many as needed for your preferred length (must be even).
- Alternative: Ch desired length (even number), hdc in each ch for Row 1.
- Row 1: Hdc across (or fhdc; counts as Row 1 of 8-row repeat).
- Row 2: Turn. Do not ch. Work a stacked sc in first st, then dc across.
- Row 3: Turn, stacked sc, dc across (in Color A).
- Row 4 (Color B):
- Change to Color B using your preferred method or “magic join”.
- Stacked sc in first st; skip 1 st, dc in next, dc in skipped st (forms X stitch)—repeat across.
- End with 1 dc in last st.
- Row 5: Change to Color A. Stacked sc, dc across.
- Row 6: Stacked sc, dc across (remain Color A).
- Row 7 (Color B): Change to Color B. Work exhdc in BLO across (first st is stacked sc).
- Row 8: Repeat exhdc in BLO (Color B).
- Repeat Rows 1–8 until you reach the desired width for front panel (suggested: 8.5” or as needed for your size).
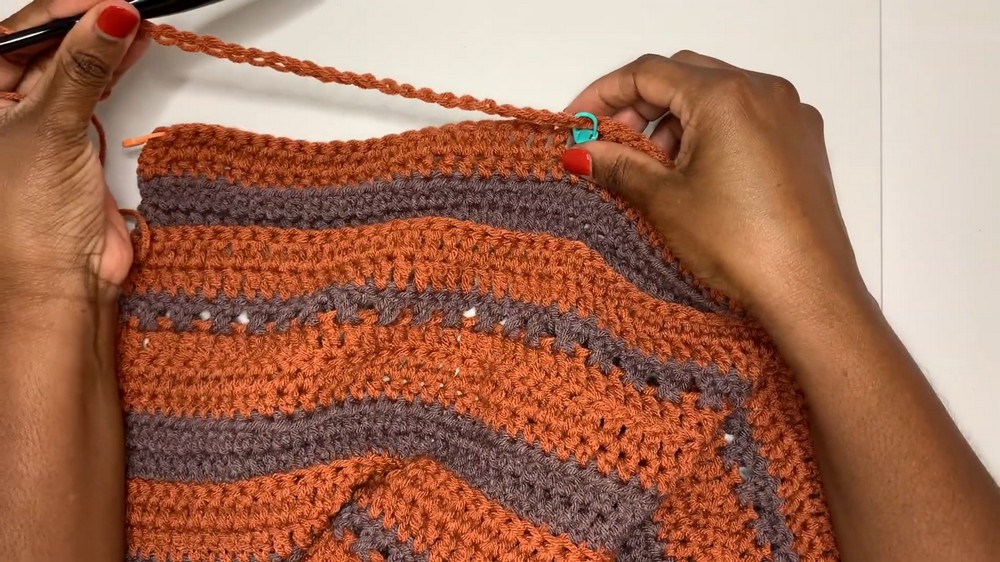
Back Panel — Creating the Armhole and Working Body
- With right side facing, turn work for back panel.
- Measure your required armhole depth (sample: 8”). Place marker at corresponding stitch; count how many stitches it spans (sample: 23).
- Null Row (does not count as part of 8-row repeat):
- Single crochet across to the stitch marker (do not fasten off yarn).
- Ch number of armhole stitches required (e.g., 23). Turn.
- This chain forms the underarm space.
- Begin 8-Row Repeat for Back Panel:
- Row 1: exhdc in BLO (or pattern row corresponding to your repeat sequence), starting in first chain of underarm and continuing across panel.
- Continue following 8-row repeat for desired back panel width (suggested: 35 rows).
- Do not fasten off yarn.
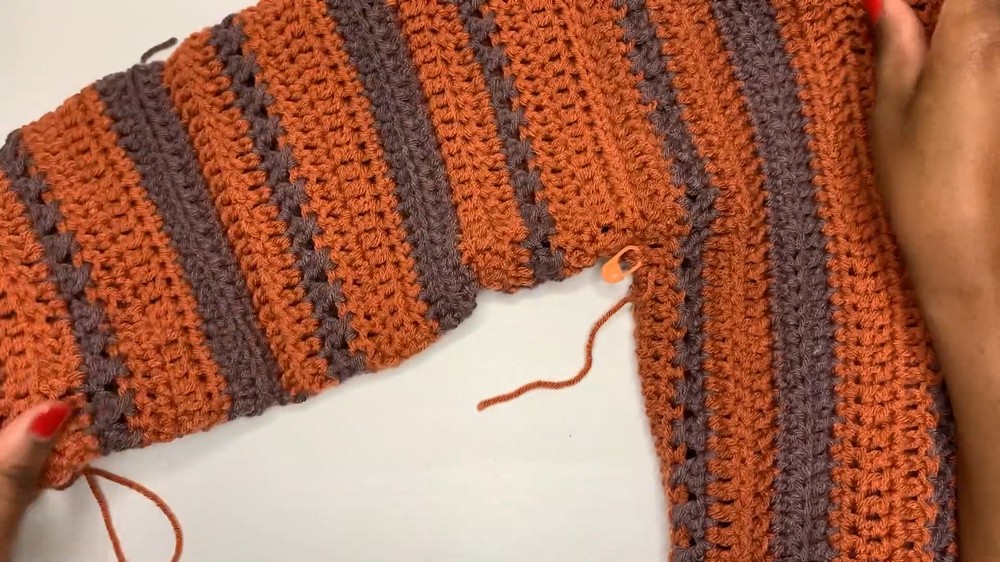
Second Front Panel — Creating Second Armhole
- Null Row:
- As with first armhole, count same number of stitches (e.g., 23) for the second armhole, place marker.
- Single crochet across to marker.
- Ch armhole length (e.g., 23), turn.
- Work 8-Row Repeat:
- Continue 8-row repeat for the same number of rows as first front panel (sample: 15 rows).
- Fasten off and leave long tail for seaming.

2. Joining Front Panels to Back Panel
- Lay piece out flat, right sides facing up.
- Fold at shoulder seams. Place stitch markers to align front and back panel shoulders.
- Using a darning needle and yarn, whip stitch or mattress stitch the shoulders together.
- Fasten off and weave in ends.
3. Sleeves (Worked in the Round)
- Turn body so armholes are at sides.
- Join yarn in underarm.
- Round 1: Ch 1, hdc evenly around armhole opening; join with sl st to first st.
- Rounds 2–24: Continue 8-row repeat in rounds.
- For rounds, use a ch 1 or ch 2 at start of each round (for hdc/dc), then turn work each round to avoid seam slanting.
- Place stitch marker in first st of each round for easier joining.
- Sleeve Length: Work desired number of rounds for sleeve (sample: 25 rounds before cuff).
- Decrease for Cuff (Round 25): Work hdc2tog (half double crochet two together) around.
- Cuff:
- Round 26: Work dc in each st around.
- Rounds 27–29: Alternate fpdc and bpdc around for ribbed texture.
- Join with sl st, fasten off, leaving tail to weave in.
- Repeat for second sleeve.
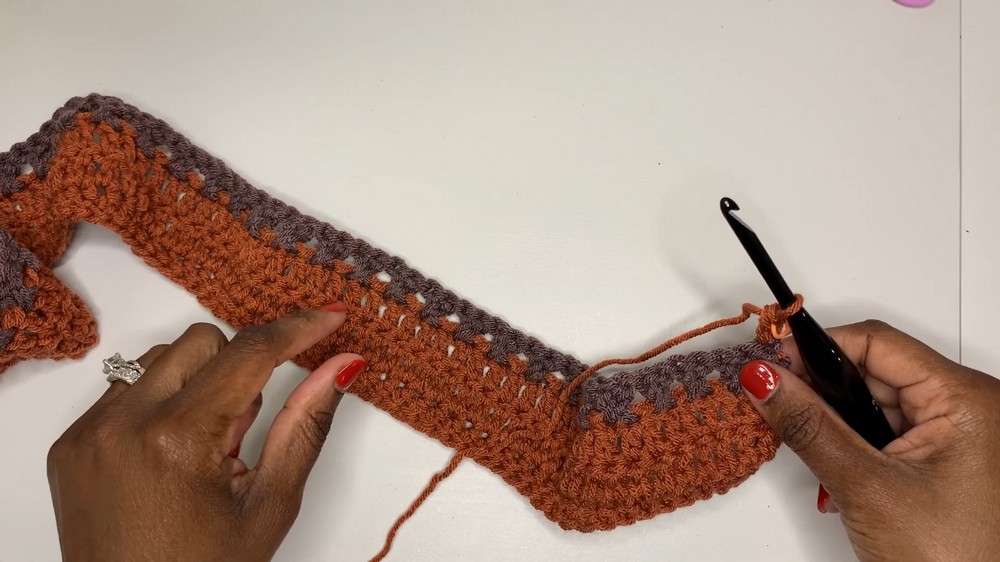
4. Border Ribbing
- Join Color B at the lower front corner.
- Row 1: Work dc evenly all around front edge, neckline, and down the other side to opposite bottom front corner.
- Rows 2–5: Alternate fpdc and bpdc across rows for a ribbed effect.
- Fasten off, weave in all ends.
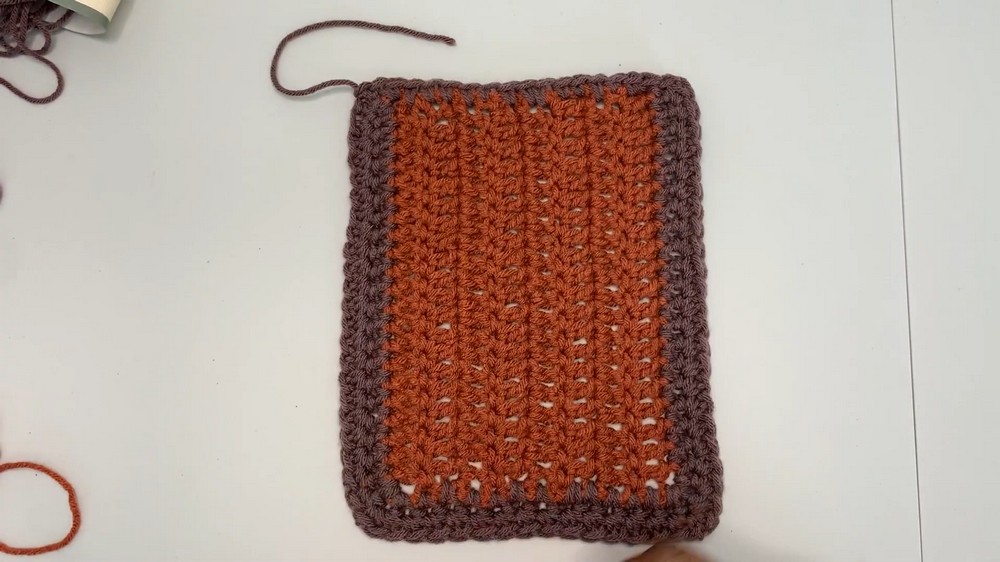
5. Pockets (Make 2)
- Row 1: Work 24 foundation dc or ch 24, dc in each ch (for a standard-sized hand; adjust as needed).
- Rows 2–8: Dc in each st across, ch 1, turn.
- Border: Change to Color B.
- Rows 1–2: Work exsc around three sides of pocket (left, bottom, right); leave top edge open.
- Top Edge: Work sc across top for a neat finish.
- Fasten off, leaving a long tail for sewing.
- Repeat for second pocket.
6. Attaching Pockets
- Position pockets on left/right front panels. Use stitch markers to hold in place.
- Use darning needle and yarn to whip stitch pockets on, leaving top open.
- Fasten off, weave in all ends.
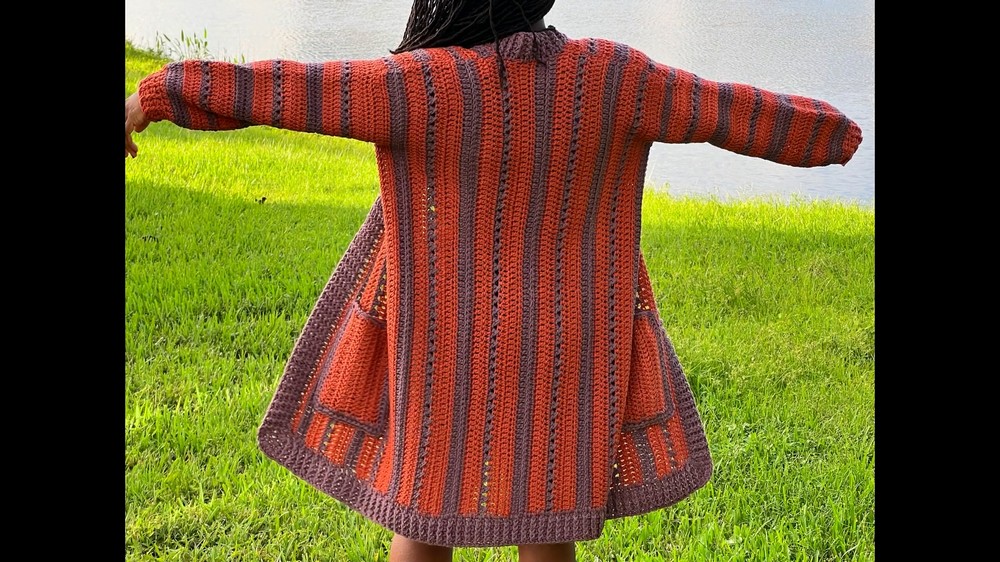
Conclusion
You have now completed the October-themed crochet cardigan! This cozy, customizable project is perfect for fall and winter, featuring a beautiful texture, practical pockets, and sturdy ribbed borders and cuffs.
Pattern Corrections & Tips
- Correction: The original transcript at times referred to “panle,” “petal,” and “pedal”; these were intended to be “panel.”
- Foundation stitches: If not comfortable with fhdc/fdc, make a standard chain and work first row of required stitches.
- Fit: This pattern is made to measure; always adjust panel and sleeve length/width to your preference.
- Armhole and body sizing: Check fit after main body before joining panels. Adjust panel width or armhole chains if needed.
- Turning chains: Do NOT use them on rows for the main body; use stacked sc instead for tidier row edges.
- Color change: Use the magic join for invisibility, or change colors as per your usual method.
- Ribbing: Alternate fpdc and bpdc for ribbed effects on cuffs and border.
Leave a Reply