
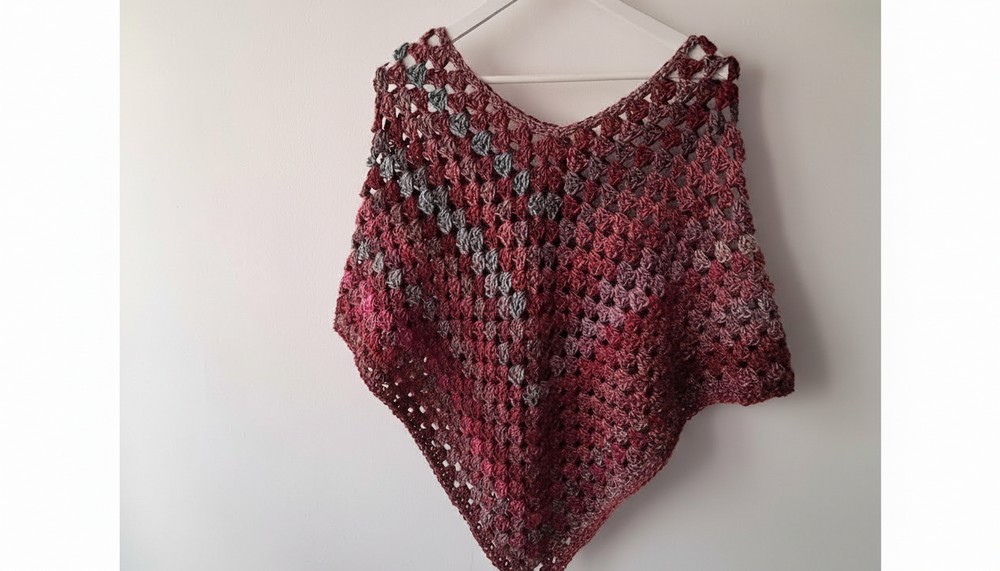
Stay warm and fashionable with crochet poncho pattern that offers comfort and charm for any occasion, perfect for all skill levels to enjoy.
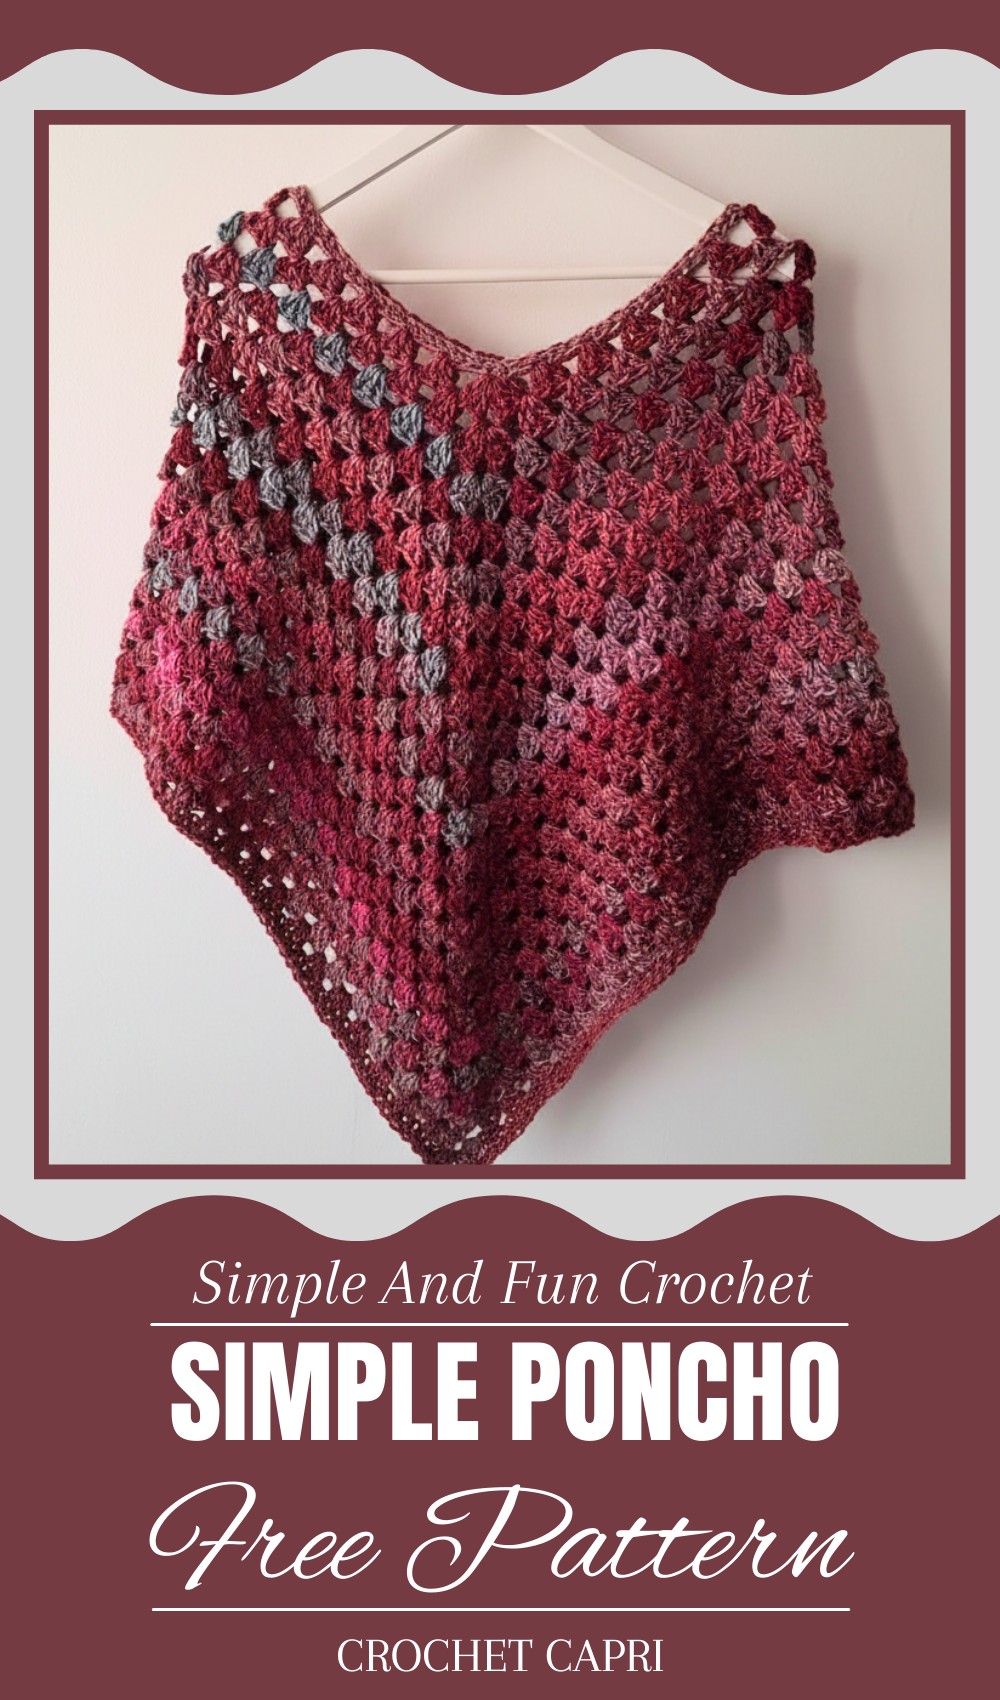
A poncho is a beautiful and versatile piece of clothing that is loved by many for its comfort and style. When made with crochet, it becomes even more special, with lovely textures and designs that catch everyone’s eye. This handmade beauty can be worn in so many ways—use it to stay warm on chilly days, as a stylish layer for casual outings, or even to add elegance during special events.
Timeless Crochet Poncho Pattern Designs for Everyday Wear
Crochet poncho patterns are perfect for creating something unique that matches your favorite colors and style. You can wear it at home, for a walk in the park, or while meeting friends. It’s also a great way to express creativity, as you can make it with simple or detailed designs. A crochet poncho not only keeps you cozy but also makes you look stunning no matter where you go. It’s truly a mix of comfort, style, and personal touch.
Materials
- Yarn:
- ~400g of medium/worsted-weight yarn (brand used in the video: DMC, recommended 138m per 100g skein). Color is up to your preference.
- Note: The example poncho uses ~350g for the body and ~50g for the finishing edge.
- Hook: Size 8mm crochet hook (or size needed for a looser texture).
- Other Tools:
- Tape measure for measurements.
- Stitch markers for marking rounds and corners.
- Scissors for cutting yarn.
- Tapestry needle for weaving in ends.
Skill Level
- Beginner
This pattern uses basic stitches such as single crochet (sc), double crochet (dc), chains (ch), and slip stitches (sl st). It’s a fantastic project for those new to crochet.
Key Abbreviations
| Abbreviation | Meaning |
|---|---|
| ch | Chain |
| sc | Single Crochet |
| dc | Double Crochet |
| sl st | Slip Stitch |
| st(s) | Stitch(es) |
Special Notes
- Sizing: The poncho can easily be made larger or smaller by altering the starting chain length and the number of rows/rounds.
- Stitch Multiple: The starting chain must be a multiple of 6 to divide evenly and maintain symmetry.
- Loose Fit: If you prefer the poncho to drape loosely, as shown in the video, use a larger hook than the one recommended for your yarn.
- Measurements for Reference:
- Starting chain = Needed circumference (56 cm in the demonstration).
- Finished Length = 55 cm as per the video.
Pattern Instructions
Part 1: Create the Foundation
1. Foundation Chain
- Begin by chaining a multiple of 6 to match the desired circumference.
- Example in the video: 72 chains = 56 cm circumference when measured with a tape. Your measurement may vary depending on yarn and tension.
- Once you’ve chained the correct length, lay the chain flat to prevent twisting.
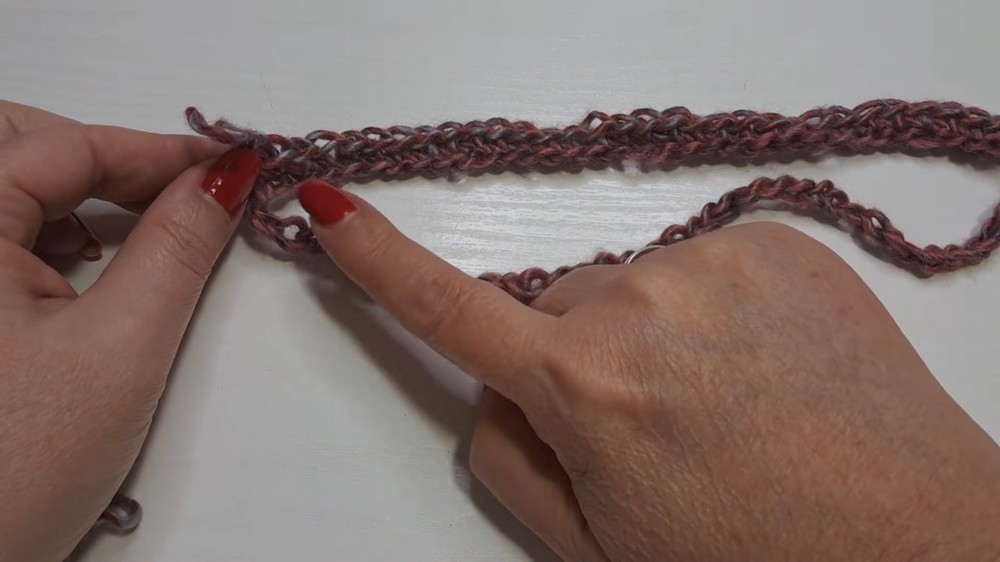
2. Join the Chain into a Circle
- Join the foundation chain into a circle by inserting the hook into the first chain, yarn over (yo), and pull through both loops to create a slip stitch (sl st).
- Tip: Ensure the chain is straight and not twisted before completing the join.
- Ch 1 to begin the first round.
Part 2: Single Crochet Base Round
3. Single Crochet Round
- Work 1 sc into each chain around.
- Weave in the tail from the foundation chain as you crochet to secure it.
- At the end of the round, join with a sl st into the first sc and ch 1.
- Mark Halfway Point:
- Divide your total number of stitches in half (e.g., for 72 sts: 36 half).
- Place a stitch marker at the center point after counting half the stitches.
- Example: If your round has 72 sc, count to the 36th stitch and place the marker in the 37th stitch.
Part 3: Adding the Pattern and Creating Corners
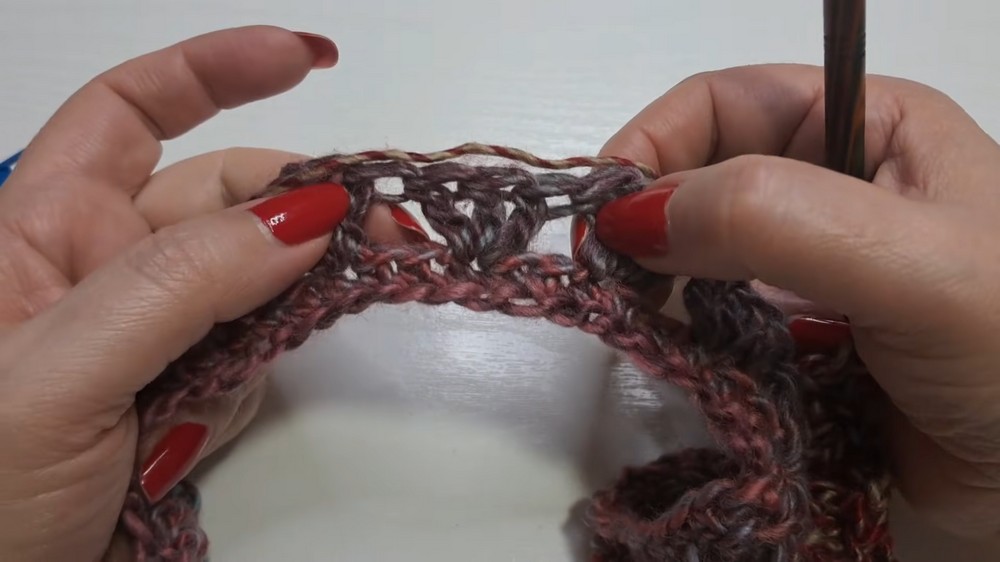
4. Row 1 with Double Crochet and Corner Increases
- To create the corner increases for the poncho:
- Ch 3 (counts as a dc).
- Work 2 dc into the same stitch where the ch 3 originates.
- Ch 3 for the corner space, then work 3 more dc into the same stitch.
- Now, continue around with this repeating pattern:
- Skip 2 stitches, then work 3 dc into the 3rd stitch.
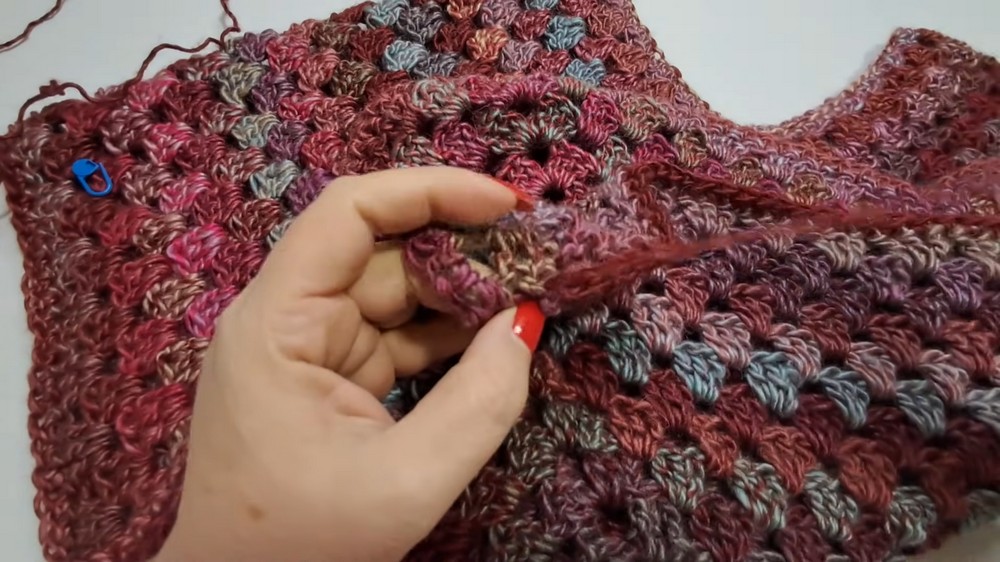
- When you reach the marker at the halfway point, repeat the corner increase:
- Into the marked stitch: 3 dc, ch 3, 3 dc.
- Replace the stitch marker in the ch 3 space of the corner.
- Continue with 3 dc groups until the end of the round.
- When you reach the beginning of the round, join with a sl st into the top of the starting ch 3.
5. Repeat Pattern Rounds
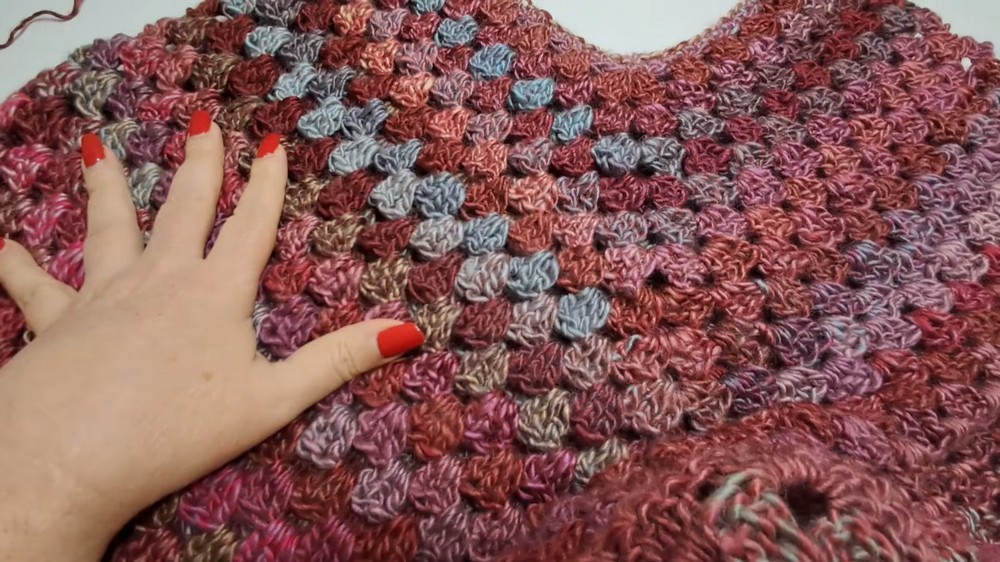
From this point forward, the pattern alternates between dc groups and corners with increases:
- Corners: Always work [3 dc, ch 3, 3 dc] into each corner’s ch 3 space.
- Sides: Work 3 dc groups into the spaces between dc clusters from the previous round.
- End of Round: Join with a sl st into the top of the starting ch 3.
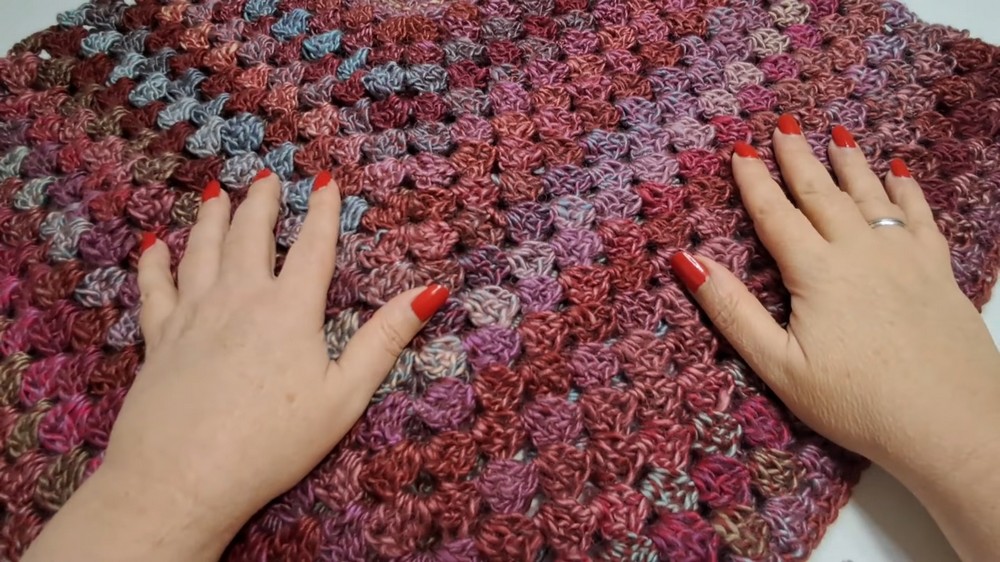
6. Continue Until Desired Length
- Repeat the pattern for as many rows as needed, increasing at the corners to create the poncho’s signature shape. Example: In the video, a total of 22 rounds were completed, resulting in a length of 55 cm.
Part 4: Finishing Edges
7. Bottom Edging (Optional)
- Switch to single crochet to create a clean edge:
- Work 1 sc into each dc and chain space around.
- In the corners, work 3 sc into the ch 3 space.
- Join with a sl st into the first sc, fasten off, and weave in ends.
8. Weave in the Ends
- Use a tapestry needle to hide any loose threads securely inside the stitches.
Conclusion
Your poncho is now complete! This pattern creates a warm and stylish garment that’s perfect for layering. Its simplicity makes it a joy to crochet, and its adjustable size ensures it’s suitable for all ages and preferences.
Pattern Corrections
- Counting Stitches: Miscounts in the foundation chain or skipping incorrect stitches while forming clusters can distort the symmetry. Take care when placing stitches in each round.
- Avoiding a Twisted Chain: Take extra care that the chain remains straight before joining.
Tips
- Customize Length: Adjust the number of rounds to make the poncho longer or shorter to your liking.
- Experiment with Yarns: Use thicker yarn for a chunkier version or finer yarn for a more delicate poncho.
- Add Personal Touches: Incorporate contrasting colors, stripes, or edging designs to make the poncho uniquely yours.

Leave a Reply