
Wrap your hands in cozy handmade crochet gloves that bring warmth, charm, and personality to your look, making them perfect for any outfit or occasion.
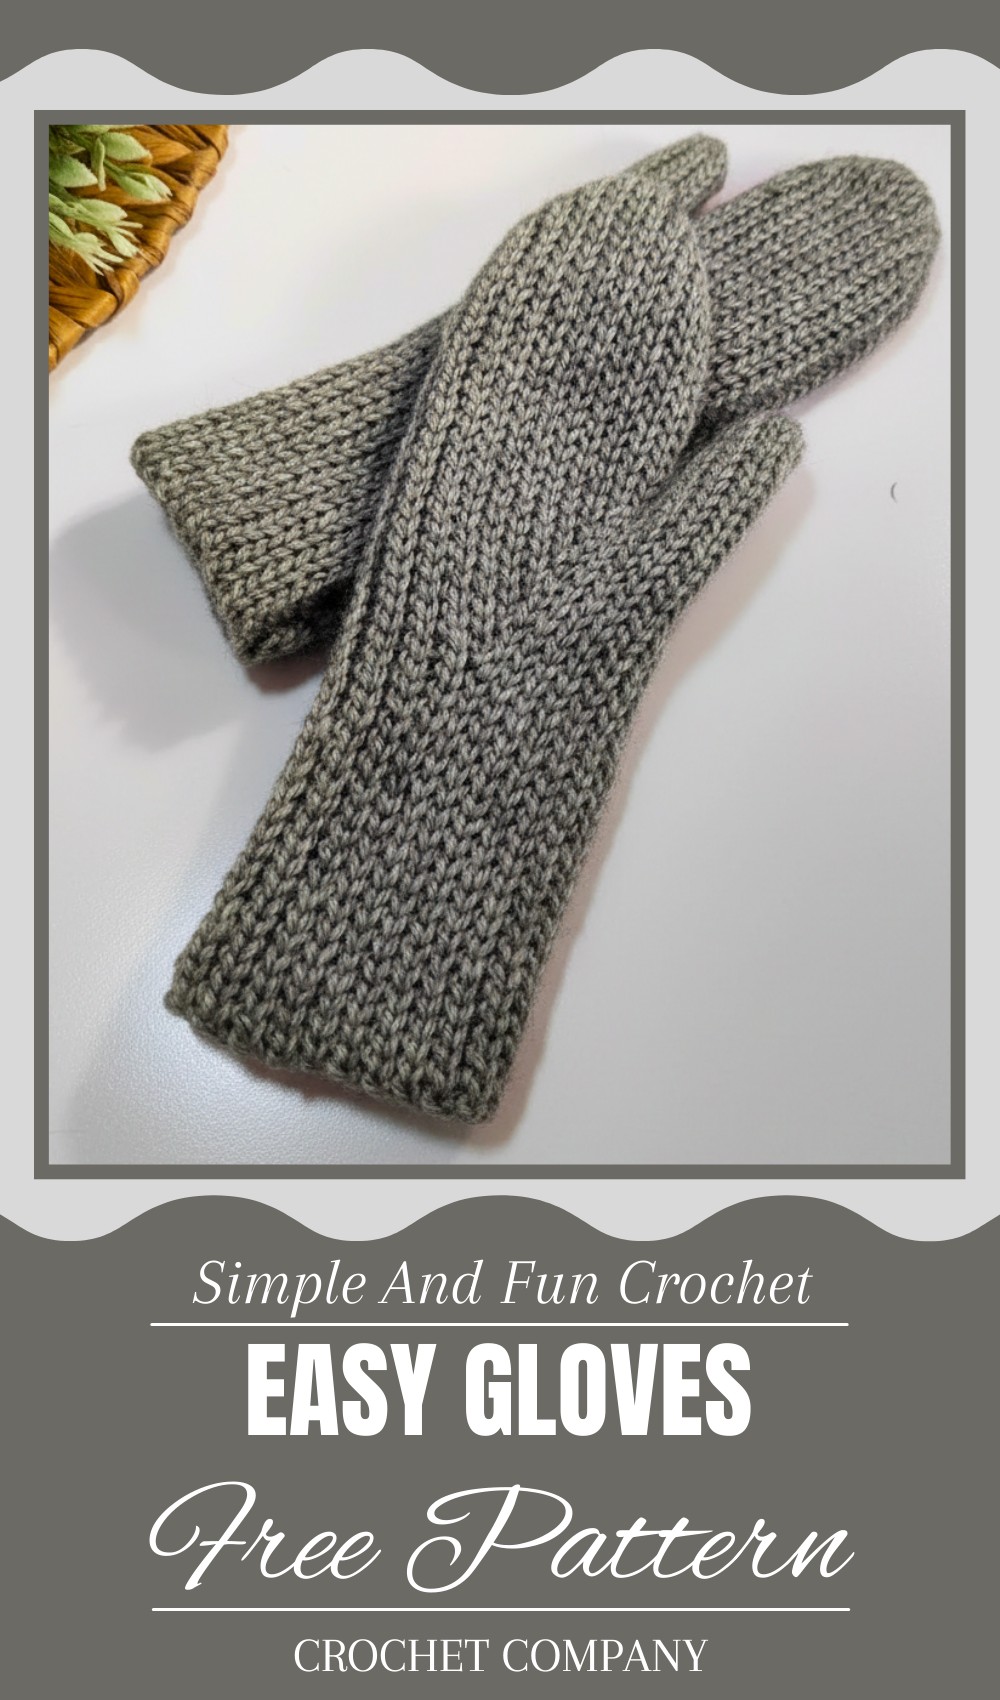
Crochet Gloves Pattern That’ll Make You Smile
Keeping your hands cozy and stylish has never been more fun! Crochet gloves bring together comfort, beauty, and creativity in one charming accessory. These patterns allow you to craft gloves that suit your personal taste, whether you love elegant, delicate designs or thick and cozy styles for colder days. The beauty of crochet gloves lies in their intricate stitches, customizable colors, and unique textures, making them stand out compared to store-bought options.
Beyond their stunning appearance, they’re practical too—perfect for staying warm, accessorizing an outfit, or even gifting to loved ones. With endless design possibilities, crochet gloves can be made for all ages, styles, and occasions. From simple fingerless gloves to detailed full-coverage options, there’s a pattern for everyone.

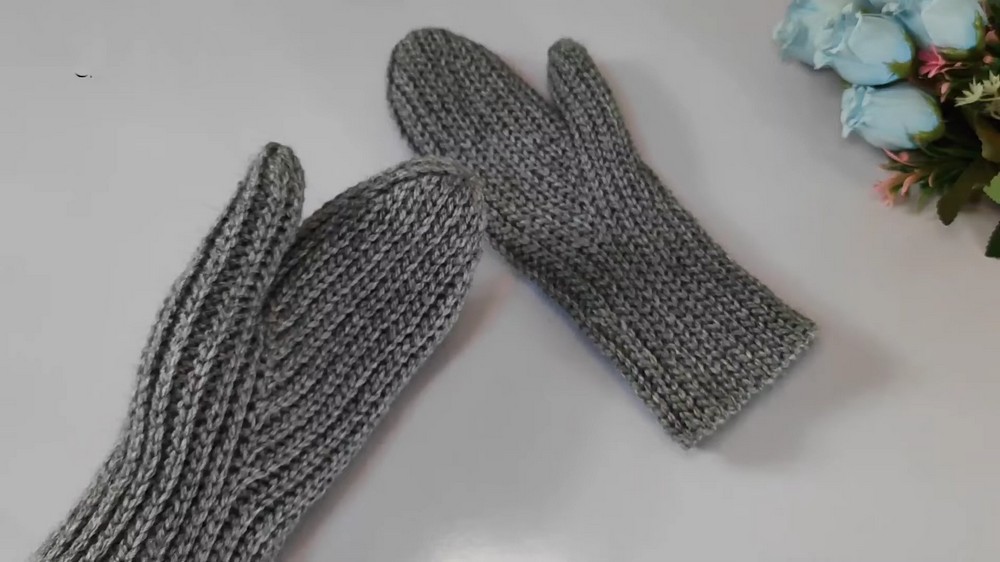
Crochet Left-Handed Glove Step-by-Step Pattern
Special Features:
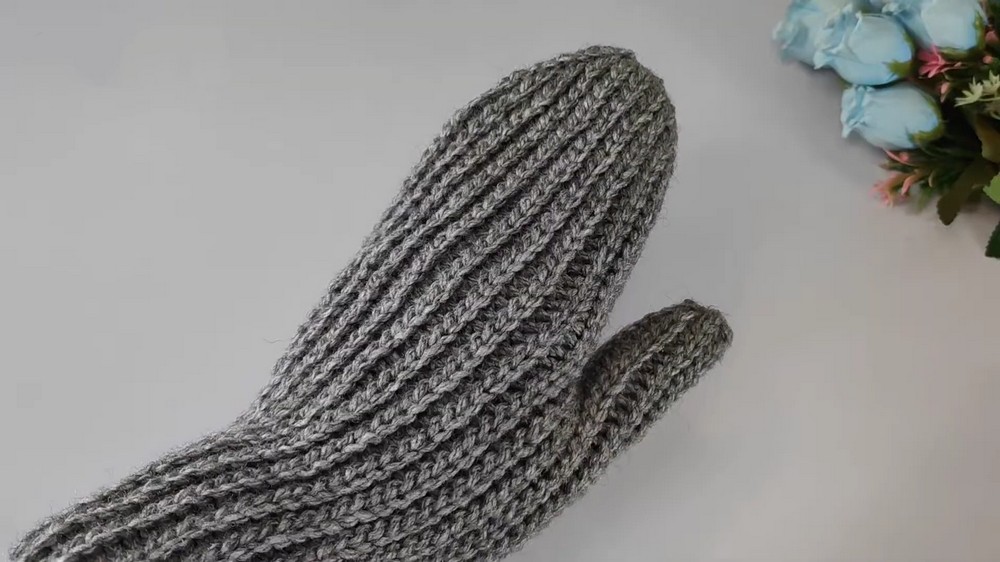
- Slip Stitch Texture: The entire glove is crafted in slip stitches worked in the back loop. This creates a ribbing effect for a snug and stretchy fit.
- Tailored Design: The pattern custom-fits the glove by measuring the hand, ensuring a perfect fit for any size.
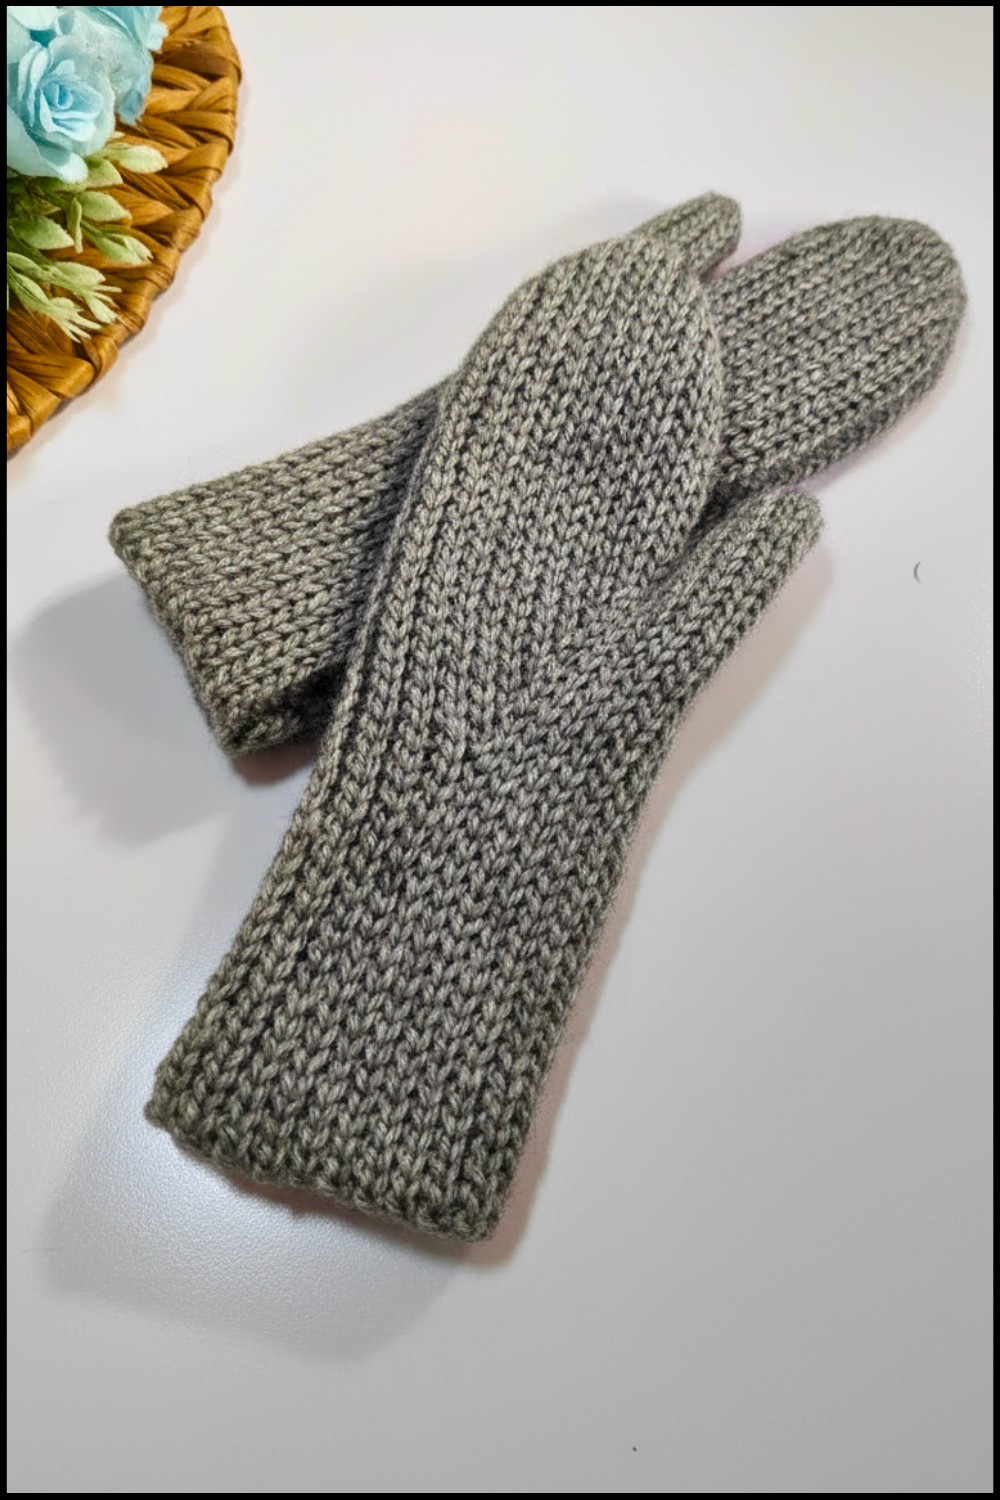
- Reversible Hand Design: This is specifically for the left hand, but by following similar adjustments, you can easily make a matching pair for the right hand.
Difficulty Level:
Intermediate. The glove is designed step-by-step for simplicity, but attention to detail is essential, especially when working in the back loops and shaping the thumb area.
Materials Needed:
- Yarn: Medium-weight yarn that is soft and slightly stretchy for comfort.
- Hook Size: 3.5 mm crochet hook.
- Scissors.
- Tapestry Needle: For weaving in ends.
Pattern Steps:
1. Understanding the General Fit and Starting Chain:
- Measure the palm of the hand from wrist to fingertips, adding the desired length for the wrist extension (glove cuff).
- Create a foundation chain equal to that length. For the tutorial glove, 51 chains are used, but you can increase or decrease the chain count as needed.
- The second line onward is not dependent on a specific stitch count, so you can adjust the size freely.
2. Foundation Chain and First Line:
- Make a slip knot, and chain 51 (or the desired number for your size).
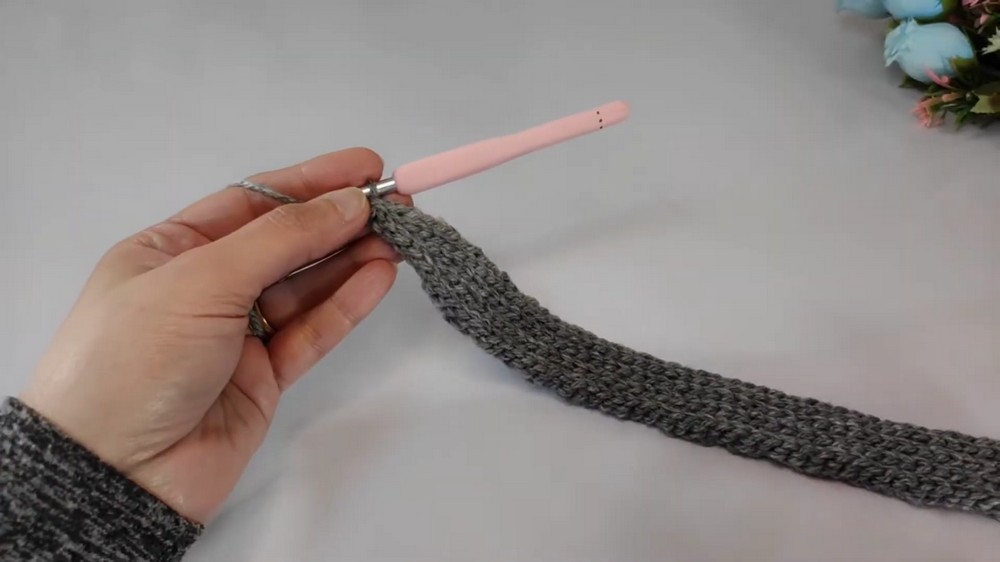
- Beginning from the 2nd chain from the hook, work 50 slip stitches (sl st) into each chain across.
- To work a slip stitch: Insert the hook into the stitch, yarn over, pull through the stitch and the loop on the hook.
- At the end of this row, you will have 50 slip stitches (or your total chain count – 1).
3. Palm Section (Lines 2–21):
Line 2:
- Chain 1 and turn.
- Work slip stitches in the back loops only (BLO) into each stitch across the row.
- This creates the ribbing effect.
- Leave the last 6 stitches unworked in this row.
Line 3:
- Chain 1, turn, and work slip stitches (BLO) into every stitch to the end of the row.
Line 4:
- Chain 1, turn, and work slip stitches (BLO) across until 6 stitches remain.
- Work only 2 of the remaining 6 stitches, leaving 4 unworked.
Line 5:
- Chain 1, and work slip stitches (BLO) into all stitches to the end of the row.
Line 6-8:
- Follow the pattern of the decreases:
- For even rows: Leave 2 fewer stitches unworked at the end of the row.
- For odd rows: Work all stitches across the row.

Lines 9–21:
- Chain 1 at the start of each row.
- Work slip stitches (BLO) from beginning to end without leaving any stitches unworked. This completes the first section (palm section).
4. Thumb Section (Lines 22–36):
Line 22:
- Chain 1, turn, and work slip stitches (BLO) into every stitch up to the thumb placement (marked).
- Remove the marker, and work a slip stitch at its position.
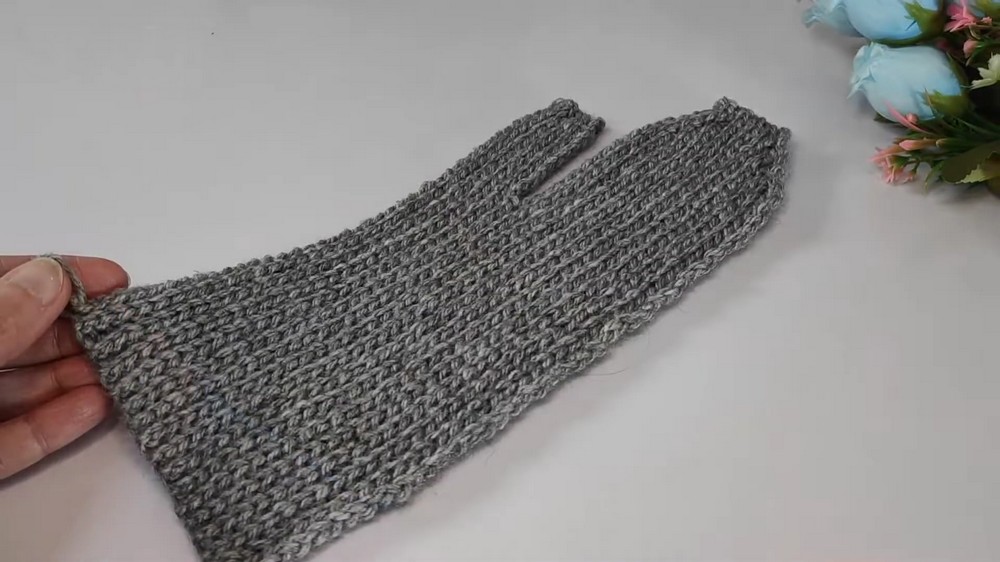
Thumb Opening:
- Instead of continuing around, chain 13 chains (or the same number used in the right-hand glove).
- Rotate your work, and beginning from the second chain, work 12 slip stitches back along the foundation thumb chain.
- Continue slip stitches along the base row to the end, working in the back loops as before.
Lines 23–36:
- Continue the pattern, alternating full-length rows and decreasing rows, to create the thumb section.
- Follow the same decrease logic as in the palm section, leaving 6 stitches unworked gradually as you progress.
- Once the thumb area is completed, end the final row with a consistent slip stitch count and prepare to finish the piece.
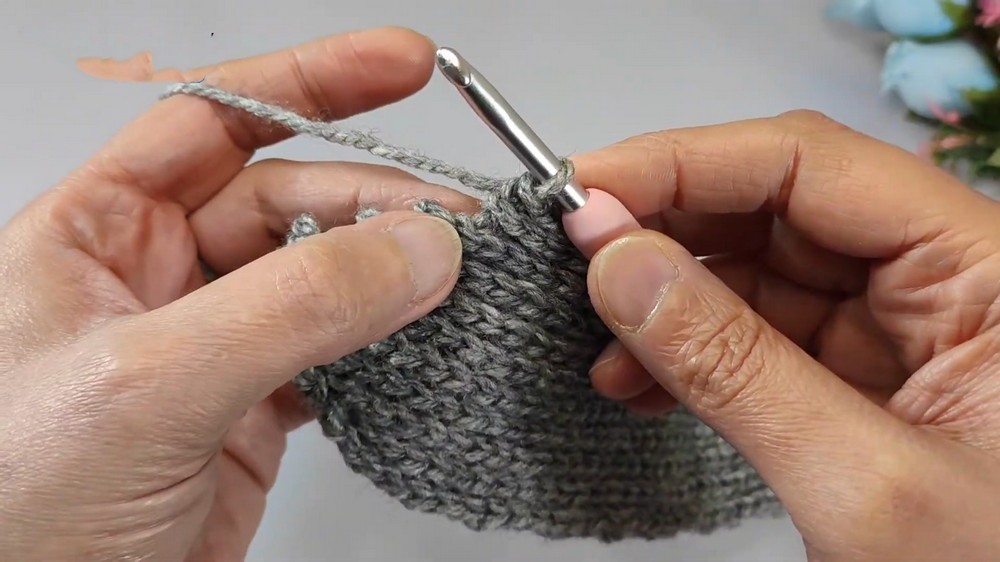
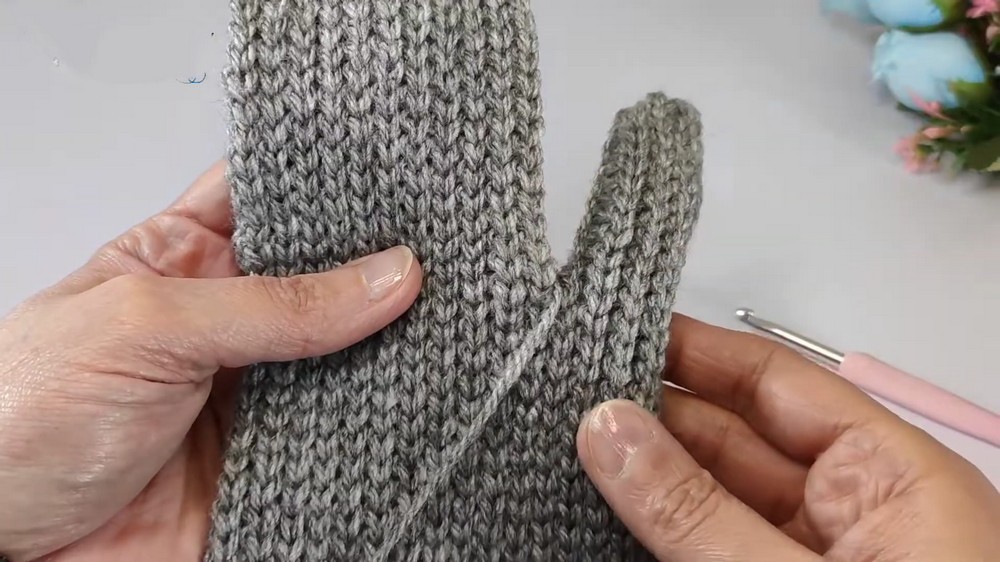
Closing the Thumb Hole:
- Fold the glove so the thumb area is aligned properly with the rest of the palm. Mark the face of the work (Row 37).
- Use slip stitches to seam the thumb area closed, ensuring that each front loop aligns with its corresponding back loop for a neat finish.
5. Back Hand Section (Lines 37–58):
- Start at the wrist edge, treating it as the beginning of the next row.
- Work 21 rows of slip stitches (BLO) across the glove’s entire working edge.
- Follow the same progression of alternating full rows with decreased rows (leaving 6 stitches unworked by the end).
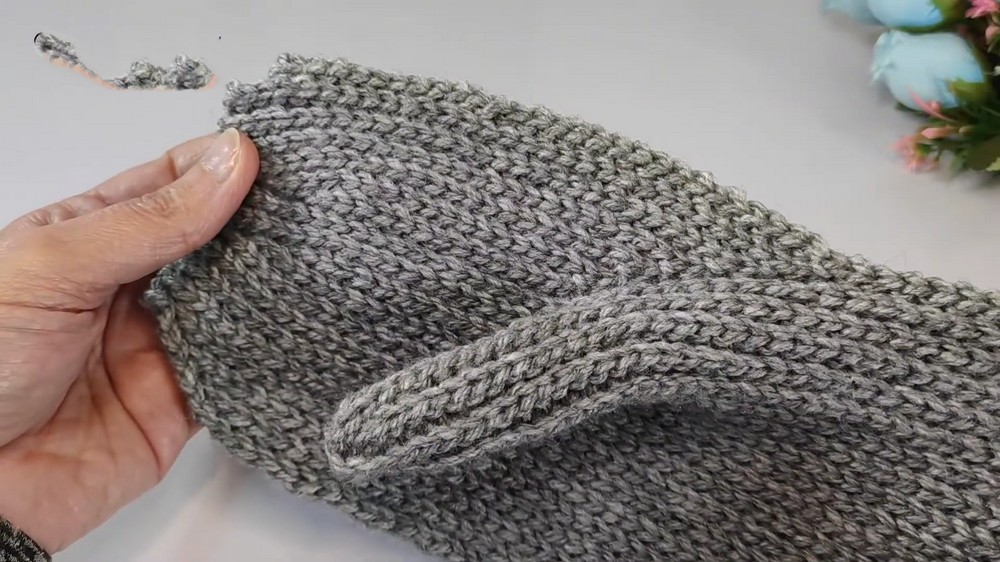
6. Closing the Glove:
- With the wrong side of the glove facing out, fold it into shape.
- Align the two edges of the glove, and use slip stitches to seam them together.
- Insert your hook through the front loop of stitch 1 and the opposite back loop, yarn over, and complete a slip stitch.
- Continue until all stitches are seamed evenly.
- Fasten off the yarn, leaving a long tail for securing the seam and weaving in loose ends.
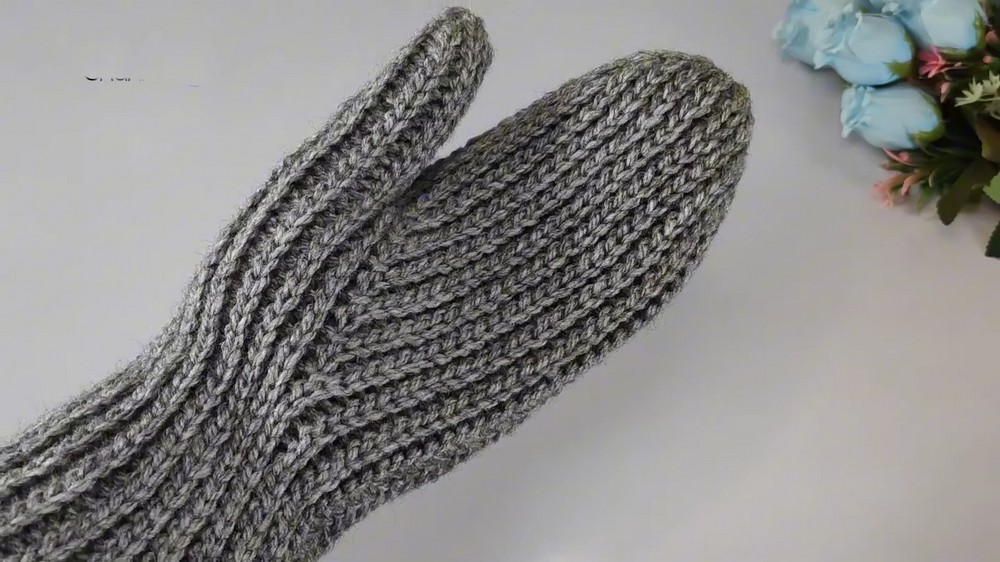
- Turn the glove inside out to reveal the finished product.
Tutor’s Suggestions:
- Adjust the starting chain and thumb opening chain if needed to make gloves for different sizes or ages. Measuring ensures a proper fit.
- Yarn Recommendation: Use soft yarn that’s slightly stretchy to ensure the glove remains comfortable during wear.
- Use for Both Hands: This guide creates a left-handed glove, but you can reference the right-hand glove tutorial to complete both hands for a matching pair.
Uses:
- Practical winter wear or stylish accessory.
- Ideal for creating personalized gifts.
- Can be adjusted for all ages, including kids and adults.
Tip:
When working in slip stitches, keep your tension consistent but loose. Tight slip stitches can make it difficult to work into the back loops.
Conclusion:
Congratulations on completing your crocheted left-handed glove! Combine it with the right-hand glove for a gorgeous handmade pair. This project is a great way to practice precision while creating something practical and beautiful.
Leave a Reply