Porches deserve to be well-organized, decorated, lean to the intended style and have many portions & features in them. If you want to upgrade your porch this year, you can take inspiration from my DIY in-screen porch upgrade guide. I would also share the complete tips that will be helpful each time you need to transform this spot beautifully. Although you will need much spare time for this project, you will enjoy this crafting experience! So keep reading!
DIY Screen Porch Idea & Tips For Beginners
An in-screen porch is the best space to relax near the outdoors without going outdoors. I spend every evening in this small area, so I embellished that space with my crafty skills. Finally, I completed it, and today you can tour this with me. Side-by-side instructions on transforming a screen porch with your hands will also include this tour.
I wanted to update the porch using elements from the inside living space to connect the rooms better and try a little vintage and modern look.
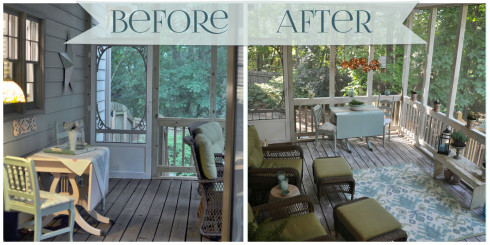
Here’s a before and after…
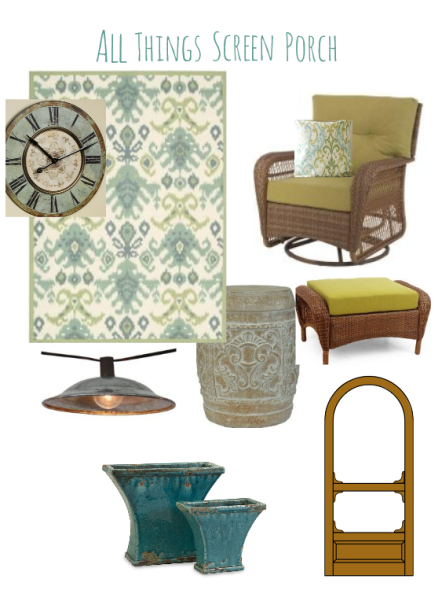
Check Inpiration Board For DIY Screen Porch Upgrade
Tip: Whenever, you have a visual inspiration board, it will help you to better gather everything you need and see how all the things together will look like. Although I would make many additions to the DIY porch makeover, overall I would stick with this inspiration chart!
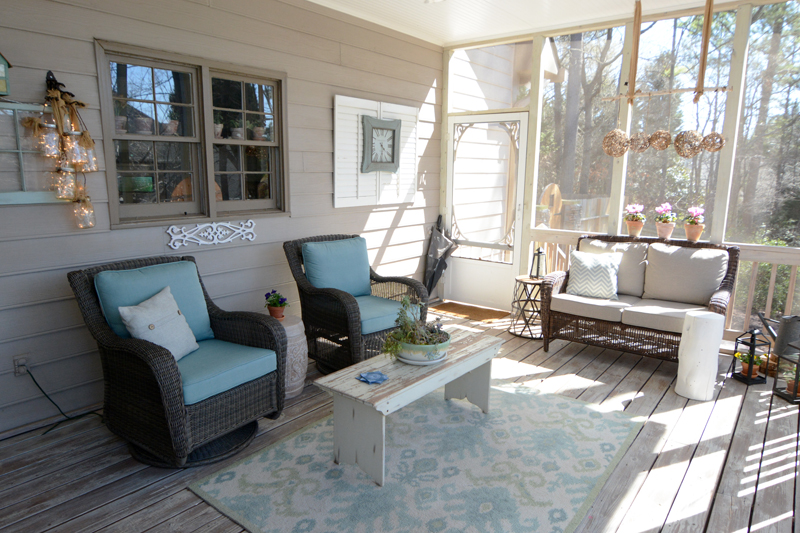
- Winker Swivel Rocking Chairs & Ottomans With Green Covers: Comfortable and Vintage. Use two pairs.
- The Rug With Beautiful Floral And Paisley Designs Printed Using The Ikat Technique.
- DIY Grapevine Porch Light: used one main porch light, a pendant string light that glows beautifully in the evening, giving orange light.
- Terracotta Planter Stool: To place Between my two rocking chairs.
- Terra Cotta Planters: I also upgraded the planters with a new design.
Additional Items Needed If Follow Our DIY Porch Makeover?
You will notice that I added many items to the inspiration board. Actually, after the original DIY vintage makeover, I found something less, so I included what I felt less like:
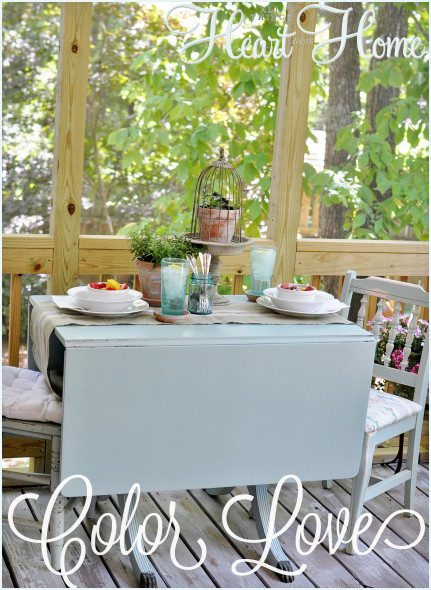
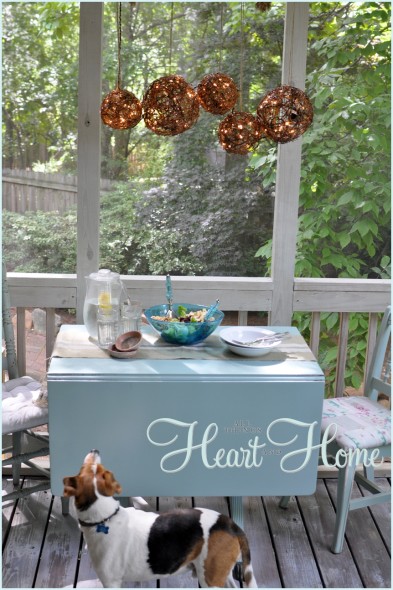
- Drop leaf table Duncan Phyfe table: Practical for a small porch space and use it for evening porch dining.
- Chairs With Dining Table: As the dining table is small, I used two basic wooden chairs (although the table can accommodate 6!) to sit and color the same color as the table.
- Grapevine Orb Vine Light or Macroom LED Hanging Lights: Above the dining table, I hung these lights that look appealing when glowing.
- Bench: I shifted the bench from my bedroom to the porch for a nice space for the plant pots and other decor.
How To DIY Screen Porch Makeover?
Below are the step-by-step instructions on how to DIY upgrade a screen porch and my porch tour.
1- Make Portions:
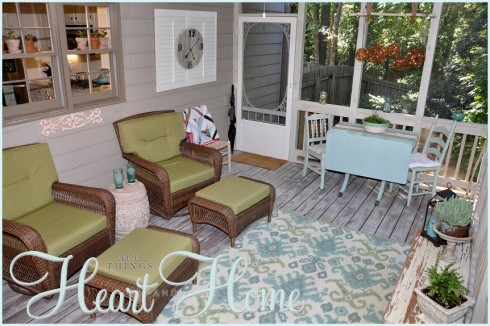
An upgraded DIY porch should have separate portions for the various activities. In our case, we added rocking chairs and ottomans as complete talking and resting spots to look at the outside. In the corner, we added a dining table for an evening meal. In this way, you can also decide on some portions for your porch, depending on your space.
I needed a little upgrade in some aspects, as follows:
Painted Tables & Chair
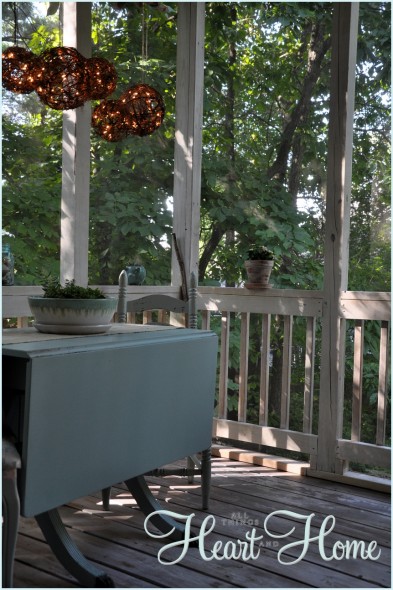
I picked a yummy soft blue-green paint for a complete drop-leaf table except for the feet of the legs, which were in black. However, you can use any color combination you wish. I also colored the chairs to match the table. Make sure you add two coats for a better finish.
How To Paint The Table?
- Wipe any dirt from table and neat.
- Gently use snadpaper to remove the old paint and clean again.
- Apply an even coat of the prime paint first using the roller. For the legs, use a brush.
- After first coat, let the paint dry and then apply second coat.
- In a day, the last coat will also dry. Then place to the porch where you want. I decided to keep it near the railing.
2- Upgrade the Floor & Railing
There are many ways to upgrade or refinish the floor, like adding appealing carpets, artificial grass, waterproofing, coating (if wooden!), or even replacing the whole with tiles or anything else.
Below is what I did about this:
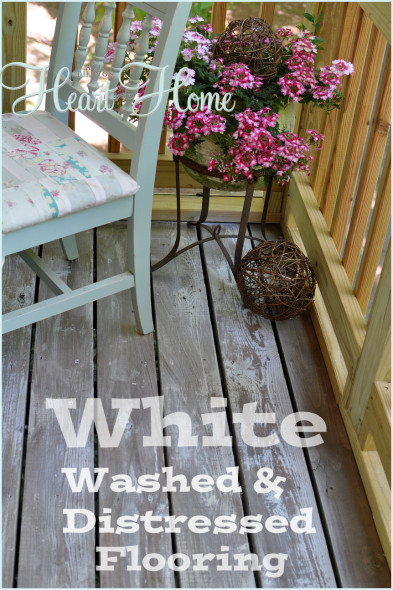
Instead of looking for a new floor option (that much expensive!) I secured my old wooden deck floor with the waterproofing stain and whitewash. Make sure you apply the transparent waterproofing before applying the semi-transparent whitewash stain.
How to Waterproof?
- Before you start, clean the floor for great results.
- It is also recommndes to smoothen the floor by sanding. Good preparation for surface will help to apply the long-lasting coat. I found the decks need an oil based acrylic coat, so I used.
- Apply a first thick coat of semi-transparent water proof coat on the deck (or the wood you have). But dont shake the jar before applying, using paint brush.
- Then also apply another thin coat than before after the first is dried.
How To White Wash?
- Remove the dirt from the wood where you applied the coat.
- Use the sponge to apply the whitewash so the paint may even enter the pits and bumps.
- Then, let the region dry.
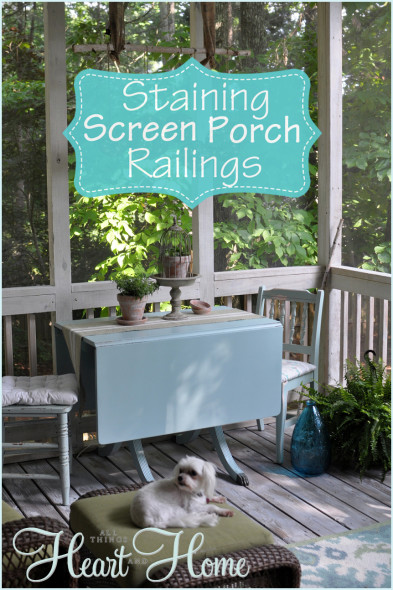
Whitewashed the railing
I had some of the Semi-Transparent Stain left over, so I did a little whitewashing on the rails. I love the way just a little stain brightened up the space they were matching with the floor.
Follow the same steps as you followed for the floor, but this time, use the paintbrush.
3- Add Lighting
Lighting the porch adds glow everywhere during the evening. They may be fixtures, string lights, lanterns, or other outdoor lighting solutions. Below is how I did this for my DIY porch setup:
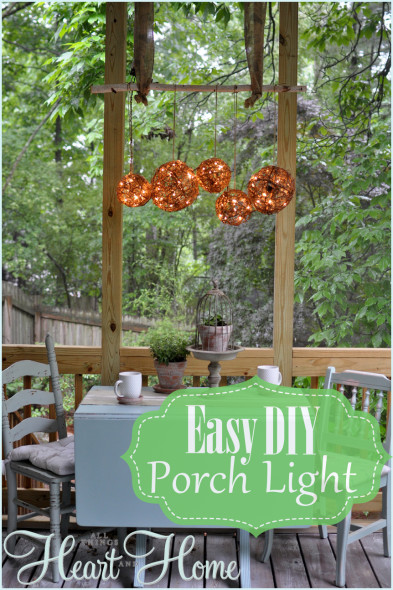
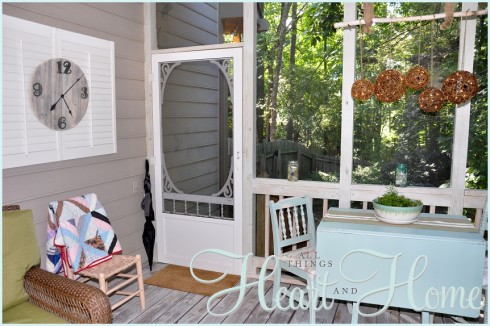
Above the table, I hung 5 grapevine orb lights using a dowel, two nails, and string and attached them between the railing pillars. You can easily try this at home or buy similar from the market.
How To Hang Lights?
- Hammer long nails on the top of the railing leaving a big part outside the wood.
- From the roof, hang the two fabric piaces and tie a dowel or a branch for the support.
- Also place the branch or dowel on the nails.
- Then one by one attcch the lights.
The light blends with the outdoor feel of the room…
And it makes such a dreamy glow at night and in the early mornings when we are up before the sun having our coffee and quiet time!
4- Add Decorations
You can further enhance the porch by adding a number of different decorations. Below is what I used:
Whitewashed Garden Stool
Although the DIY screen porch makeover was on a small budget, I added a couple of vintage decorations I loved…
First, I used a cheap rustic terra cotta planter stool with beautiful ancient-inspired carving. As mentioned, we placed it between our comfy chairs, and it’s perfect! It will be heavy, so call somebody for help to place where you want.
Rug
The other thing I ordered was a beautiful rug. They are really less expensive and have HUGE variations in color and patterns printed on them! The rug was my inspiration for everything else, and honest guys…I’ve never loved a rug more. I placed it in the middle of my porch.
A Rustic Clock
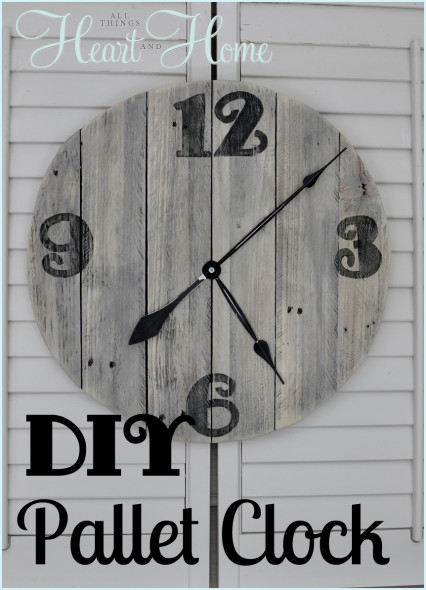
I made a new clock from the old pallet wood different from my inspiration table. Also, I felt it was prettier and cheap. I attached it where first I had the window.
5- Place The Planting & Pictures
For the in-screen porch, without worry put the flower and plant pots to add the outside greenery in. You can also select the best memories instead. Here is how I did:
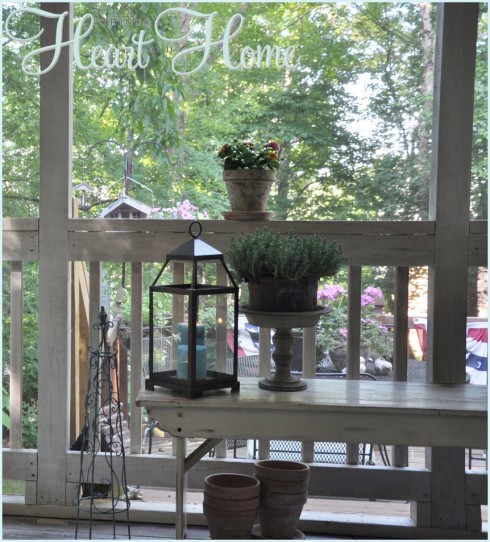
I added a chippy bench from the bedroom…it’s a nice place for plants, and when someone comes over, I sit the plants on the floor, and the bench is perfect for extra seating! (We thought about an outdoor love set here, but I didn’t want to obscure the view!)
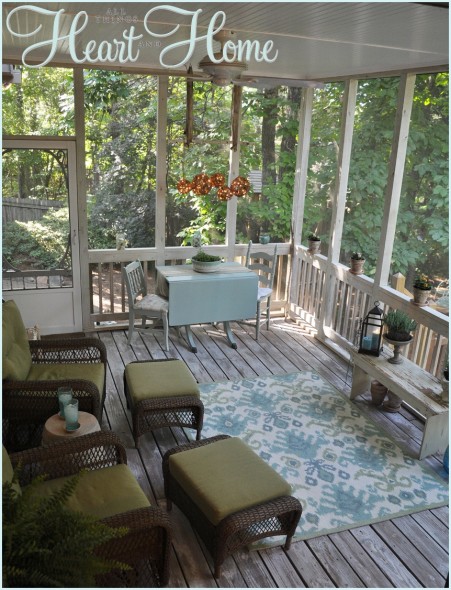
The porch came together on a small budget, although it took much time. Have a final look again.
6- Repair
You will need to find any spot on the porch that needs to be repaired. Address any necessary maintenance or repairs, such as fixing loose boards, replacing damaged railings, or addressing structural issues.
I mean, he loves it so much he’s said lots of times…“I” ‘m glad you did all this to the porch.”… score!
We have coffee out here in the early mornings, and several evenings a week, we have dinner on the porch!
Oh, and isn’t that a beautiful planter!? It’s from Target~
Here’s the view towards the inside of the house…and in this photo, you can see my little DIY Succulent Wreath.
It’s so much fun to work on an outdoor project after a long winter!
Final Thoughts
Upgrading any spot on your own may take effort and design. So, always have patience, and it is better to gather the family members for each step. I hope you loved this upgrade!



Leave a Reply