
Make a colorful and stylish ripple yarn bag with this free crochet pattern, perfect for beginners and great for daily use, shopping, or as a cute accessory.
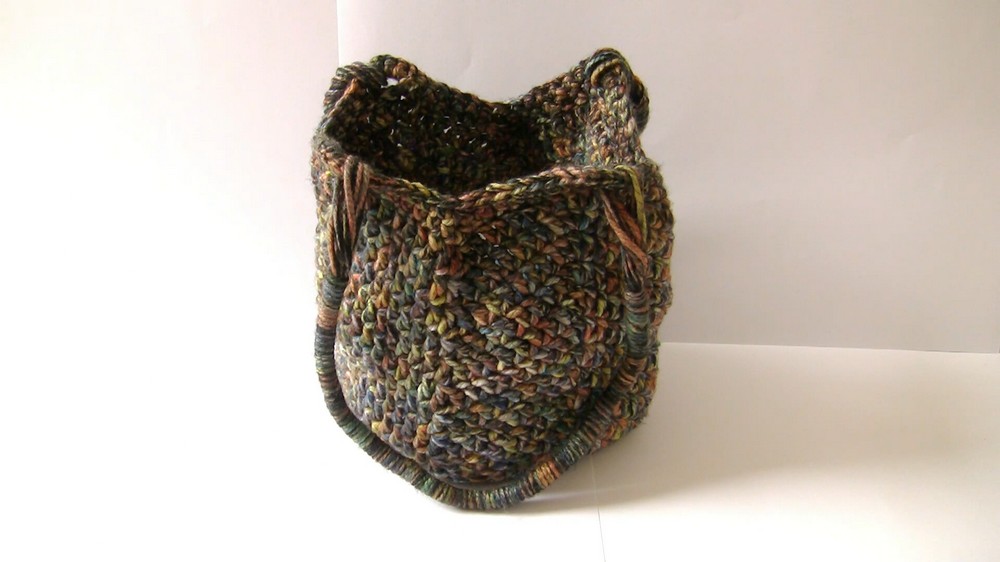
Creating a stylish and colorful bag that you can use for any occasion. This ripple yarn bag is a perfect project for crochet lovers who enjoy making something unique and eye-catching. The design features beautiful wavy patterns that flow like soft ripples, making it look modern and elegant. It is both lightweight and durable, making it great for daily use as a tote, shopping bag, or even a fun accessory to match your outfit.
Free Ripple Yarn Bag Crochet Pattern for Stylish Accessories
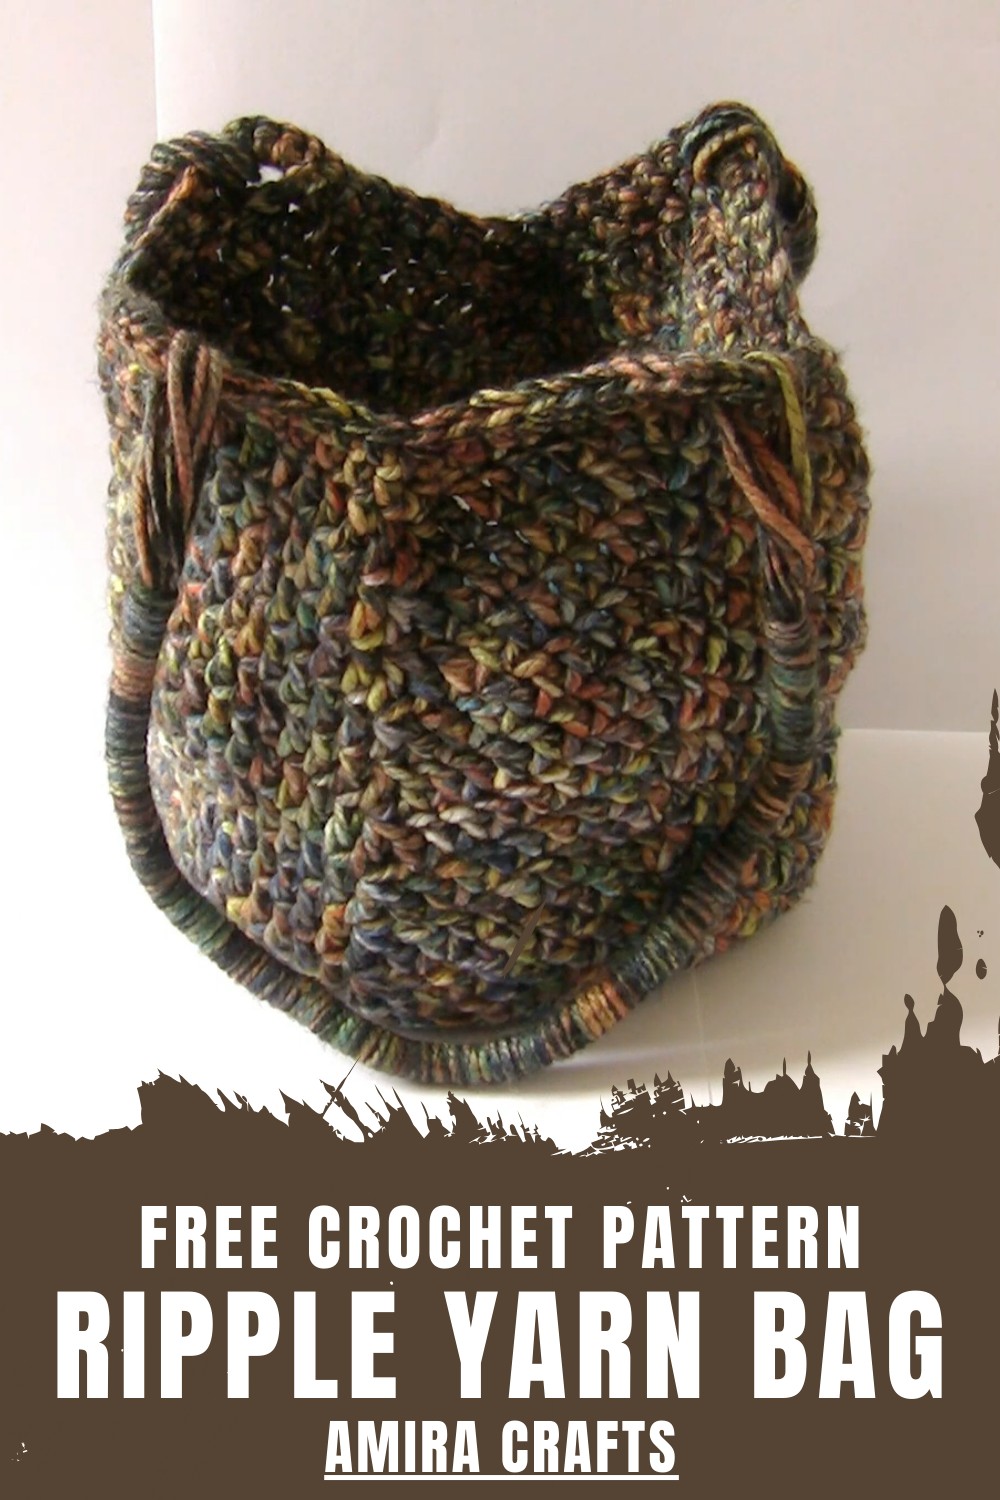
The blend of different yarn colors makes the bag stand out, and you can customize it to suit your style. The pattern is easy to follow, so it’s perfect for beginners and experienced crocheters alike. With its soft texture, creative design, and practical use, this bag is not only fun to make but also a great addition to your collection of handmade creations.
Pattern: Ripple Yarn Crochet Bag
Finished Size
- Width: Approximately 12 inches (30 cm)
- Height: Approximately 13 inches (33 cm) including the handles.
The size is adjustable based on your yarn type, hook size, and the number of rounds worked.
Materials Needed
- Yarn:
- 400g of Chunky/Stiff Yarn (recommended for durability). Suggested brands: NeCo Chunky Yarn. The stiffness ensures the bag holds its shape.
- Hook Size:
- 6 mm crochet hook
- Optional Tools:
- Tapestry needle (for sewing and weaving in ends)
- Scissors
- Row counter or stitch markers
- Measuring tape
Gauge
- Gauge for this pattern is not critical, but for reference:
- 10 single crochet (sc) and 10 rows = 4 × 4 inches (10 × 10 cm).
Key Abbreviations
| Abbreviation | Meaning |
|---|---|
| sl st | Slip Stitch |
| sc | Single Crochet |
| hdc | Half Double Crochet |
| dc | Double Crochet |
| ch | Chain |
| YO | Yarn Over |
| st(s) | Stitch(es) |
| dec | Decrease |
Special Techniques
- Slip Knot and Foundation Chain: Begin by making a slip knot and creating the chain foundation.
- Magic Circle: For a seamless round start. This creates a sturdy and polished base.
- Increase: Adds stitches in the same space to expand the bag.
- Decrease (dc2tog/sc2tog): Combines two stitches into one for shaping and tapering sections.
Pattern Instructions
Base of the Bag (Round Sections)
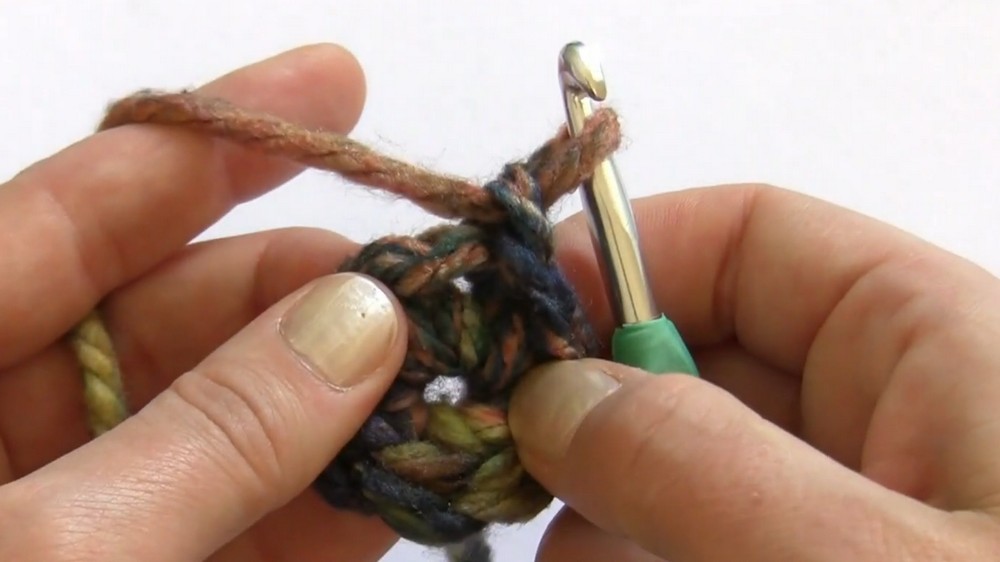
Step 1: Start with a Magic Circle
- Form a magic circle with your yarn and secure it.
- Ch 1 and make 8 sc into the magic circle.
- Pull the tail of the yarn to tighten the circle.
- Join with sl st to the first sc to close the round.
[8 sts]
Step 2: Round 1
- Ch 1 (this counts as the first sc).
- Into the same stitch, work 1 hdc and 1 sc.
- In the next stitch: 1 sc followed by 1 hdc and 1 sc.
- Repeat this pattern of 1 sc, 1 hdc, and 1 sc per stitch for all stitches.
- Sl st into the first hdc to complete the round.
[24 sts]
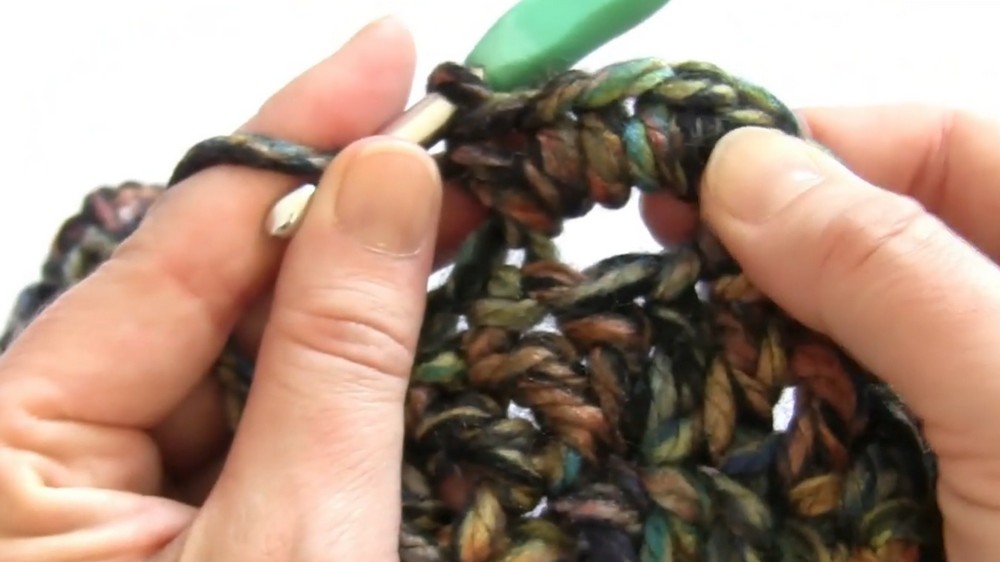
Step 3: Round 2
- Ch 1 to begin the round (acts as the first sc).
- Work 1 hdc and 1 sc into the same stitch as the sl st.
- Sc into each of the next 3 stitches, then work 1 sc, 1 hdc, and 1 sc into the same stitch (corner increase).
- Repeat the pattern: 3 sc followed by an increase in the corner.
- Join with a sl st into the first hdc.
[32 stitches]
Step 4: Rounds 3–9
- Continue to work the same corner increase formula as in Round 2. Each corner increase adds 1 hdc and 2 sc into the same stitch.
- The only difference from round to round is that the number of scs between corners will increase by 4 each round (e.g., 3 sc between corners in Round 2, 7 sc in Round 3, and so on).
Sides of the Bag
Step 1: Transition from the Base
- After completing 9 rounds for the base, switch to creating the vertical sides of the bag.
- Ch 3 (counts as the first dc).
- Work 1 dc in each stitch around the base without any increases.
- Join with a sl st to the first dc.
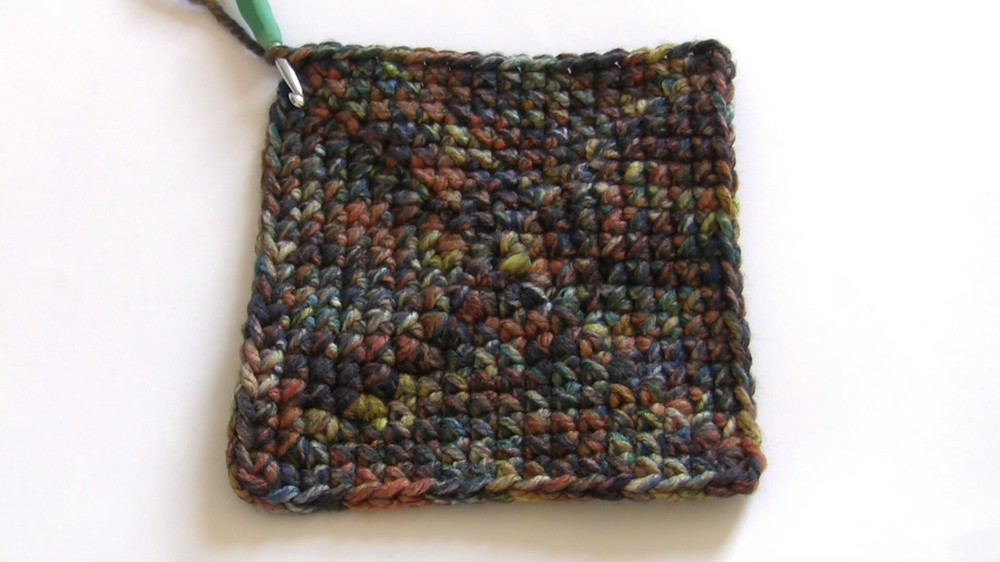
Step 2: Continue the Sides
- Work plain dc rounds for 10 rounds or your desired bag height.
- For a rippled or wavy effect, alternating rounds of front-post dc (fpdc) and plain dc can also be used.
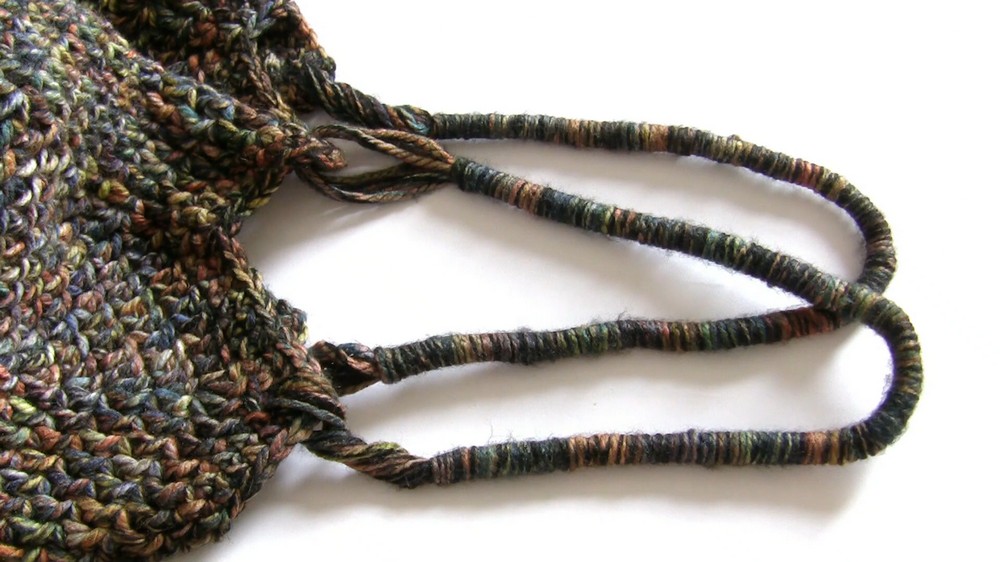
Handles
Step 1: Creating Chain Loops for Handles
- At the top of your bag, mark where you want both handles to be placed.
- Skip 12–14 stitches (depending on handle width).
- In the handle space, ch 30 stitches (or longer for longer handles).
- Attach the chain back to the skipped section using a sl st.
Step 2: Wrapping the Handles
- Cut a long piece of your working yarn (about 6 meters depending on the handle length).
- Wrap the yarn evenly and tightly over the chain handles to reinforce strength and texture.
Finishing Adds-On
Add Decorative Wrapping
- Use contrasting yarn or the same color to create a visually pleasing wrapping on the handles if desired.
- Make sure the wrapping is even and identical for both handles.
Final Touches
- Weave in all loose ends with a tapestry needle.
- Block or lightly steam the bag to ensure shape retention.
Customization Ideas
- Size Variations: Adjust the base size (add more or fewer rows) and side height for smaller or larger bags.
- Color Blocking: Use multiple colors to create stripes or visual patterns.
- Lining: Add fabric lining to enhance durability and functionality.
- Strap Style: Use leather straps for an elevated look or metal chain straps for glamor.
Conclusion
Your Ripple Yarn Crochet Bag is complete! This bag is stylish yet functional, making it perfect for everyday use or as a gift. Thanks to its stiff yarn and optional lining, it retains its shape and can carry various lightweight items.
Pattern Corrections
- Consistency in corner increases is crucial for symmetry. If the bag appears uneven, recount stitches and adjust the stitches in missed corners.
Tips
- Tension: Maintain tension throughout the project to create a tight, sturdy fabric for the bag.
- Stiff Yarn: Always use stiff or chunky yarn for a polished finish and form retention.
- Handles: Ensure the handles are securely wrapped for durability.
Leave a Reply