
Stay warm and stylish this winter with a stunning crochet hat pattern that’s simple to follow and perfect for adding a unique touch to your look.
Cozy Crochet Hat Pattern in Just a Few Steps
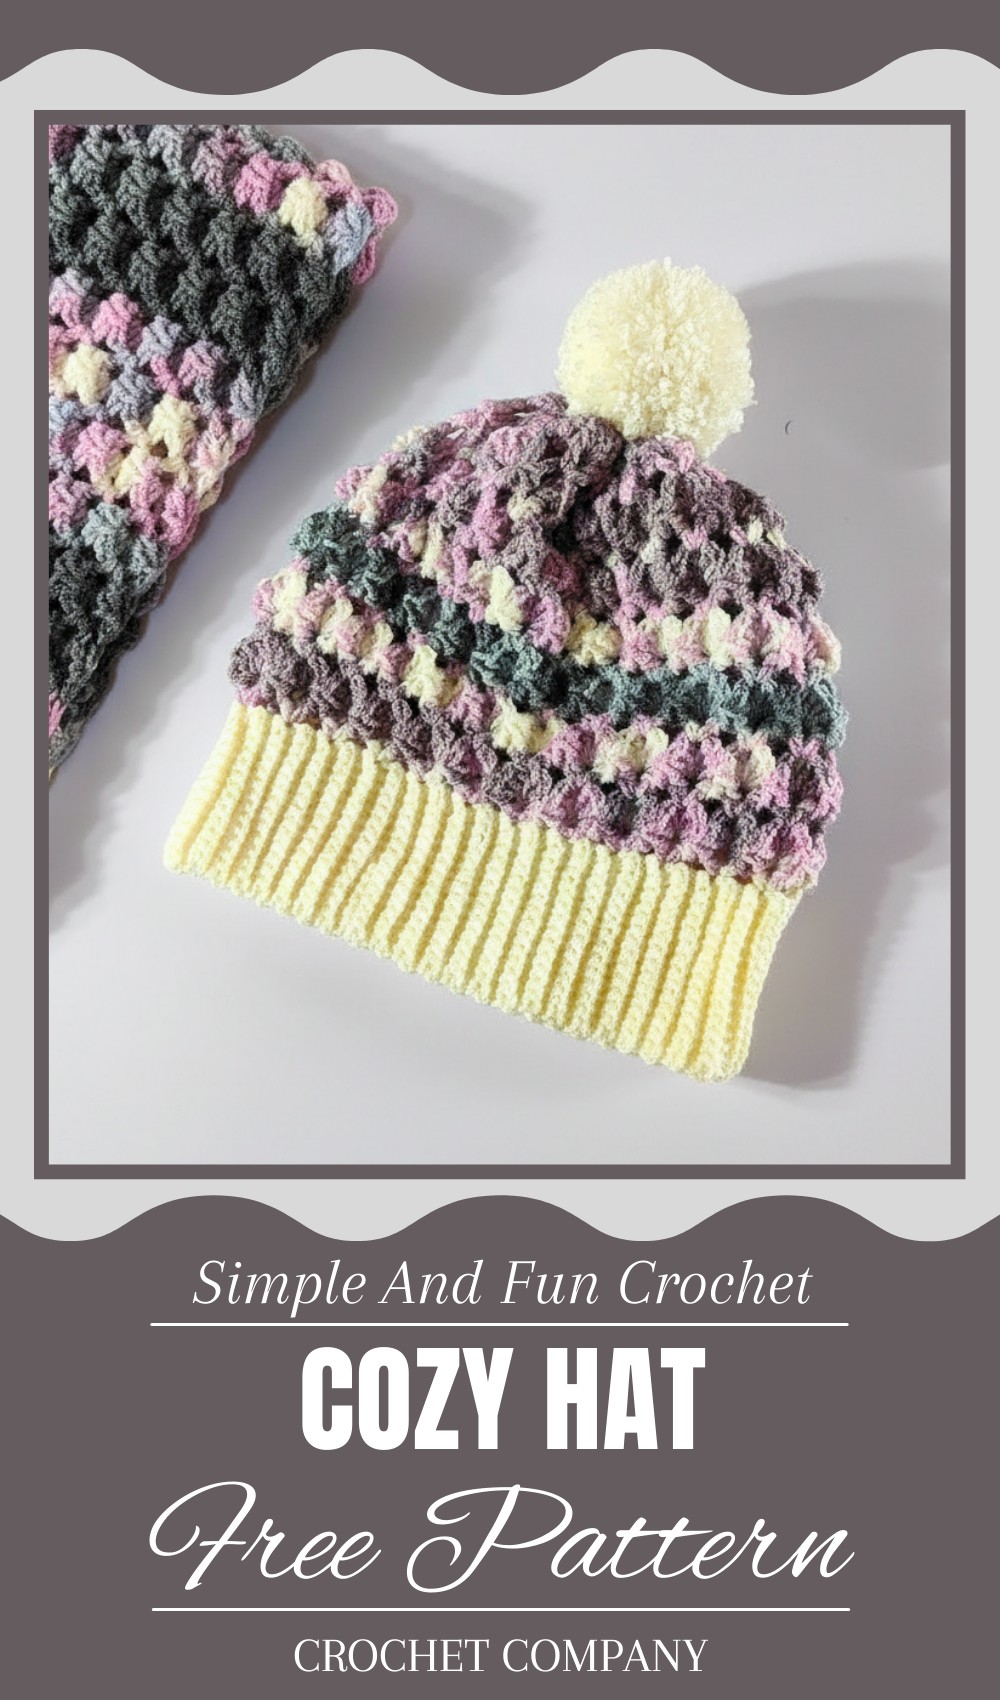
Keep your head warm and stylish this season with a gorgeous handmade piece that’s both practical and beautiful! A crochet cozy hat pattern gives you a soft, snug accessory perfect for chilly days. These hats stand out with their charming textures, vibrant colors, and unique designs that you can easily customize to suit your taste. Whether you want something casual for daily wear or a stunning gift for a loved one, this is a project that fits all occasions.
Its beauty lies in the detailed stitches and patterns that create warmth while adding a touch of elegance. These hats are not just functional; they’re a statement piece that elevates any outfit. From outdoor adventures to simple walks in the park, they’re designed to keep you comfortable and stylish. Plus, they’re incredibly fun to make, even for beginners. A crochet cozy hat isn’t just a craft; it’s a heartwarming addition to your winter essentials.
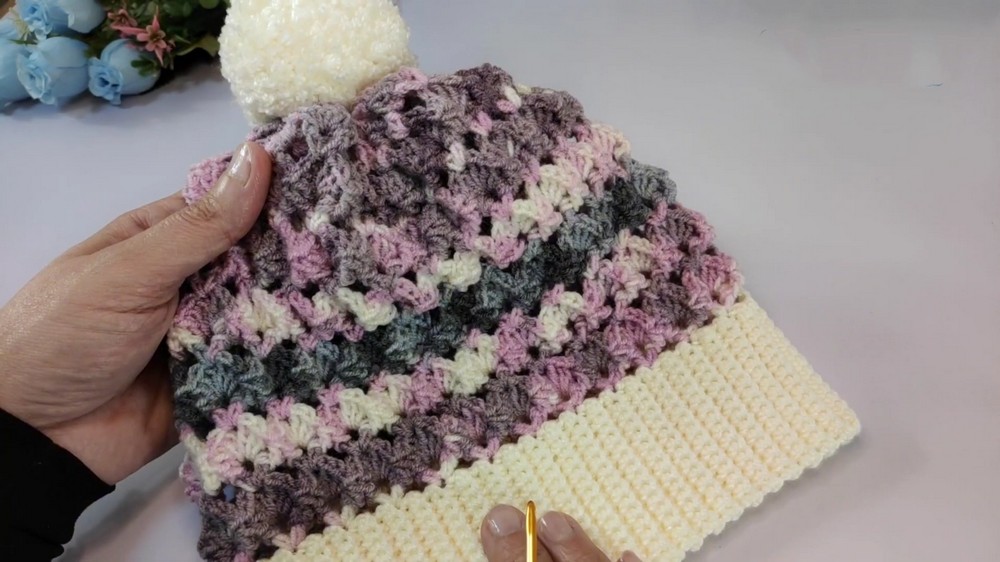
Ice Cap Crochet Pattern
Special Features of the Ice Cap
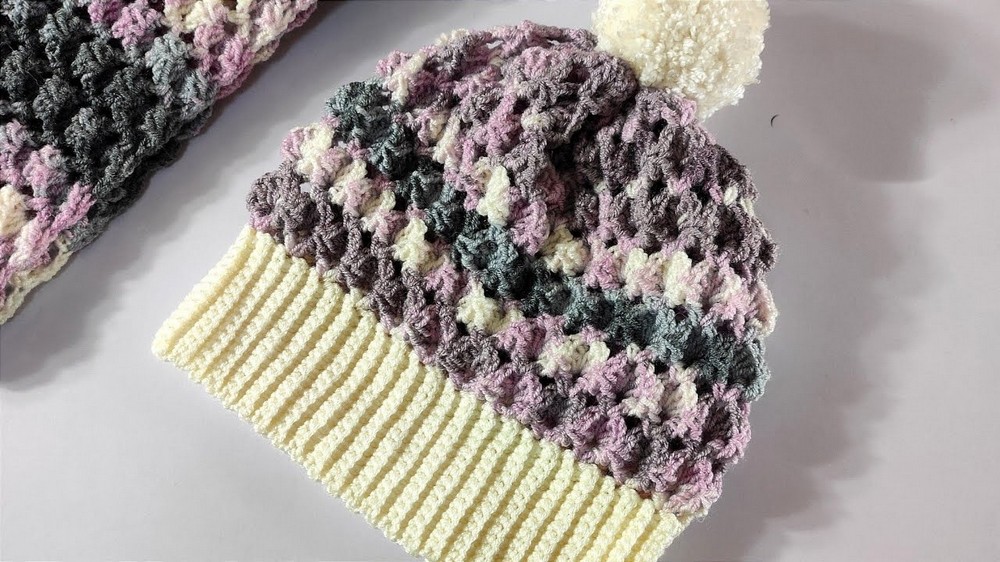
- Elegant Ribbed Edge: Provides a snug fit around the head.
- Textured Body: Created by alternating rows, giving the cap a charming and unique appearance.
- Pom-Pom Detail: Adds a playful finishing touch.
Level of Difficulty
Skill Level: Easy to Intermediate
The repeating pattern and simple stitches make this an excellent project for crocheters looking to build their skills.
Supplies Needed
- Medium-Thickness Yarn: Ensure it’s soft and warm for best results.
- Crochet Hooks:
- Needle size 3mm (for the ribbed edge).
- Needle size 3.5mm (for the textured body).
- Pom-Pom Maker (Optional): To add the final decorative touch to your ice cap.
The Crochet Ice Cap Pattern
Step 1: Ribbed Edge Band
- Begin with a Slip Knot using the 3mm crochet hook.
- Chain 15 stitches to start the band of the ice cap.
- In the second chain from the hook, work a Single Crochet (SC) stitch.
- Continue to work SC stitches across each of the remaining 14 chains. You should have 14 stitches in total.
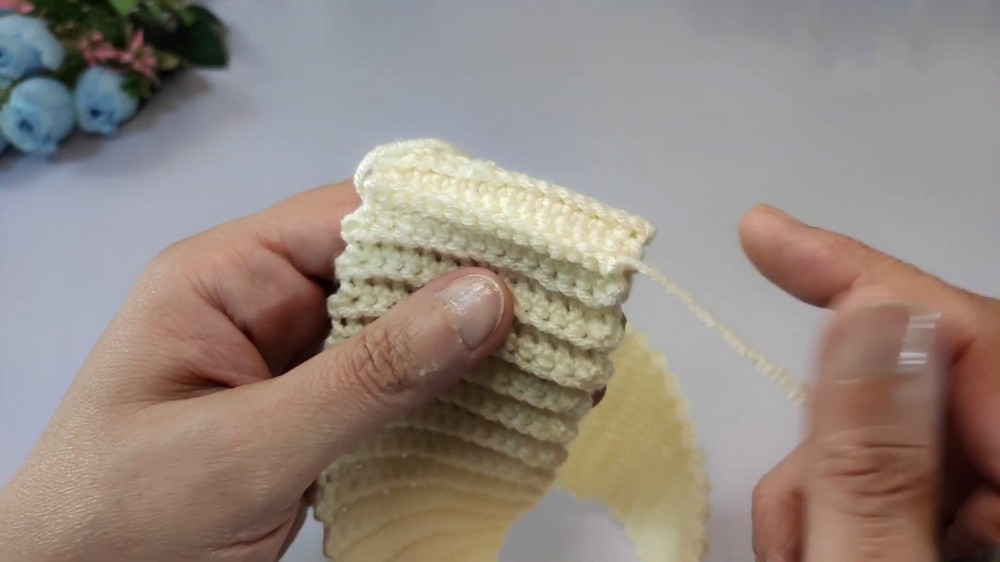
- Line 2: Chain 1, turn your work, and work SC stitches into the back loop only of each SC from the previous row. (Back-loop SC creates the ribbed texture).
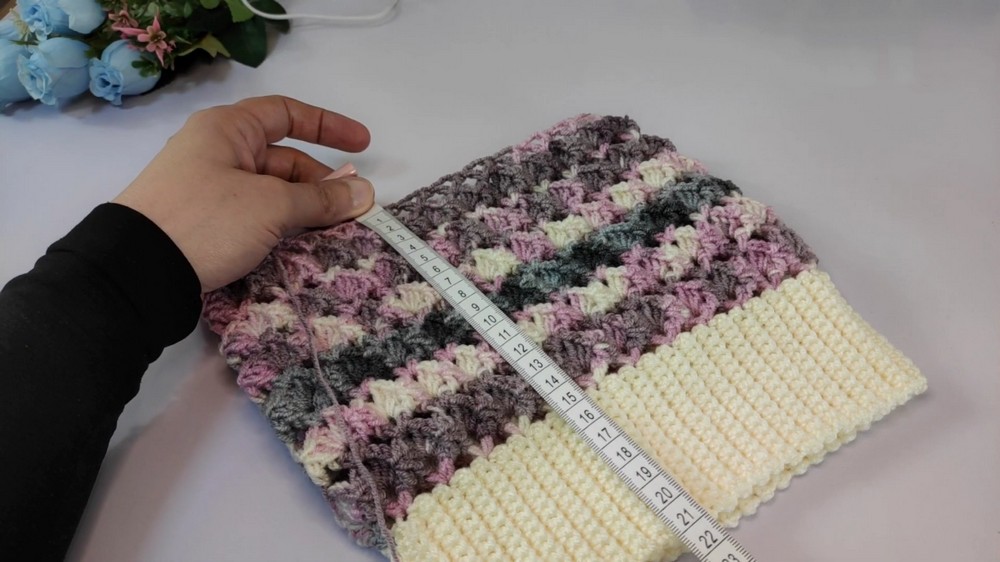
- Repeat Line 2 until the length of the band equals the circumference of the head minus 6-7cm for a snug fit. For example, as Salwa did, she worked 96 rows for a 47cm band length.
- Joining the Band: Bring the two edges together and join with Slip Stitches using the back loops only. Break off the yarn and secure it.
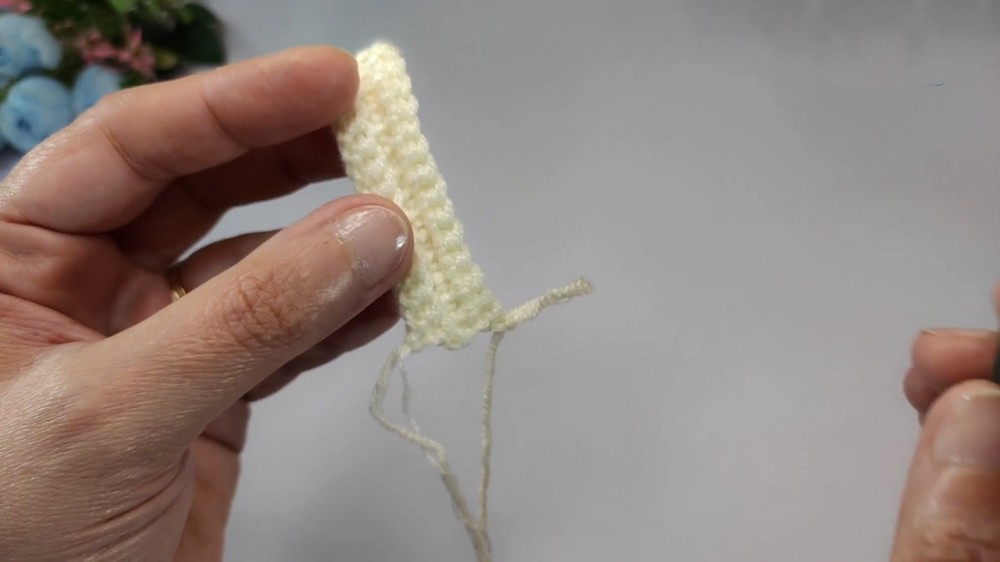
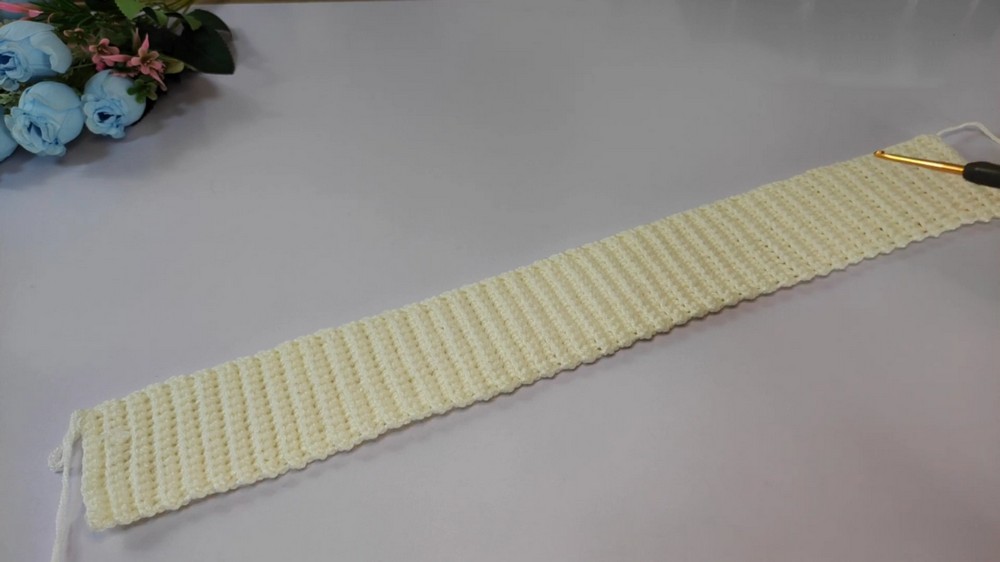
Special Note: The number of rows should be a multiple of 4.
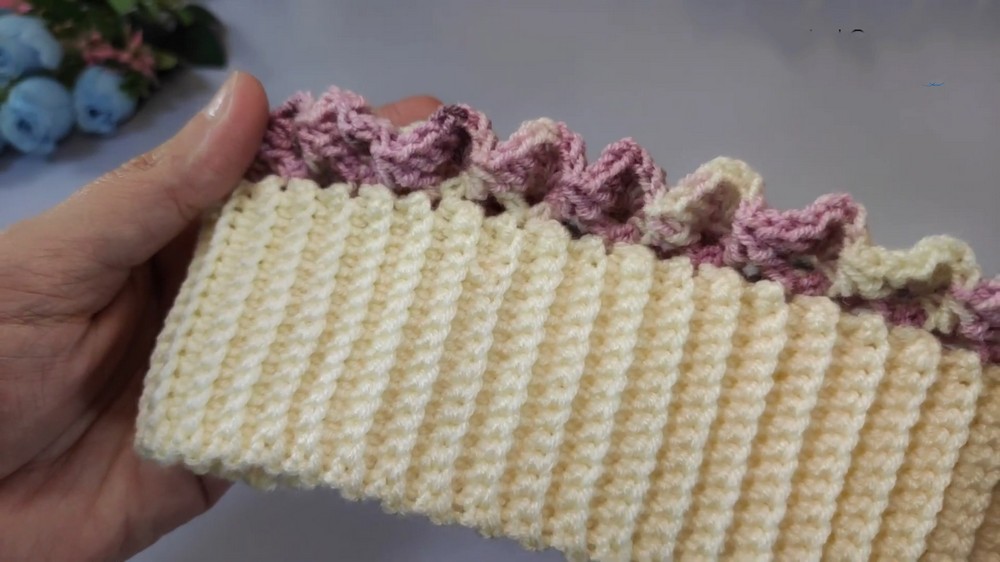
Step 2: Body of the Ice Cap
- Attach the medium-thickness yarn to the ribbed edge and switch to the 3.5mm crochet hook.
- Foundation Round:
- Chain 5. (3 for the first DC + 2 for spacing).
- Insert the hook into the same starting stitch and create a Double Crochet (DC).
- Skip 3 rows of the ribbing and insert a DC in the 4th row. Continue this pattern around the entire band.
- Join with a Slip Stitch into the 3rd chain of the starting stitch.
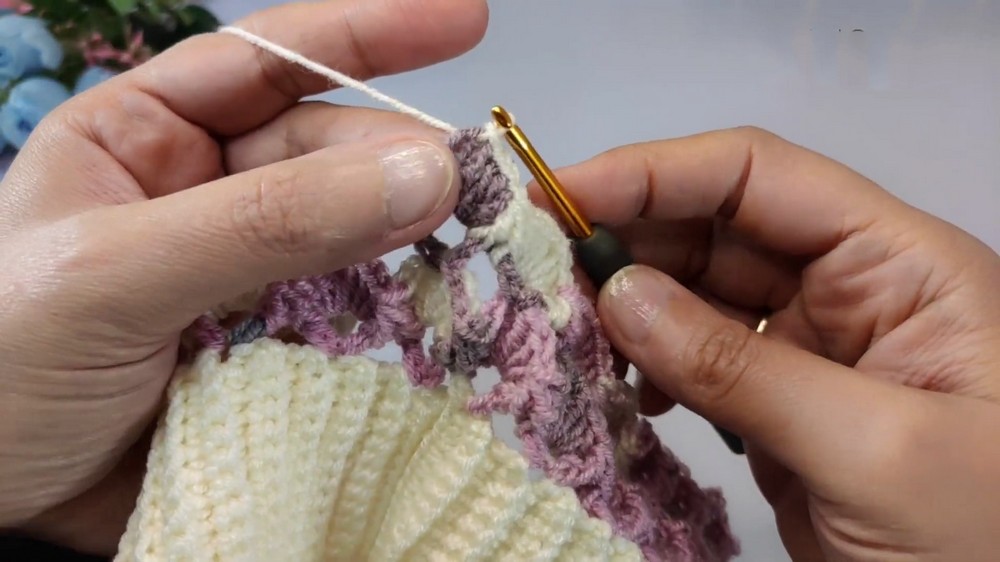
- Textured Alternating Rows:
- Row 1 (Cluster Pattern):
- Work into the chain spaces created in the previous round.
- Chain 3, work 2 DCs into the same chain space, Chain 1, then add 3 additional DCs into the same space.
- Repeat into each chain space around. Close the row with a Slip Stitch.
- Row 2 (Cluster & Raised DC):
- Starting in the chain space, Chain 3 as the first DC, work 2 DCs, Chain 1, then continue with 3 DCs.
- Around the post of the first DC, work a Front Post Double Crochet (FPDC): wrap the yarn around the post instead of the top of the stitch.
- Row 1 (Cluster Pattern):
- Repeat Rows 1 and 2 until the ice cap measures approximately 21cm (or your desired length).
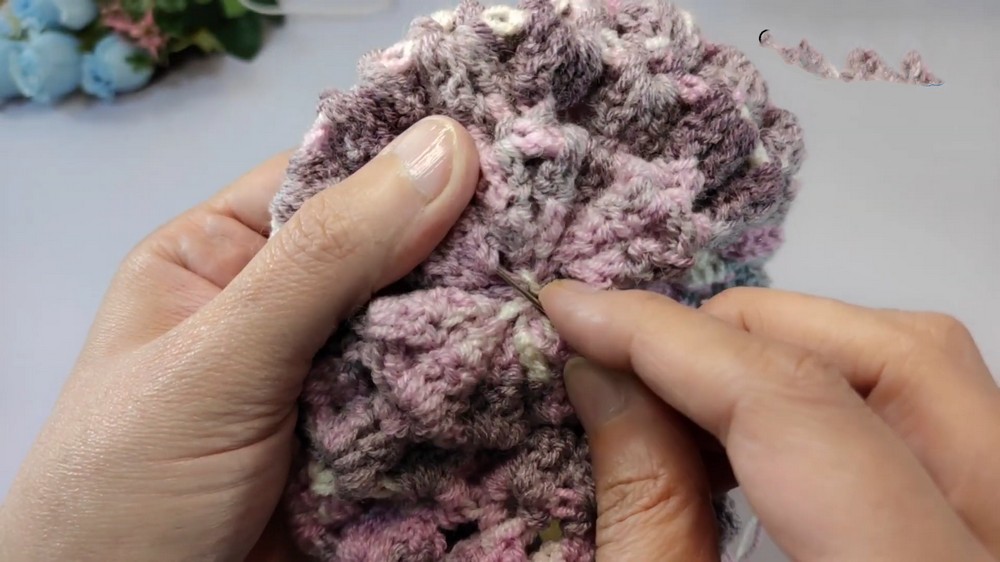
Step 3: Closing the Ice Cap
- Final Row: Once you’ve reached your desired length, work 3 DCs into each chain space (without chaining in between).
- Start tapering the ice cap by reducing stitches:
- Combine the 3 DCs into 1 by working them together (i.e., DC3TOG – Double Crochet 3 Together).
- Finish with a Slip Stitch to completely close off the top of the ice cap.
Step 4: Adding the Pom-Pom
- Use yarn to create a fluffy pom-pom or use a pom-pom maker.
- Attach the pom-pom securely to the top of the ice cap.
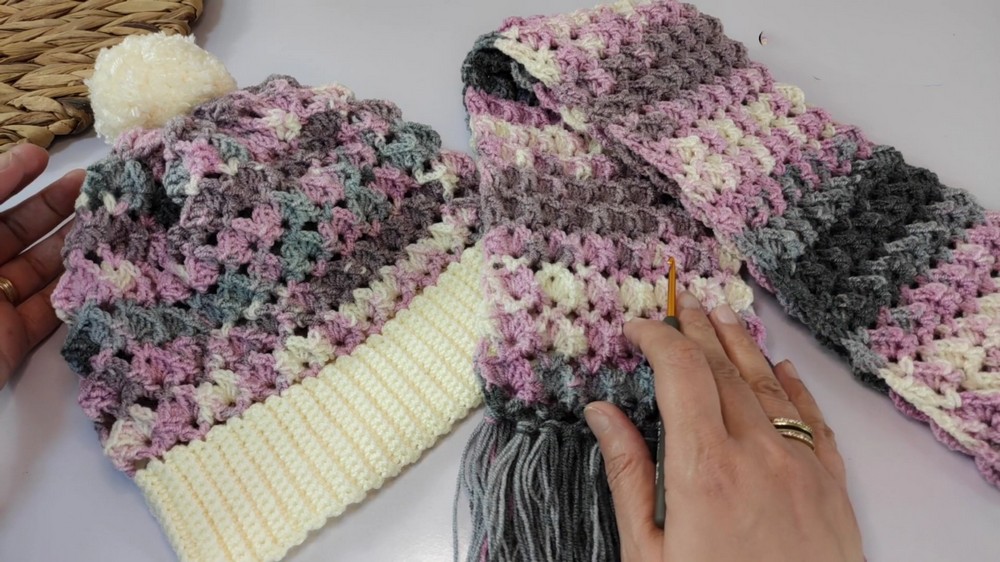
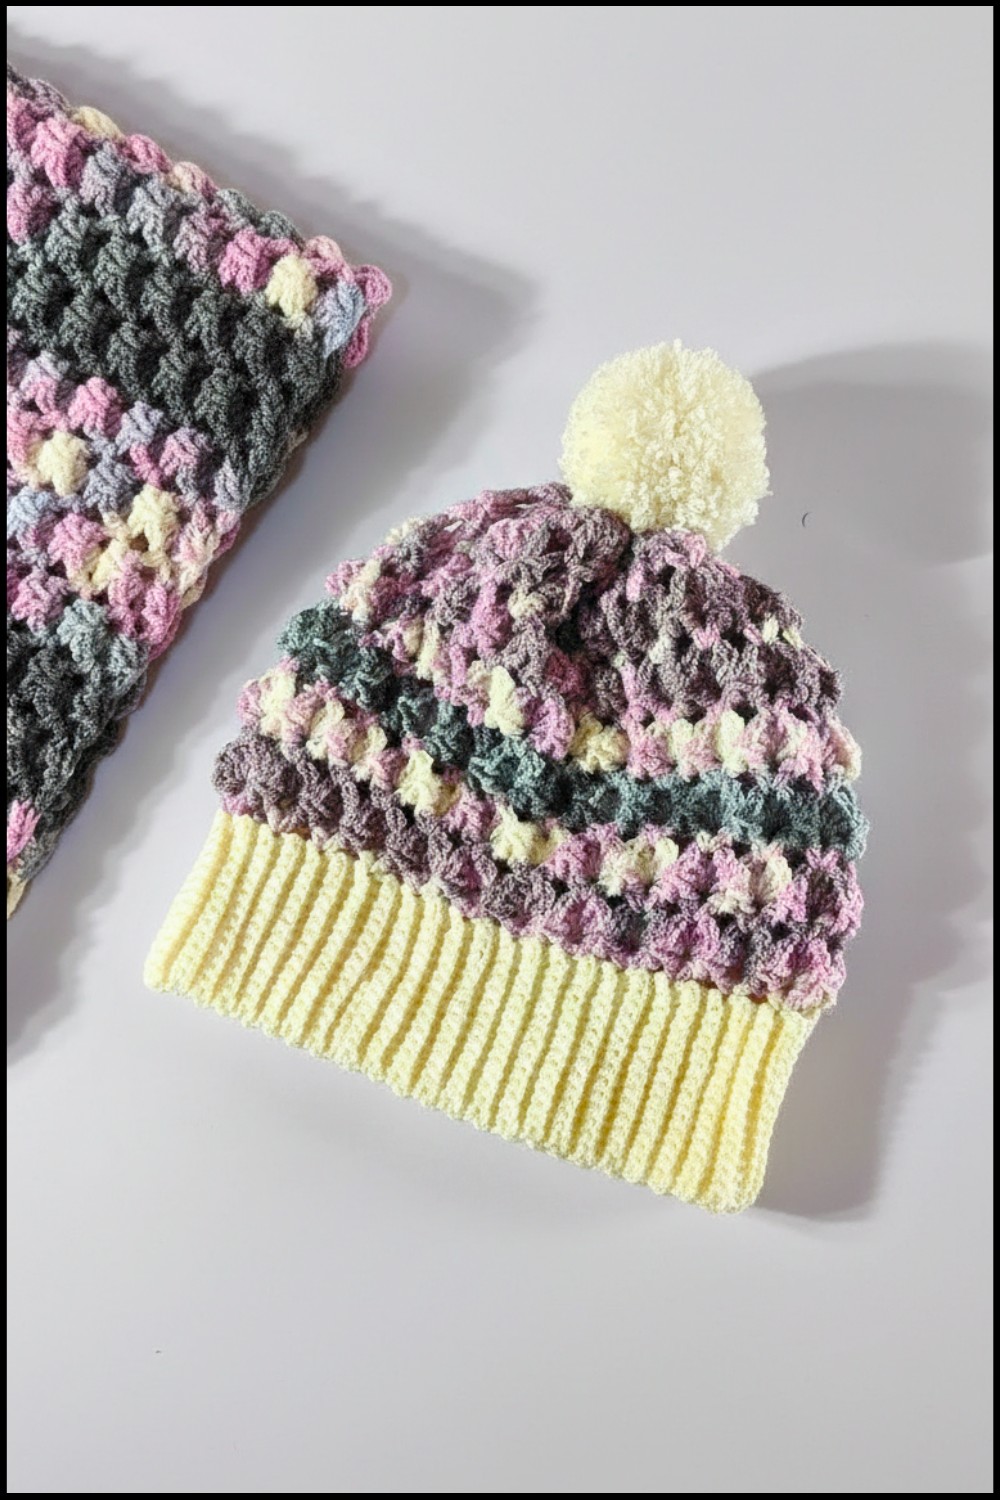
Uses of the Ice Cap
- Everyday Wear: Keep warm during cold weather while looking stylish.
- Handmade Gift: Perfect for friends and family, especially paired with a matching scarf.
- Craft Fairs: A beginner-friendly yet attractive design ideal for selling.
Tutor’s Suggestions
- Always check your gauge to ensure the proper fit.
- For a unique twist, switch between two colors for the textured rows to create a striped effect.
- Experiment with other embellishments like beads or appliqué for extra charm.
Tip of the Day!
When working with the ribbing, be consistent with back-loop-only stitches to maintain even tension and get a clean, professional look.
Conclusion
This crochet ice cap is both functional and beautiful, with a thoughtfully designed texture and snug fit. Whether you’re making it for yourself, gifting it to a loved one, or selling it at a craft fair, it’s a project filled with love and warmth.
Leave a Reply