
Hold your style confidently with this Crochet Handbag Pattern that offers a chic and practical piece ideal for daily use and casual outings.
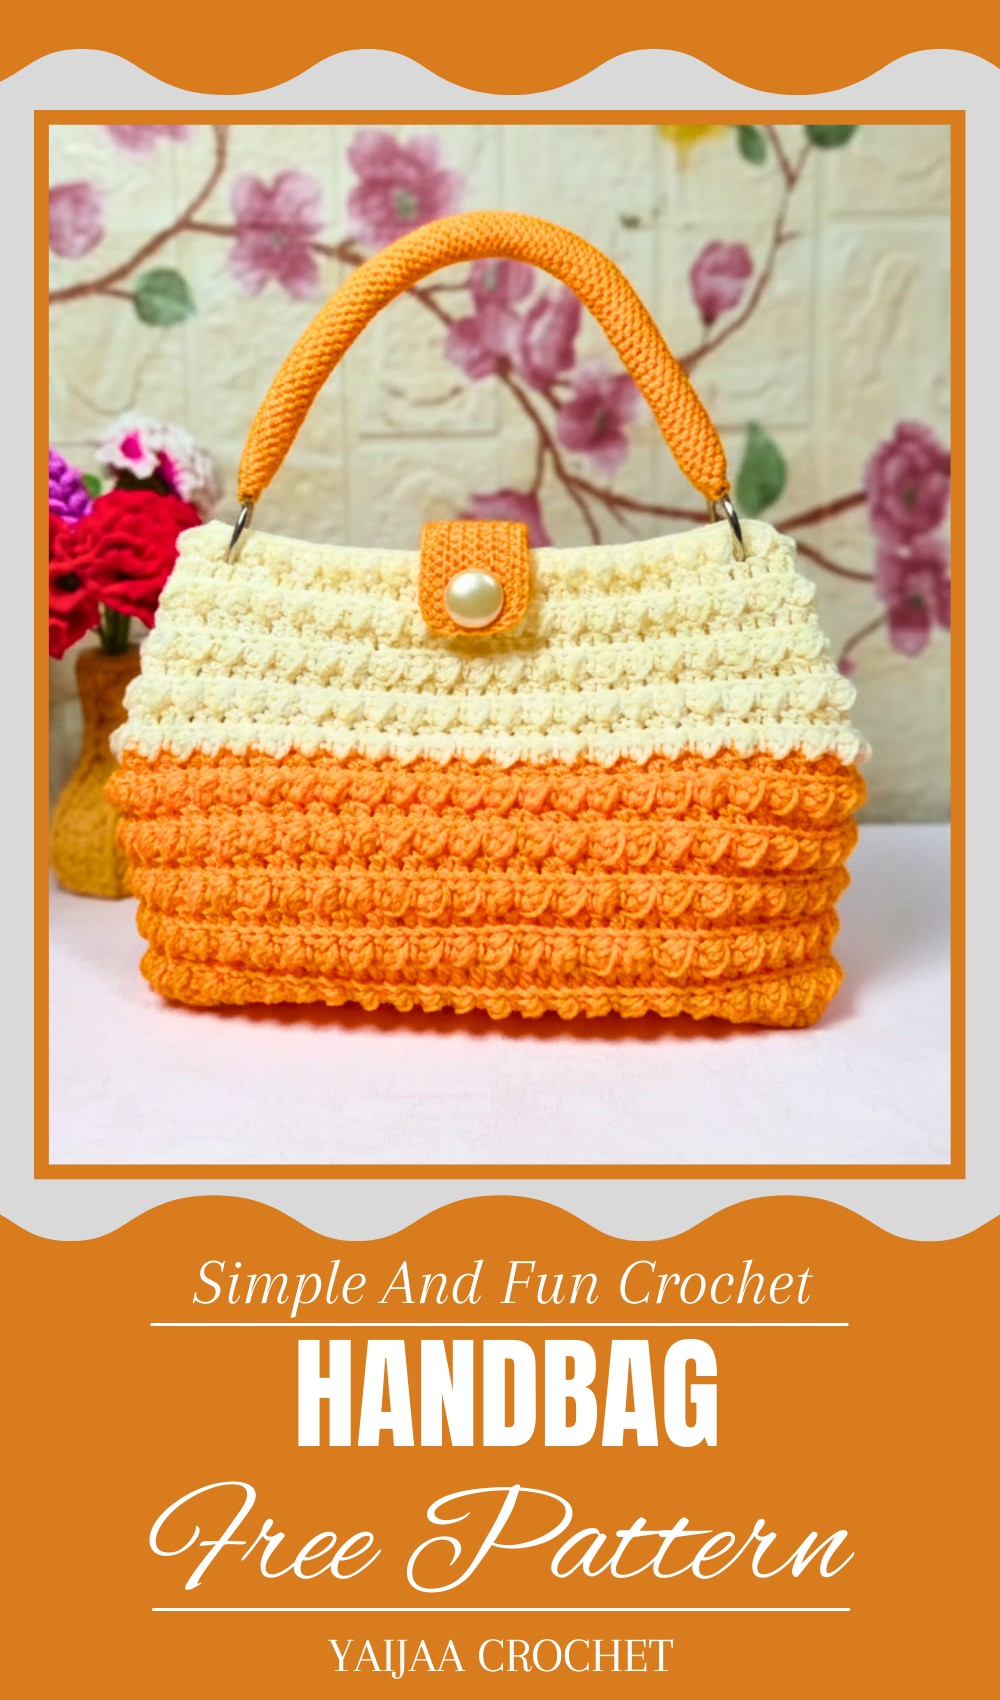
Luxe Crochet Handbag Pattern You’ll Want to Carry Daily
A handmade bag can bring both beauty and practicality to your everyday life. A crochet handbag is perfect for adding a unique touch to your outfit, whether you’re out running errands, at a special event, or even enjoying a casual day out. This bag can be crocheted in a variety of colors, patterns, and textures, making it easy to match to your personal style. Each stitch creates a bag that is not only useful but also a wonderful piece of art that highlights the time and love put into making it.
It’s great for carrying essentials while showcasing something truly special. This handbag also makes a thoughtful gift, showing care through the crochet. Easy to carry and perfect for any occasion, it’s an accessory that stands out. With the right crochet pattern, you can turn yarn into a stunning and functional piece everyone will admire.
Materials
- Yarn/Rope:
- Umbrella rope (2mm thickness).
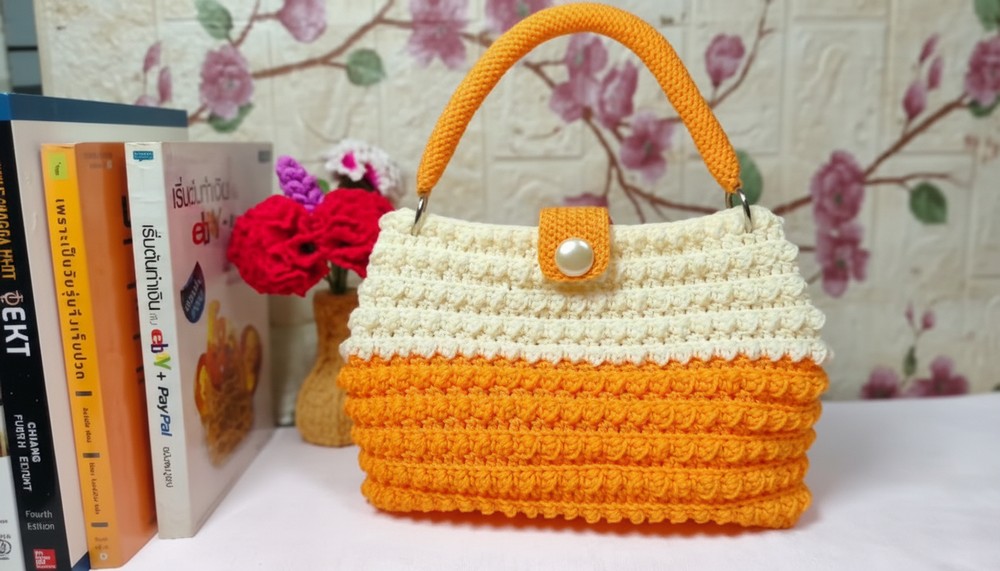
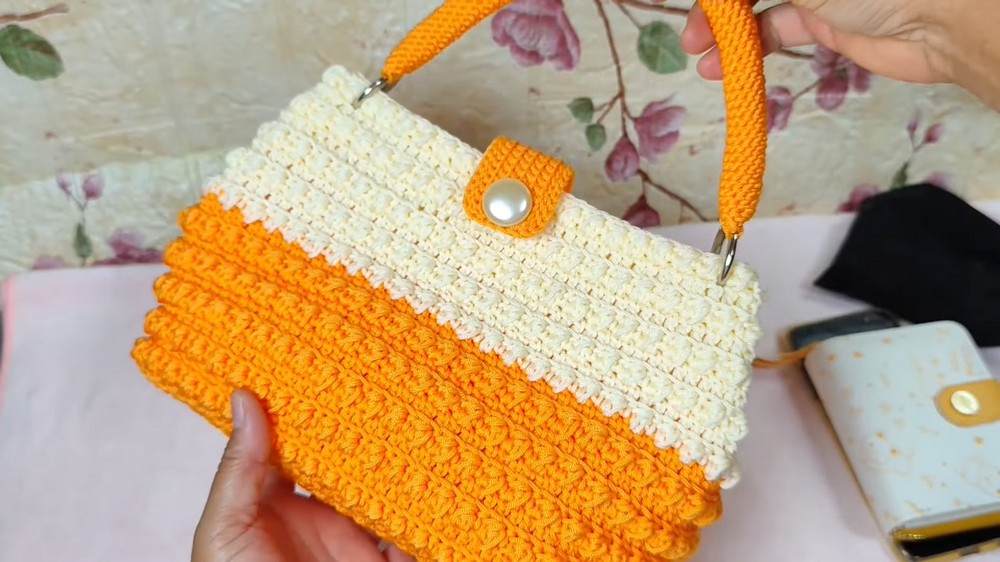
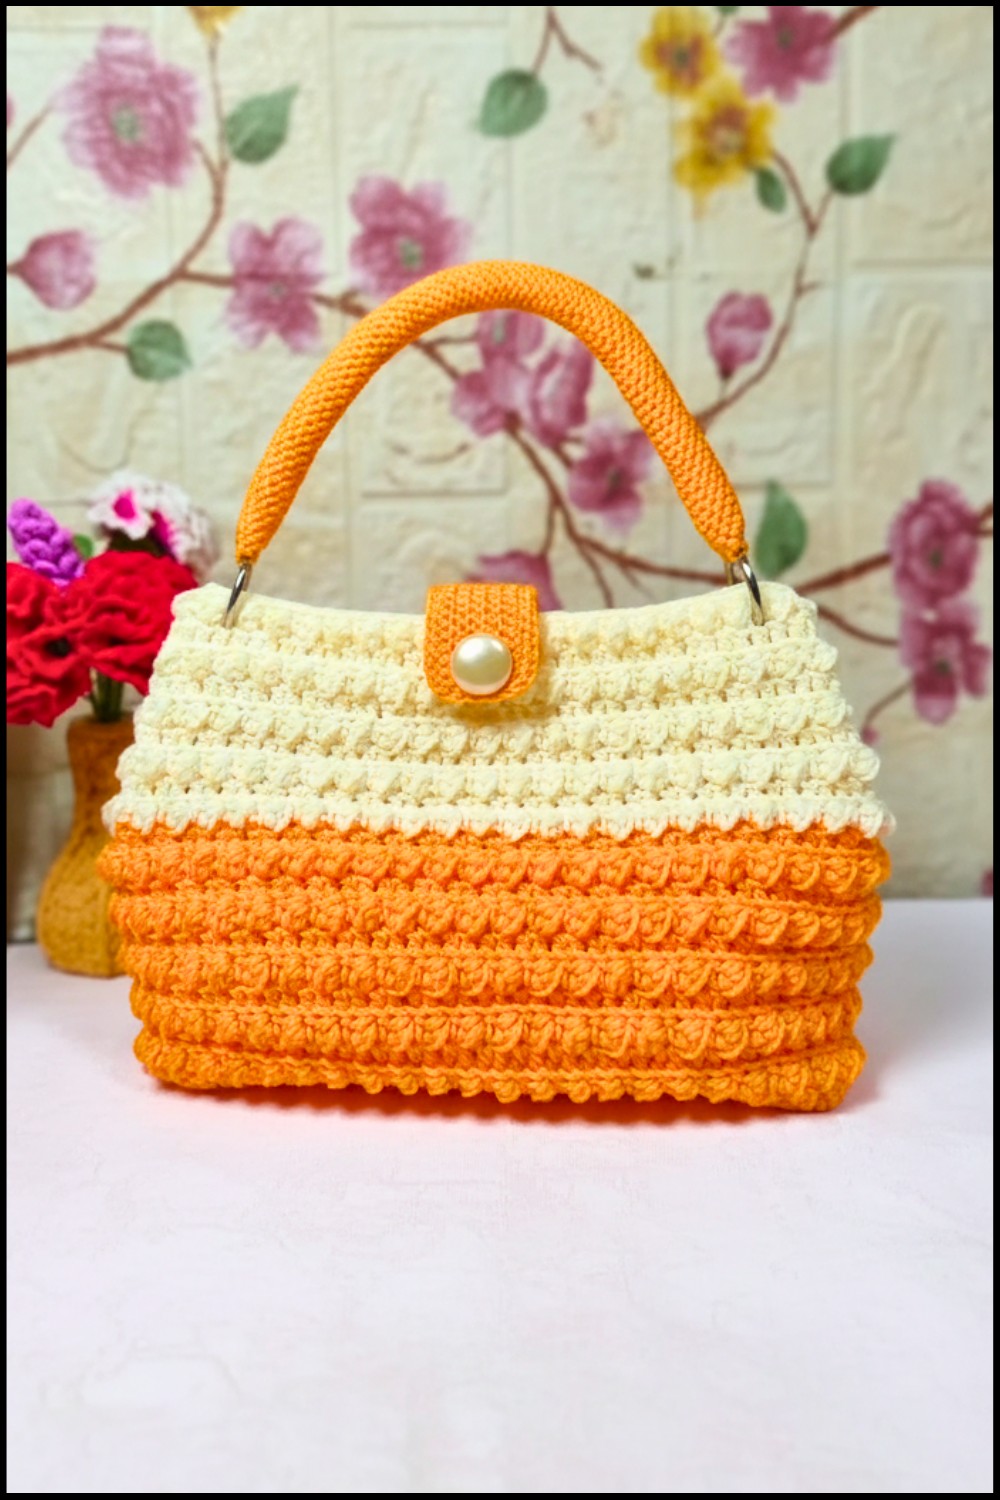
- Two colors: Orange for the bag base and initial rows, and cream (or any preferred complementary color) for the upper bag portion.
- Crochet Hook:
- Size 5/0 (3.0mm).
- Tools:
- Scissors.
- Stitch markers.
- Tapestry needle (for sewing and finishing).
- Lighter (to melt and seal the ends of the umbrella rope, optional).
- Optional Accessories:
- Magnetic buttons for the closure flap.
- Keyring hoops (3cm diameter) for bag straps.
- Decorative buttons or flowers for embellishment.
Key Abbreviations
- sl st: Slip Stitch
- ch: Chain
- sc: Single Crochet
- hdc: Half Double Crochet
- 2hdc cluster: Two half double crochets worked into the same stitch, with all loops pulled together in the last step. This creates an embossed look.
Customization Ideas
- Bag Size: Adjust the number of foundation chains and rows to achieve your desired bag dimensions.
- Strap Length: Add or reduce chains during the initial strap stage to create shorter hand straps, elbow-length straps, or shoulder straps.
- Colors: Use one solid color for the entire bag or alternate two or more colors for a stylish look.
- Yarn Substitution: If umbrella rope is not available, substitute with bleached cotton rope or durable yarn.
Step-By-Step Pattern
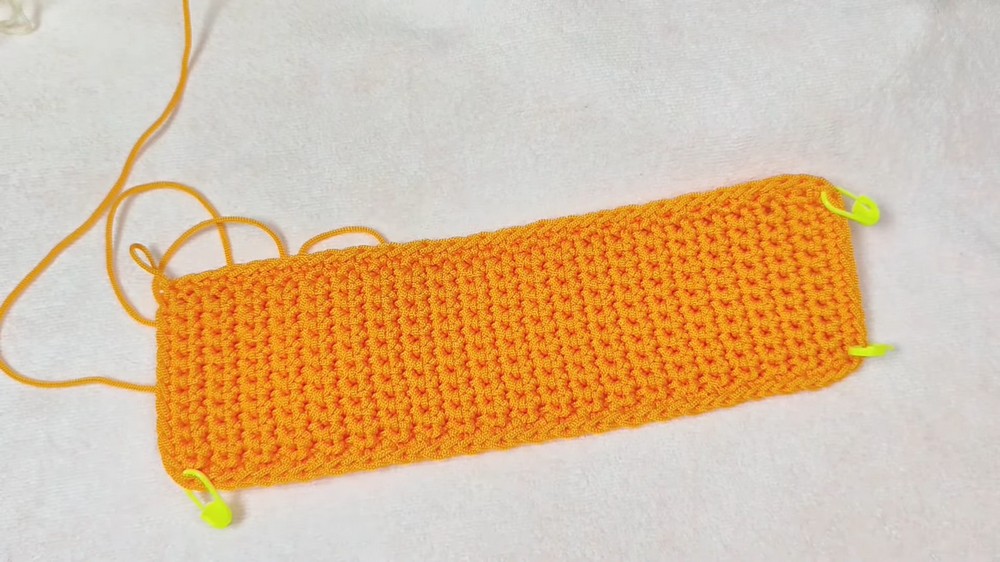
Step 1: Create the Base (Rectangular Bottom of the Bag)
- Foundation:
- Start with a slip knot, then make 10 chains.
- The width of the base is determined by your chain length. Adjust as desired.
- Row 1:
- Ch 1, then work 1 sc into each of the next 10 chains (10 stitches total).
- Turn your work.
- Rows 2-42: (Adjust based on desired base length).
- Ch 1, turn your work, and work 1 sc into each stitch across (10 stitches per row).
- Repeat until you have completed 42 rows.
- The finished base dimensions are approximately 23cm (length) x 7cm (width).
- Finish the Base:
- Your base now has 42 rows. Fasten off and weave in ends.
- Use stitch markers to mark the corners for the next steps.
Step 2: Create the Bag Walls
Crochet Around 3 Sides of the Base
- With the orange yarn, start on one side of the base.
- Work sc evenly along one side (1 sc per stitch). Mark the first stitch for easier tracking.
- Corners:
- When reaching a corner, work 2 sc into the corner stitch to maintain the shape.
- Continue on 2nd and 3rd Sides:
- Repeat the same process for the next two sides, working 1 sc per stitch and 2 sc in the corners.
- Edge Count:
- Ensure you have the correct stitch count. For a base of 42 rows and 10 chains:
- Long Sides: 42 stitches.
- Short Sides: 10 stitches.
- Total: 104 stitches around.
- Ensure you have the correct stitch count. For a base of 42 rows and 10 chains:
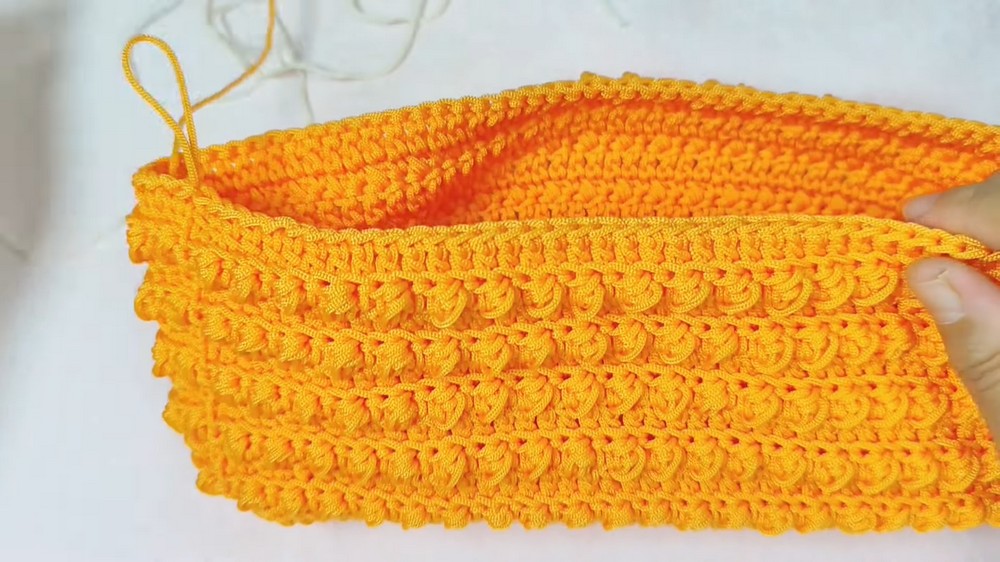
Row 1 of Bag Walls
- Switch to bag wall pattern:
- Start with 1 sc, then work 1 hdc into each stitch around.
- End the round by joining with a sl st to the first stitch.
- Rows 2-5 with Orange Yarn:
- Alternate rows of 2hdc cluster (embossed pattern) and hdc rows as follows:
- Row 2: Work 2hdc clusters, crocheting in the back loop only.
- Row 3: Work hdc in the back loop only.
- Repeat Rows 2-3 until you’ve made 5 rows total.
- Alternate rows of 2hdc cluster (embossed pattern) and hdc rows as follows:
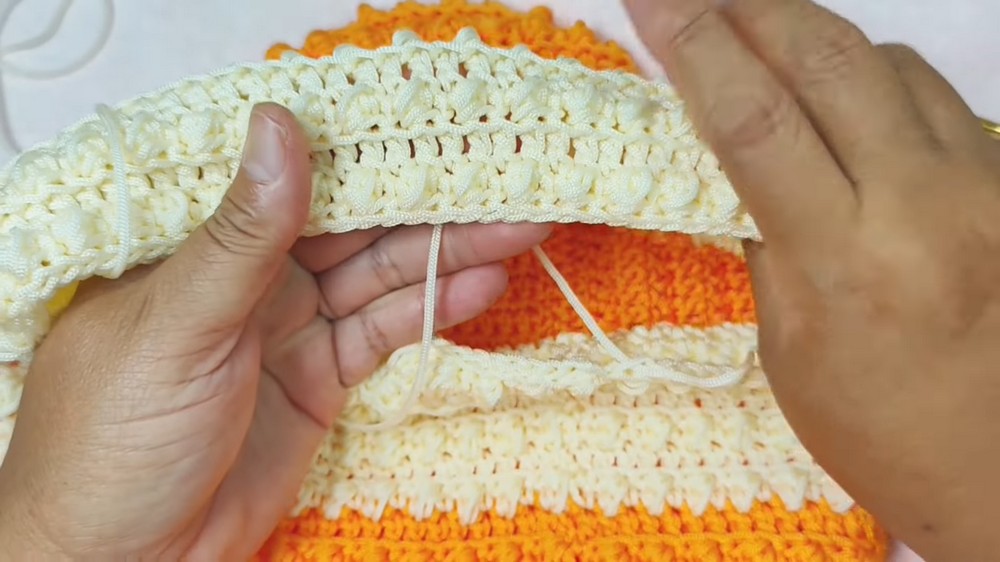
Switch Yarn Color (Optional)
- After completing the orange portion, switch to a second color (e.g., cream).
- Continue the embossed pattern (Rows 2-3) for another 5 rows of the cream color.
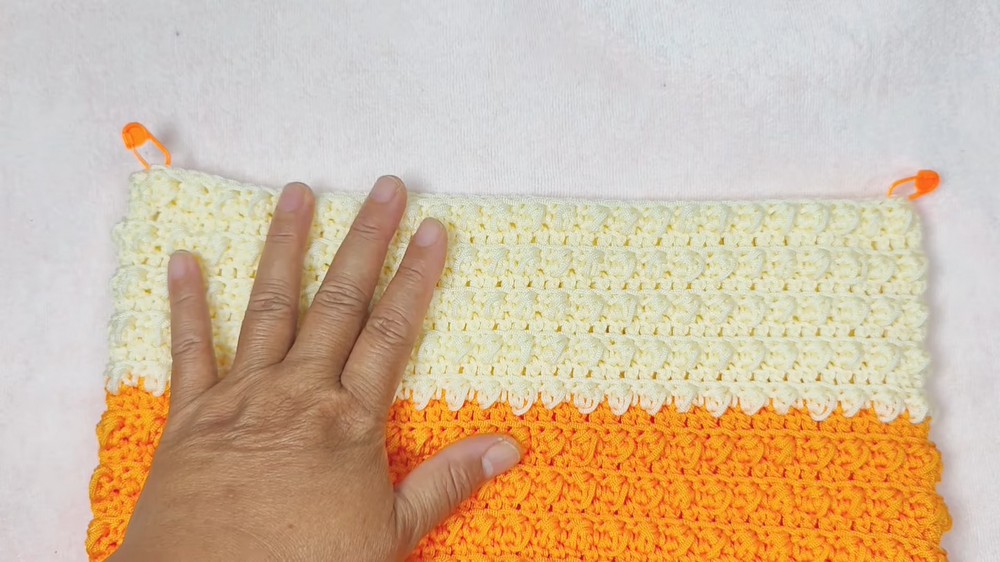
Step 3: Finish the Bag Walls
- To secure the edge:
- Work 1 row of sc in back loops only to create a clean edge.
- Fasten off and weave in all ends.
- Use a lighter (if using umbrella rope) to seal the edges of the yarn and prevent fraying.
Step 4: Bag Strap
Round Strap
- Foundation Chain:
- Start with a slip knot, then ch 10. Adjust the chain number for different strap widths.
- Form the Loop:
- Join the chain ends with a sl st to create a circular strap.
- Continue the Strap Body:
- Work sc into the back loops of the foundation chain. Continue working in rounds to build the loop strap.
- Adjust the length by adding rounds until the strap measures as desired. Example: 27cm for a handheld strap.
- Finish the Strap:
- Secure the end with a sl st and cut the yarn, leaving a tail for attachment.
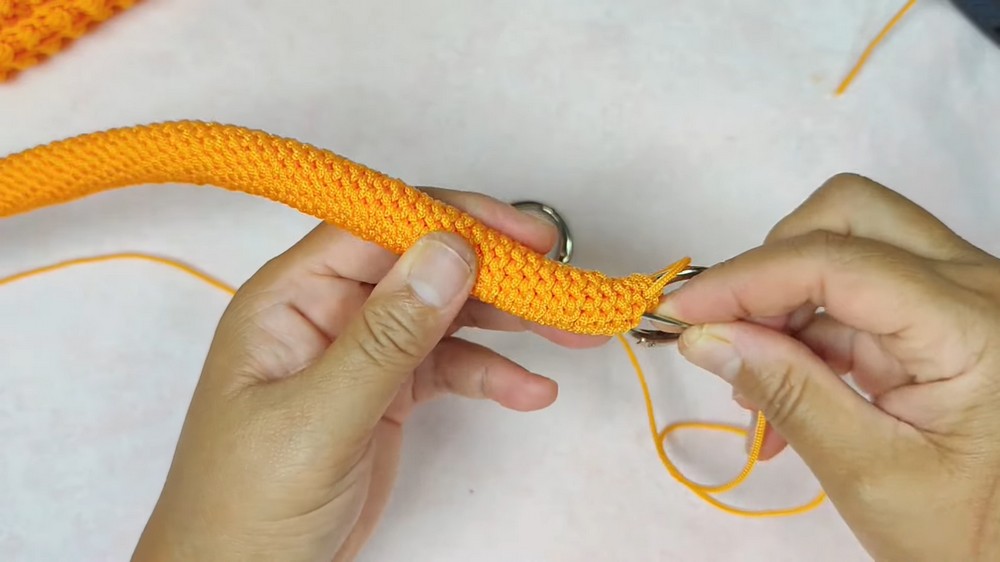
Attach the Strap
- Sew the strap ends securely onto the bag at the marked points (or to rings for additional adjustability).
- Make sure to reinforce the stitches for durability.
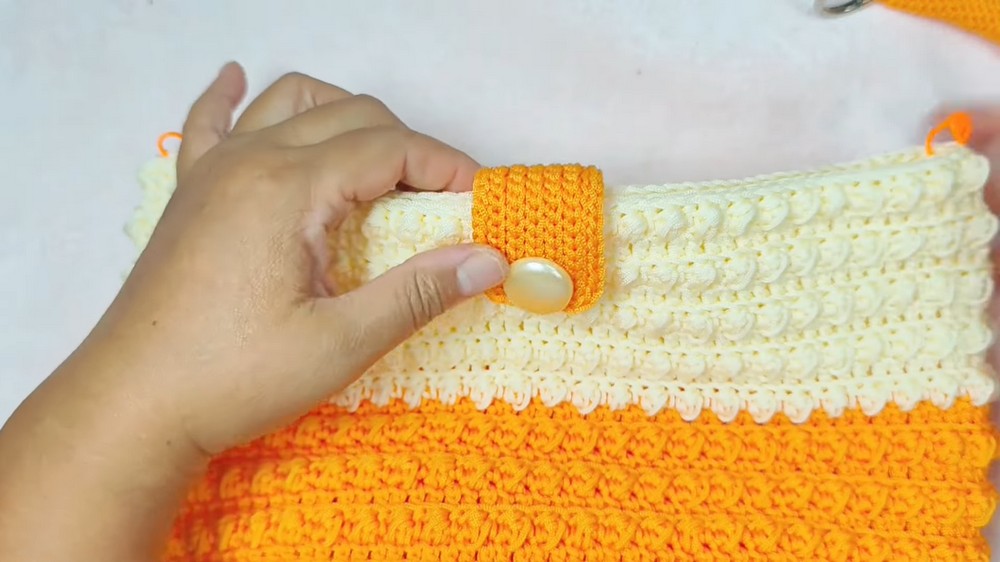
Step 5: Closure Flap (Optional)
- Foundation:
- Start with 20 chains for the closure flap.
- Work Back and Forth:
- Work sc into each chain, then turn and repeat for each row.
- Continue until the flap measures approximately 3cm.
- Edging:
- For finishing, work sl st around the edges of the flap.
- Attach the Flap and Magnetic Button:
- Sew the flap to the back wall of the bag.
- Attach the magnetic button following its instructions.
Special Notes
- Knife Pleat (Optional): Create a fold at the top of the strap for a unique, adjustable look. Secure the pleat with stitching or a decorative button.
- Customization: Add embellishments on the flap or strap, such as flowers, beads, or buttons.
- Adjustable Strap: Add rings or clips for a removable or adjustable strap option.
Conclusion
This rectangular crochet bag is not only practical but also stylish with its embossed design. Special features like the strap and flap add versatility, and you can customize the bag to your style and needs. The 2-row alternating pattern is beginner-friendly yet creates a textured and professional look.
Corrections and Tips
Corrections:
- Ensure corners are worked properly (2 stitches in each corner) to maintain the bag’s rectangular shape.
- Maintain even tension while working with umbrella rope or sturdy yarn.
Tips:
- Always count stitches when working the base and wall to avoid uneven rows.
- Test the magnetic button location before sewing to ensure proper alignment.
- If using lighter materials (cotton yarn), consider lining the bag for added strength.
Leave a Reply