
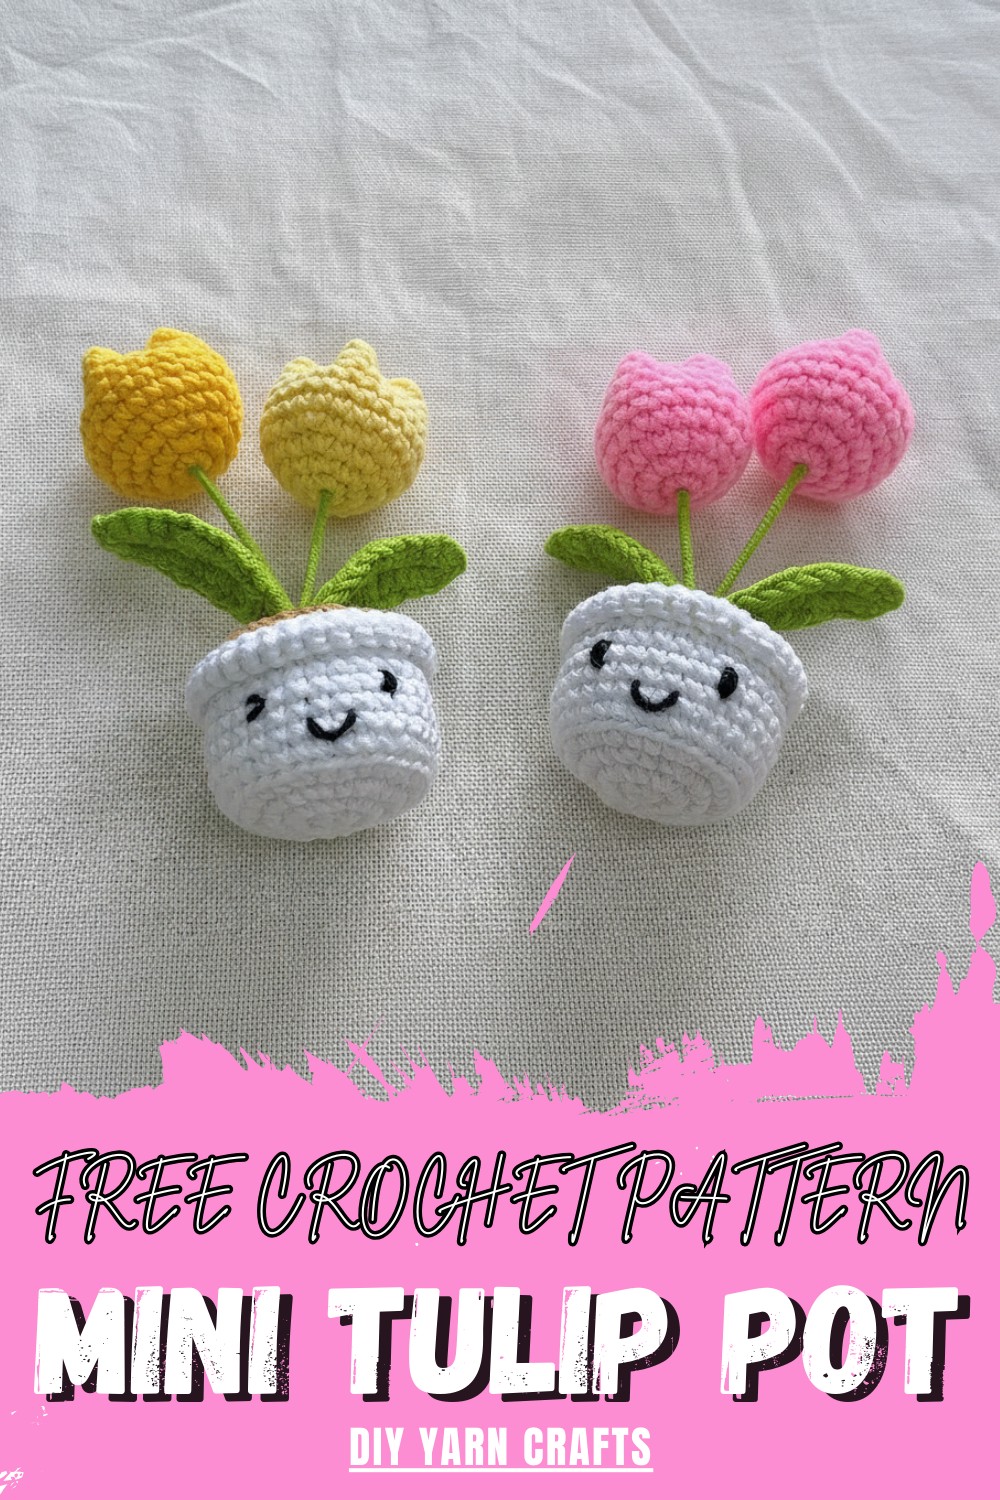
Fill your space with everlasting color and joy for all seasons using a free crochet tulip pot pattern that’s easy and fun for everyone to try.
Did you know you can bring the beauty of blooming tulips into your home without sunlight or water? With the Crochet Tulip Pot pattern, anyone can create a vibrant display for any surface—tables, windowsills, or shelves. Its bright petals and gentle green leaves make it look just like a real flower, but this tulip never wilt and always stand tall. This pattern offers a simple way to add cheerful color and warmth to every space, making it perfect for gifts, decorations, or personal keepsakes.
Free Crochet Tulip Pot Pattern: Easy Spring Decor for All
Every pot can be shaped to look lively and welcoming, no matter where you put it. Easy to follow and fun to make, the Crochet Tulip Pot pattern helps you fill your life with lasting beauty, gentle charm, and a sense of accomplishment, turning yarn into a lovely centerpiece that brings smiles every day.
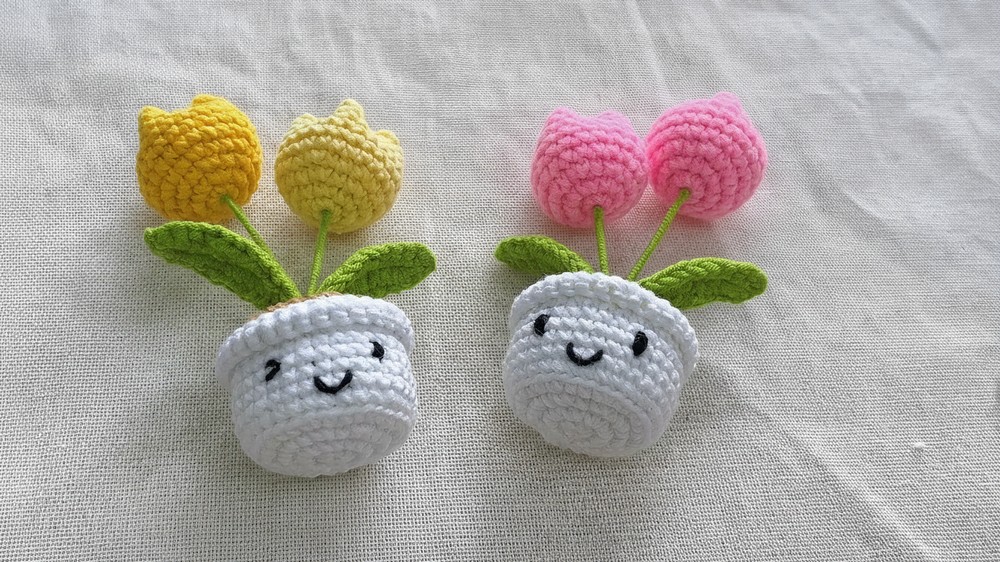
Mini Tulip Pot Crochet Pattern
Materials
- Yarn: Small amounts of worsted weight (
#4, medium) yarn in:- Pot color (brown/tan)
- Soil color (dark brown)
- Tulip color(s)
- Green (for leaves/stems)
- Hook: 2.5–3.5 mm (or size appropriate for your yarn)
- Notions:
- Stitch marker
- Scissors
- Yarn needle (for sewing)
- Polyester fiberfill (for stuffing)
- Craft wire (16 cm for leaves, 10 cm for stem)
- Glue (fabric or craft)
- Optional: Hot glue gun for assembly
Key Abbreviations (US Terms)
| Abbreviation | Meaning |
|---|---|
| ch | chain |
| sc | single crochet |
| hdc | half double crochet |
| sl st | slip stitch |
| st(s) | stitch(es) |
| inc | increase (2 sc in 1 st) |
| BLO | back loop only |
| FLO | front loop only |
| MR | magic ring (adjustable ring) |
| rep | repeat |
Special Notes
- The pattern is worked in continuous rounds unless otherwise specified.
- Always use a stitch marker to keep track of the first stitch in each round.
- Adjust yarn weight and hook size for larger/smaller flowers.
- Use wire for realistic and shapeable stems/leaves, and wrap them with yarn for a finished look.
Pattern
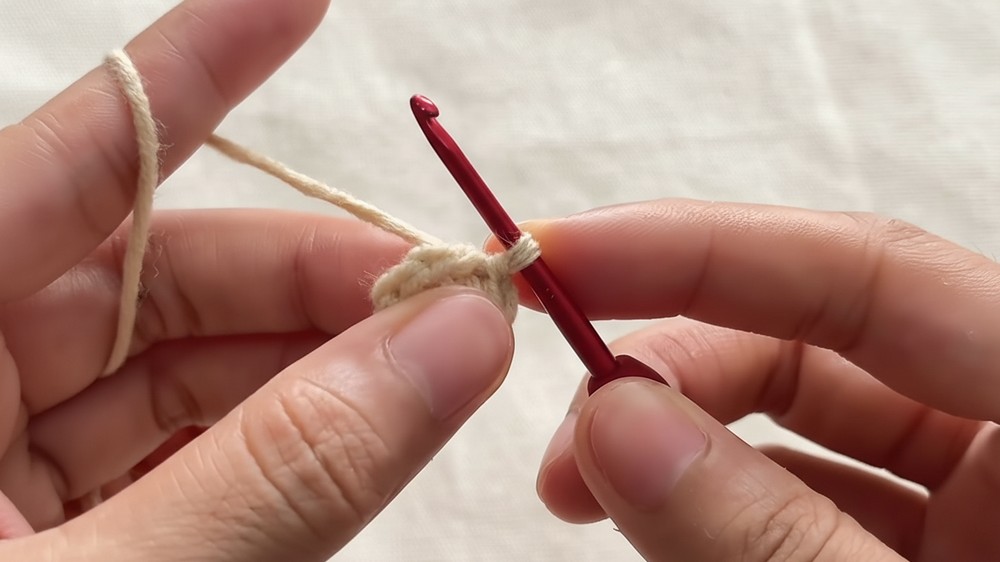
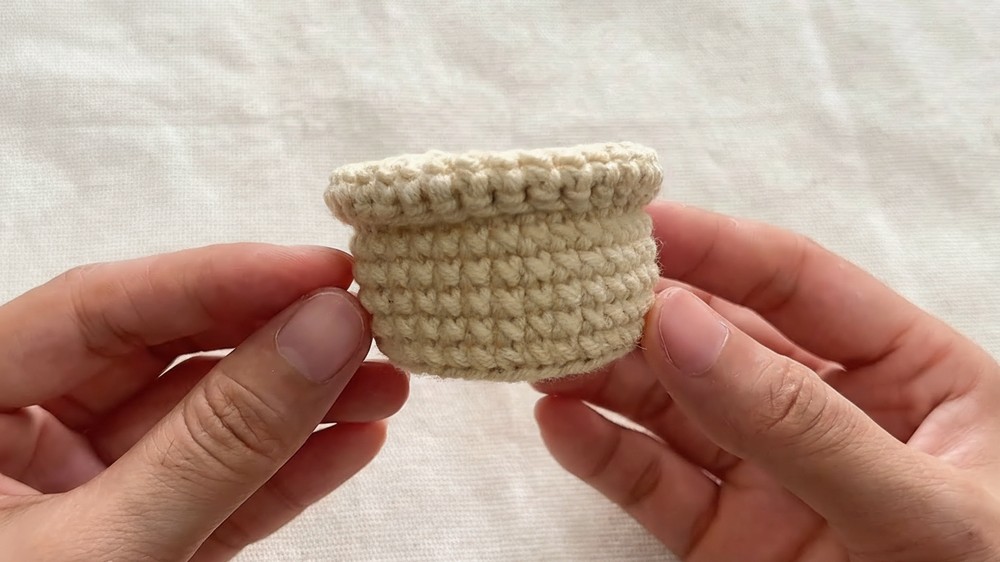
1. Pot
With pot color:
Round 1:
Work 8 sc in a MR. Pull ring tightly. (8 sc)
Sl st to first sc to join.
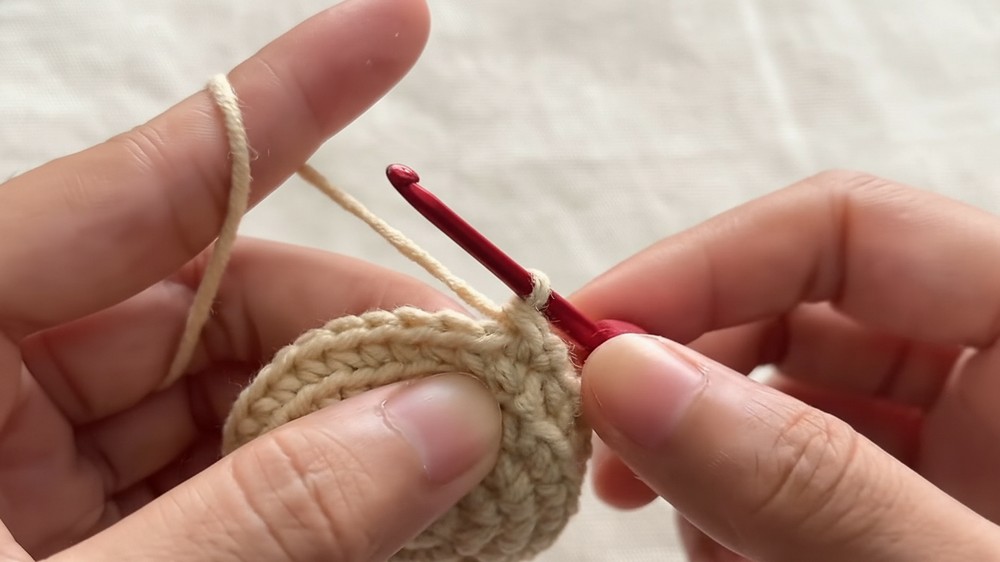
Round 2:
Ch 1. Inc in each st around (2 sc in each st). (16 sc)
Sl st to first sc.
Round 3:
Ch 1. [Sc in next st, inc in next st], rep 7 more times. (24 sc)
Sl st to first sc.
Round 4:
Ch 1. [Sc in next 2 sts, inc in next st], rep 7 more times. (32 sc)
Sl st to first sc.
Round 5:
Ch 1. Working BLO only: Sc in each st around. (32 sc)
Sl st to first sc.
Round 6–11:
Ch 1. Sc in both loops of each st around. (32 sc per round)
Sl st to first sc after each round.
Round 12:
Ch 1. Working FLO only: Sc in each st around. (32 sc)
Sl st to first sc.
Round 13:
Ch 1. Sc in both loops of each st around. (32 sc)
Sl st to first sc.
Fasten off, cut yarn and weave in ends. Set aside.
2. Soil
With soil color:
Round 1:
Work 8 sc in a MR. Leave the ring slightly loose (do not fully close—there will be a hole for inserting the flower stem). (8 sc)
Sl st to first sc.
Continue increasing following pot base pattern until the circle fits snugly inside the pot opening.
- Increase by 8 sts per round (just as for amigurumi: [sc, inc], [sc 2, inc], etc.).
- When the soil disc matches the pot’s inner opening, fasten off leaving a long tail for sewing.
- Stuff pot loosely with fiberfill.
- Sew the soil to the top of the pot with yarn needle.
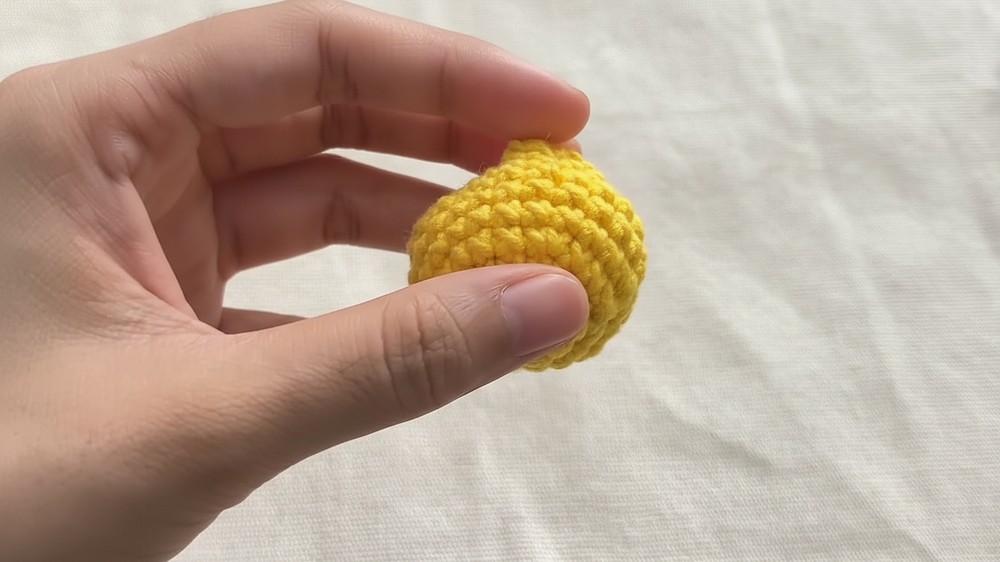
3. Tulip Bud
With tulip color:
Round 1:
Work 6 sc in a MR. Pull tight. (6 sc)
Round 2:
Inc in each st around. (12 sc)
Round 3:
[Sc in next st, inc in next st], rep around. (18 sc)
Round 4:
[Sc in next 2 sts, inc in next st], rep around. (24 sc)
Rounds 5–10 (6 rounds):
Sc in each st around. (24 sc per round)
Sl st in next st, ch 1, fasten off. Leave a long tail for sewing.
Lightly stuff the bud with fiberfill.
Optional:
Using the yarn needle and tail, sew a cross stitch over the bud opening for detail.
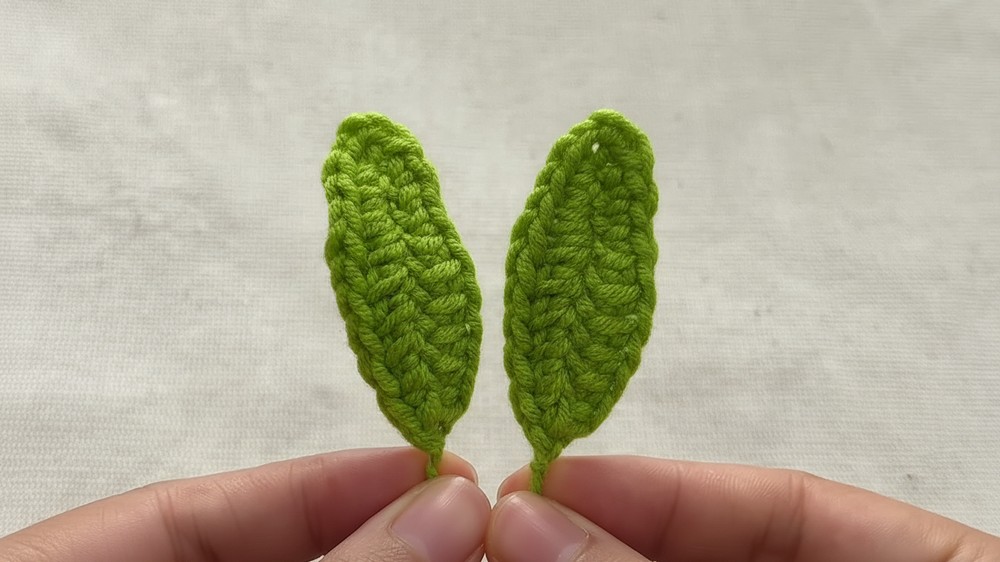
4. Leaf (Make 2)
With green yarn and 16 cm wire:
a. Foundation:
Make a slip knot and ch 12.
b. Crochet with Wire:
Position the wire along the foundation chain, under the working yarn and hook.
Row 1:
- Insert hook into 2nd ch from hook, sc.
- In next ch, hdc.
- In each of next 7 ch: hdc (total 8 hdc across).
- In next 3 chs: sc (total 3 sc).
- Ch 2.
Row 2 (work back along opposite side):
- Work sc in same ch as ch-2.
- In next 2 ch: sc.
- In next 7 ch: hdc (total 8 hdc).
- In last ch, sc.
- Sl st to starting st. Ch 1, fasten off.
Wrap yarn over exposed wire and knot at end.
5. Assemble Pot and Soil
- Stuff pot lightly with fiberfill.
- Sew the soil disc to the pot opening.
- Leave a small hole in soil’s center for the flower stem.
6. Assemble Tulip Flower
For each tulip (single or double):
- Prepare 10 cm wire for the stem.
- Apply glue to one end of the wire and wrap with green yarn to cover fully.
- Glue or sew stem into the bottom center of the tulip bud.
- For double tulip/leaf arrangement:
- Continue wrapping stem; after 5 cm, tie in second tulip flower and leaves.
- Finish wrapping both stems together with green yarn and glue.
- Secure ends with glue.
7. Final Assembly
- Insert completed stem(s) through the soil’s opening.
- Glue in place if desired for added security.
- Shape and arrange leaves as desired.
Conclusion
You now have a charming, realistic mini crochet tulip arrangement in a pot! Use your favorite colors for the buds and create as many flowers/leaves as you wish. This quick and simple project is perfect for gifts, decoration, or brightening your craft desk.
Pattern Corrections & Tips
- Correction: Keep count of stitches per round to ensure proper shaping of pot and tulip.
- Tips:
- Always use a stitch marker for rounds.
- Avoid overstuffing for a neat shape.
- For an adjustable stem/leaf length, trim wire before wrapping.
- When wrapping yarn over wire, add small amounts of glue to keep yarn secure and tidy.
- Adjust the number of increases for soil and pot as needed to achieve a snug fit.
Leave a Reply