
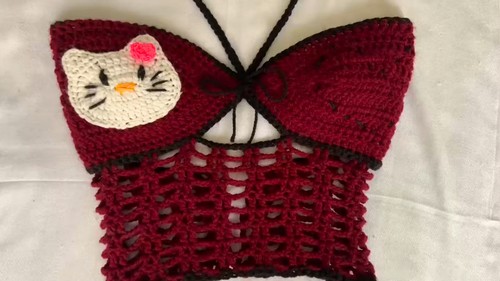
Dress up your day with this free crochet Hello Kitty crop top pattern that’s add cutest touch of fun and comfort to every outfit you choose.
Little hearts beat with joy when a top has a cute kitten face and bright colors that shine. All this comes together with the crochet Hello Kitty crop top pattern which turns soft yarn into something playful and fun for any day. Wearing this crop top brings a sweet smile not only to you but also to everyone who sees you. The design is simple and easy to follow with clear shapes that are lovely to see and touch.
Free Pattern for Hello Kitty Crochet Crop Top

Because it is light and short it feels cool and comfy as you play dance or just relax. Hard work turns into happiness as each piece fits perfectly and shows your own style. Friends and family will want to join you in making or showing off this special top and the little kitty details make sure it always stands out in a crowd making ordinary days brighter and more magical.
Hello Kitty Crop Top – Crochet Pattern
Materials
- Yarn:
- White medium weight (Worsted, category 4) yarn (main color for cups and Hello Kitty face)
- Burgundy medium weight (Worsted, category 4) yarn (contrast color for the mesh section and ties)
- Black medium weight (Worsted, category 4) yarn (outlining and embroidery)
- Yellow medium weight (Worsted, category 4) yarn (nose embroidery)
- Pink or red medium weight yarn (for Hello Kitty’s bow)
- Hooks:
- 4.0 mm (US G/6) crochet hook
- 6.0 mm (US J/10) crochet hook (optional for looser mesh, follow gauge)
- Notions:
- Yarn needle (for sewing and embroidery)
- Stitch markers
- Scissors
- Measuring tape
Abbreviations (US Terms)
- ch: chain
- sl st: slip stitch
- sc: single crochet
- hdc: half double crochet
- dc: double crochet
- st(s): stitch(es)
- inc: increase (work 2 sts in the same st)
- rep: repeat
Special Notes
- Adjust the number of starting chains in the cup for sizes S, M, or L – see instructions.
- Always measure chains to check for gauge and fit, not just chain count.
- The crop top uses two cups, joined sideways for the Hello Kitty design to sit correctly.
- Embellishments (Hello Kitty’s face, bow, and the heart) can be freestyle or omitted, if desired.
Sizing Reference
| Size | Cup starting chain length (cm) | Center mesh chain # | Mesh rows |
|---|---|---|---|
| S | 11–12 cm | 14 | 10 |
| M | 14–15 cm | 16 | 12 |
| L | 16–17 cm | 18–19 | 15–16 |
Pattern
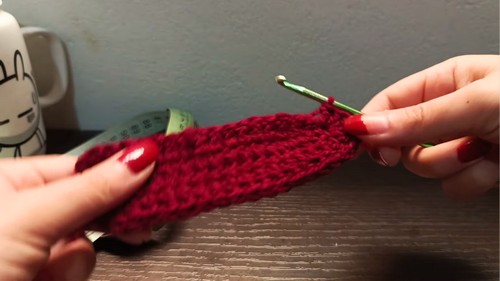
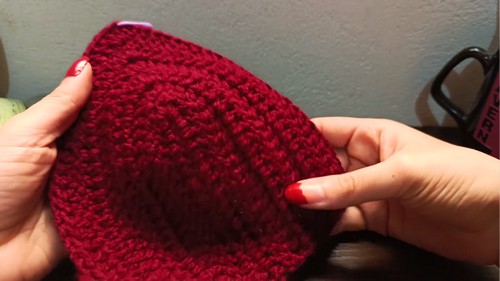
1. Cups (Make 2)
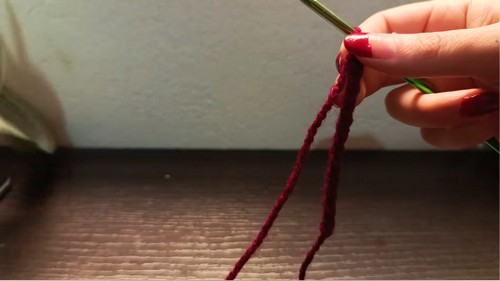
With white yarn and 4.0 mm hook:
- Foundation Chains:
- Sizing: For size S, make chains measuring 11–12 cm; for M, measure 14–15 cm; for L, 16–17 cm. (Count the chains as you go; the number will vary.)
- Example: 16 chains for S. Adjust as needed to reach the listed cm.
- First Row:
- Ch 2 more (counts as first dc).
- Dc in each ch across until last ch.
- Cup Increase (Last Ch):
- Make 5 dc in the last ch (first inc corner of the cup).
- Mark the 3rd dc with a stitch marker (this will always be the cup’s center/peak).
- Continue working down the other side of foundation chains, dc in each stitch, hiding tail as you go.
- Turn, Begin Cup Rows:
- Ch 2, turn.
- Dc across to the marker (full dc rows).
- At the marked st, remove marker, work 5 dc in that st (repeat marker at new center st).
- Continue dc in each st down the other side.
- Repeat Row 4 for a total of 6 rows (including foundation row), always increasing by 5 dc at the center/peak.
- Fasten off. Leave tail for sewing.
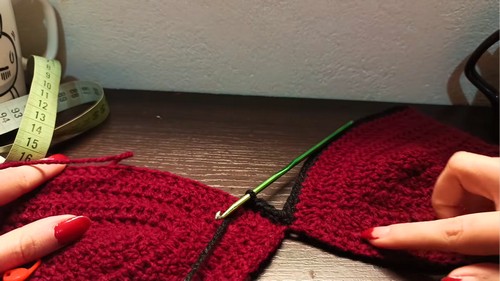
2. Joining Cups & Edging
- Attach black yarn at outer corner of one cup.
- Sc evenly across the straight side of cup to center/marker.
- Join 2nd cup: At the marker, insert hook through both cups and make 1 sc to join. Continue sc along the 2nd cup’s outer edge to the end.
- At the top/outer corners of each cup, ch 12 (S), 16 (M), or 18–19 (L) for top ties. Fasten off.
3. Bottom Center Join
- With cups RS facing, align the underbust edges.
- Count approx. 8 sts from center on each cup for your body width.
- Attach black yarn at one marked edge, ch 14 (S), 16 (M), or 18 (L) and join to the other cup’s marked edge with a sl st.
- Fasten off. This is the underbust opening.
4. Mesh Body
With burgundy yarn (or color of choice):
- Attach yarn at the base of one end tie chain.
- Ch 2 (counts as first dc). Dc in next st.
- Ch 3, skip 3 sts, dc in next st, dc in next st (forms mesh square).
- Rep mesh sequence all across, following the chains, body, and center join.
- Rows: At end of row, ch 2, turn, dc in next st, ch 3, skip 3, dc in next dc, dc in next dc, repeat across.
- Work for 10 rows (S), 12 rows (M), or up to 16 rows (L).
- Fasten off.
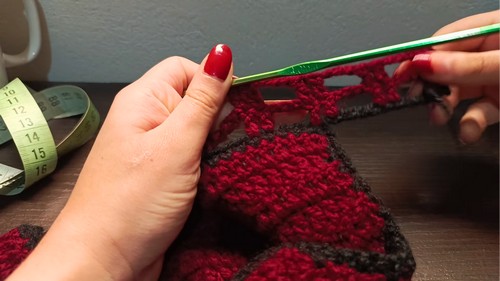
5. Bottom Edging
With black yarn and 4.0 mm hook:
- Sc evenly along the entire bottom edge.
- Work 1 sc in each dc and in each ch space, avoiding increases or decreases.
- Fasten off.
6. Back Strap/Ties
- With burgundy yarn, attach at one bottom corner.
- Ch 250 (or adjust as preferred for the tie length).
- Weave the tie through the mesh/eyelets in back.
- Fasten off, repeat on the other side if desired.
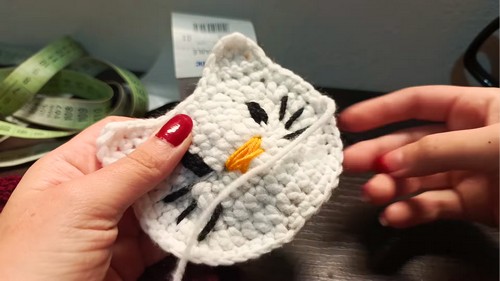
7. Hello Kitty Appliqué
Face (White)
- With white yarn, ch 9.
- Row 1: Dc in 4th ch from hook and across (10 dc total).
- At end of row, in last ch, turn, and work 3 dc into same st, turn work, continue down other side with dc in each ch.
- Continue in rows, working an inc (2 dc) in each end for 2 more rows, forming a rounded rectangle.
- Fasten off, leave long tail for sewing.
Ears (Make 2)
- Attach white at corner of Hello Kitty face.
- Row 1: Ch 1, sc in next 4 sts.
- Row 2: Ch 1, turn, sc in each st (4).
- Row 3: Ch 1, turn, sc2tog, sc2tog (2).
- Row 4: Ch 1, turn, sc2tog.
- Fasten off. Repeat on other upper corner.
Edging (Black)
- With black, sc around the entire face and ears.
- At middle of the chin, switch to hdc, making 6 hdc for chin “point”.
Features (Embroider, Yarn Needle):
- Nose: Use yellow yarn, embroider a horizontal oval in the middle.
- Eyes: Use black yarn, embroider two vertical ovals above nose.
- Whiskers: Embroider three black lines on each side.
Bow (Pink/Red)
- With pink yarn, make a magic ring.
- Ch 2 (counts as dc), 3 dc into ring, sl st in ring, ch 2, 4 dc into ring, sl st in ring.
- Pull tight and wrap yarn around center to form bow shape.
- Sew bow onto one “ear” area.
- Sew the Hello Kitty face to one cup as shown in sample images.
8. Heart Appliqué (Black, Optional)
- Embroider a small heart shape on the other cup using straight stitches with black yarn. Build it with short parallel lines to mimic a heart.
9. Neck/Shoulder Ties
- At top of each cup, attach yarn and ch 90 for each tie.
- Fasten off, weave in all ends.
FINISHING
- Weave in all leftover ends with yarn needle.
- Adjust/applique Hello Kitty and heart as preferred for symmetry.
- Block lightly if desired.
Corrections & Tips
- Correction:
When working cups, always count your dc in the center to ensure the 5-dc increase is centered; otherwise, your cup will be uneven. - Tip:
Use stitch markers generously (especially for cup peaks and mesh section) to avoid losing your place or misaligning joins.
When sewing on appliqués, lightly pin them for placement before permanently sewing with yarn needle.
Conclusion
You have now crocheted a gorgeous Hello Kitty-inspired crop top, complete with an iconic face, mesh body, and a touch of kawaii. This piece is playful, fashionable, and customizable. Don’t hesitate to adjust colors or add more details to make it uniquely yours. If any questions arise, refer to the sizing and special notes above for further guidance.
Leave a Reply