
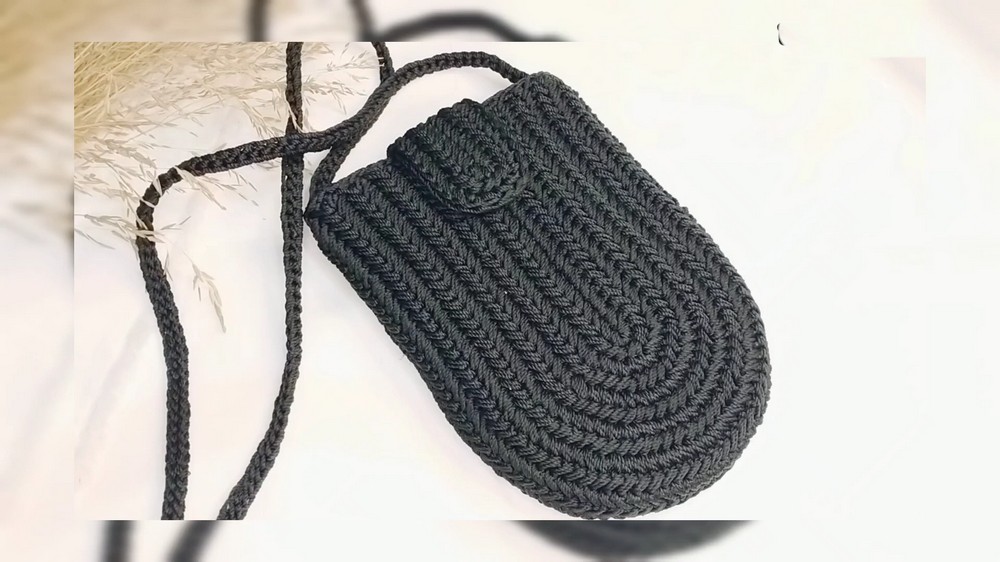
Simplify your everyday life with this crochet cell phone bag pattern that is perfect for keeping your phone safe and stylish wherever you go.
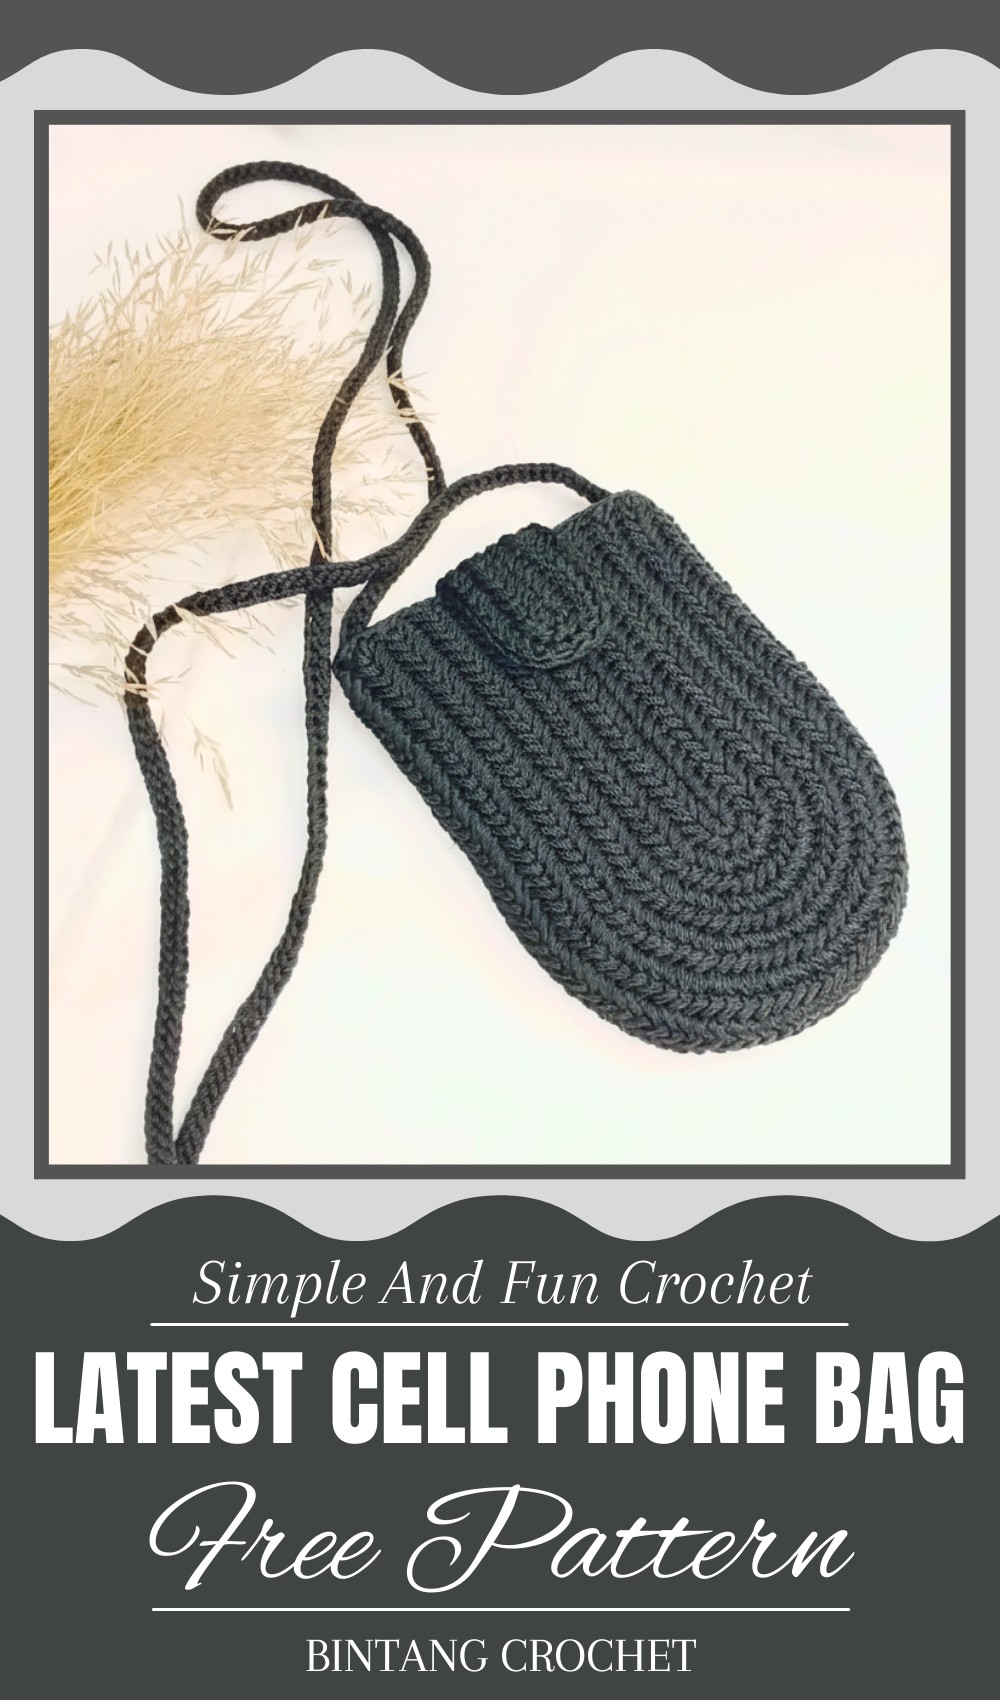
A beautiful handmade crochet bag is the perfect way to carry your phone safely while looking stylish. It’s small and light, making it easy to take anywhere—whether you’re going for a walk, shopping, or attending a party. With soft patterns and bright colors, it adds charm to your outfit and lets you show off your creativity. The crochet cell phone bag pattern makes it simple to create something useful and lovely.
Customizable Crochet Cell Phone Bag Pattern Match Any Outfit
You can wear the bag over your shoulder or across your body, keeping your phone close and secure. It’s just the right size to hold your phone along with a few small essentials like keys or money. This bag is not only practical but also a thoughtful handmade piece that makes a wonderful gift. Simple to make and easy to use, it’s perfect for adding a personal touch to your everyday life.
Materials
- Yarn: 100% polyester thread; use double strands for extra durability.
- Hook: Size 4mm crochet hook.
- Other Tools:
- Tapestry needle for sewing and weaving ends.
- Stitch markers for marking key points.
- Scissors for cutting yarn.
- Button (optional) for adding a closure to the bag.
Skill Level
- Intermediate
This pattern uses oval bases, slip stitches for compact texture, and stitch adjustments for curves. Experience with US terminology and stitch tension control is advised.
Key Abbreviations
| Abbreviation | Meaning |
|---|---|
| ch | Chain |
| sl st | Slip Stitch |
| sc | Single Crochet |
| st(s) | Stitch(es) |
| yo | Yarn Over |
Special Notes
- Stitches Per Round: Keep track of stitches to maintain symmetry, especially at the curved ends of the oval base.
- Compact Texture: Slip stitches are used in the foundation for a sturdy and tight texture.
- Customize Size: Adjust the chain length and number of rounds for custom dimensions.
- Double Threads: Working with double strands improves thickness and durability for practical use.
Pattern Instructions
Part 1: Create the Oval Base
1. Foundation Chain
- Begin with a slip knot on your hook.
- Chain 25 chains for the base length.
- Add 1 extra chain for turning (26 total chains).
2. Round 1 – Slip Stitch Foundation
- Skip 1 chain from the hook and work 1 slip stitch (sl st) into the second chain from the hook.
- To make a slip stitch: Insert the hook into the chain, yarn over (yo), pull through the chain and the loop on the hook.
- Work 1 sl st into every chain across the row until the end.
3. Turn Corner (Oval Shape)
- At the last chain, work 4 sl sts into the same stitch to turn and form the curved edge.
- Use stitch markers to mark the second and third stitches to keep track.
- Continue working around the opposite side of the chain with 1 sl st into each chain.
- At the beginning chain (first chain), work 1 additional sl st into the last unworked stitch.
- Join the round using a sl st into the first sl st at the start of the row.
4. Round 2 – Reinforce the Oval
- Chain 1 to start the round.
- Work 1 sl st into each stitch across until the curved edge.
- In the 4 curved stitches from the previous round, work 2 sl sts into each stitch (creating an increase to maintain the curve).
- Continue working 1 sl st into each stitch along the opposite side until you reach the base curve.
- At the curve, repeat the increase pattern (2 sl sts into each stitch from the previous curve).
- Join with a sl st into the first stitch, then fasten off.
Repeat as Needed
For a larger base, repeat Round 2 increases until the desired size is achieved. Mark the start and end points of your stitches for symmetry.
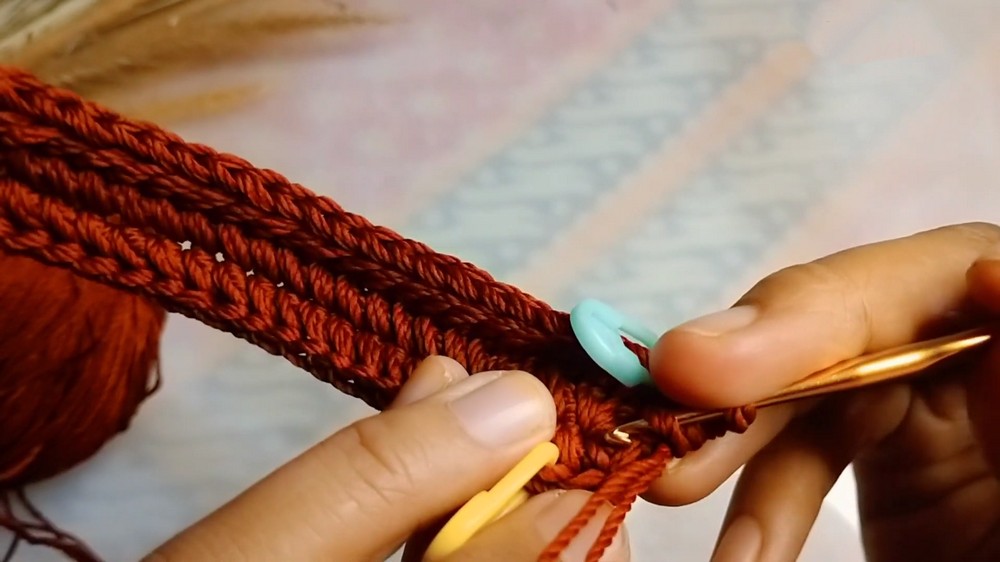
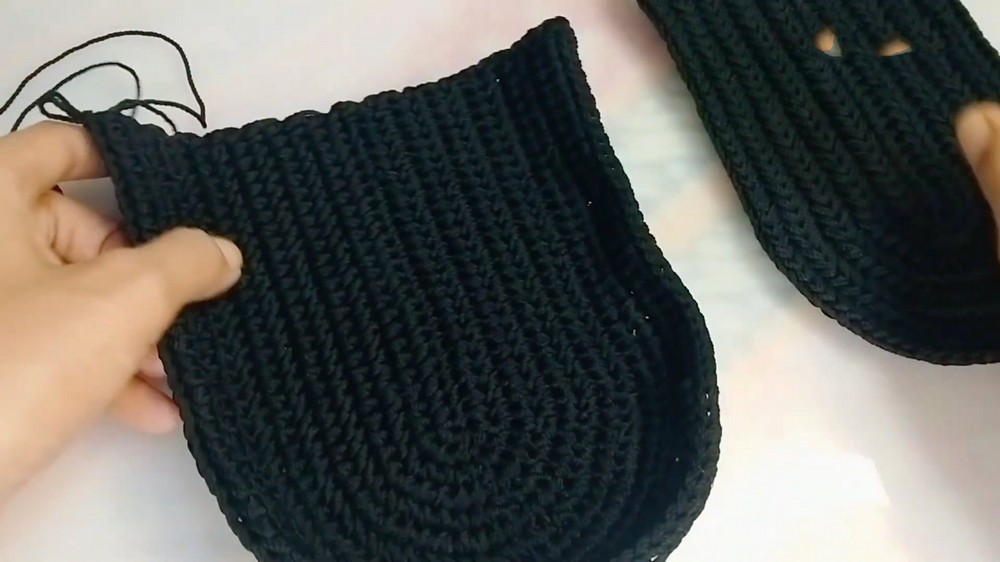
Part 2: Build the Body of the Bag
5. Working in Rounds
- Attach yarn to any point on the base using a slip knot.
- Chain 1 and begin working 1 sc into each stitch around.
- Note: Ensure consistent stitch placement for straight edges.
- At the curve section, mark the center-most 4 stitches. Work 2 sc into these 4 stitches to maintain the curve.
- Finish the round by joining with a sl st into the first stitch.
6. Additional Rounds
Work in continuous rounds:
- For each new round, start with ch 1, then repeat: 1 sc into each stitch across and 2 sc into 4 center stitches at the curve.
- As the bag grows in height, begin spacing out increases in the curve section:
- Round 3 and onward: Add 1 stitch between each pair of 2 sc into the curve stitches.
- Example: sc 1, 2 sc into next stitch.
- Repeat this pattern for a total of 9 rounds or until desired bag height is achieved.

Part 3: Create the Bag Curve (Top Opening)
7. Shaping the Top Curve
- After completing the main body, stop increasing in the rowing pattern.
- Work 1 sc into each stitch without increases for a total of 3 to 4 rounds.
- This step creates the flat, curved opening at the top of the bag.
- Finish with a sl st and fasten off.
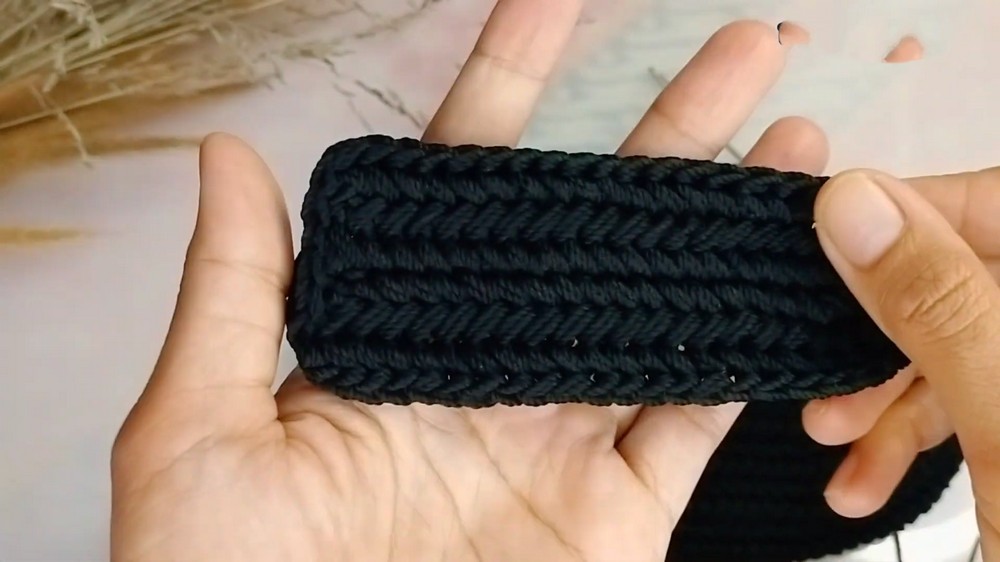
Part 4: Create the Strap
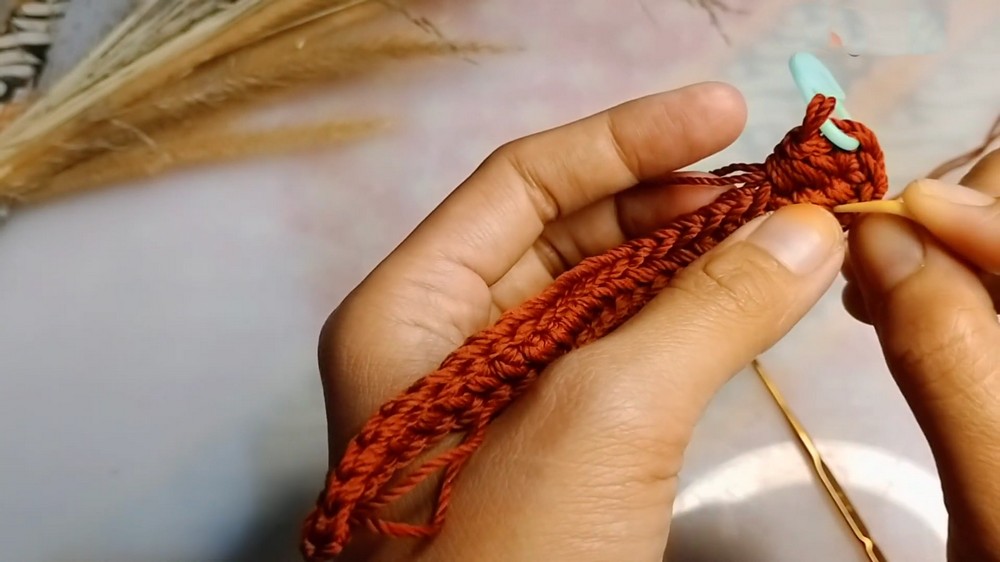
8. The Strap
- Attach yarn to one side of the bag top with a slip knot.
- Chain your desired strap length (suggested: 100 cm).
- Work back along the chain using sl st or sc into each chain.
- Attach the strap to the opposite side of the bag using a sl st, ensuring it is not twisted.
- Fasten off and weave in ends securely.
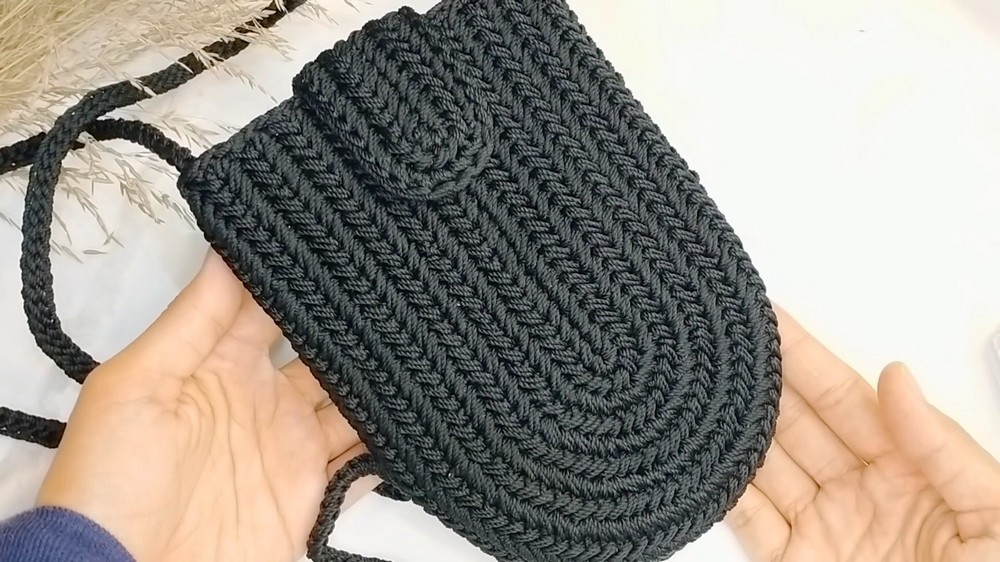
Part 5: Add the Flap Cover
9. Crochet the Cover
- Start with a foundation chain of 20 chains.
- Repeat the same steps used to create the bag base, but stop after completing the curve or approximately 4 rows.
- Attach the completed cover to the rear top of the bag, leaving it free for flipping over the opening.
Part 6: Finishing Touches
- Attach a button for closure on the flap and corresponding position on the bag.
- Weave in and secure all loose ends.
- If using polyester thread, carefully flame-seal all cut edges to prevent fraying.
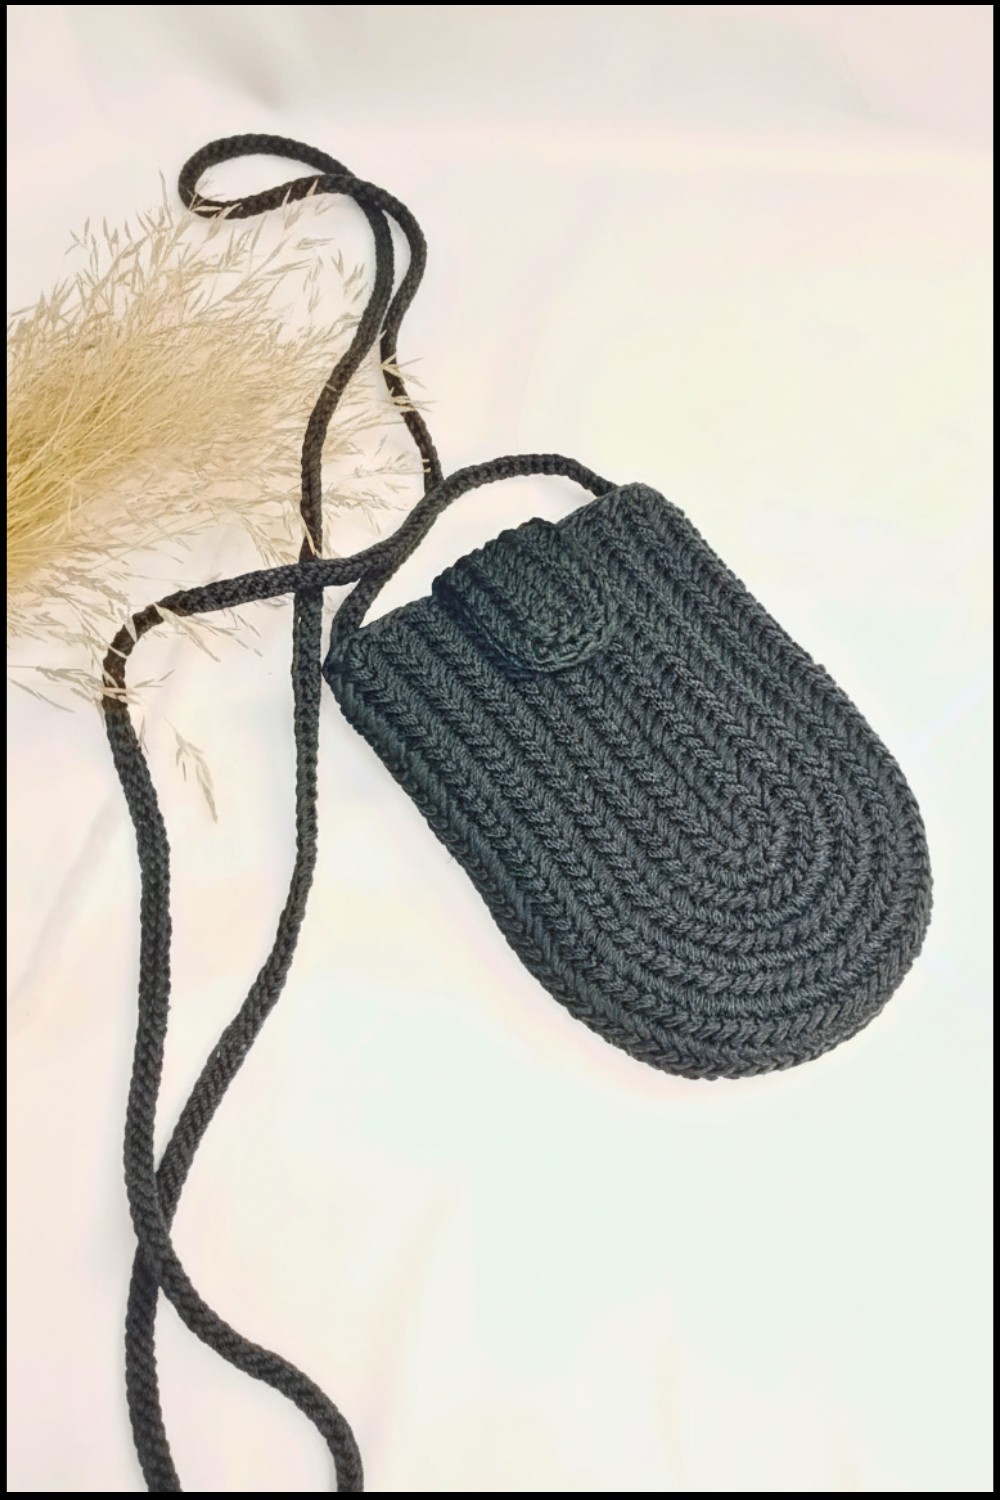
Conclusion
You’ve created a compact and stylish sling bag with the dependable Herimotif. Its tight, oval construction ensures durability and minimizes the need for an interior lining. The adjustable strap and optional button flap make this a versatile accessory.
Pattern Corrections
- Ensure the curve increases remain symmetrical in each round. Uneven increases result in distortion.
- Maintain even tension when working slip stitches, as they determine the base’s structural integrity.
Tips
- Thread Selection: Use contrasting or light-colored thread during practice, as stitches will be easier to see than with darker yarns.
- Customization: Add decorative embellishments like tassels or beading to personalize the bag.
- Reinforcement: If desired, sew inner lining into the bag for extra stability and aesthetic appeal.
Leave a Reply