
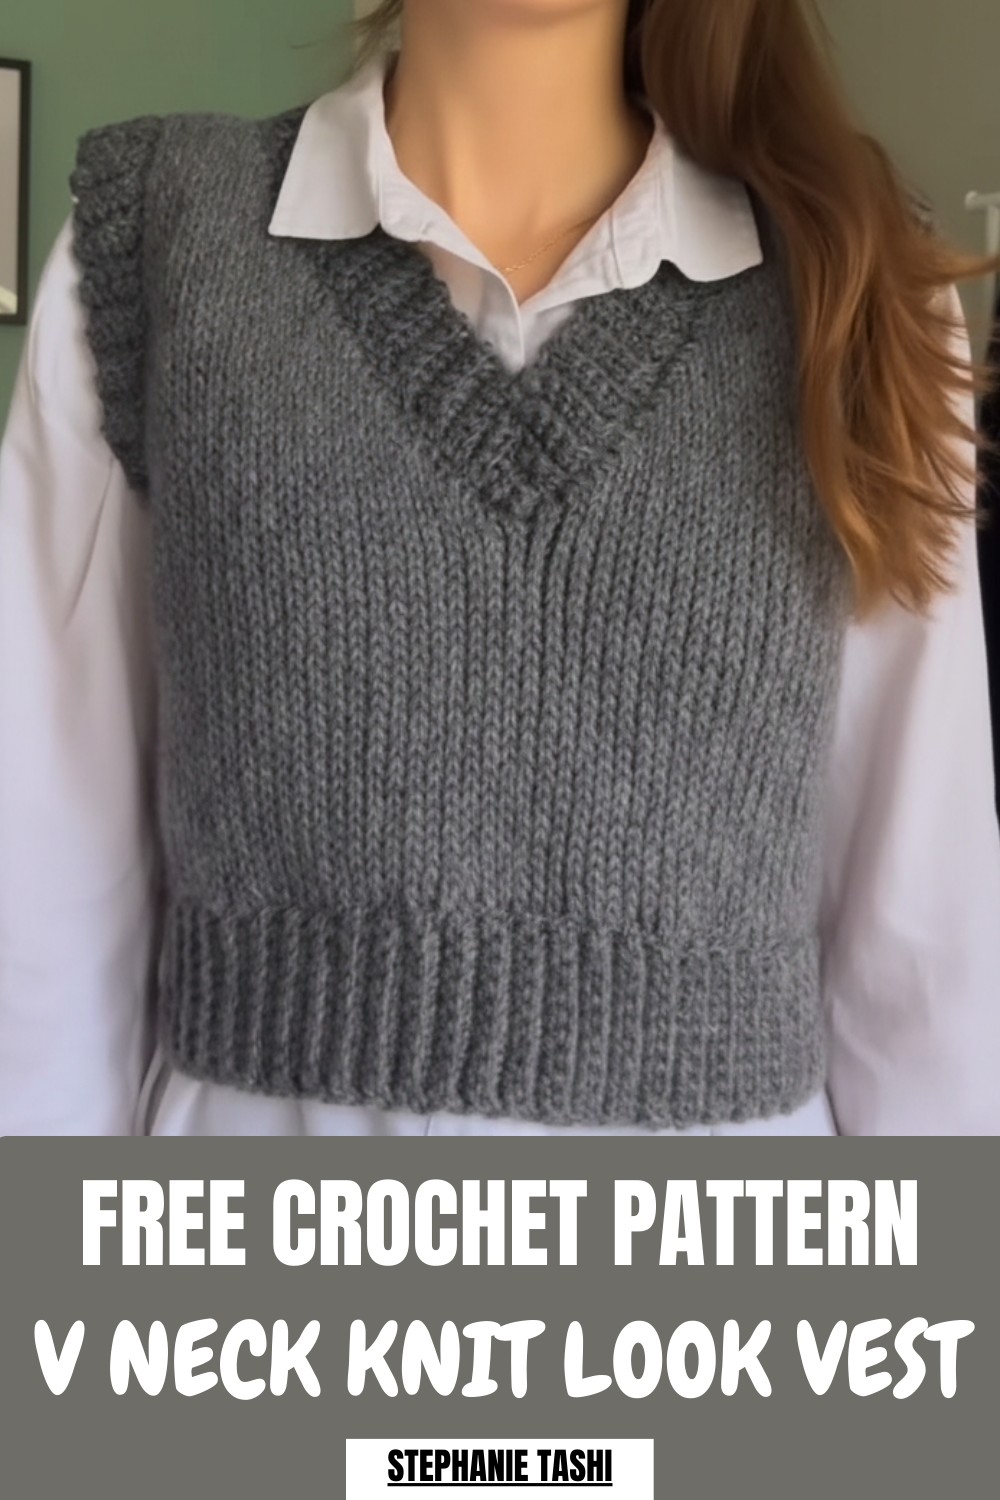
Create a stylish Crochet V Neck Vest with this unique pattern, combining modern charm and versatility for a fun project perfect for all skill levels and seasons.
Add some handmade flair to your wardrobe with a chic and versatile V-neck vest! A Crochet V Neck Vest Pattern lets you whip up a layering piece that’s not only stylish but practical for all seasons. From bold, chunky yarns for cozy winter vibes to lightweight cotton for breezy summer looks, it’s a project with endless possibilities.
Free & Simple Crochet V Neck Vest Pattern for All Levels
Perfect for experimenting with textures or showcasing your favorite stitches, this vest is a satisfying way to level up your crochet game. This piece can easily dress up jeans or complement flowy skirts. Whether you’re gifting it or keeping it for yourself, this modern-meets-vintage project is where creativity meets functionality in the best way.
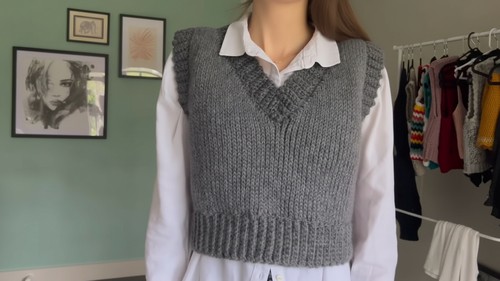
V-Neck Crochet Vest Pattern
Skill Level
Intermediate
- The project uses slip stitches, increases, decreases, and ribbing techniques.
Materials Needed
- Yarn:
- Approx. 450 grams of medium-weight yarn (size 4 yarn).
- Preferred fibers: Cotton-acrylic blend or worsted-weight yarn for structure and comfort.
- Hooks:
- 6 mm crochet hook for panels.
- 5 mm crochet hook for trims.
- Additional Tools:
- Stitch markers (optional, for precise assembly).
- Scissors.
- Darning needle (for sewing seams and weaving in ends).
Gauge
- 10 slip stitches x 8 rows = 2 inches (5 cm) using a 6 mm hook and medium-weight yarn.
- Adjust your hook size if your gauge doesn’t match the measurements.
Finished Measurements
- The vest can be customized for sizes S, M, L, and XL. Refer to the specific row counts, centimeter, or inch measurements provided in the pattern.
Special Techniques
- Back Loop Slip Stitch (BLSL):
- Work into the back loop of the stitch to create a ribbed texture.
- Flat and V Shaping:
- Achieve a knit-like finish by alternating increases and decreases strategically at shoulder, underarm, and neckline areas.
Customization Tips
- Length: Adjust the foundation chain to make a cropped or longer vest.
- Add or subtract chains in the foundation chain (multiples of 1).
- Fit: Add rows for a looser fit or decrease rows for a more fitted look.
- Armholes and Neckline: Adjust chains for larger or smaller openings.
Pattern Instructions
Step 1: Front and Back Panel Starting Sections
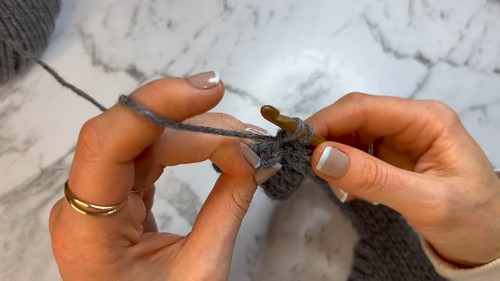
- Chain Foundation:
- With the 6 mm hook, make a slip knot and CH 24 (for all sizes).
- Adjust chain count if you prefer longer or shorter vests.
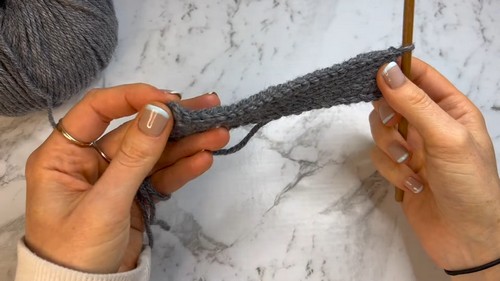
- Row 1 (Slip Stitch Foundation):
- Skip the first chain.
- Insert the hook into the second chain, yarn over, pull through, and pull through the loop on the hook (SLST).
- Continue working 1 slip stitch (SLST) into each chain across.
- You’ll have 23 slip stitches.
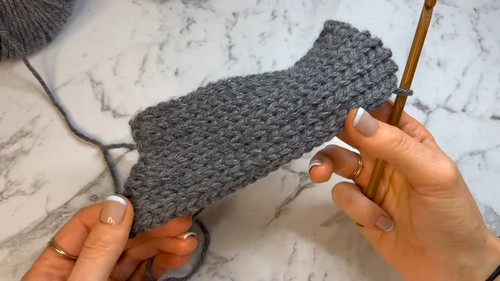
- Row 2 Onward (Back Loops):
- CH 1, turn.
- Work into the back loop only (BLSL) of each stitch across.
- Repeat this row for a total of 6 rows (size small).
Row Counts by Size:
Size Rows for First Section Small 6 rows Medium 8 rows Large 10 rows XL 12 rows - Match your rows based on size or refer to centimeter/inch measurements.

Step 2: Side Increases for Shaping
- Row 7 & Odd-Numbered Rows (Increases):
- At the end of each odd row, do an increase in the last stitch:
- Insert hook into the back loop, yarn over, pull through, and complete the slip stitch.
- Insert again into the same stitch for a second slip stitch (increase completed).
- At the end of each odd row, do an increase in the last stitch:
- Row 8 & Even-Numbered Rows:
- Work BLSL across, with no increases.
- Repeat Increases:
- Continue adding increases to odd-numbered rows only.
- For size small, add 10 rows (5 increases).
Row and Increase Counts by Size:
Size Rows in Increase Section Increases Small 10 rows 5 increases Medium 12 rows 6 increases Large 14 rows 7 increases XL 16 rows 8 increases
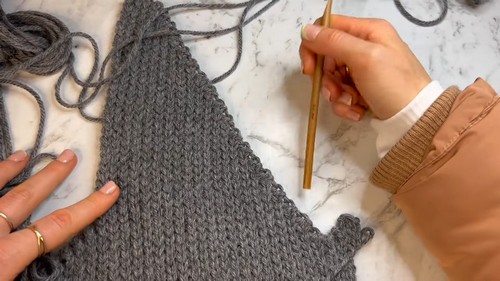
Step 3: Shoulder Section (Straight Rows)
- After completing increases, continue with BLSL rows having no increases or decreases.
Row Counts by Size:
Size Straight Rows in Shoulder Section Small 8 rows Medium 10 rows Large 12 rows XL 14 rows
Step 4: Shaping the V-Neckline (Front Panel)
V-Neck Decreases
- At the end of the shoulder section, begin decreasing for the v-neck:
- Odd Rows (No changes): Work straight rows.
- Even Rows (Decreases):
- Into the first two stitches, work a decrease:
- Insert hook into the first back loop.
- Yarn over and pull through.
- Immediately insert into the next back loop, yarn over, and pull through both loops.
- Into the first two stitches, work a decrease:
- Continue decreasing at the neckline edge until reaching the point of the V.
V-Neck Increases (Returning to Shoulder)
- After reaching the bottom point of the V, begin doing increases at the neckline edge.
- Add one stitch per row using the same technique as side increases.
- Match the increase rows to the decrease rows to mirror the neckline.
- Finish the Shoulder: Complete the same straight rows as before.
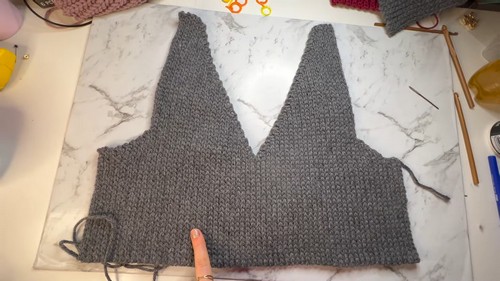
Step 5: Back Panel V Shape
- Work the back panel using the same method as the front panel:
- The first several rows and shaping are identical, except the back neckline is flat.
- Skip the v-neck shaping. Continue with straight rows instead.
- Ensure shoulder chunks for front and back panels match in stitch and row counts for proper alignment.
Step 6: Joining Front and Back Panels
- Place front and back panels right sides together.
- Seam the shoulder sections and side seams using your preferred method (slip stitch, whip stitch, or mattress stitch).
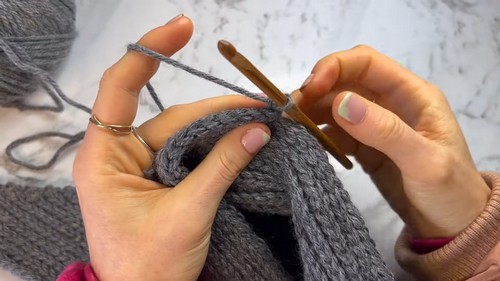
Step 7: Trims
Armhole Trims
- With a 5 mm hook, work continuous rows of back loop single crochets.
- Match trim’s row count to achieve symmetry.
Neckline Ribbing
- Follow the method for armhole trims but begin with 6 stitches across.
- Attach evenly around the neckline, ensuring symmetry.

Waistband Ribbing
- Chain 11 for a wide waistband.
- Work rows of 10 back-loop single crochets until ribbing matches the vest’s bottom width.
- Stretch ribbing slightly while attaching to ensure a snug fit.
Finishing
- Weave in all loose ends using a darning needle.
- Block your vest to shape and relax the stitches, if necessary.
Conclusion and Final Remarks
Congratulations on completing your V-Neck Knit Look Crochet Vest! This versatile piece is perfect for layering and pairs well with various outfits.
Helpful Tips
- Stitch Counting: Consistently count your stitches, especially after increases and decreases, to maintain symmetry.
- Yarn Stretch: If your yarn doesn’t stretch much, consider adding a few more rows for ease.
- Blocking: For a polished finish, lightly block the vest if the yarn type allows it.
Leave a Reply