
Create a beautiful crochet sunflower with this free pattern, perfect for adding a bright and cheerful touch to your home, gifts, or personal projects.
Bright and cheerful, this sunflower design is perfect for adding a touch of nature’s beauty to your creations. With its vibrant yellow petals and detailed center, it looks just like a real sunflower. This pattern is easy to follow for both beginners and experienced crocheters, making it a fun project for all skill levels. Its eye-catching appearance makes it ideal for home decor, gifts, or personal accessories like bags and hats.
Sunflower Free Crochet Pattern for Nature-Inspired Projects
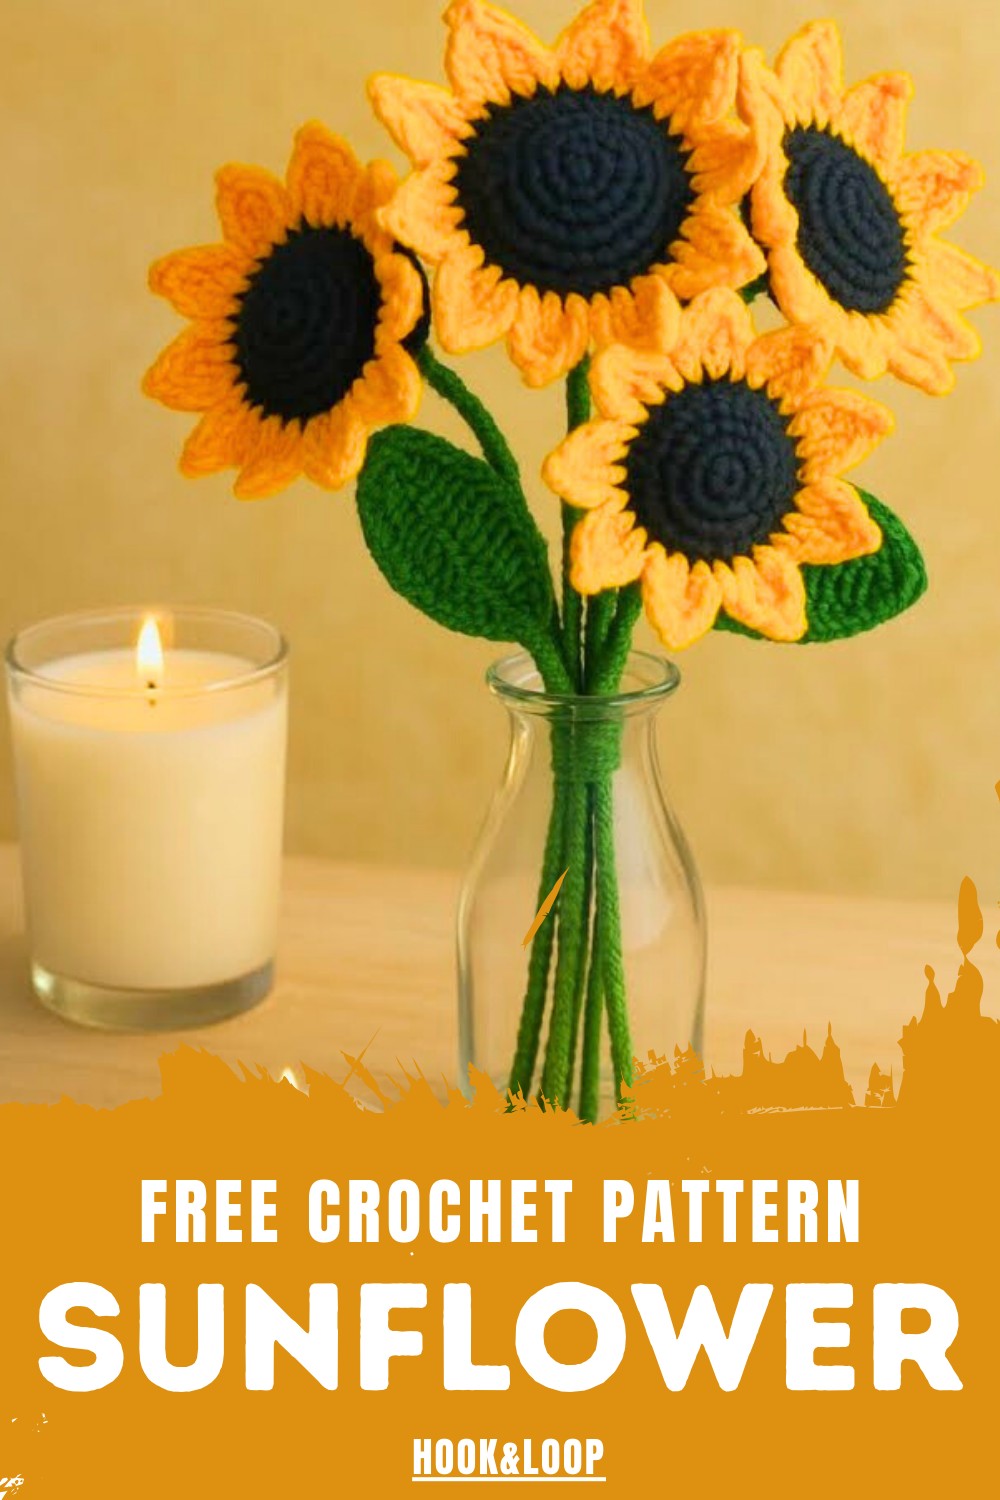
The design is lightweight, versatile, and adds a pop of color to any space or outfit. The detailed stitches give it a unique texture, making it stand out in your collection of designs. Perfect for any season, it brings a warm and sunny feel wherever it’s used. Simple yet stunning, it’s a wonderful way to celebrate the beauty of sunflowers in your handmade projects.

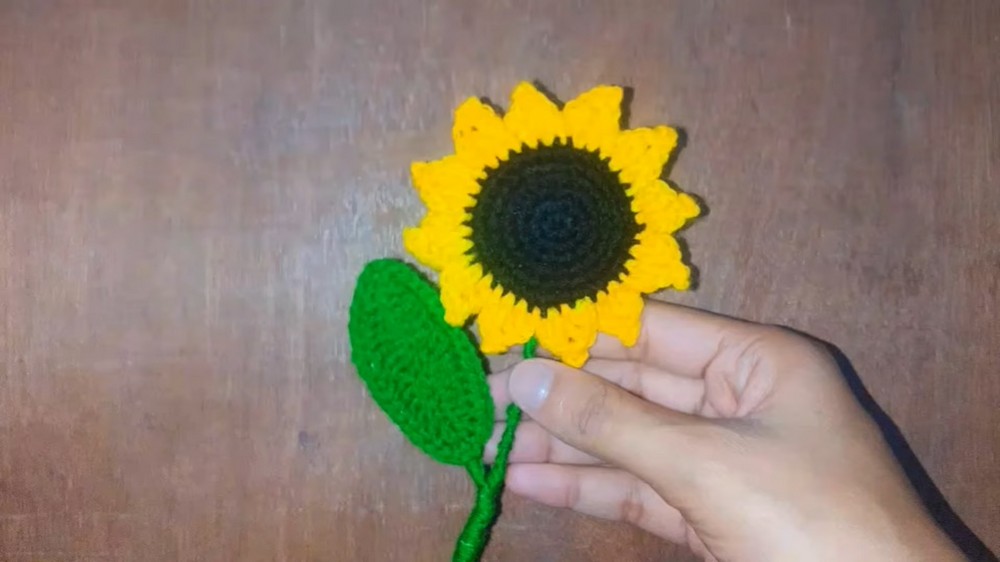
Pattern: Crochet Sunflower with Stem and Leaves
Finished Size
- The completed sunflower (including the stem) measures approximately:
- Flower Diameter: ~10–12 cm
- Stem Length: Adjustable based on preference
Materials Needed
- Yarn:
- Black (for the center of the sunflower)
- Green (for the back base, leaves, and stem)
- Yellowish orange (for the petals)
- Hook sizes:
- 3 mm crochet hook
- Other Supplies:
- Tapestry needle (to sew and weave in ends)
- Scissors
- Cotton filling for stuffing
- Floral wire or similar sturdy material for the stem and leaves
- Masking tape (to stabilize joins)
- Optional: Glue gun for stronger adhesion (not mandatory)
Gauge
- Gauge is not crucial for this project. However, aim for tight stitches to maintain the sunflower’s structure and form.
Abbreviations
| Abbreviation | Meaning |
|---|---|
| ch | Chain |
| sc | Single Crochet |
| hdc | Half Double Crochet |
| dc | Double Crochet |
| tr | Treble (or Triple) Crochet |
| sl st | Slip Stitch |
| inc | Increase |
| YO | Yarn Over |
Special Techniques
- Magic Circle: Used to start a seamless circular base.
- Wrap the yarn around your finger to form a loop. Insert the hook, pull through a loop, and ch 1 to secure the circle.
Instructions
Base of the Sunflower
You will make two bases:
- Front Base: Black yarn
- Back Base: Green yarn
The pattern for both bases is identical:
1. Make the Magic Circle.
- Form a magic circle and secure it with a chain (ch 1).
2. Round 1:
- Work 6 sc into the magic circle. Pull the tail to tighten the circle.
- Join with a slip stitch (sl st) in the first sc.
[6 sts]
3. Round 2:
- Ch 1; work 2 sc in each stitch around.
- Join with a sl st.
[12 sts]
4. Round 3:
- Ch 1; work 1 sc in the first stitch, 2 sc in the next stitch. Repeat around.
- Join with a sl st.
[18 sts]
5. Round 4:
- Ch 1; work 2 sc in the first stitch, 1 sc each in the next 2 stitches. Repeat around.
- Join with a sl st.
[24 sts]
6. Round 5:
- Ch 1; work 1 sc each in the next 3 stitches, 2 sc in the next stitch. Repeat around.
- Join with a sl st.
[30 sts]
7. Round 6:
- Ch 1; work 1 sc each in the next 4 stitches, 2 sc in the next stitch. Repeat around.
- Join with a sl st and fasten off.
[36 sts]
Tip: Leave a long tail for sewing later.
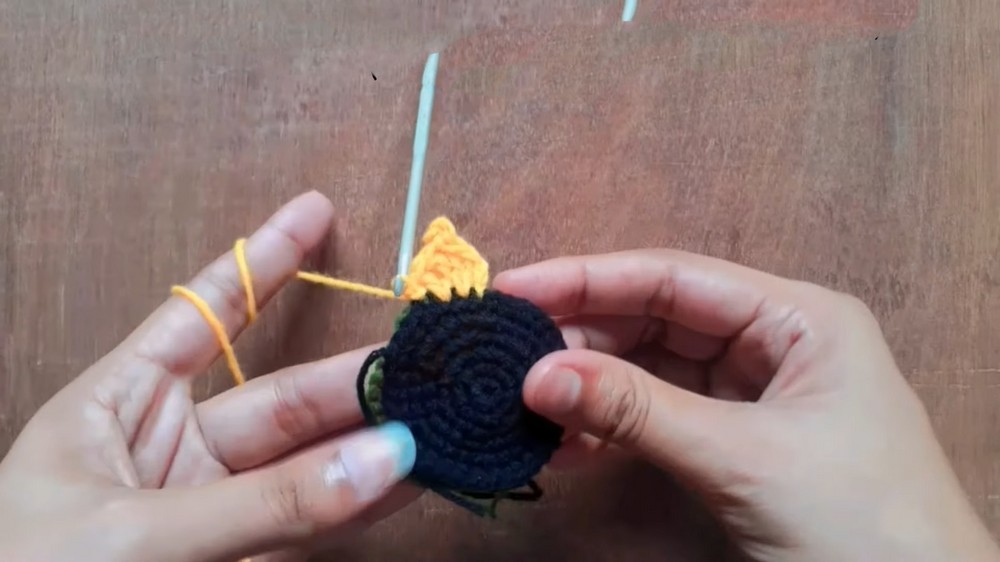
Petals
Preparation
- Place the black base on top of the green base, aligning the edges to “sandwich” them together.
Attaching Yarn and Starting Petal Design
- Insert the hook through both bases (to keep them attached). Pull the yellowish-orange yarn through and secure with a chain (ch 1).
Create Petals:
For each petal, follow these steps:
- Ch 2.
- In the first stitch:
- Work 1 dc, followed by 1 tr.
- Ch 3, then work a sl st in the same stitch below to anchor the petal’s tip.
- Move to the next stitch:
- Work 1 tr, then 1 dc.
- Complete the petal by working a sl st in the next base stitch.
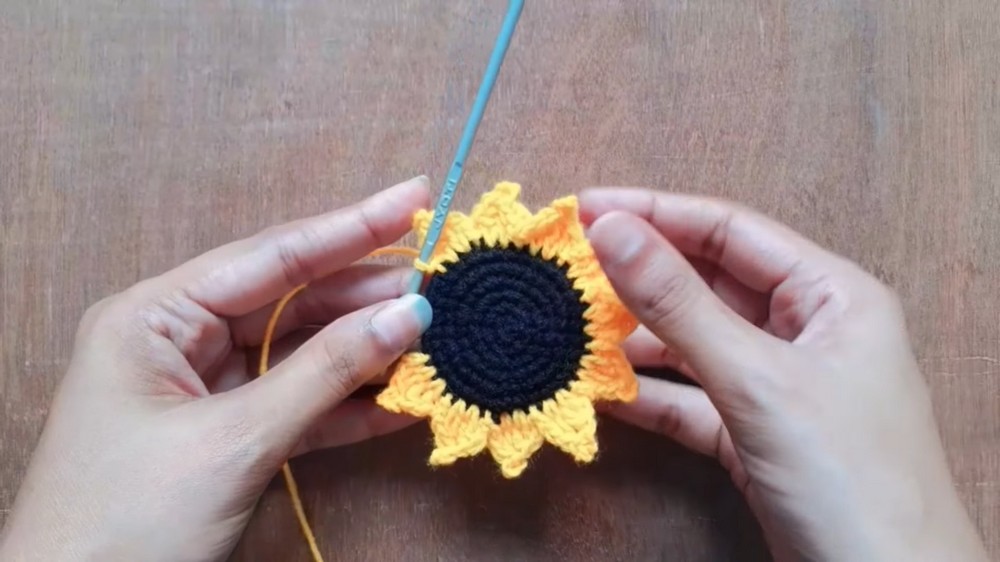
Repeat around, creating one petal per stitch. Ensure the final petals leave a small opening.
Stuffing
- Fill the sunflower lightly with cotton stuffing.
- Fasten the remaining petals using the same method, closing the sunflower.
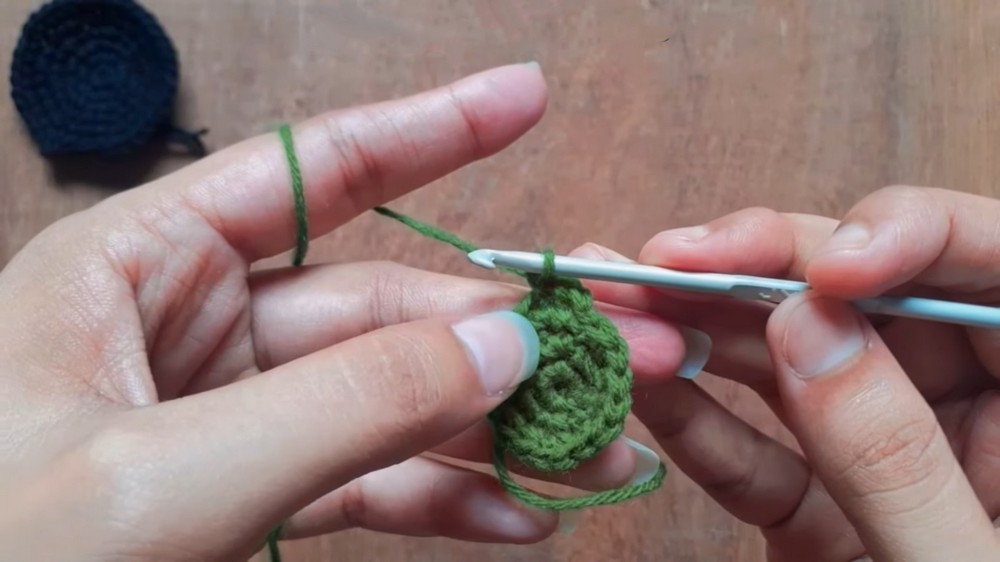
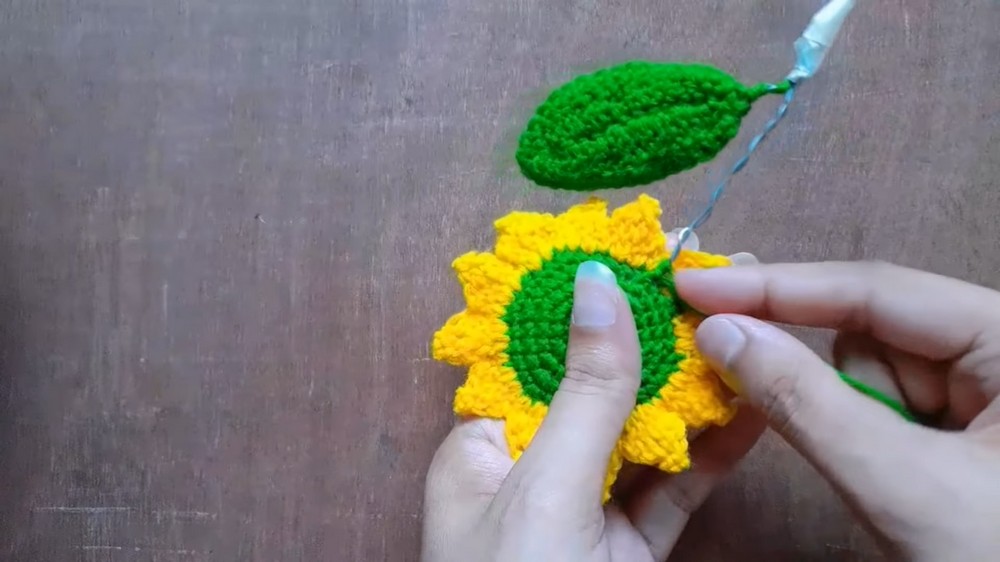
Leaves
Leaf Pattern
- Ch 16.
- Work back down the chain:
- In the 2nd chain from the hook, make 1 sc.
- In the next chain, make 1 hdc.
- In the next 4 chains, make 4 dc (1 dc per chain).
- In the next 3 chains, make 3 tr (1 tr per chain).
- In the last few chains, work back down: 4 dc, 1 hdc, and 1 sc.
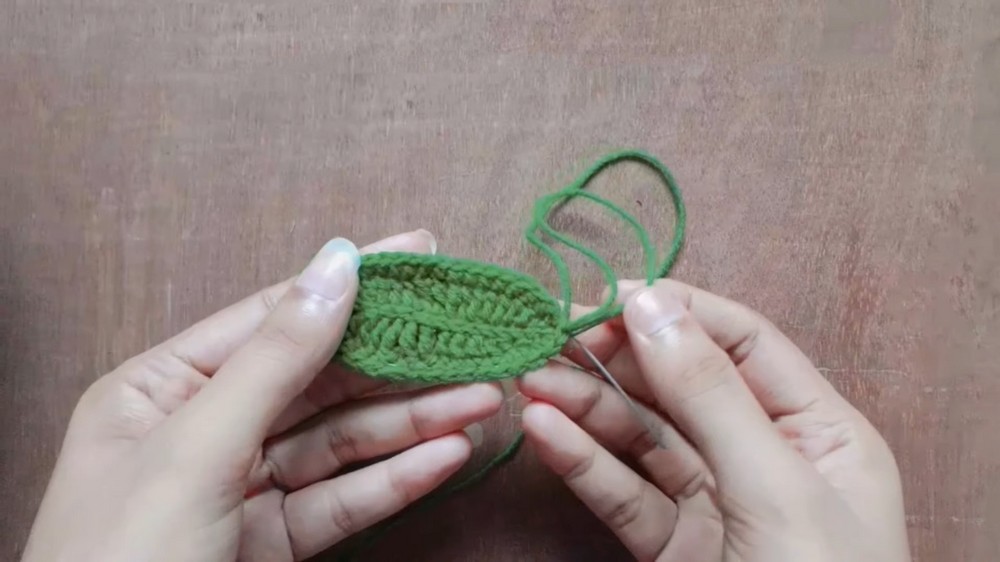
3. Bordering the Leaf
To make the leaf symmetrical, work along the opposite side of the foundation chain using the same stitch progression: 1 sc, 1 hdc, 4 dc, 3 tr, 4 dc, 1 hdc, 1 sc.
4. Reinforce
Attach floral wire along the center of the leaf using single crochets to allow bending.
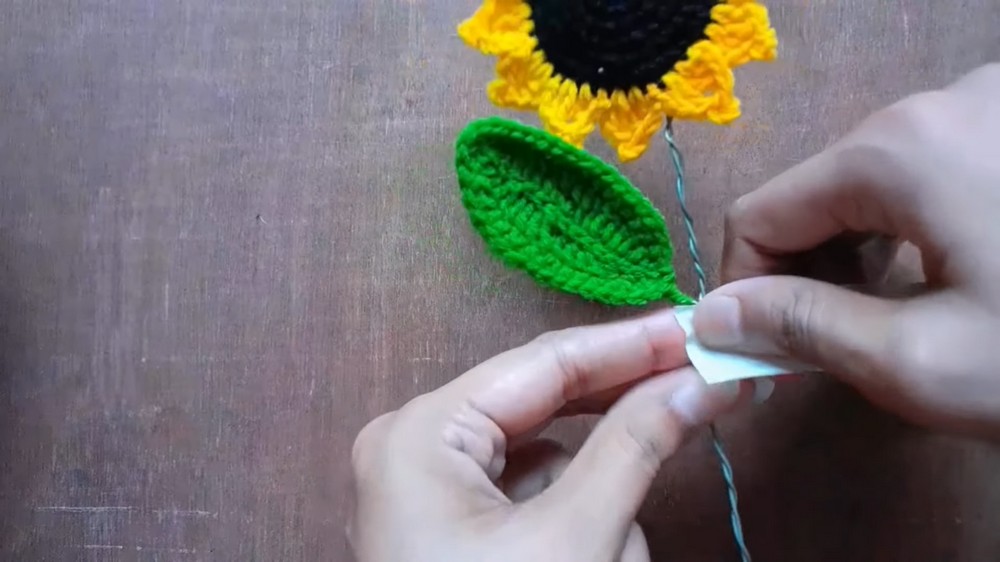
Connecting the Stem
- Insert floral wire into the sunflower’s base and twist to secure.
- Cover the stem with green masking tape for alignment.
- Use green yarn to wrap the stem tightly, securing it with thread or glue.
Customization Ideas
- Color Variations: Experiment with petal colors like red, orange, or even white for a creative look.
- Stem Length: Adjust the stem length depending on whether the sunflower will be displayed in a vase or as a wall hanging.
- Petal Texture: Use different yarn types (e.g., velvet or cotton blends) for varied textures.
Conclusion
This sunflower project is perfect for both beginners and seasoned crocheters, offering opportunities for creativity and personalization. The finished sunflower, with its vibrant colors and structured stems, adds charm to any home décor.
Important Remark:
Tight stitches and consistent tension are crucial to maintaining the sunflower’s round shape. Light stuffing avoids distorting the shape. Always secure the floral wire firmly for stability.
Leave a Reply