
Wrap your little one in warmth and style with this charming crochet hooded baby jacket pattern that’s perfect for cozy adventures and chilly days.
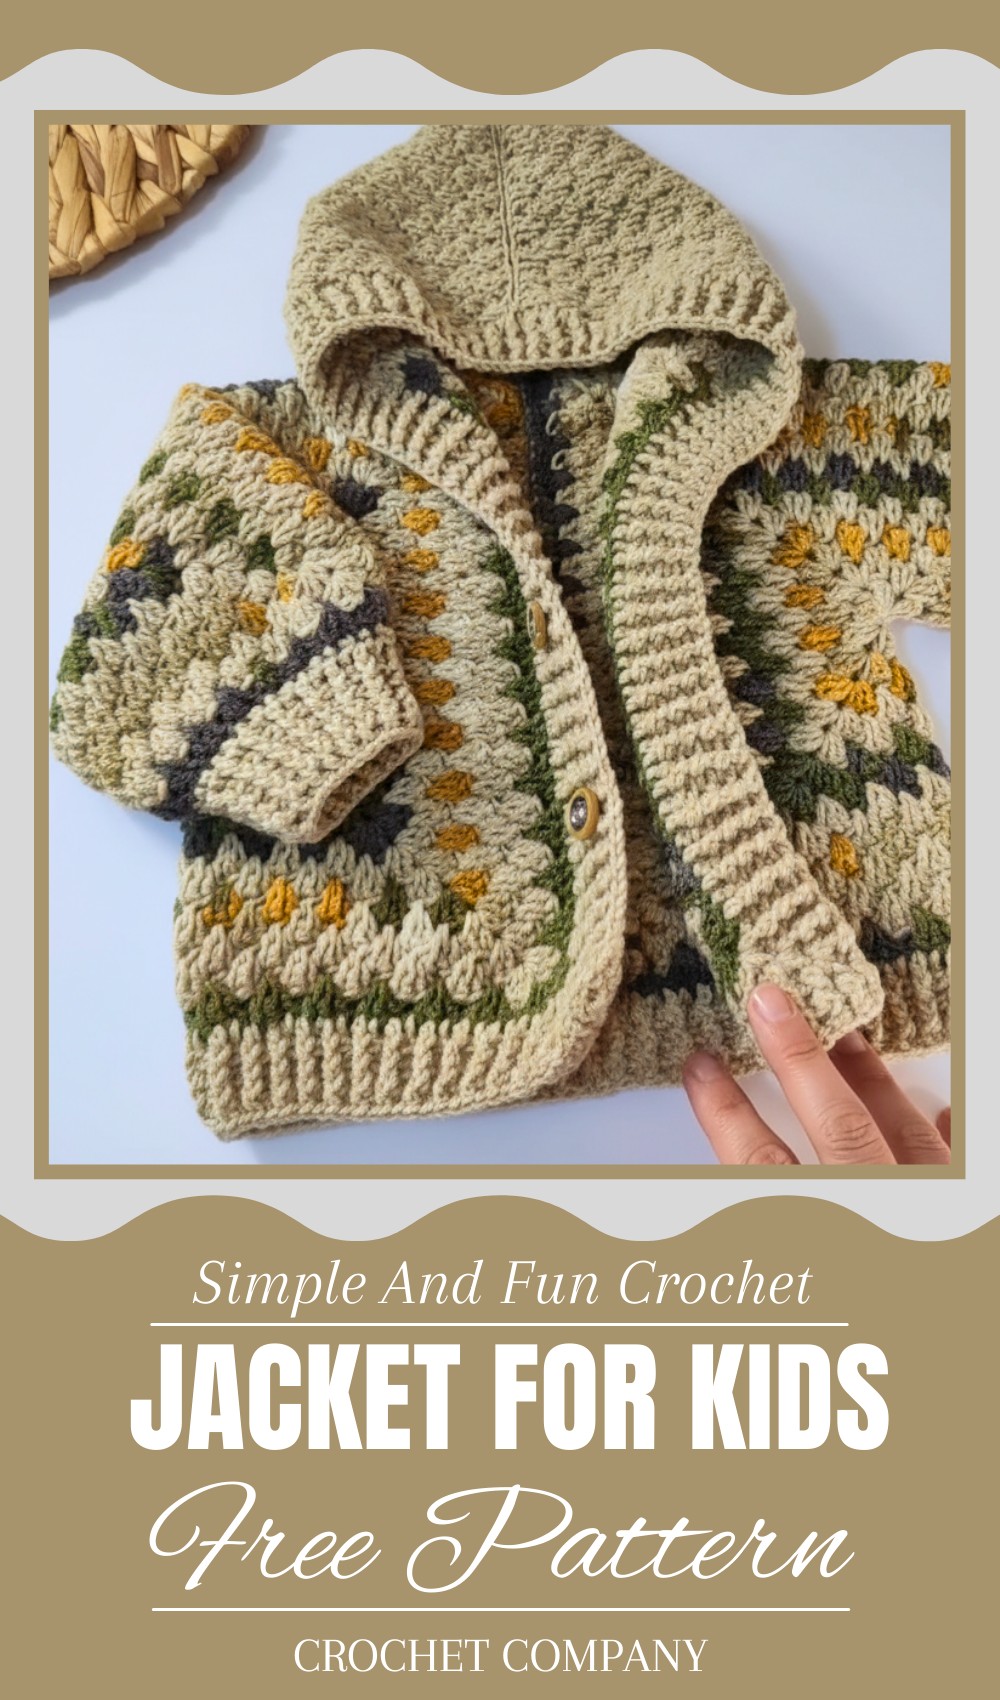
Crochet Hooded Baby Jacket Pattern for Snug Winter Walks
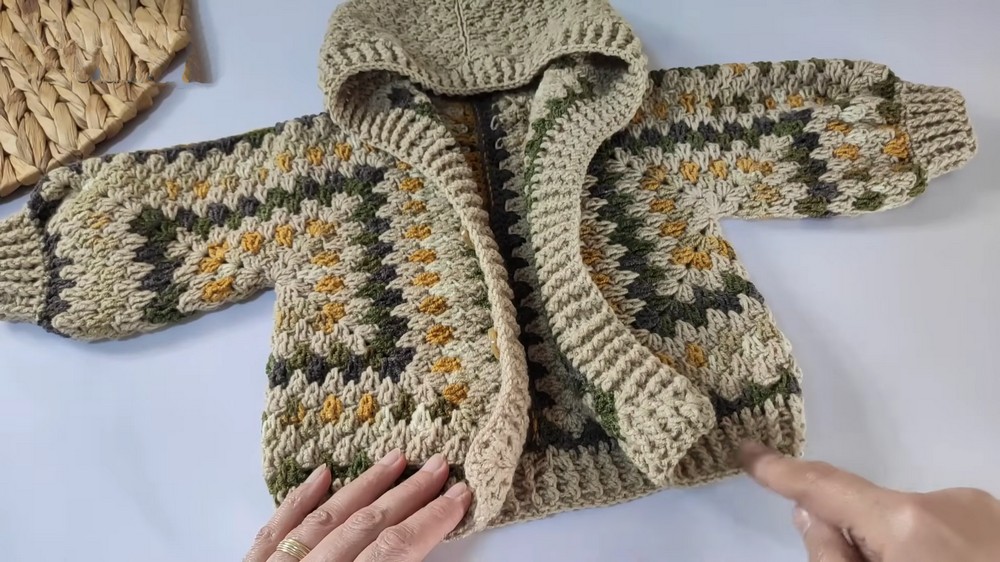
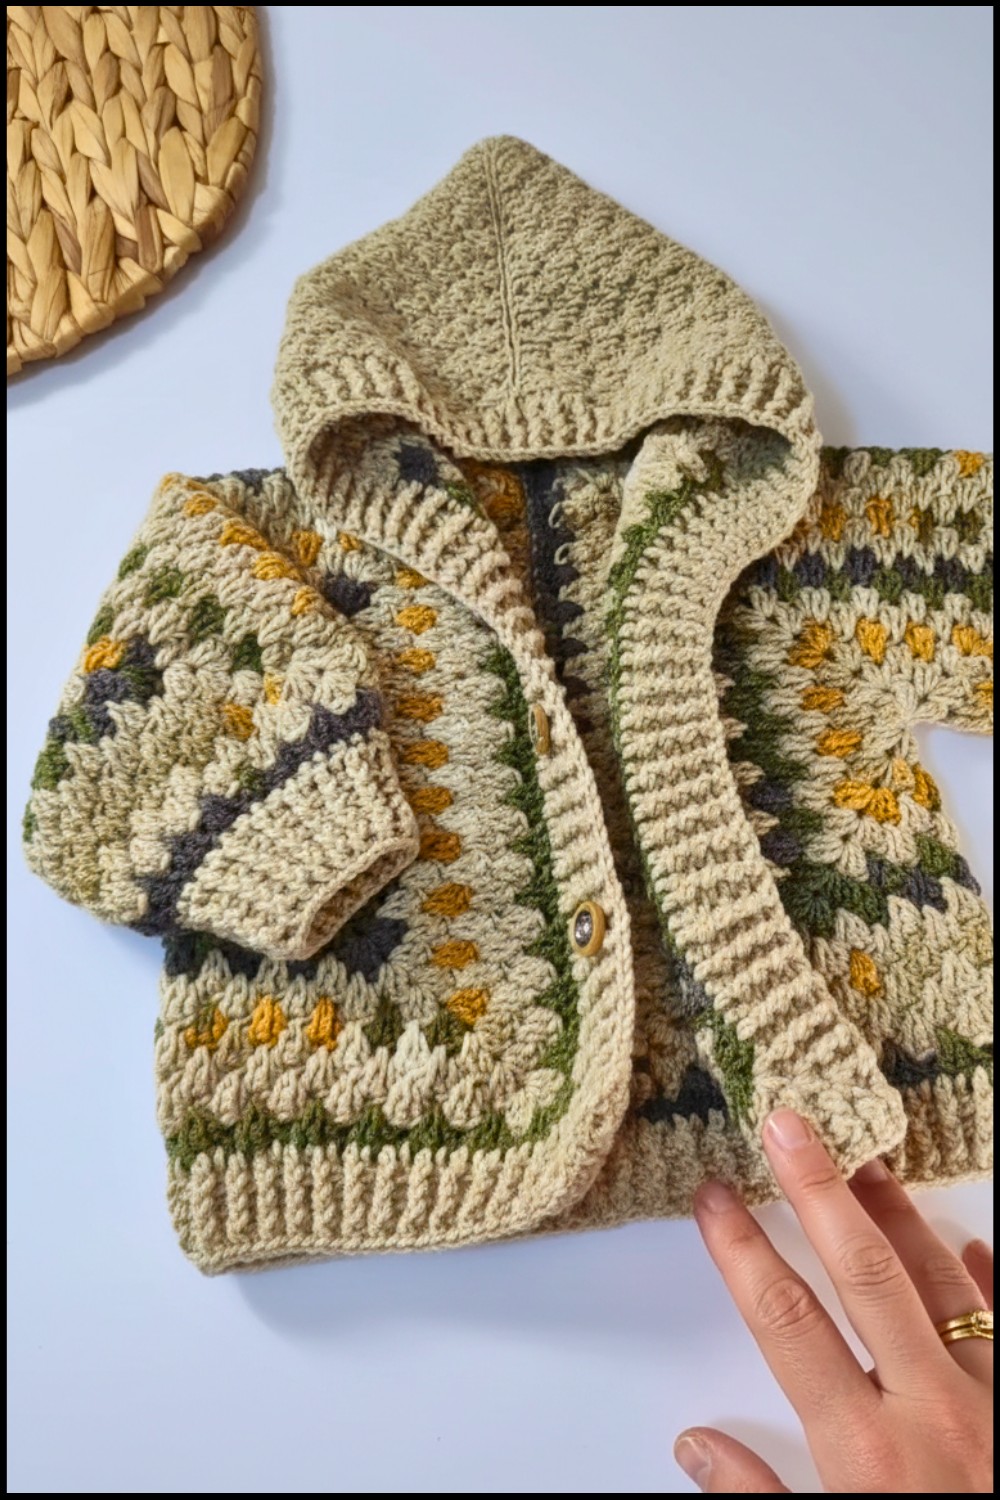
A chilly day when a baby needs something warm and soft to keep cozy. That’s when a special handmade jacket becomes a perfect hug. The crochet hooded baby jacket pattern is designed to keep little ones snug and comfortable. Made with gentle, warm yarn, this jacket has a cute hood that fits just right, protecting tiny heads from cold winds. Its bright or soft colors and lovely stitches make it look cozy and charming at the same time.
Parents love it because it’s easy to put on and takes care of their babies when outside on walks or playing in cool weather. This jacket is not just clothing—it’s a warm, loving layer made by hand with care. It looks adorable on babies, making them both comfortable and stylish. Whether for daily use or special outings, it’s a perfect piece for any baby’s wardrobe.
Crochet Baby Jacket with Hood Pattern
Materials:
- Yarn: Multicolored spool + plain yarn (your choice of colors)
- Crochet Hook: 4.0 mm (and 3.5 mm for ribbed cuffs)
- Yarn needle for sewing and finishing
- Buttons (optional)
Skill Level:
Intermediate – This project combines working in rounds, color changes, double crochet clusters, front-post and back-post double crochet stitches, shaping, sewing pieces together, and finishing touches like ribbed cuffs and hood. Suitable for confident beginners and beyond.
Step-by-Step Pattern
Part 1 – Jacket Halves Construction
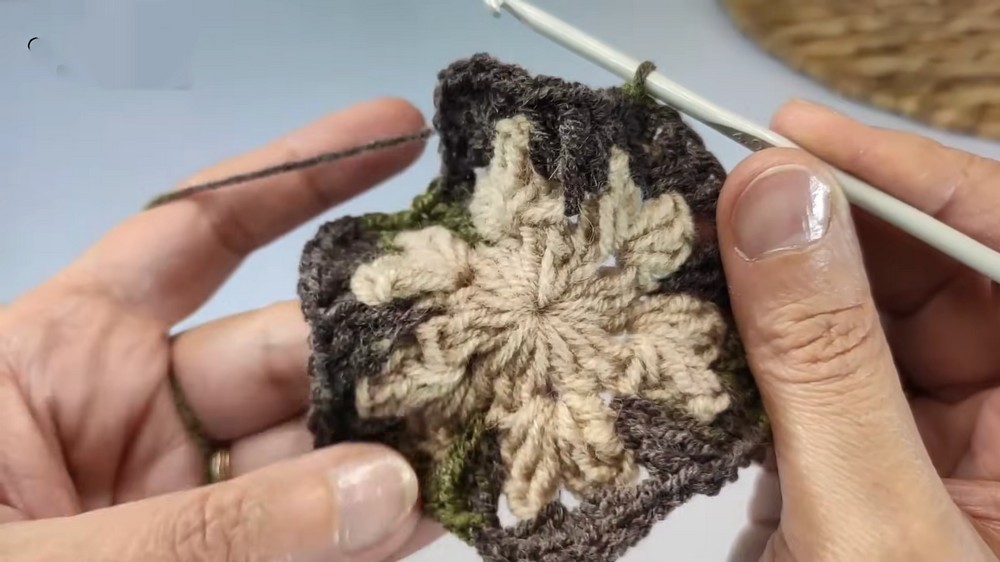
Step 1: Magic Circle and First Row
- Make a magic circle
- Chain 3 (counts as first double crochet (dc))
- Work 2 more dc in the circle
- Chain 1
- Repeat 3 dc, chain 1 five more times, resulting in 6 groups of 3 dc separated by chain 1 spaces
- Pull the tail to tighten the circle
- Join with a slip stitch in the 3rd chain of the initial chain 3

Step 2: Row 2 – Increasing Corners
- Chain 3 (counts as 1st dc)
- In the same chain 1 space, work 2 dc
- Chain 1
- In the next space, work 3 dc, chain 1, 3 dc (corner cluster)
- Repeat corner clusters in each chain 1 space around until 6 corners are formed
- Join with slip stitch in 3rd chain of starting chain 3
Step 3: Color Change
- Before closing the row with slip stitch, switch yarn color by pulling new color through the loop
- Tighten to secure both yarns together
- Alternate 2 rows color by color as desired (plain, multicolored, etc.)
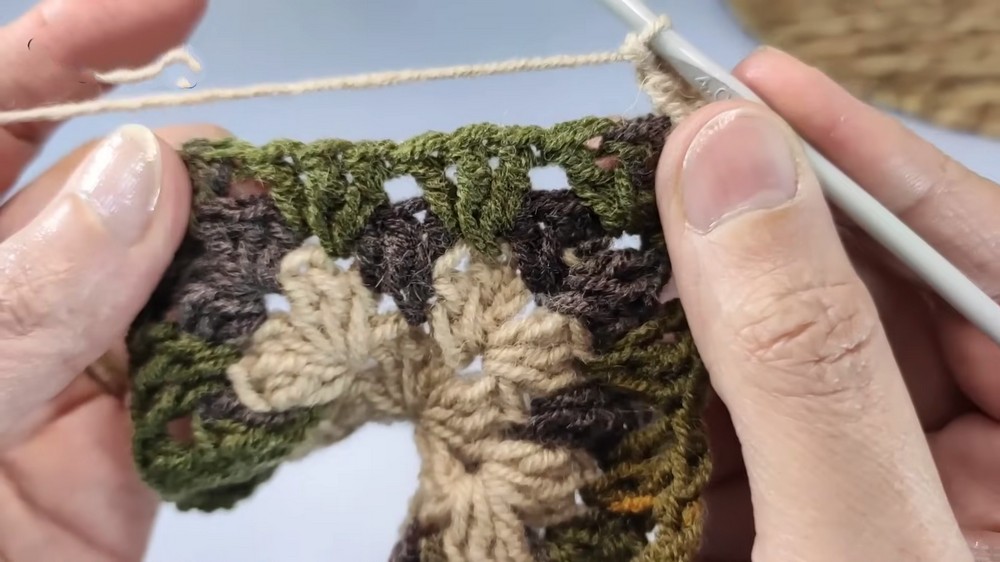
Step 4: Row 3 and 4 – Solidifying Corners and Edges
- Chain 3, work 2 dc in first space
- For middle dc of 3-dc groups from Row 1, make double crochet with yarn overs over last loops to match height
- Continue with 3 dc, chain 1, 3 dc clusters at corners
- Repeat for Row 4, as in Row 3, maintaining stitch consistency and shaping corners
Step 5: Subsequent Rows
- Increase the number of chain 1 spaces between corner clusters by 1 per row
- Continue alternating yarn colors every 2 rows without cutting yarn (carry up threads at back)
- Work until desired size is reached for half the jacket (approx. 13 cms for chest quarter measurement)
- Work 15 rows or as needed
Step 6: Repeat for Second Half
- Make the second half identical in pattern and sizing
- Both halves should have similar measurements and shapes
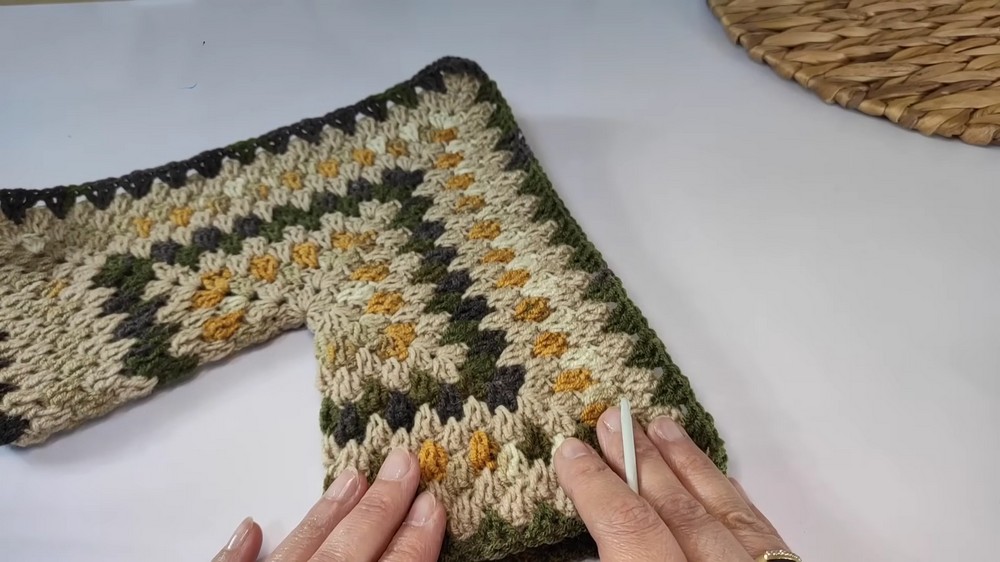
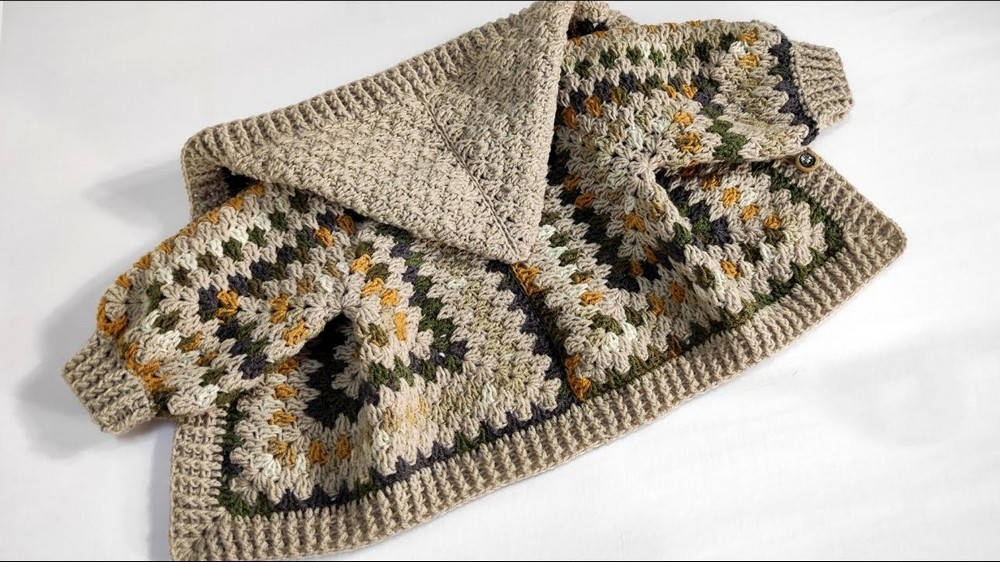
Part 2 – Assembly
Step 7: Join Jacket Halves
- Place halves right sides facing each other
- Join by slip stitching edges together along back side
- Insert hook through chain spaces of both pieces alternating front and back loops for stretch and neat finish
- Keep stitches even but loose enough for flexibility
- Secure ends with slip stitch and weave in yarn tails

Step 8: Mark and Sew Sleeves
- From corner edges, leave 6 cm (neck opening per side for 1 to 1.5 years old) unsewn
- Sew sleeves closed on each side from corner to mark
- Use slip stitch technique same as back join
- Leave openings unsewn for neck and armholes
Part 3 – Ribbed Cuffs
Step 9: Begin Ribbing
- Using hook 3.5 mm, work single crochet (sc) stitches around sleeve edge
- Work decreases by crocheting 2nd and 3rd dc of clusters together to reduce width
- Keep tension firmer for a snug cuff
Step 10: Ribbing Pattern
- Row 1: Sc stitches with decreases as needed
- Row 2: Chain 3, then dc over each sc
- Row 3 and onward: Alternate front-post double crochet (fpdc) and back-post double crochet (bpdc) stitches to create ribbing texture
- Work ribbing until cuff length desired
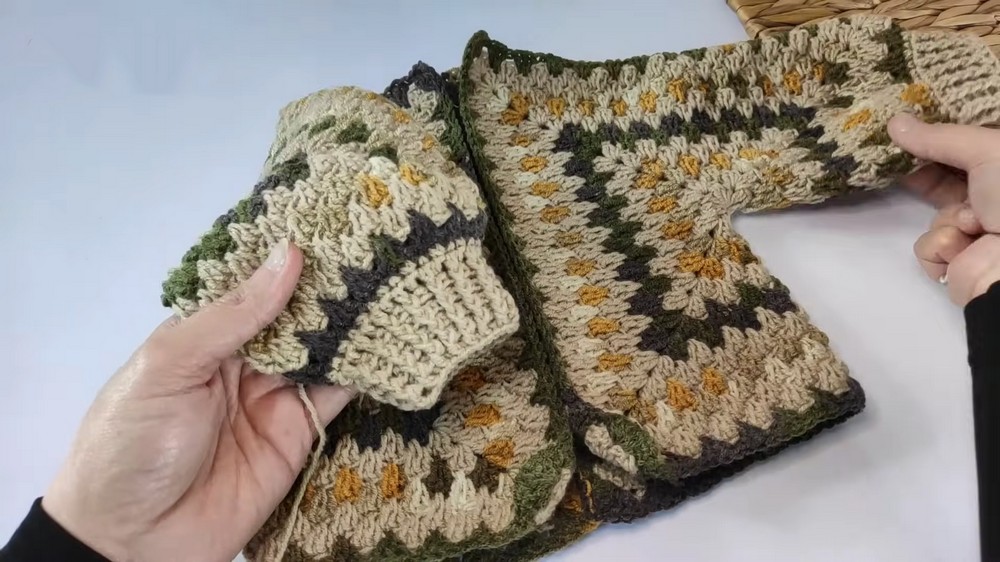
Part 4 – Hood
Step 11: Starting Hood
- At corner of jacket back, pull yarn through stitch
- Chain 3 (counts as 1 dc)
- Work 2 dc in same space (3 dc total)
Step 12: Continue Hood Base
- Follow same double crochet clusters and increases around hood edges as done in jacket body
- Work corners clusters of 3 dc, chain 1, 3 dc to maintain shape
Step 13: Subsequent Hood Rows
- Chain 3 at start of rows
- Continue double crochet pattern respecting increased stitches and corners
- Change colors and correspond to jacket body if desired
Step 14: Hood Length
- Work hood rows until length is approx. 19 cm or as preferred for coverage
- Finish by joining sides with slip stitch
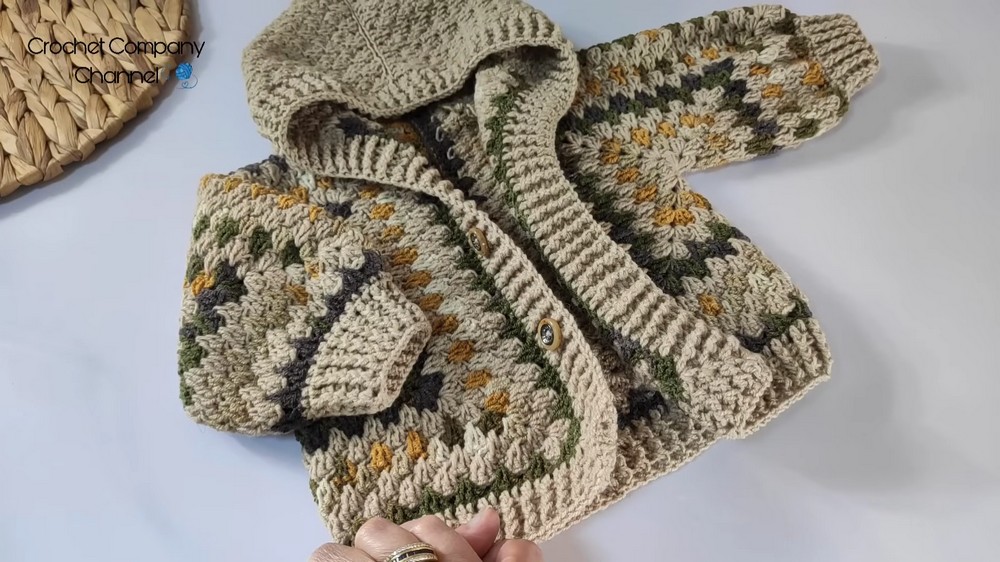
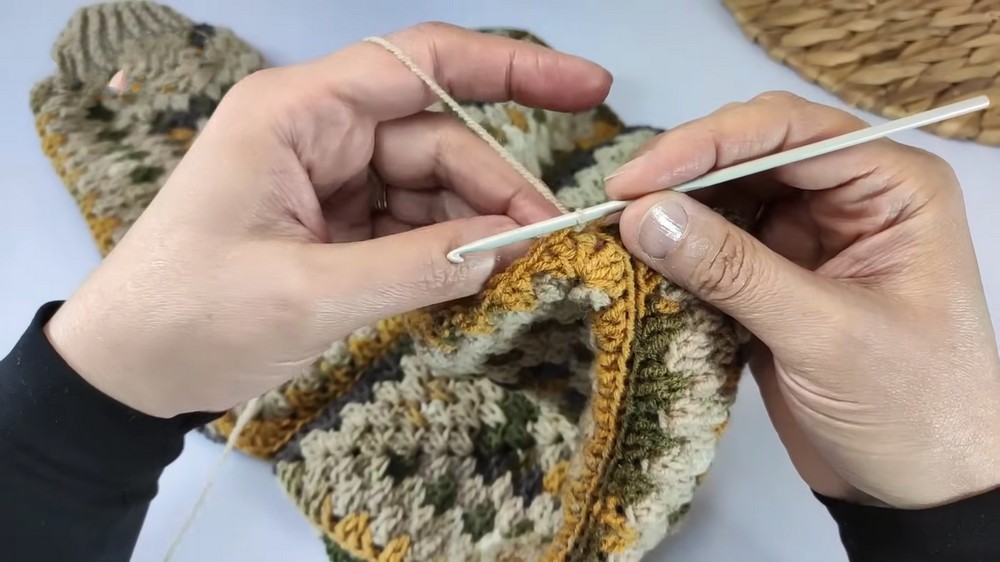
Part 5 – Final Finishing and Buttonholes
Step 15: Join Hood and Jacket
- Attach hood securely to jacket neckline adjusting for fitting
Step 16: Edge Finishing (Plisse Stitches)
- Work double crochet stitches around jacket edges (sleeves, front, bottom)
- For corners, work (2 dc, 1 chain, 2 dc) clusters
- Continue until edges are neat and structured
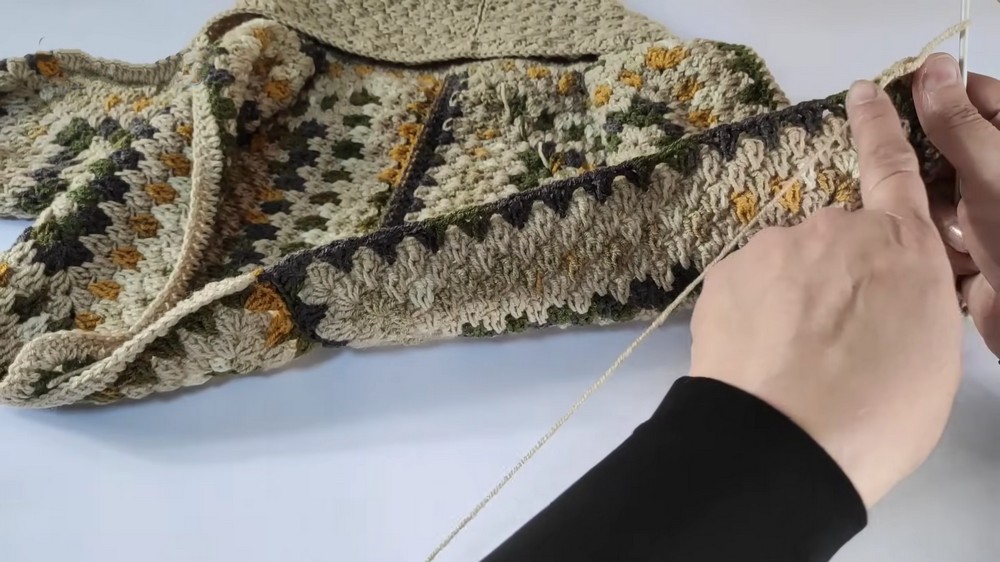
Step 17: Ribbed Edging Rows
- Work rows alternating fpdc and bpdc around edges to create textured ribbing
- Work 4 plisse rows total: 1 dc row and 3 ribbing rows
- Buttons can be added naturally in ribbed texture openings
Tutor’s Suggestions
- Keep stitch counts consistent especially at corners for nice shaping.
- Don’t overtighten slip stitches during sewing; jacket must remain stretchy for comfort.
- Use stitch markers to mark increases and decreases for accuracy.
- Blend color palettes to your personal style for a unique jacket.
- Blocking the finished piece can help even out stitches and set shape.
Uses
- Baby jacket suitable for age 1 to 1.5 years
- Handmade gift that’s colorful, warm, and flexible
- Great practice for post stitches and garment assembly
Tip
When working front-post and back-post double crochets, keep yarn tension even and lift stitches at the same height to maintain uniform ribbing texture. Use a smaller hook for cuffs to ensure a snug fit.
Conclusion
This cozy baby jacket with hood and ribbed cuffs is a lovely and practical project that combines shaping, color work, and textural stitches. With Salwa Al-Fahham’s clear tutorial, you can create a customized garment sized perfectly for your little one while honing your crochet skills.
Leave a Reply