
Show your style with this Free crochet flamingo cardigan pattern that’s simple for everyone perfect for adding a splash of fun to your wardrobe.
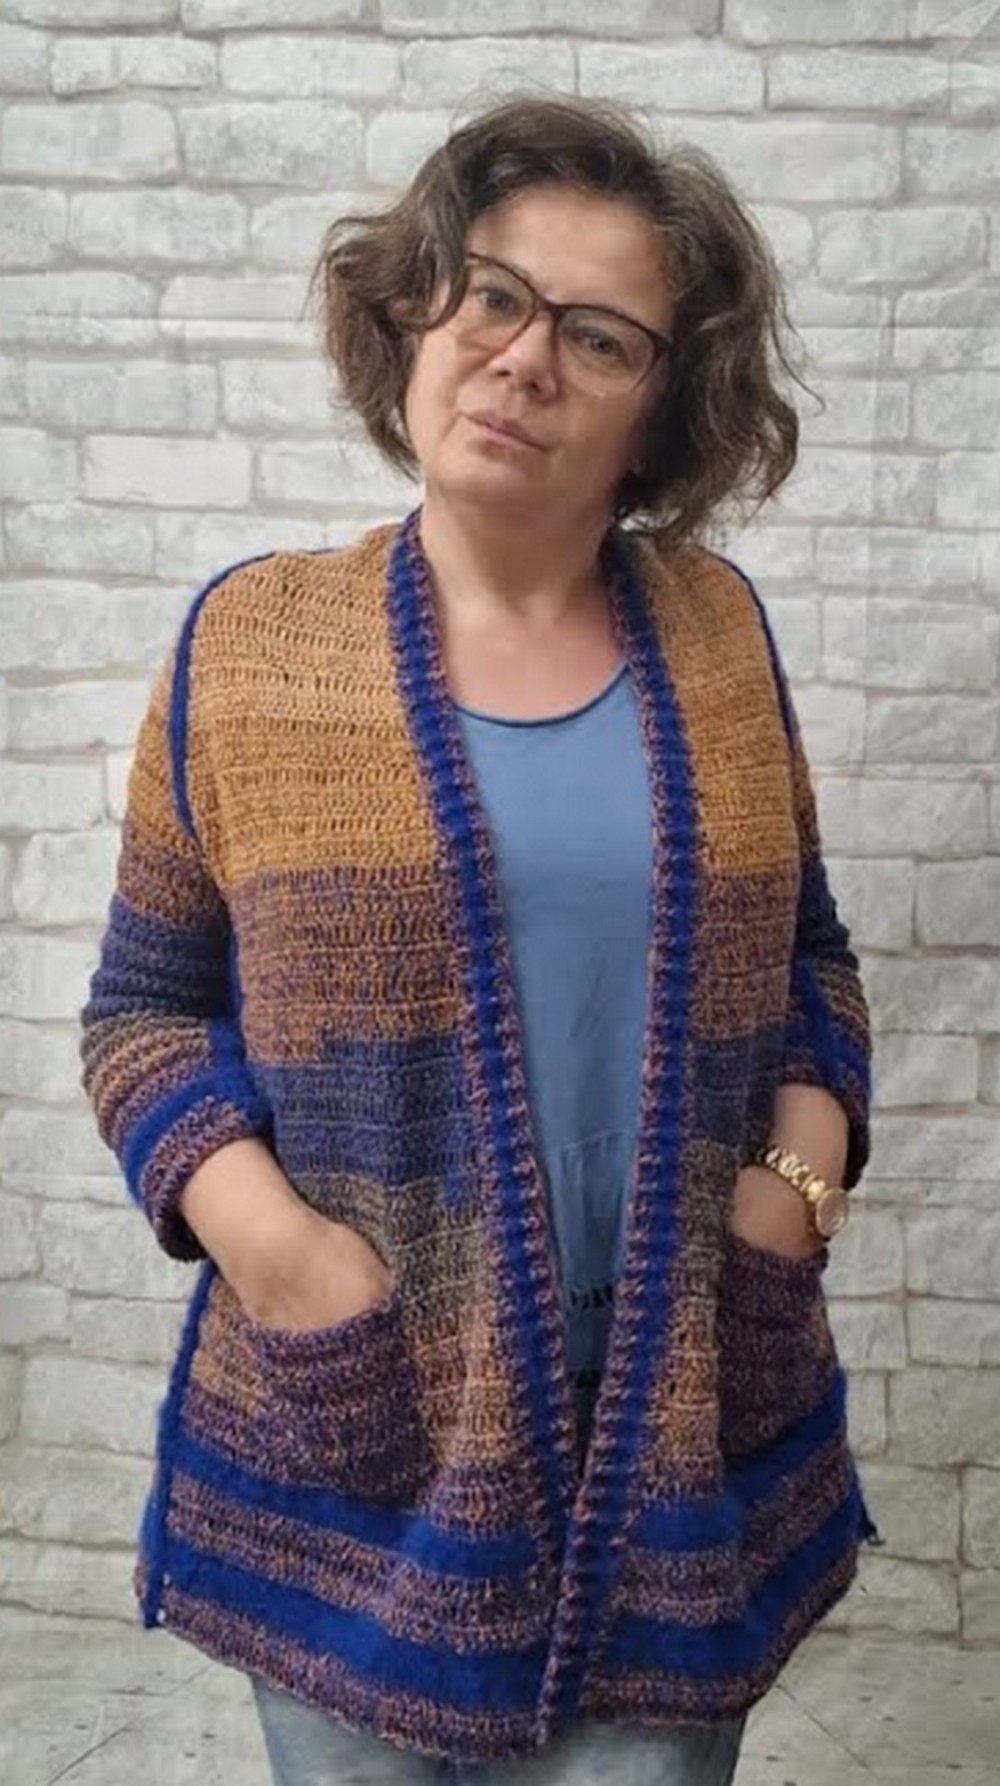
Bright colors fill your world with happiness when you slip into a cardigan shaped like a cheerful pink flamingo. The crochet flamingo cardigan pattern features long sleeves and a gentle ribbed edge for easy comfort while black and white accents bring the playful bird to life. Roomy pockets offer space to keep little things close and the light yarn keeps you cozy without being heavy. People of all ages enjoy the simple steps in this pattern as it brings a sense of pride when a brand new sweater is made.
Free Crochet Flamingo Cardigan Pattern for Fun and Comfort
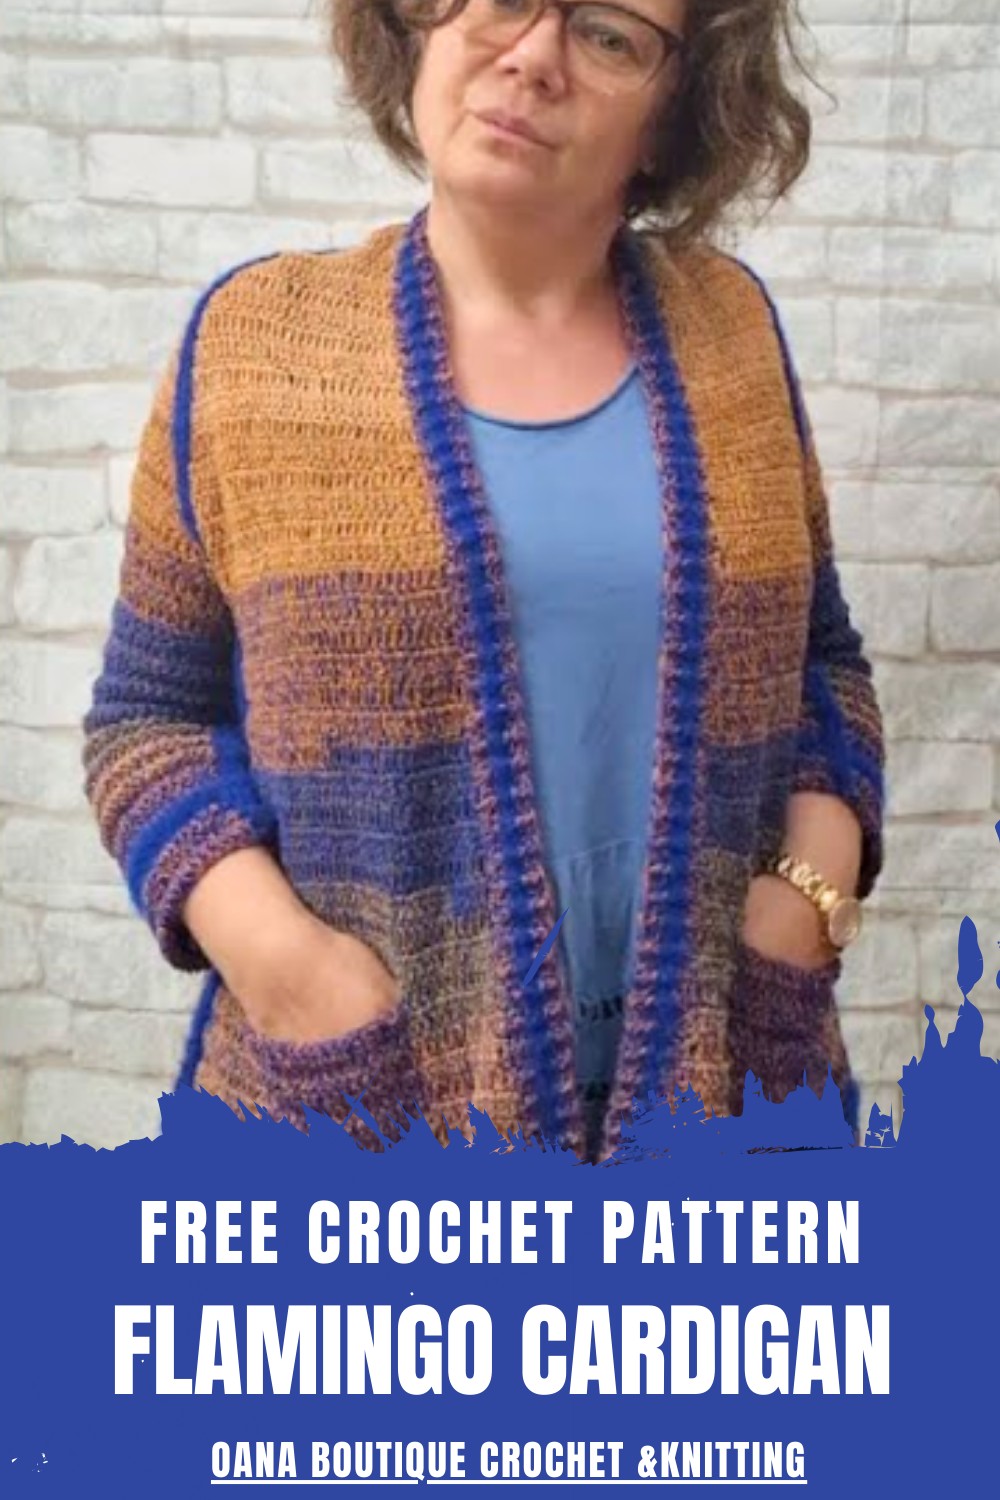
The bold appearance catches everyone’s eye and quickly becomes a favorite for chilly days or just adding fun to daily life. This cardigan is not just clothing but also a way to show creativity making each moment special. No need for reading skills as instructions are easy and helpful turning yarn into a delightful garment that brings smiles everywhere.
Elongated Double Crochet Cardigan-Poncho with Sleeves
Materials
- Yarn:
- Worsted weight (#4 Medium) yarn, main color and contrasting colors for stripes and border.
- Optional: Brushed alpaca or similar for vertical stripes and border accent.
- Hook:
- 4 mm (US G/6) crochet hook
- Notions:
- Stitch markers
- Scissors
- Yarn needle/tapestry needle
- Measuring tape
Key Abbreviations (US Terms)
| Abbreviation | Meaning |
|---|---|
| ch | chain |
| dc | double crochet |
| edc | elongated double crochet (see below) |
| sc | single crochet |
| sl st | slip stitch |
| fpdc | front post double crochet |
| bpdc | back post double crochet |
| st(s) | stitch(es) |
| inc | increase (2 sts in one st) |
Special Notes
- Elongated Double Crochet (edc): Yarn over, insert hook, yarn over and pull up a loop, yarn over, pull through one loop (makes “elongation”), yarn over and pull through two, yarn over and pull through last two.
- Cardigan is constructed from six joined triangle sections (“motifs”)—these comprise the yoke, which shapes the shoulders and sleeves.
- The increases are always made in the first and last stitch of each triangle (except after dividing for body/sleeves).
- Project is highly adjustable: Try on after each major section for a custom fit.
PATTERN
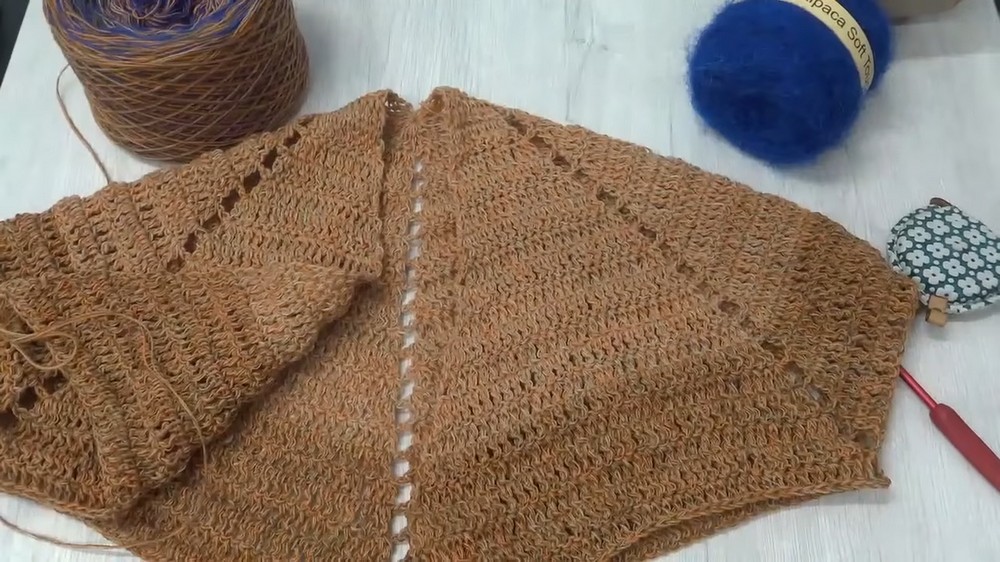
1. Yoke Construction (Six Triangle Motifs Joined In Round)
Foundation Row:
- With MC and 4 mm hook, ch 4, join to form ring.
- (First Triangle): Ch 3 (counts as first edc), work 2 edc into ring.
- Ch 2, work 3 edc (all into ring) – this is your first triangle.
- Ch 2, repeat step 3 until you have 6 triangles (total: 6 sets of 3 edc with ch-2 between each set).
- Sl st to top of beginning ch-3 to join.

You should have:
- 6 triangle groups of 3 edc each, separated by ch-2 spaces (“corners”).
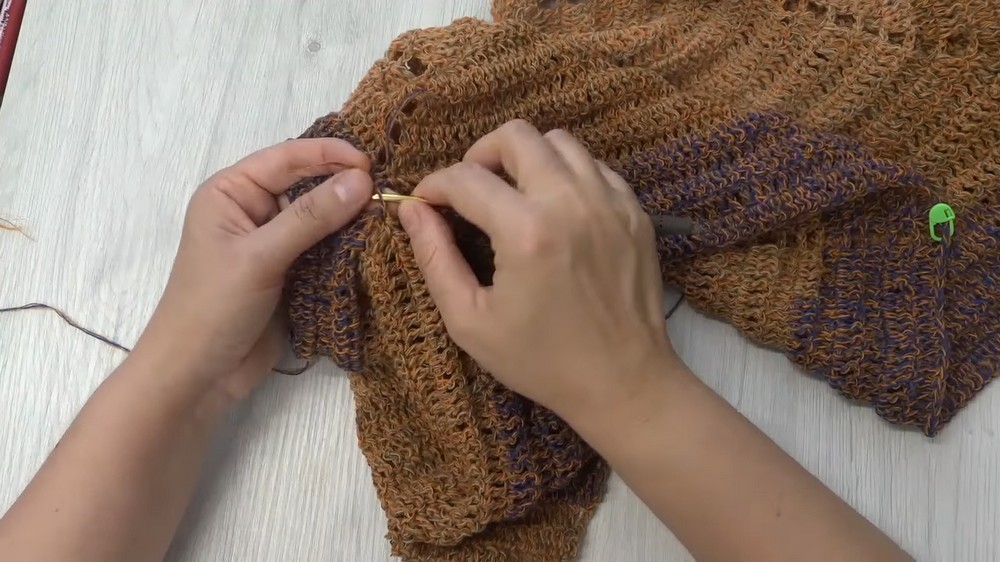
2. Increasing the Yoke
Work in continuous joined rows, increasing at the first and last edc of each triangle, separated by ch-2 spaces.
For Each Row:
- Ch 4 (counts as edc), edc in first st (increase made).
- Edc in each st of triangle, except last st.
- In last st of triangle, work 2 edc (increase).
- Ch 2, move to next triangle, repeat around.
- Join with sl st to starting chain at end of row.
Continue as above, increasing at the start and end of each triangle, each row:
- 1st triangle: 3 edc
- 2nd row: 5 edc
- 3rd row: 7 edc
- and so on.
- Always [number of rows × 2 + 1] edc per triangle.
Work until each triangle “side” (distance from center to edge along motif line) measures approximately 30 cm (12 inches) for medium size or to fit across your shoulders. (Example: About 20 rows)
3. Separating Body and Sleeves (“Division Row”)
a. Try on yoke: Mark the first and last triangle as fronts and the sixth as back. The second and fifth triangles become sleeves.
b. Divide pieces:
- Work first triangle as before, increasing at start (edc, inc), regular edc stitches.
- At end of triangle, do not increase underarm.
- Chain 2, skip sleeve triangle (and its ch-2 corner space), go directly into next triangle (side or back).
- Repeat: Ch 2, skip next sleeve, continue edc in next triangle.
- Complete round, skipping underarm triangles and joining body triangles together.
- Place stitch markers at division points underarms.
4. Body Section
- Continue working in rows across front and back (body triangles only), joining with sl st.
- Increase only on every second row: at the start and end of the first and last triangle (shoulder/side), and at the center back if desired (in the central ch-2 space).
- NO increases underarm after dividing for sleeves.
- Continue even or with gentle side increases to desired length.
5. Sleeves
- Join yarn at underarm (either directly into ch-2 space for wide sleeve or into previous row for a narrower sleeve).
- Work in rounds:
- Ch 3 (or 4), begin with edc/edc in same st (if preferred).
- Edc around, working into all available sts along armhole edge.
- At ends (ch-2 underarm area), work 2 edc each side for width.
- Join with sl st, turn after each round (to keep fabric reversible).
- Increase rounds only every other row as on body, as desired for shape, or work straight for straight sleeves.
- Work even to desired sleeve length.
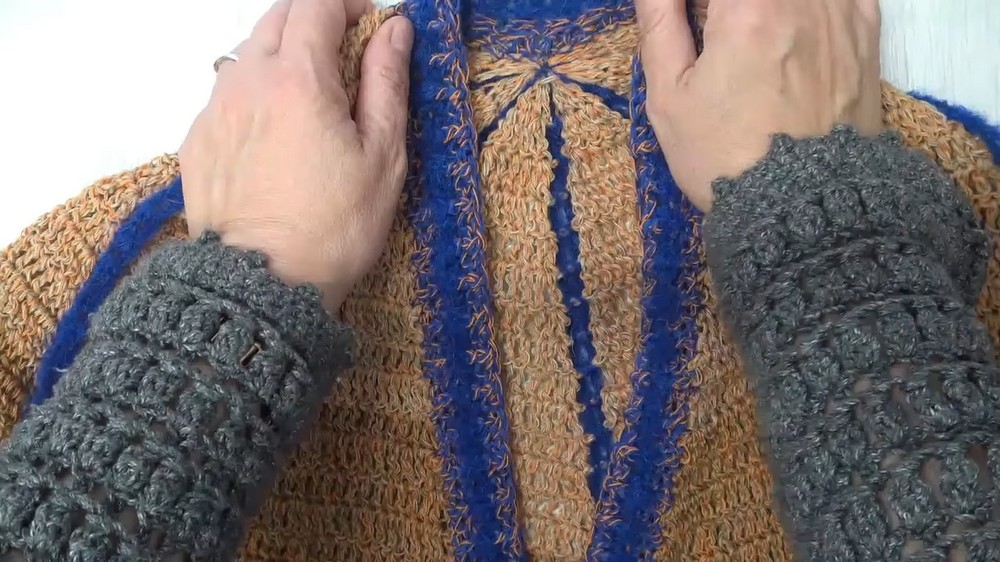
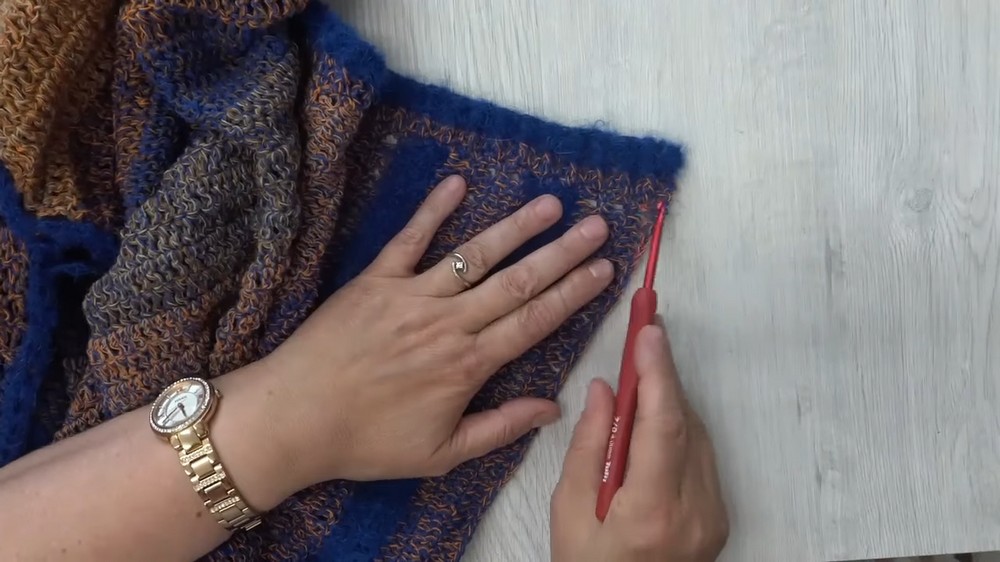
6. Vertical Stripes/Columns (Optional Decorative Step)
- With contrasting brushed alpaca or other accent yarn:
- At the base of any ch-2 column (vertical “hole” line), join yarn.
- Row 1: Ch 2, sc in next ch-2 space vertically above. Repeat up the “column”.
- Turn at top, chain 2, sc in ch-2 space, work back down the column.
- Continue until satisfied with effect; repeat for each ch-2 column desired (front, back, sleeves).
7. Border/Edging
Work 4–6 rows of easy border stitches around cardigan opening (front, hem, cuffs).
- Row 1: Sc around, working 2 sc in each dc row-end, and 1 sc in each st.
- Row 2: [Dc, sc] in alternate stitches around.
- Row 3+ (Pattern Row): [Dc in next st, sc in next st, front post dc (fpdc) or back post dc (bpdc, when on WS)] repeat for texture.
- Work 4–6 border rows as desired. For a contrast, use brushed yarn.
8. Pockets (Optional)
- Make two rectangles in any stitch (for example, edc or sc to match fabric).
- Sew to lower front at desired position.
9. Finishing
- Weave all ends to the wrong side.
- Block gently to shape.
- Sew any gaps closed at underarm or vertical columns.
- Try on and enjoy your custom, geometric cardigan poncho!
Conclusion
This unique cardigan-poncho is creative, modular, and flexible. The elegant construction from triangle motifs joined to form body and sleeves allows for color play, variety, and custom fit. The pattern is open to modifications with sleeve width, length, and decorative accents.
Pattern Correction & Tips
- Correction: Always increase only at the first and last stitches of triangles; after dividing for sleeves, do not increase at underarm.
- To avoid holes at underarm joins, add extra stitches or sew small gaps closed when finishing seams.
- Tip: Turn work at the end of each round to maintain matching appearance (“right” and “wrong” side columns) and balance.
- For clarity, keep stitch count consistent and use markers for division points and ch-2 columns.
Leave a Reply