
Slip into summer vibes with this free crochet cover up top pattern, offering stylish comfort perfect for layering over swimsuits, dresses, or casual outfits.
Not every outfit is perfect for those sunny days when you want comfort and style. That’s where this free crochet cover up top pattern becomes your go-to solution. It blends airy, lightweight charm with just the right amount of coverage, making it ideal for layering over swimsuits, tank tops, or summer dresses. The beauty of this design lies in its elegant simplicity and flowy texture, which keeps you cool while giving you a fashionable look.
Crochet Beautiful Cover Up Top Free Pattern for Any Occasion
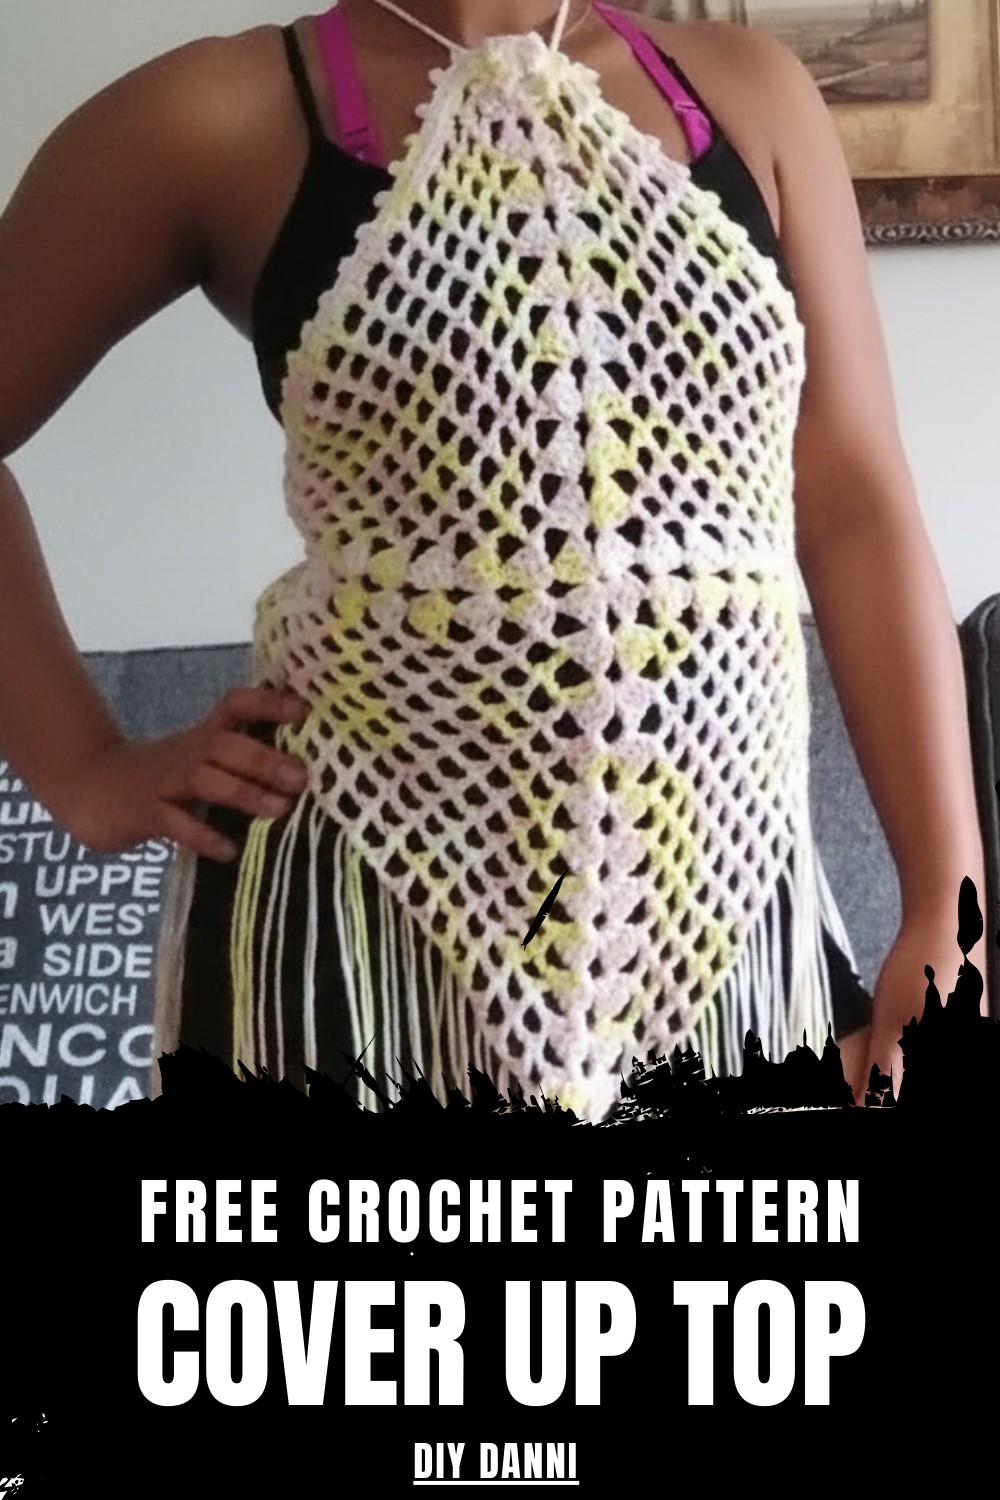
Perfect for beach trips, casual outings, or even lounging at home, this cover up top is as versatile as it is stylish. You can make it unique by choosing colors that suit your mood or match your wardrobe. Its handmade essence adds a personal touch that makes it stand out from ordinary store-bought options. This pattern is not just practical but also adds a refreshing touch of beauty to your summer wear.
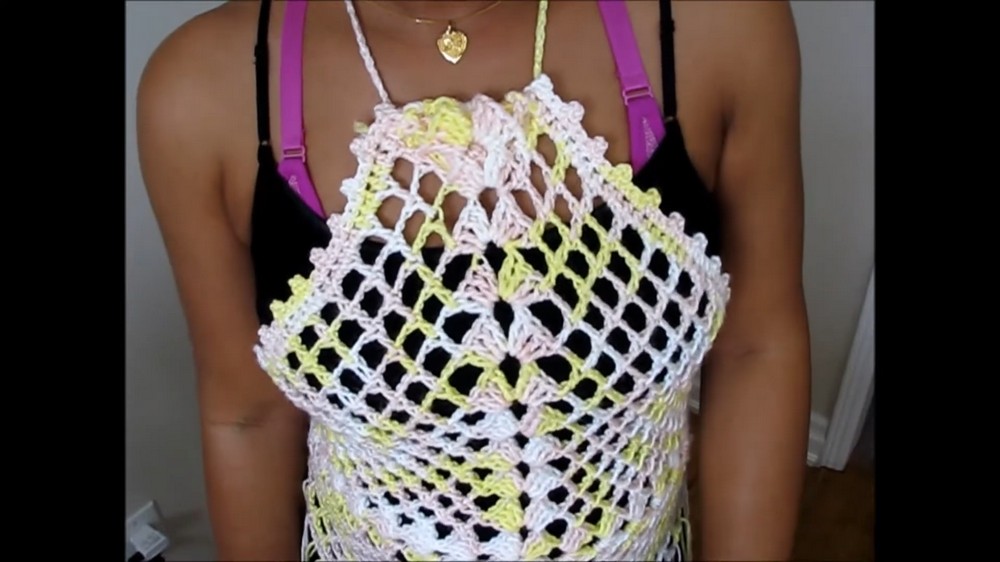
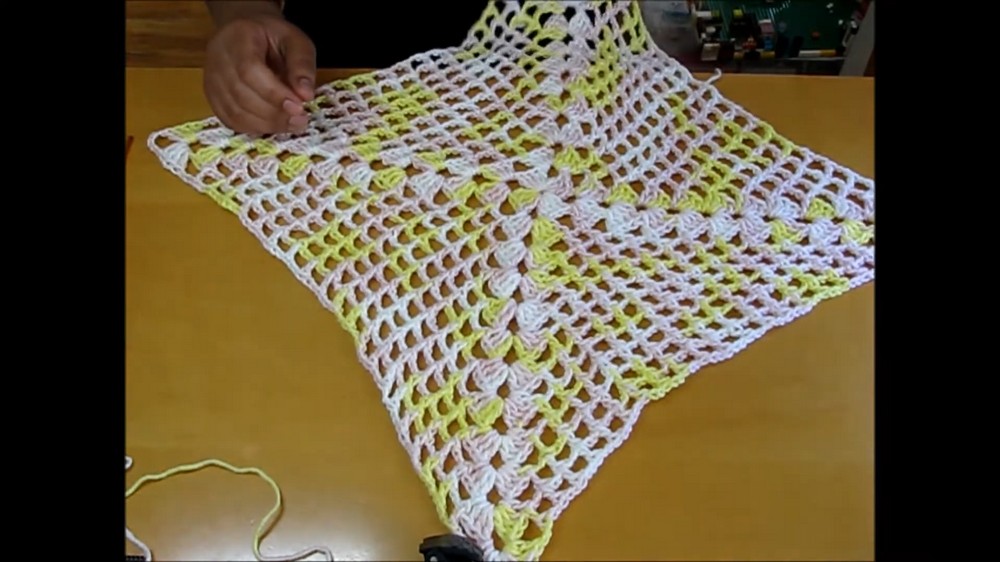
Granny Square Beach Cover-Up Pattern
Finished Size
The cover-up size depends on the number of rounds worked in the granny square. 12 rounds are recommended for a small size, and 14–16 rounds for medium or large sizes. For customizable sizing, measure the square against your body as you progress.
Necessary Materials
- Yarn: Bernat Premium in variegated rose pink or a similar medium-weight yarn. Adjust colors and textures to personalize your project.
- Hook: 4 mm crochet hook.
- Scissors: For cutting yarn and fringe.
- Yarn Needle: For weaving in loose ends.
- Measuring Tape: To ensure accurate fringe lengths and square dimensions.
- Stitch Markers: To mark sections when adding straps or edging (optional).
Abbreviations (US Terminology)
- CH: Chain
- SL ST: Slip Stitch
- SC: Single Crochet
- HDC: Half Double Crochet
- DC: Double Crochet
Special Techniques
- Granny Square Basics: Four corner spaces created in every round starting with a set of DC clusters and chain spaces.
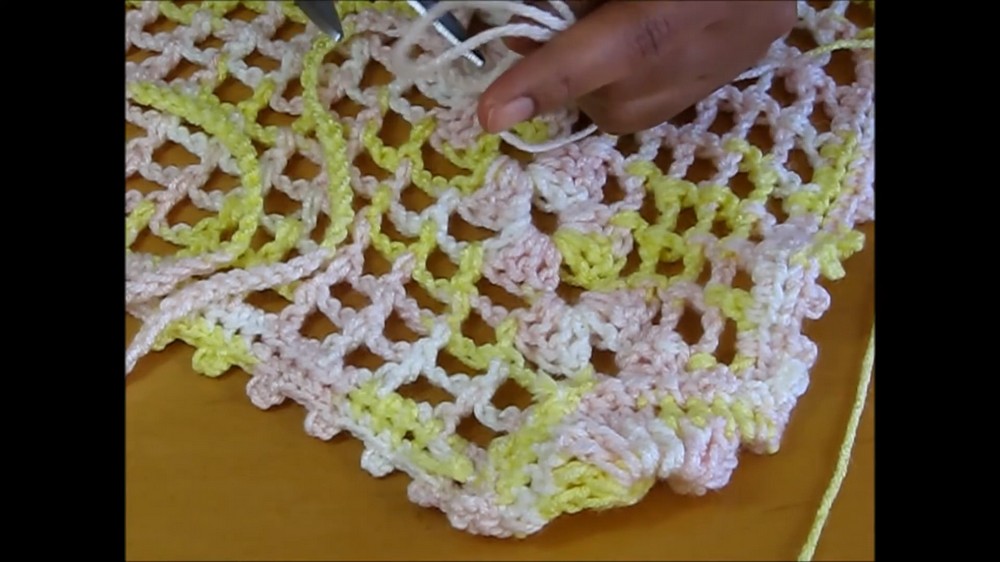
- Picot Edging: Decorative edging detail using SC and chained loops.
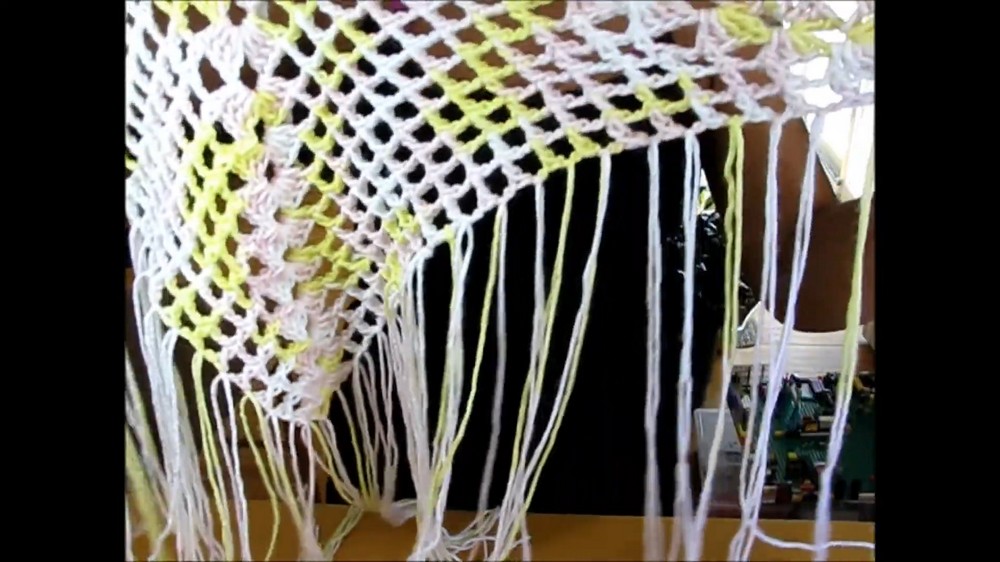
- Adding Fringe: Attaching neatly measured strips of yarn to the bottom edge for a finishing touch.
Step-by-Step Pattern
Step 1: Start the Granny Square
Foundation Ring:
- Begin with a slip knot and CH 4.
- SL ST into the first chain to form a ring.
Round 1:
- CH 3 (counts as the first DC).
- Make 3 DC into the center of the ring.
- CH 4, then work another cluster of 4 DC into the ring.
- Repeat (CH 4, 4 DC) two more times to form the corners.
- CH 4, SL ST into the top of the CH 3 to join the round.
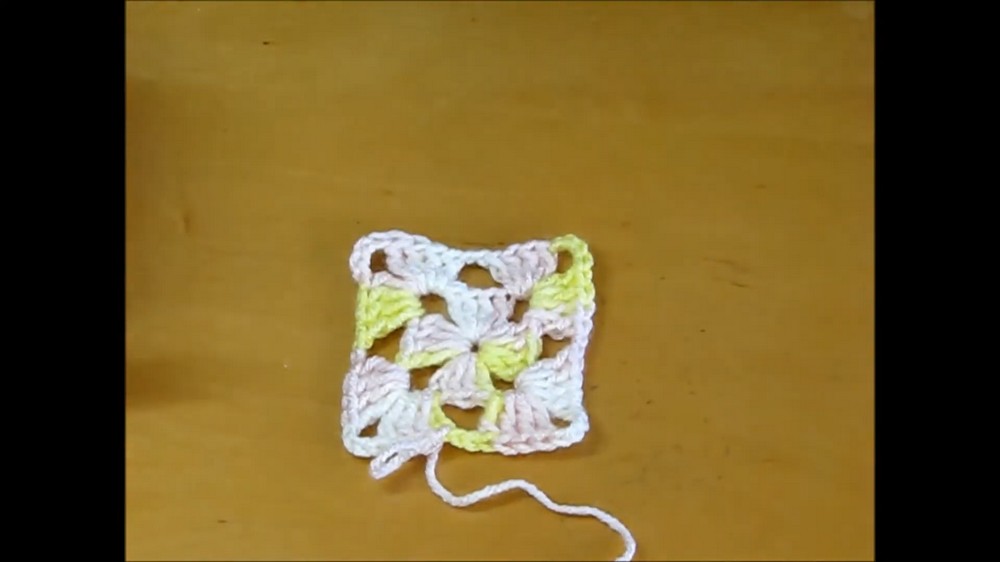
You should have 4 clusters of 4 DC separated by chain 4 spaces, forming the first round with clear corners.
Step 2: Build the Granny Square
Continue working rounds with repeated corner increases, as outlined below:
General Round Instructions:
- Start the Round:
- CH 5 (counts as CH 3 + CH 2).
- Work into Corner Spaces:
- In each corner space:
- 4 DC, CH 4, 4 DC (creates the corner increases).
- In each corner space:
- Move Between Corners:
- CH 2, add 1 DC into the last stitch of the previous cluster, and 1 DC into the first stitch of the next cluster.
- Repeat Around:
- Continue this process for each corner space and between clusters.
- End the Round:
- SL ST into the third chain from the beginning CH 5 to join.
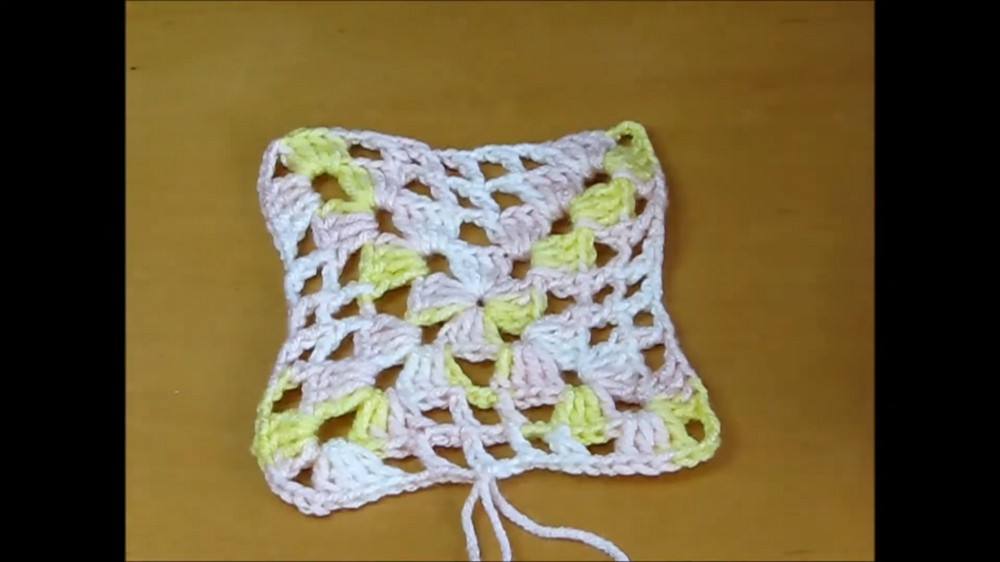
Round Progression:
- Repeat until you achieve the desired size.
- Reference the following guide for size customization:
- Small: Approx. 12–14 rounds.
- Medium–Large: Approx. 14–16 rounds.
Measure against your body during progression to ensure the square appropriately fits across your back or desired coverage area.
Step 3: Adding Edging
Edging Setup:
- Attach the yarn to the top edge of the square.
- CH 2, and work HDC stitches evenly across the edge, including in CH spaces.
- For chain spaces, place 2 HDC into each CH space and 1 HDC into each DC across the row.
Picot Edging:
- Turn your work after completing the HDC row.
- CH 1 and SC into the first stitch.
- CH 3, then SL ST into the front loop of the SC to form a picot.
- Skip 1 stitch, SC into the next stitch, and repeat picots across the edge.
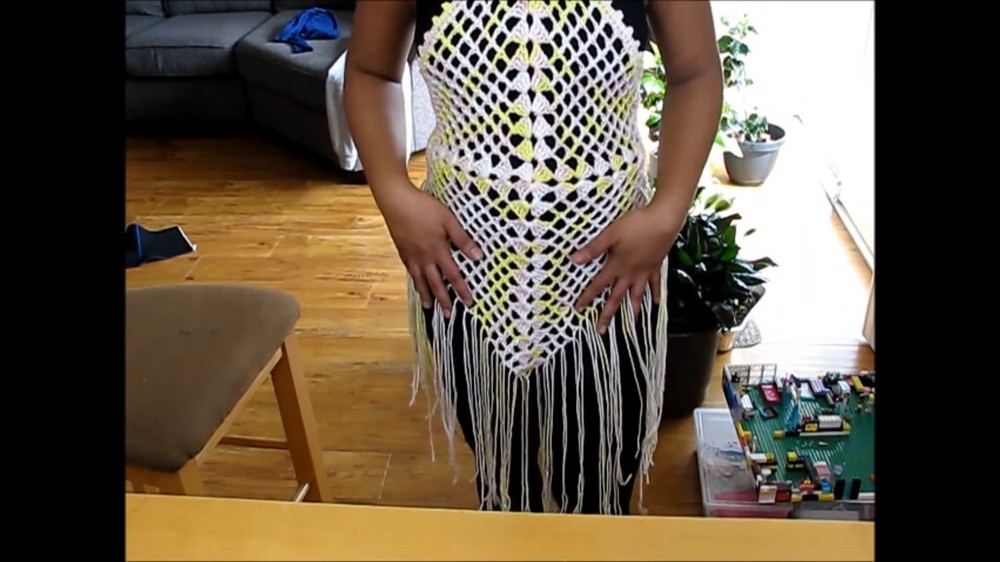
Step 4: Adding Straps
Neck Straps:
- Attach yarn to one corner of the top edge.
- CH a long strap (e.g., 150 chains or as desired).
- Cut and secure the end of the chain with a knot.
- Repeat for the other corner to create the second strap.
Back Straps:
- On the bottom of both edges of the square, attach yarn, and CH 40 chains for back straps.
- Cut and secure ends with knots.
Step 5: Adding Fringe
- Cut yarn in strips to desired fringe length.
- Suggested length: 24 inches, folded to 12 inches when attached.
- Insert a crochet hook through desired stitch at the bottom edge and pull the folded yarn strip through.
- Pull the tails of the yarn through the folded loop to secure the fringe.
- Repeat evenly along the bottom edge.
Finishing the Pattern
- Weave In Loose Ends: Use a yarn needle to tidy up all loose strands.
- Optional Blocking: Lightly block your square for crisp edges.
- Final Assembly: Tie the neck and back straps, adjust fit, and wear your beach cover-up proudly.
Tips for Maintenance
- Handwash or machine wash on a gentle cycle.
- Avoid pulling on fringes to maintain their integrity.
- Store flat or folded gently to avoid distorting picots and fringe.
Final Words
This granny square beach cover-up is simple yet elegant, making it a great addition to any wardrobe. It’s ideal for beginners exploring granny square patterns with added decorative touches like picot edging and fringe.
Leave a Reply