
Grab your yarn and enjoy a simple crochet hat pattern that’s super fun, cozy, and perfect for brightening up your chilly day style instantly.
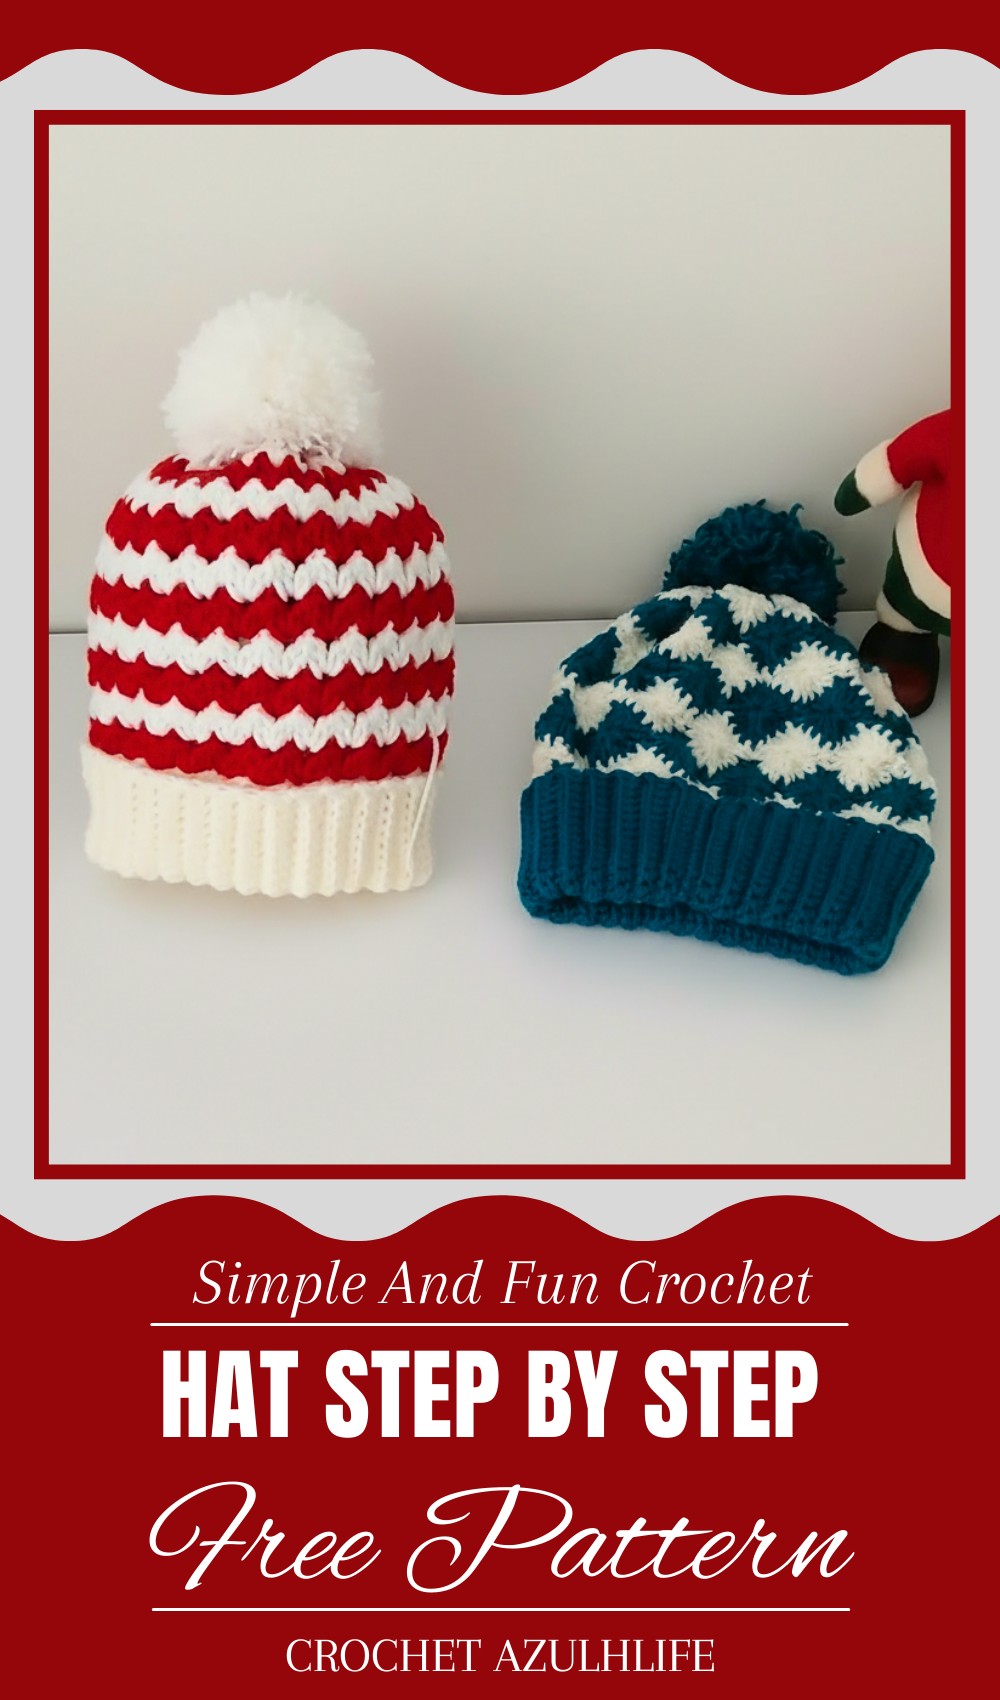
Cute & Cozy Crochet Hat Pattern Made Simple for You
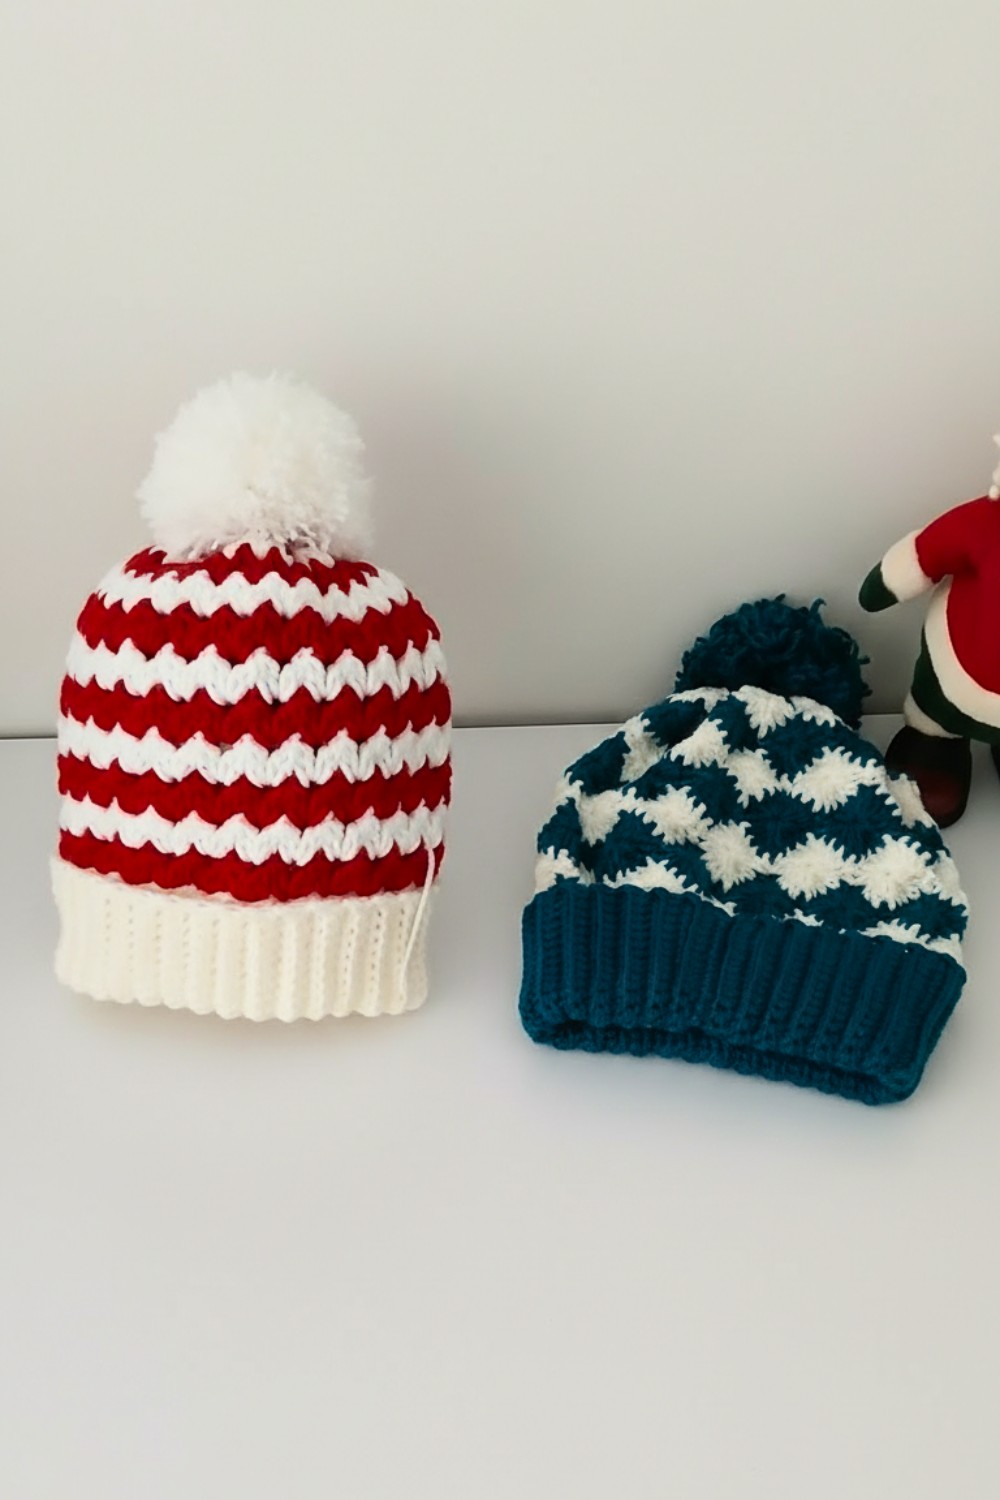
Warm hug that you can wear on your head—something that feels cozy on chilly days and looks stylish all year round. That’s exactly what a crochet hat can be. This beautiful accessory is made with simple yarn loops, creating a snug fit that keeps your head warm while adding a charming touch to any outfit. With colors and patterns as varied as a rainbow, crochet hats can be plain and elegant or bright and playful.
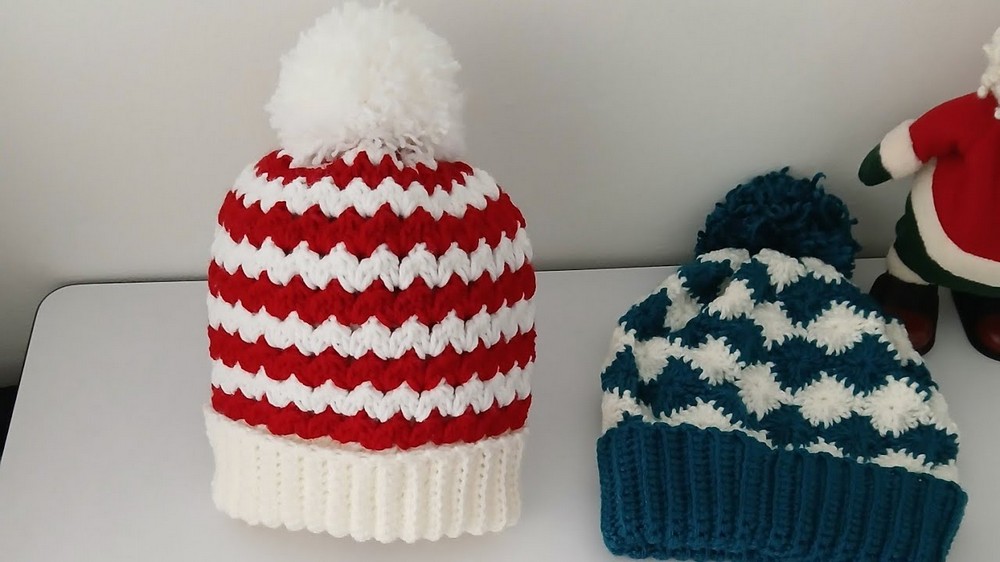
They are perfect for every season, helping to block the cold wind in winter or keep the sun off your face in summer. The crochet hat pattern makes it easy for anyone to create their own unique style, giving a sense of pride and joy in handmade beauty. Whether you are looking for comfort, warmth, or a pop of color, this versatile accessory fits every need perfectly.
Easy Crochet Hat Pattern – Step-by-Step Guide
Special Features
- Uses single crochet (sc), slip stitch (sl st), half double crochet (hdc), and double crochet (dc) stitches.
- Worked flat with back loops only in some sections for stretchy ribbing.
- Alternating colors and making clusters of stitches with partial finishes for texture and design.
- Includes instructions for adding a pom-pom.
Level of Difficulty
- Beginner to Intermediate
- Requires basic crochet knowledge and familiarity with changing yarn colors and working into back loops.
Materials Needed
- Chunky/Jumbo yarn (example: Madame Knitting Paris Jumbo, 100% acrylic)
- Crochet hooks sizes 5 mm and 6 mm (US H/8 and J/10)
- Yarn needle for weaving in ends
- Scissors
- Pom-pom (optional)
Step-by-Step Crochet Hat Pattern
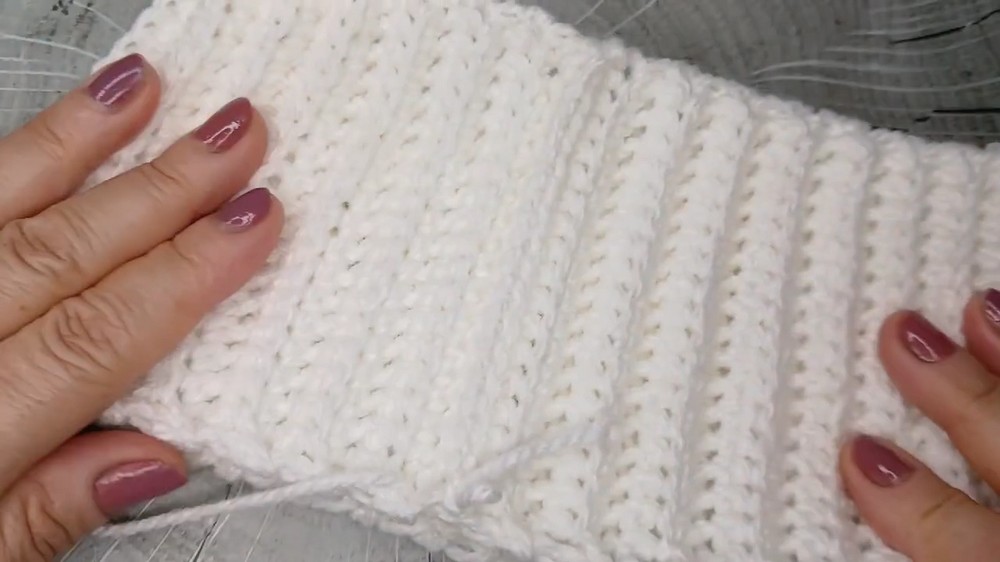
Step 1: Make the Ribbing Foundation (Elastic Band)
- Using size 5 mm hook, chain 19.
- Turn, skip first chain, and single crochet in the back loop only of each chain across.
- Chain 1, turn. Repeat single crochet in back loop only across.
- Continue until the piece measures ~50 cm in width (for adult head circumference).
- Make sure to keep your tension moderately tight for good elasticity.
- You will end up with 18 single crochet stitches in width and about 12 cm tall.
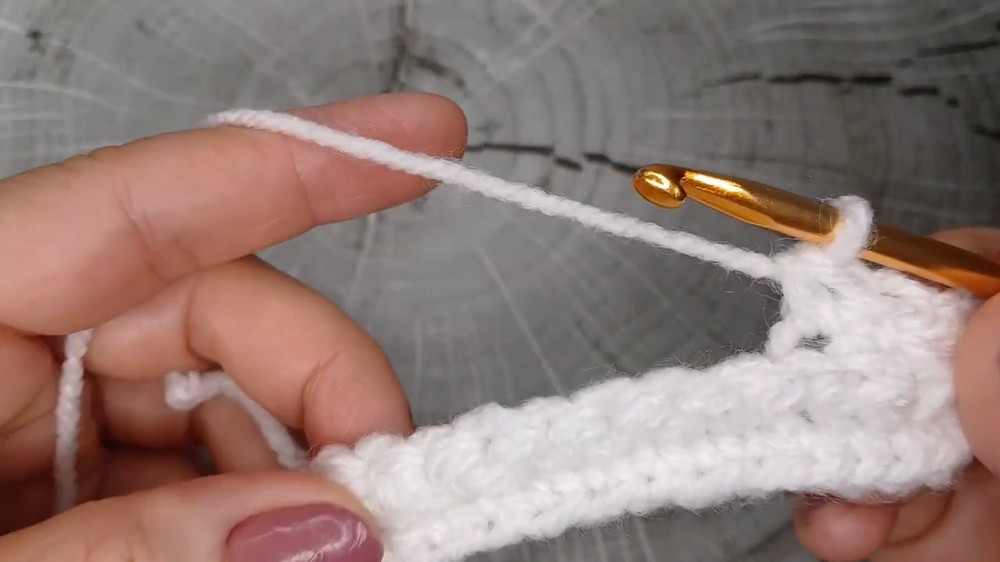
Special note: Working only in back loops creates a ribbing effect which adds stretch and fit.
Step 2: Join the Ribbing into a Band
- Fold your ribbing to join the two shorter edges.
- Using slip stitches, join the band edges together by inserting the hook through the back loop of each stitch on both sides and slip stitch.
- Finish by slip stitching over the entire edge once to secure.
Step 3: Begin the Body of the Hat
- Switch to size 6 mm hook.
- On the joined band, single crochet over both strands at the edge to create a round.
- Chain 1, slip stitch to begin working in the round.
- Start the pattern of half double crochet (hdc) across the round.
- Make increases every second stitch by placing 2 hdc stitches in one stitch to create flare.
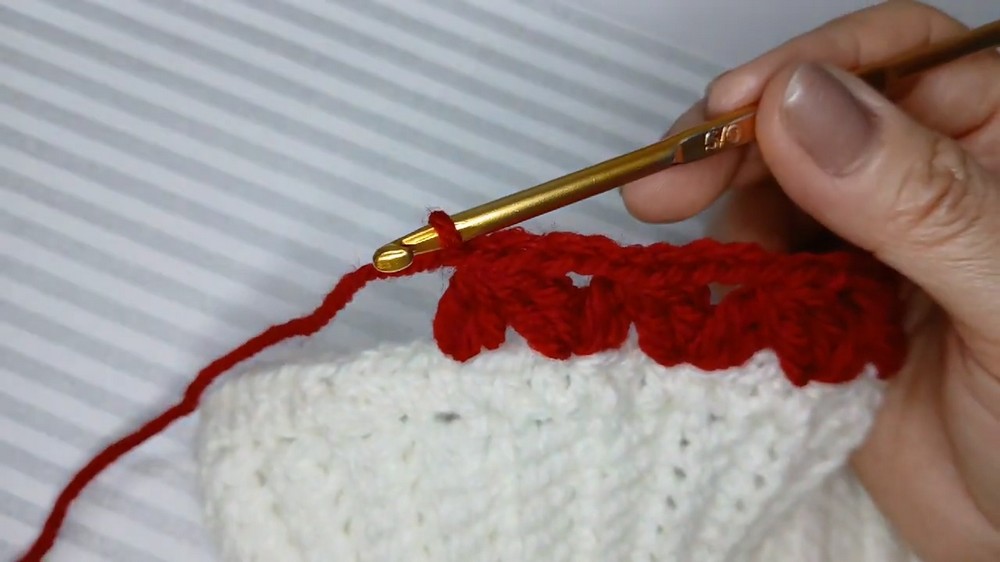
Step 4: Crochet the Textured Pattern with Color Changes (Motifs)
- After establishing the round of hdc, begin making clusters (groups) using unfinished double crochet stitches (dc without finishing the last yarn over).
- Chain 1 or 2 between clusters as indicated.
- Work texture by skipping stitches and crocheting into the spaces between stitches.
- Change yarn colors every other round (e.g., red and white) by joining new yarn color on the final yarn over of the last stitch.
- Continue alternating colors and clusters to desired length (about 12 cm from ribbing).
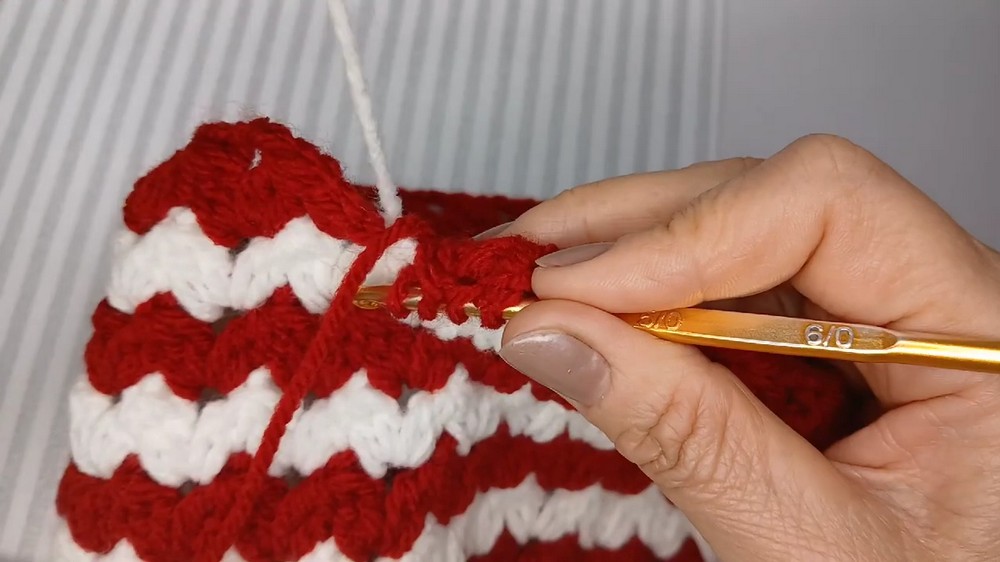
Step 5: Shape the Hat Crown by Decreasing
- After reaching the desired height, begin decreasing:
- Use the same cluster stitch pattern but reduce the number of stitches in each round gradually.
- Follow the same pattern of groups and unfinished stitches but skip more stitches than before.
- Continue closing the round with slip stitches joining.
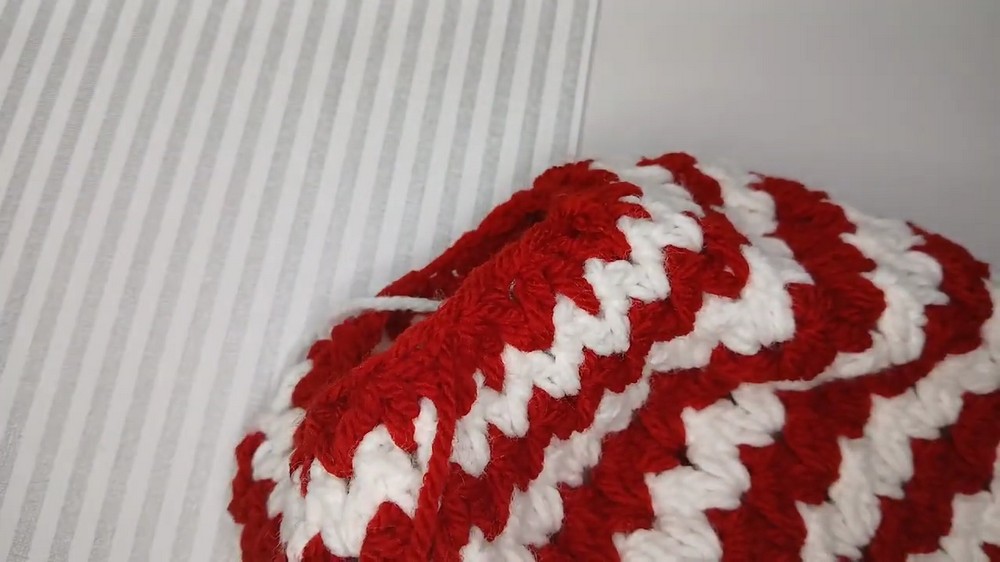

Step 6: Finishing Touches
- Once hat length is complete (total length ~28 cm including ribbing), fasten off yarn.
- Weave in all yarn ends carefully using the yarn needle.
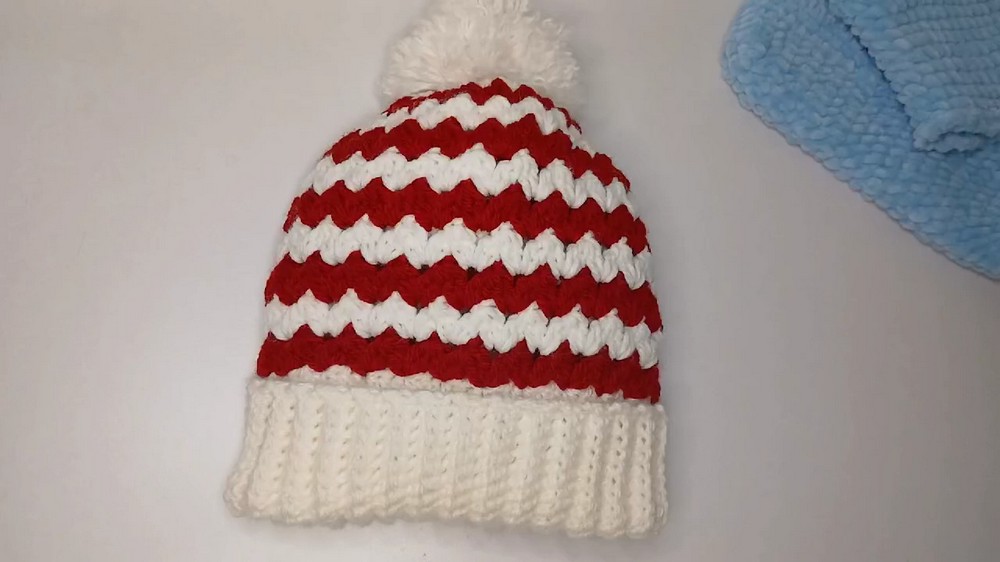
- Make a coordinating pom-pom using leftover yarn and attach it to the top center of the hat securely.
Tutor’s Suggestions
- Keep your tension consistent, especially when working clusters and switching yarns to avoid loose stitches.
- The colorful stripe technique enhances the hat’s visual appeal—choose contrasting colors.
- The ribbing in back loops is crucial for the hat’s elastic fit; don’t skip this step.
- The decrease rounds require attention; mark your starting point with a stitch marker.
Uses of This Hat
- Warm wool hat for cold weather.
- Stylish Christmas or winter gift.
- Fashion accessory with handmade charm.
- Suitable for all genders with color customization.
Tip for Success
Blocking your finished hat will help even out stitches and improve fit. After weaving in ends, dampen the hat slightly and reshape it on a bowl or hat form to dry flat and smooth.
Conclusion
This easy crochet hat combines simple stitches with a fun textured and striped design, perfect for beginners and experienced crocheters alike. Its elastic ribbing makes it comfortable and adjustable for most adult head sizes. With patience during color changes and decreases, you’ll create a warm and attractive handmade hat that’s great for gift-giving or personal use.
Leave a Reply