
Top off your outfits with this Crochet Hat Pattern that gives a stylish shape and a playful handmade charm perfect for all seasons.
Trendy Crochet Hat Pattern for Fashionable Headgear
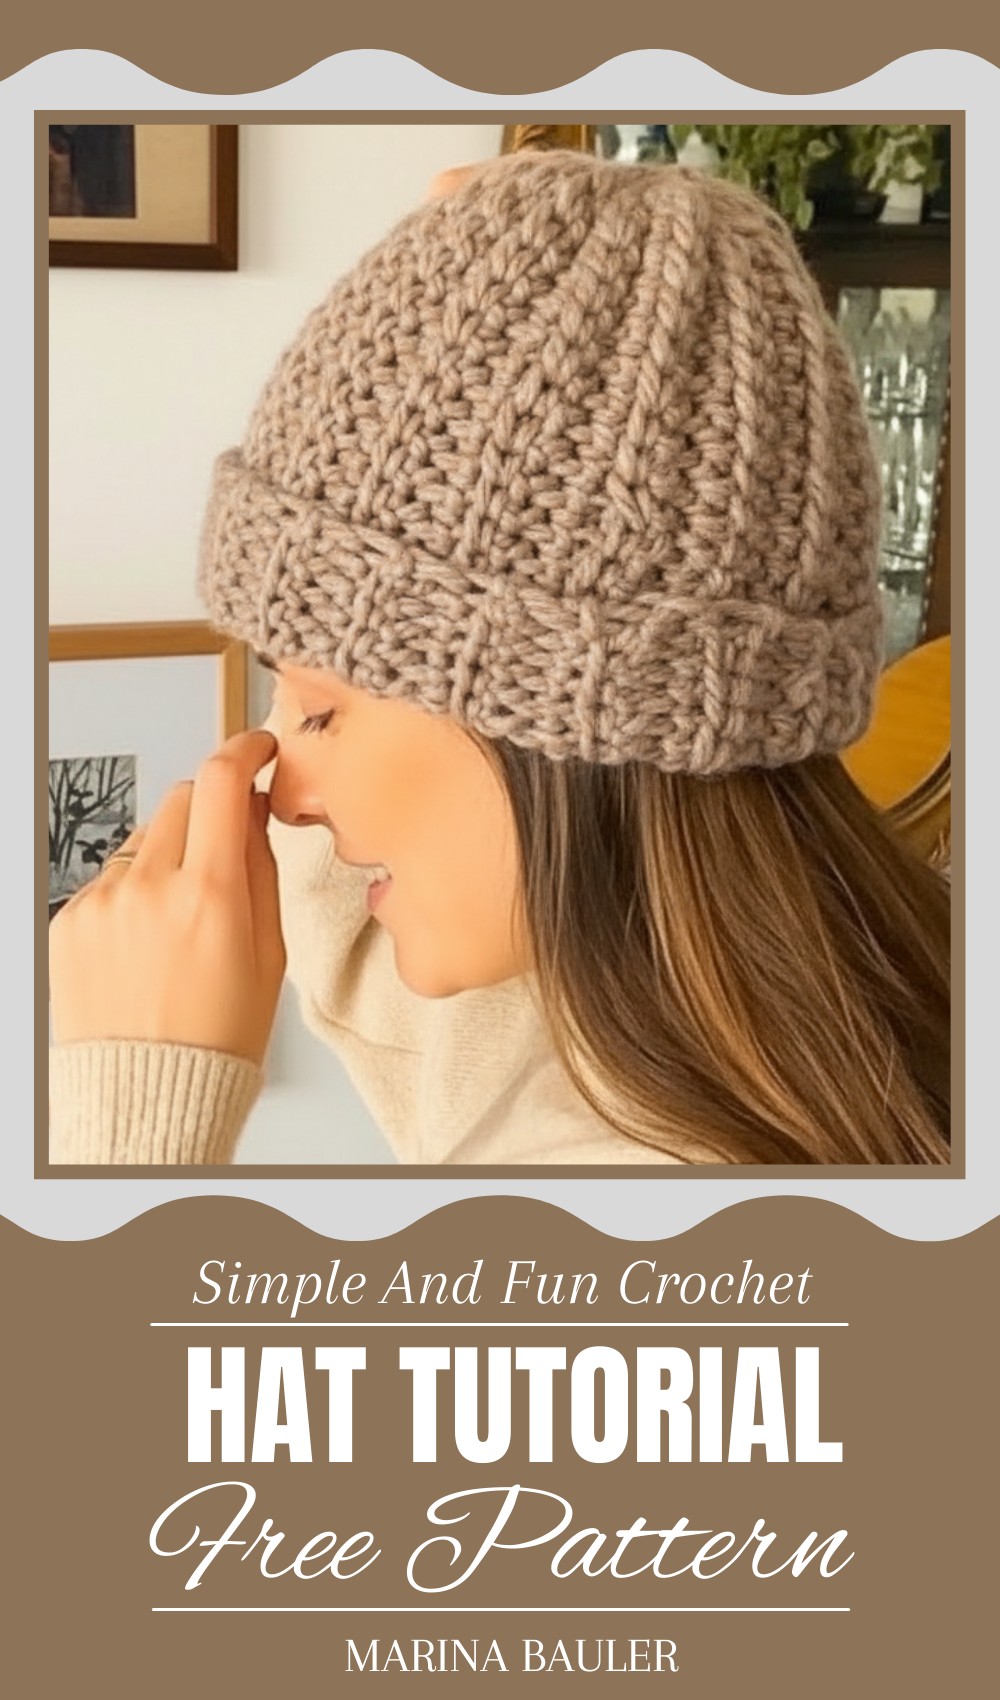
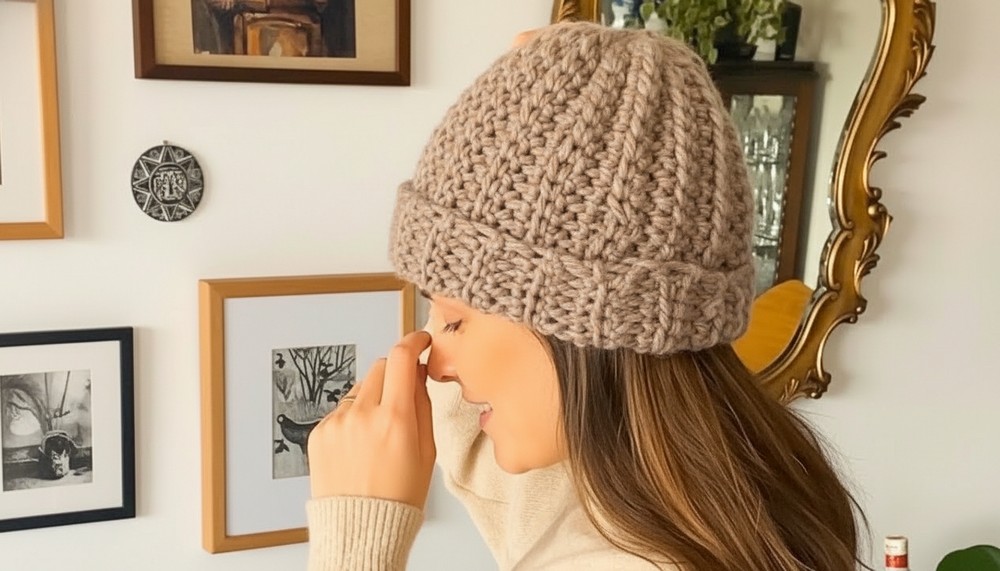
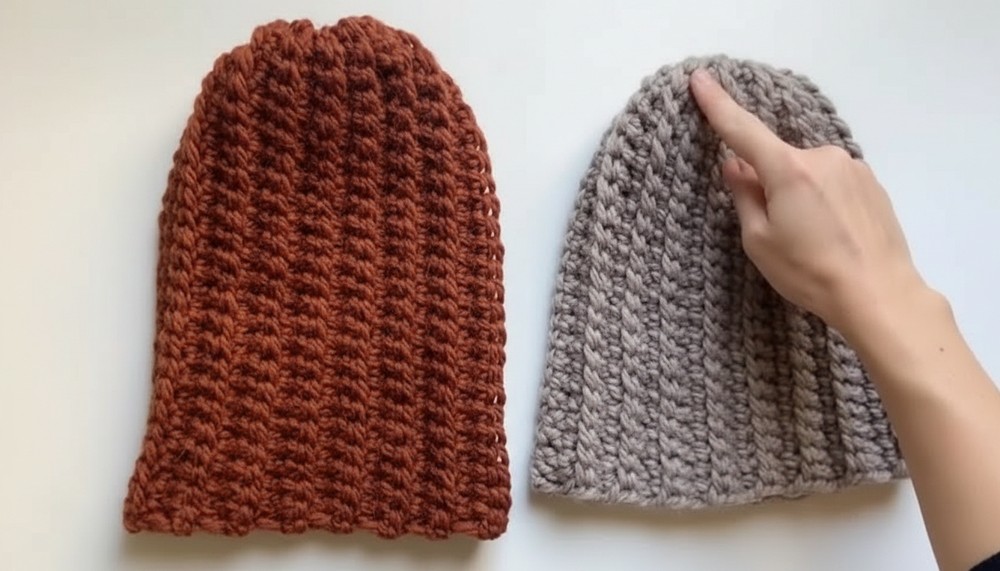
Want a hat that keeps you warm and looks beautiful? This crochet hat is just the thing! It’s soft and cozy, made with thick yarn to protect you from cold winds. The hat fits comfortably on your head and feels gentle on your skin. It has simple, pretty patterns that make it special and fun to wear. You can take it anywhere — to school, the market, or just outside to play.
It adds a nice pop of color to your clothes and helps you feel snug all day long. Plus, it’s light and easy to carry around. Handmade with care, this hat isn’t just practical; it’s something that makes you smile every time you put it on. Stay warm, look nice, and enjoy the soft comfort of this charming crochet hat.
Simple Single Crochet Hat Pattern
Materials Needed
- Medium weight yarn (size 7 suggested)
- 7 mm crochet hook
- Tapestry needle for weaving ends and sewing
- Stitch marker (optional)
- Scissors
Special Features
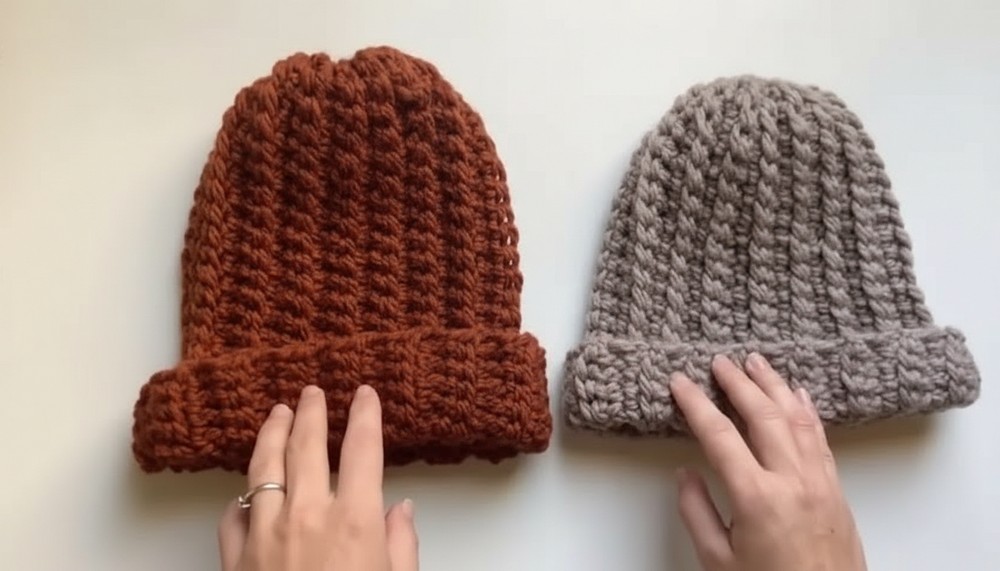
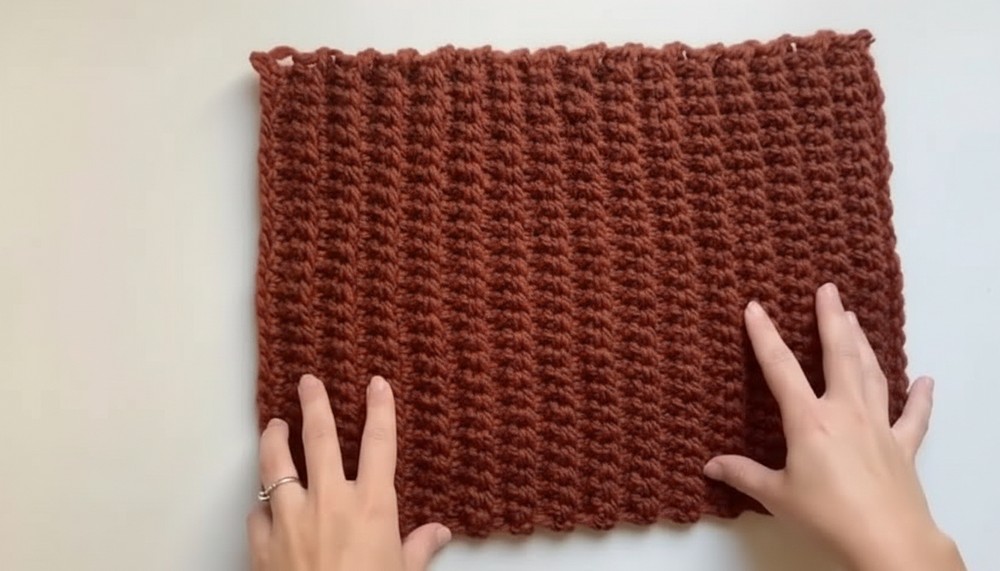
- Back loop only single crochet stitches for a subtle ribbed texture
- Simple rectangular piece worked flat, then seamed to form the hat body
- Elastic stretch in the fabric for a comfortable fit
- Easy construction suitable for beginners
- Customizable size by changing initial chains and rows
Difficulty Level
Beginner
Step-by-Step Pattern
Step 1: Foundation Chain
- Make a slip knot.
- Chain 26 loosely (adjust chains for larger or smaller hats; do not make chains too tight).
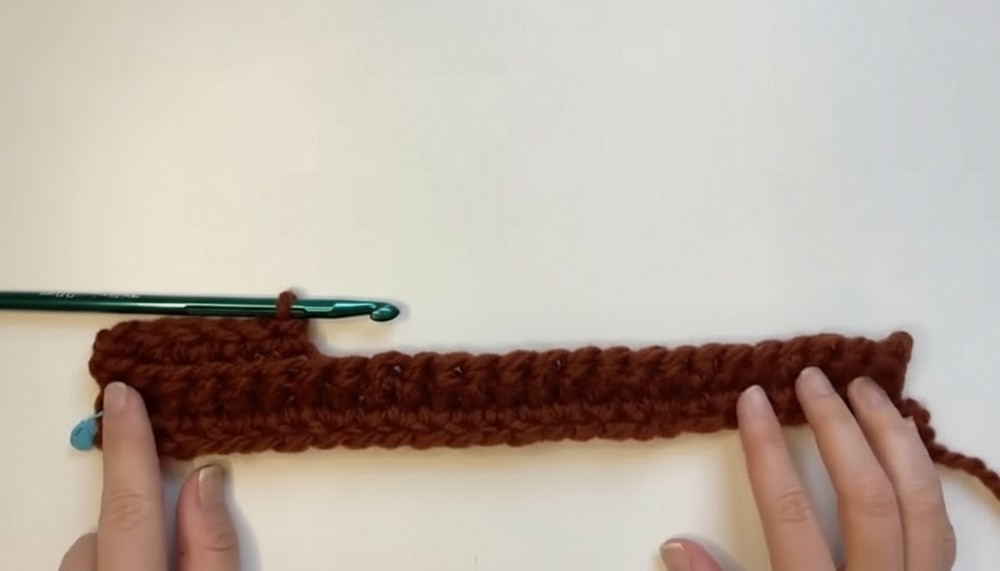
Step 2: Row 1
- Skip the first chain from hook.
- Work single crochet (sc) in each chain to end (25 sc).
- (Optional) Use a stitch marker on the first sc to help identify the end of row for seaming later.
Step 3: Row 2 and Onwards
- Chain 1, turn.
- Work single crochet (sc) in the back loop only (BLO) of every stitch across.
- Repeat this row until the piece measures approximately 29 cm in height or desired length.
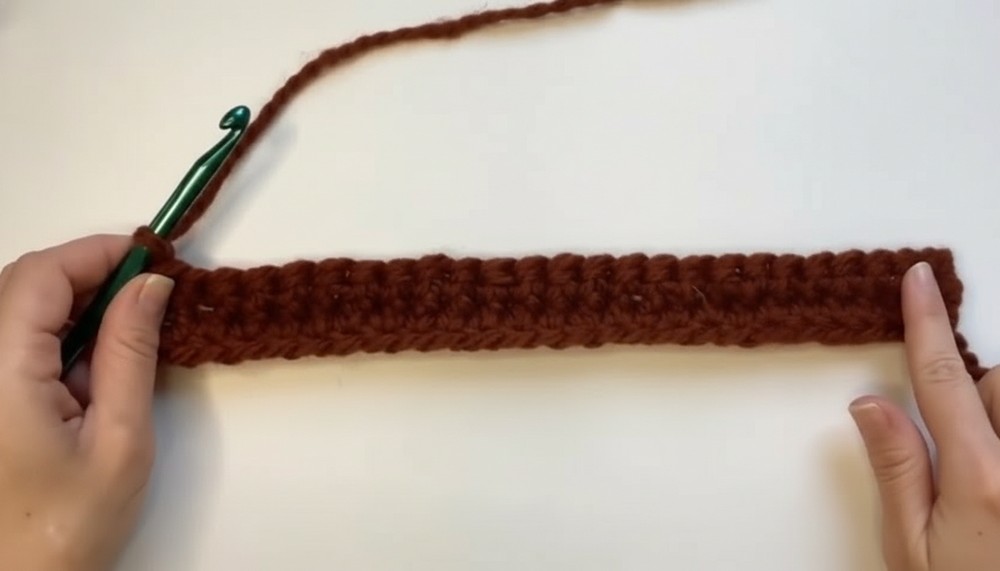
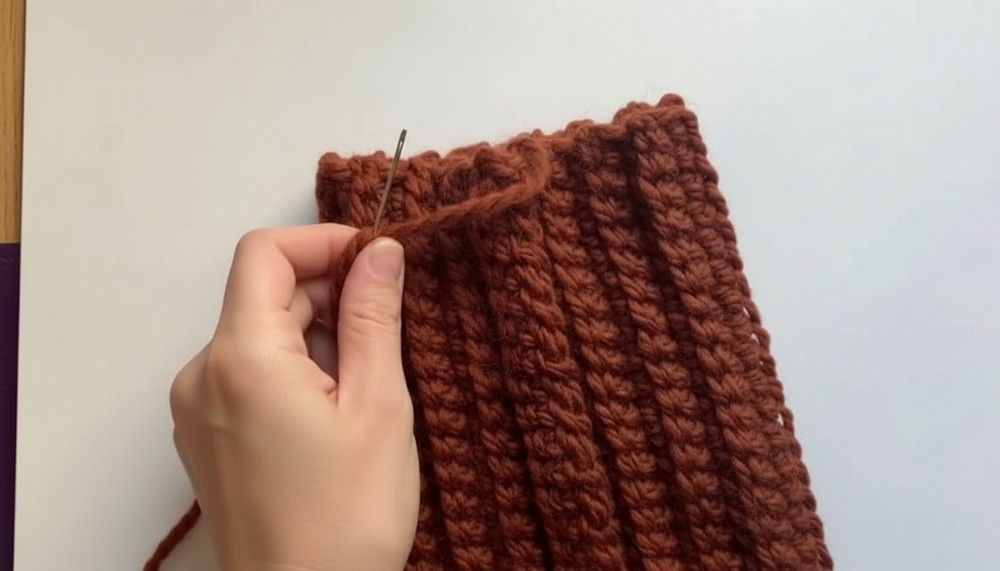
Step 4: Closing the Side Seam
- Cut yarn leaving an appropriate tail for sewing.
- Using a tapestry needle, sew the short edges of the rectangle together by inserting the needle into the front loops of each stitch to create a neat seam.
- Alternate between picking stitches from each side of the fold to close the seam securely and flat.
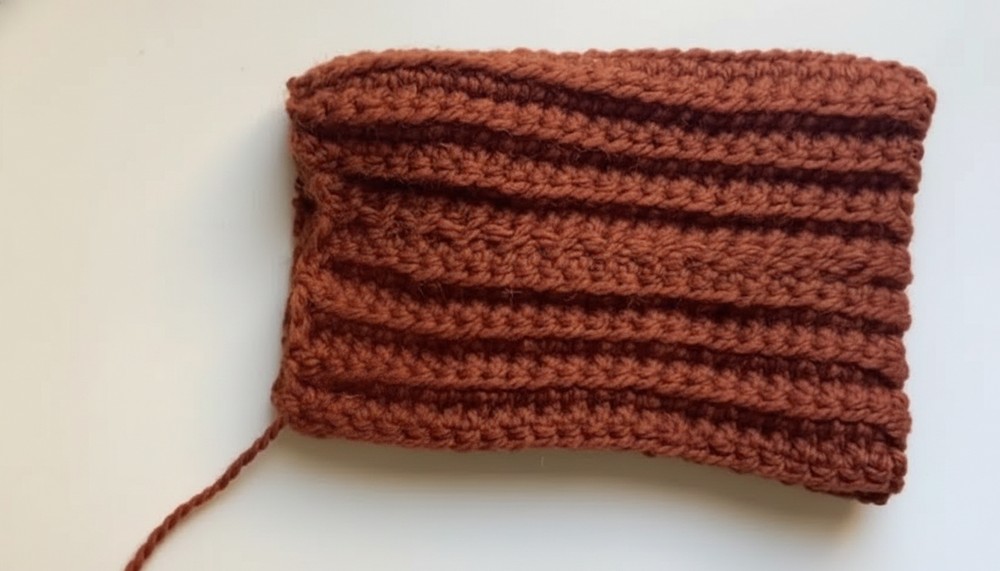
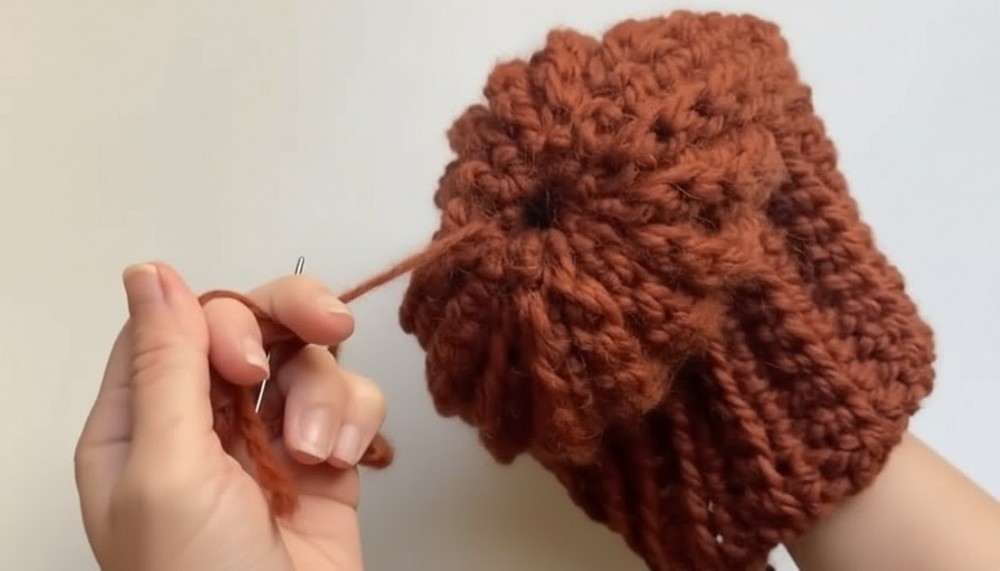
Step 5: Closing the Crown Top
- With the hat now forming a tube, we close the top circularly by sewing or pulling together the loops at the closed seam edge.
- Insert the tapestry needle through stitches evenly around the top to gather the opening.
- Pull tight to close the hole at the crown snugly.
- Weave the yarn tail securely inside the hat to finish.
Tutor’s Suggestions
- Adjust chain length for larger or smaller head sizes. Remember that the fabric stretches, so start with a slightly shorter chain than the head circumference.
- Keep your tension even but slightly loose for comfortable stretch and softness.
- Work into back loops only to achieve the gentle ribbed texture that adds subtle style and elasticity.
- Use a blunt tapestry needle to avoid snagging yarn when seaming.
- For a wider brim, simply add more chains and adjust rows accordingly.
Tip
Before closing the top, try the hat on to check fit and adjust the gathering tension accordingly. This helps avoid making the crown too tight or too loose.
Conclusion
This simple single crochet hat is a fast, beginner-friendly project with flexible sizing and a lovely ribbed texture from back loop stitches. Perfect for gifts or cozy winter wear, it can be easily modified with different yarn weights or added details like stripes or embellishments.
Leave a Reply