
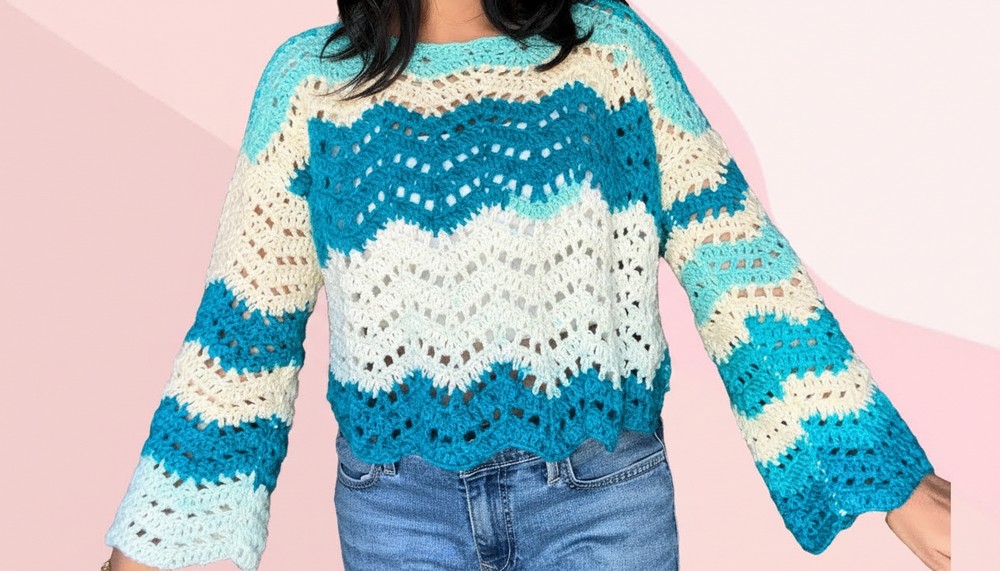
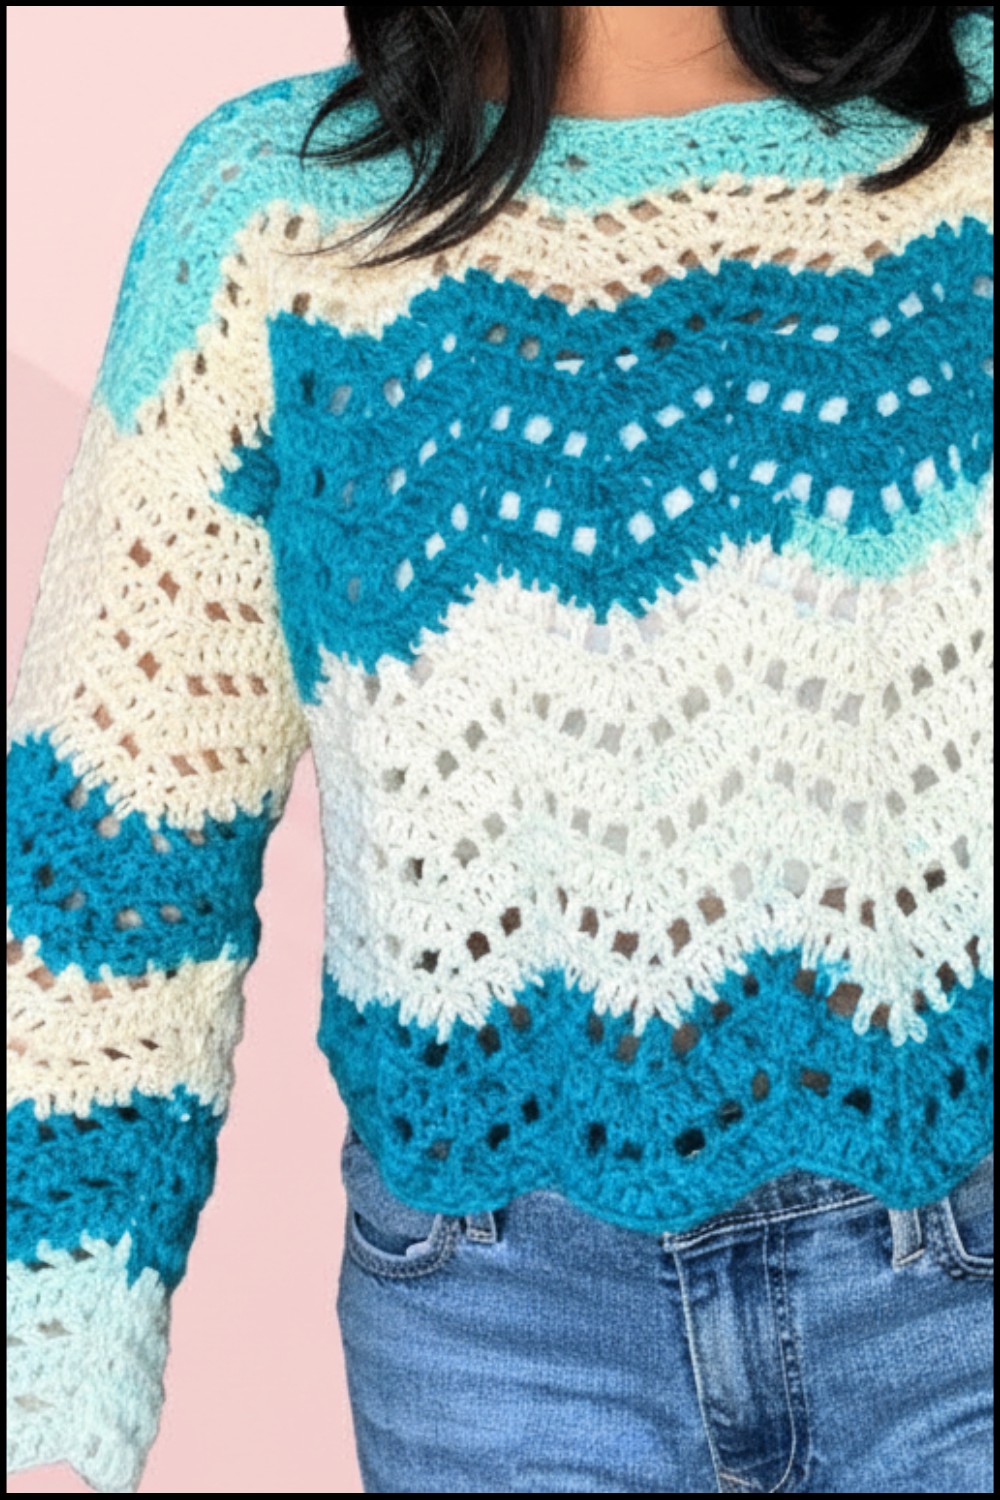
Layer with comfort and style using this Crochet Wave Stitch Mesh Sweater Pattern that’s a lightweight and cozy sweater ideal for casual days.
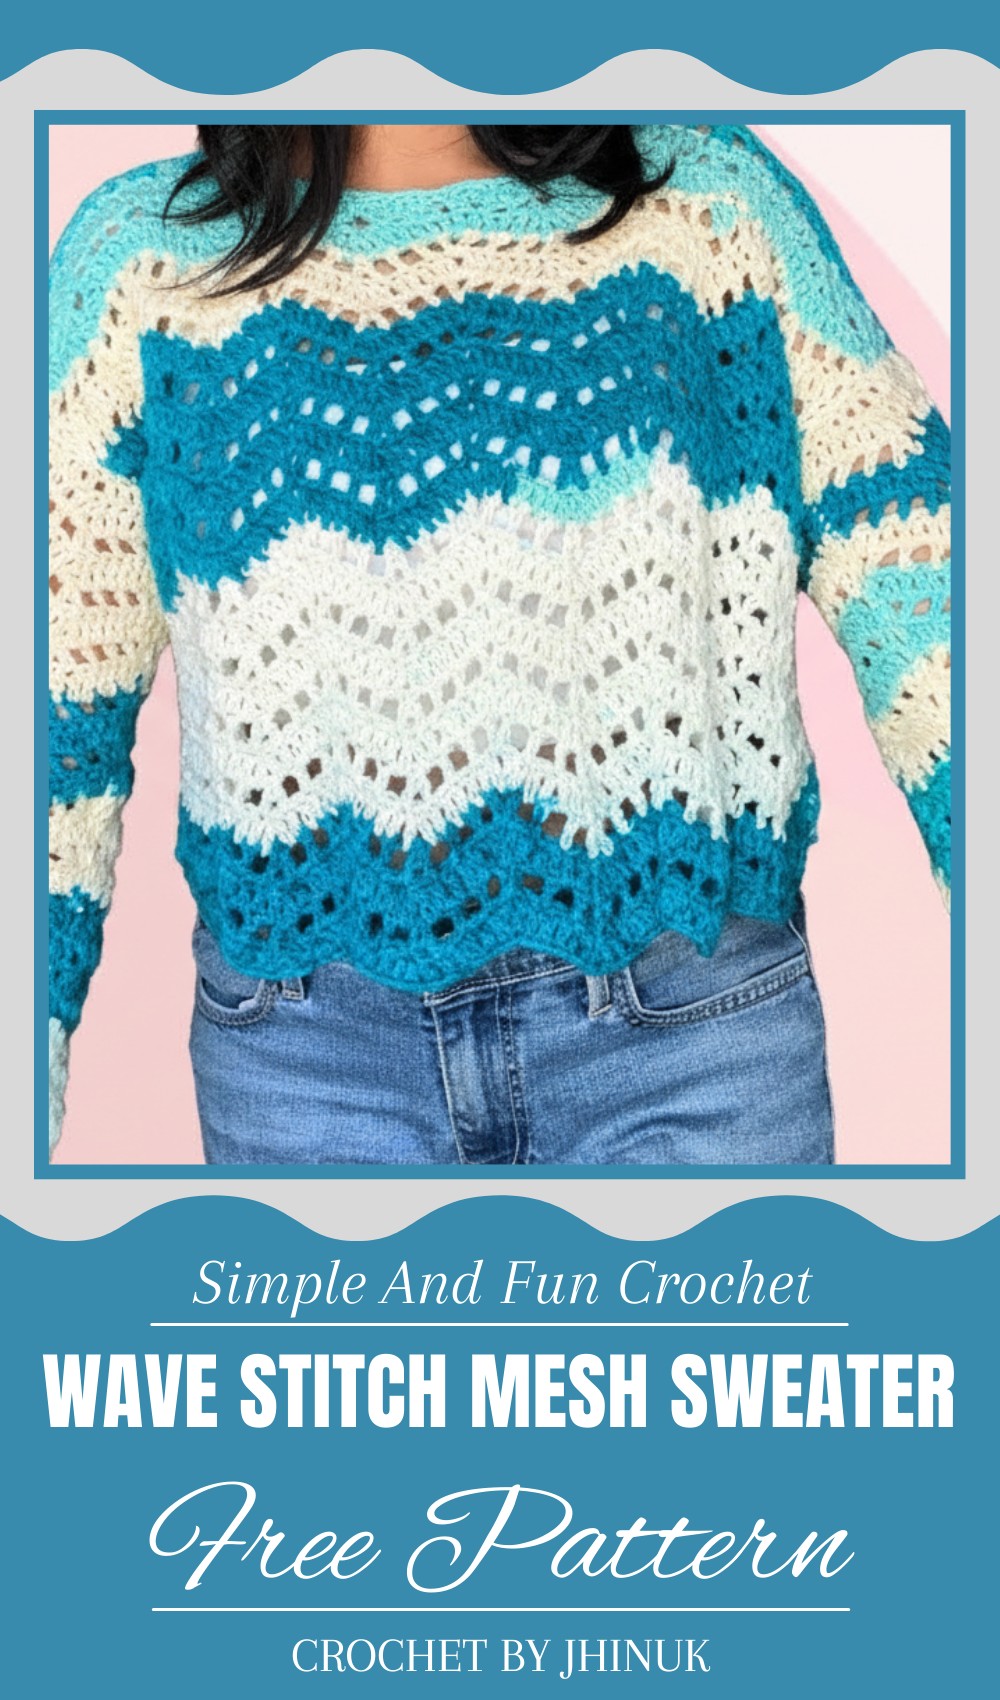
Eye-Catching Crochet Wave Stitch Sweater Pattern To Stand Out
A design filled with the beauty of flowers brings elegance and creativity to life. The crochet flower bouquet top pattern showcases stunning floral arrangements that come together to form a truly unique and eye-catching top. Each flower, built with vibrant colors and textures, adds delicate charm to the overall look. Perfect for garden parties, events, or even casual outings, this beautiful pattern allows you to celebrate nature in your clothing.
It’s lightweight and stylish, making it a great option for warm summer days or layering during other seasons. This floral-inspired design is not only comfortable but also versatile, offering endless possibilities to pair with skirts, jeans, or shorts. Wearing this piece will undoubtedly make you stand out and add a personal touch to your wardrobe. Whether you gift it or keep it, the crochet flower bouquet top pattern blends fashion and the soft charm of flowers beautifully!
Materials Needed
Yarn
- Multicolor Acrylic Yarn: Preferably from Hobby Store or any multicolor acrylic yarn that creates a wave-like effect.
- Note: Various colors will help accentuate the pattern, making the sweater more striking.
Hook Size
- 5 mm Crochet Hook: Ideal for creating the wave stitch while maintaining a soft and drapey fabric.
Other Tools
- Yarn Needle: For sewing the panels together.
- Scissors: For cutting yarn ends.
Key Abbreviations (U.S. Crochet Terminology)
- ch: Chain
- sc: Single Crochet
- dc: Double Crochet
- sl st: Slip Stitch
- sk: Skip
- yo: Yarn Over
Customization Ideas
- Yarn Colors: Mix and match various colors to create a vibrant wave effect.
- Size Adjustments: Adjust the foundation chain as described to fit different sizes.
- Panel Length: Modify the number of rows to suit your desired sweater length.
Special Notes
- Tension Control: Maintain consistent tension for a uniform wave pattern.
- Stitch Counting: Regularly count stitches to ensure accuracy, especially in row transitions and waves.
- Blocking: Lightly steam block your panels for an even finish before sewing.
Pattern Overview
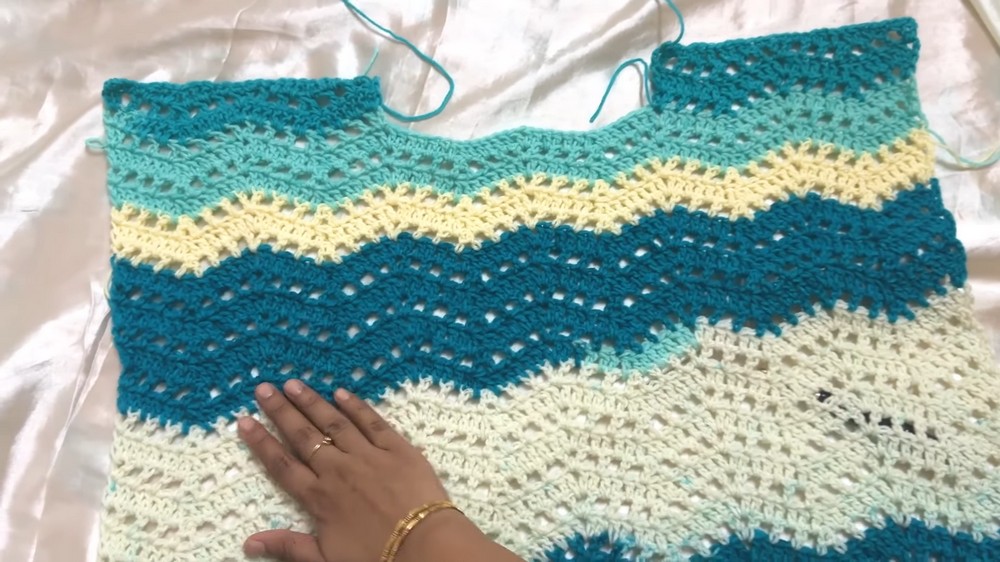
This pattern consists of creating four panels (front, back, and two sleeves), which are then sewn together. The wave stitch is created using alternating row patterns of double crochet rows (solid) and mesh rows (dc with ch spaces).
Step-by-Step Pattern
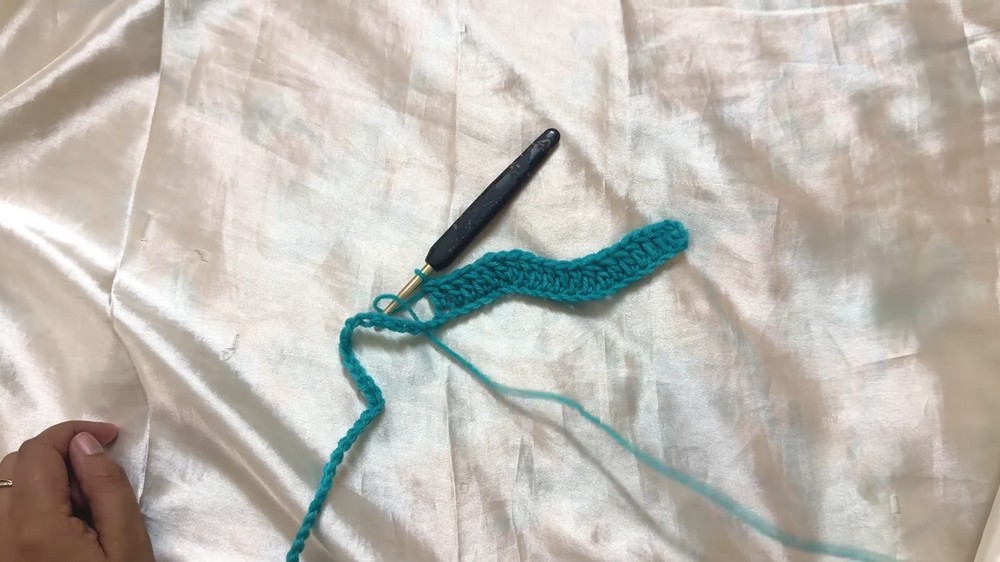
Foundation Chains and Wave Stitch Set-Up
Foundation Chain Formula:
- Chain a multiple of 14 + 4.
Back Panel
- Based on your size, create the foundation chain:
- Small Size: Chain 88.
- Larger Size: Chain 102.
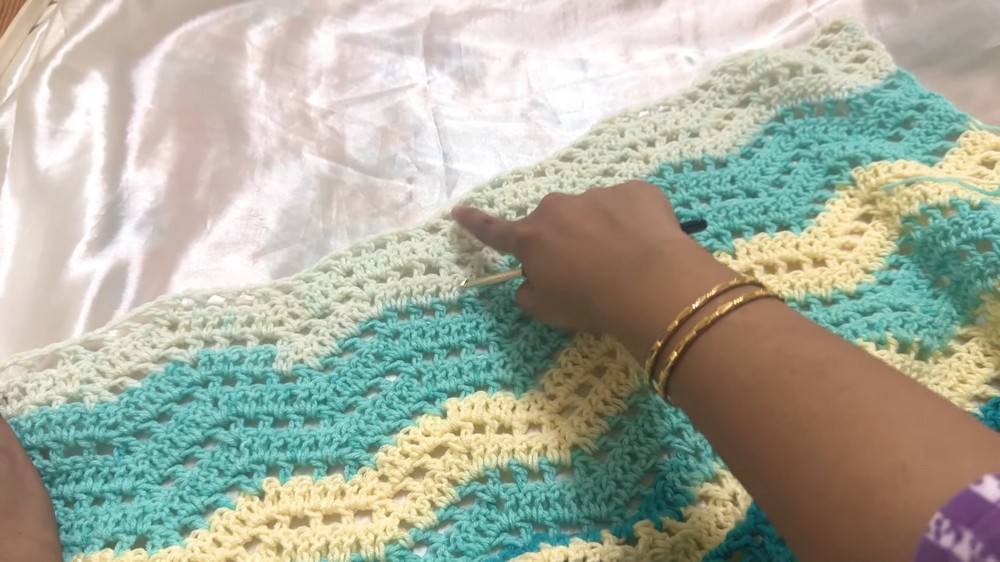
- Row 1 (Solid Wave Row):
- Ch 3 (counts as dc), skip the first three chains.
- 1 dc in next 5 ch.
- To create the lower point: dc in next ch, skip 1 ch, dc in next ch. Do not complete either dc; you now have 3 loops on the hook. Yo and pull through all 3 loops.
- 1 dc in next 5 ch.
- To create the upper point: (dc, ch 1, dc) all in same st.
- Continue the pattern (5 dc, lower point, 5 dc, upper point) across the row.
- At the end, 2 dc in the last ch.
- Row 2 (Mesh Row):
- Ch 3, turn work, dc in same st.
- Ch 1, sk next st, dc in next st, repeat twice.
- At the lower point, ch 1, sk next st, dc in next st, repeat for the three dc3tog.
- At the upper point, (dc, ch 1, dc) into ch-1 space.
- Continue the pattern (dc, ch 1, dc, lower point, dc, ch 1, dc, upper point) with ch 1, skipping one st in between each.
- End with two dc in the last st.
- Row 3 (Solid Wave Row):
- Repeat Row 1, adjusting stitch positions for correct wave formation using dc in dc and maintaining lower and upper points.
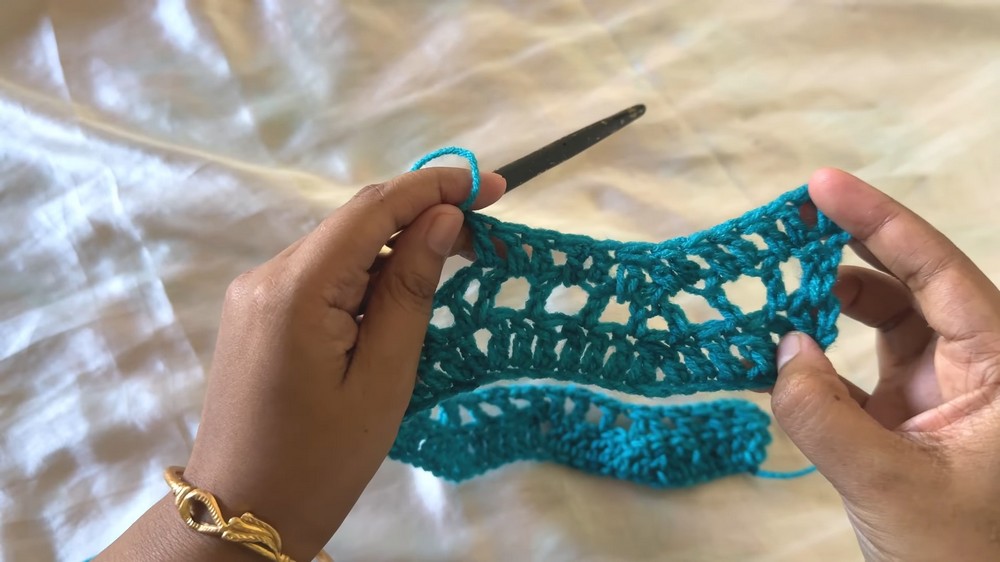
Repeat Alternating Rows:
Repeat Rows 2 and 3, altering between solid wave rows and mesh rows until you reach 32 rows for the back panel. Adjust the number of rows to your desired length.
Front Panel
- Exact same steps as the back panel, but crochet only 29 rows to leave room for the neckline shaping.
Neckline Shaping (Front Panel Only)
- Mark and attach yarn where the neckline will begin.
- Create 3 additional rows following the mesh and solid row pattern (i.e., mesh, solid, mesh).
- After completing the 3 neck rows, begin straightening as follows:
- Chain 1, turn work, sc in the first 4 sts.
- 3 dc in next 3 sts, sk 1, 3 dc in next 3 sts.
- 3 sc in next 3 sts, sk 1, 3 sc in next 3 sts.
- Repeat the straightening pattern until the panel’s edge.
Sleeve Panels (x2)
- Foundation Chain: Chain 60 (or 74 for larger sizes).
- Just as with the back and front panels, follow Row 1 (Solid Wave Row) and Row 2 (Mesh Row) to generate the wave stitch pattern.
- Continue this wave pattern for 26 rows.
- Straighten top edge for shoulders following the same straightening technique described above.
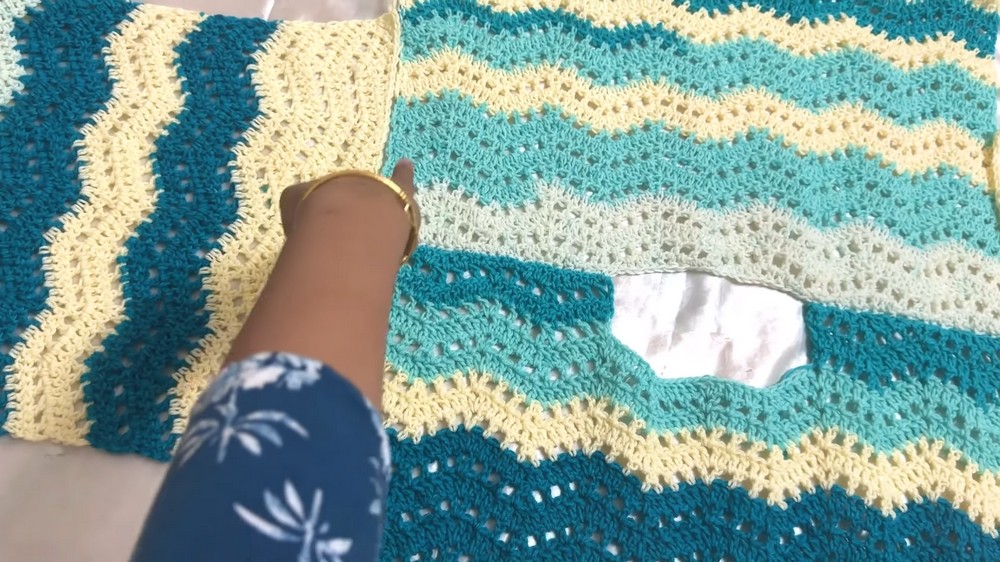
Assembly Instructions
- Sew Shoulders:
- Align the front and back panels at the shoulders. Stitch each shoulder together using a yarn needle and tail ends left from crocheting.
- Attach Sleeves:
- Find the center of the sleeve’s top edge and align with shoulder seam. Sew from the center outwards on both sides to ensure even attachment.
- Stitch Sides:
- Fold sweater in half. Sew down from the sleeve cuffs to the armpits and continue down the sides of the sweater body.
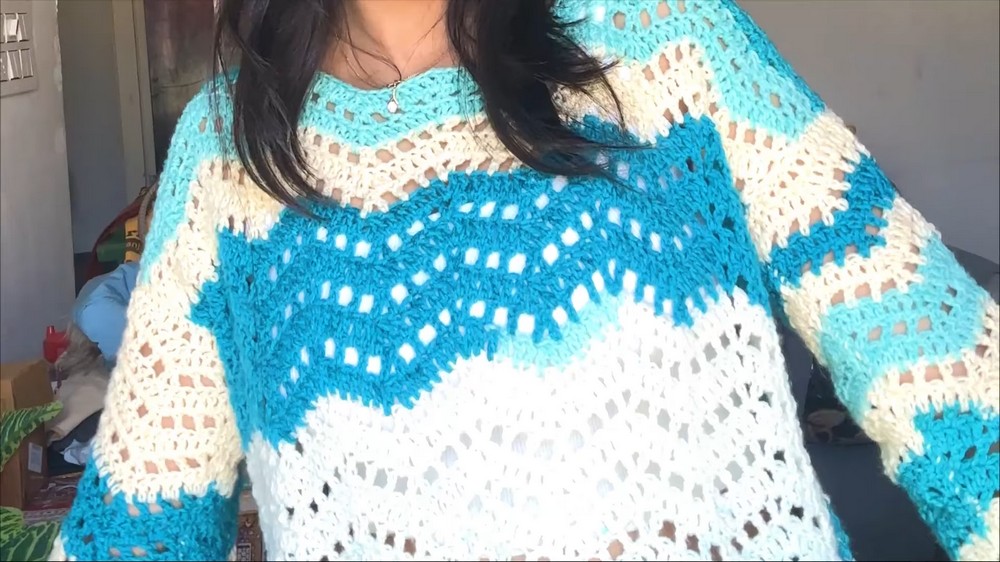
Conclusion
Congratulations! Your wave stitch sweater is complete, blending soft wave patterns with rich colors. This eye-catching design is sure to add a touch of fun and elegance to your wardrobe.
Pattern Corrections and Tips
- Correct Stitch Counts: Ensure correct multiples and pattern alignments to maintain wave consistency.
- Yarn Management: Switching colors can add complexity but enhances the final look. Securely weave in ends.
Leave a Reply